18' Starcraft SuperSport restoration

ezmobee

Supreme Mariner
Joined
Mar 26, 2007
Messages
23,767
Re: 18' Starcraft SuperSport restoration

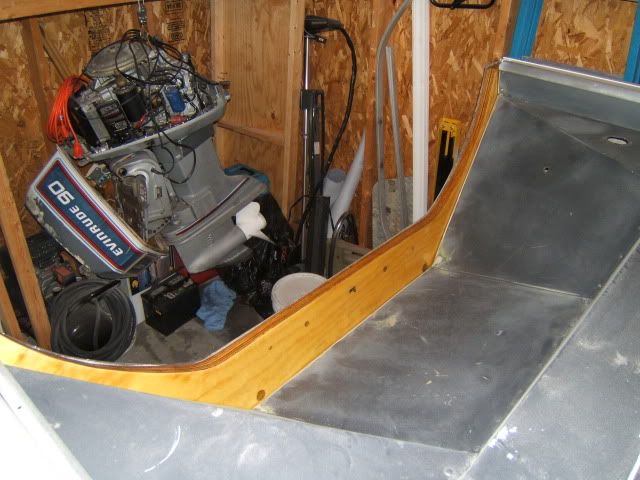
I was pretty busy this week and therefore accomplished nothing on the boat :mad: Yesterday I got the garage cleaned up and retrieved some parts that I will soon need that were stored behind the boat. With the weather getting nice I'm really itching to get this thing done and on the water. As such, my to do list has been reordered to move everything absolutely needed in order to use the boat to the top. This is what it's looking like:

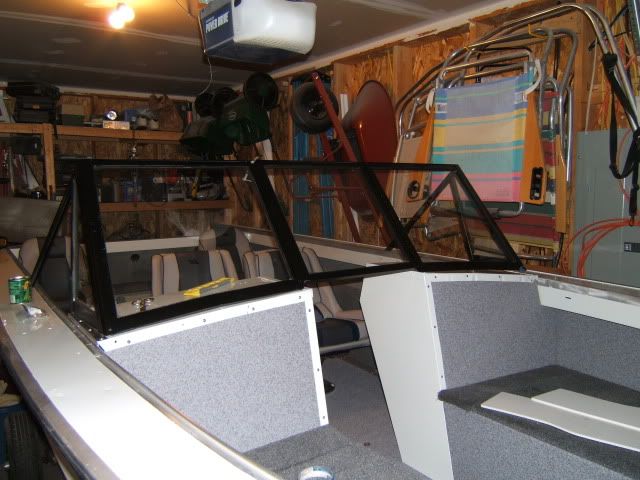
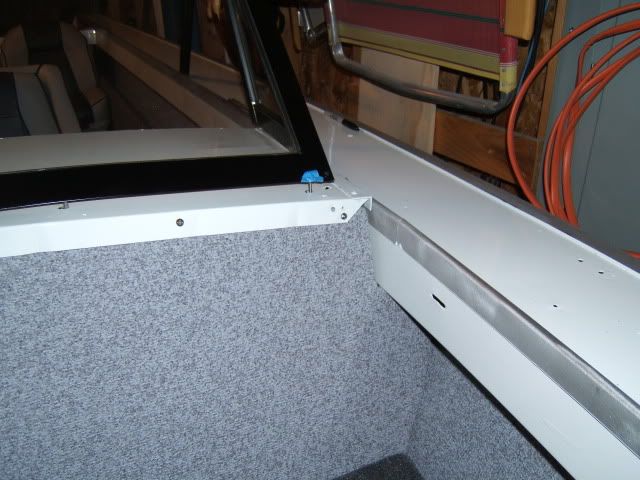
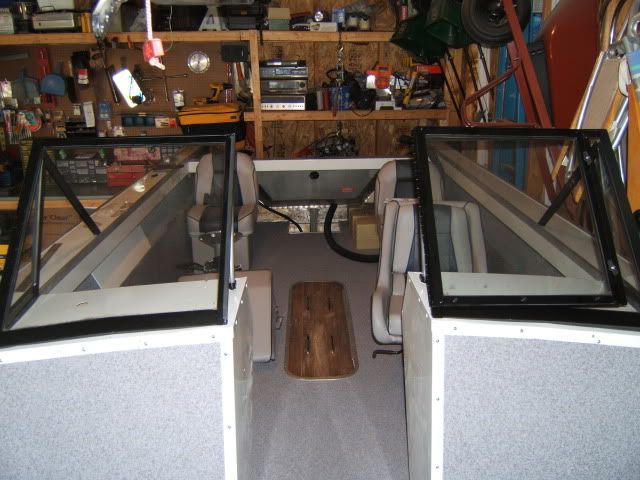
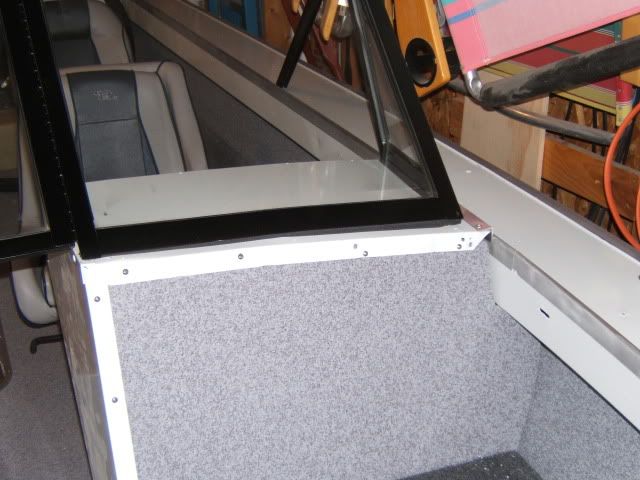
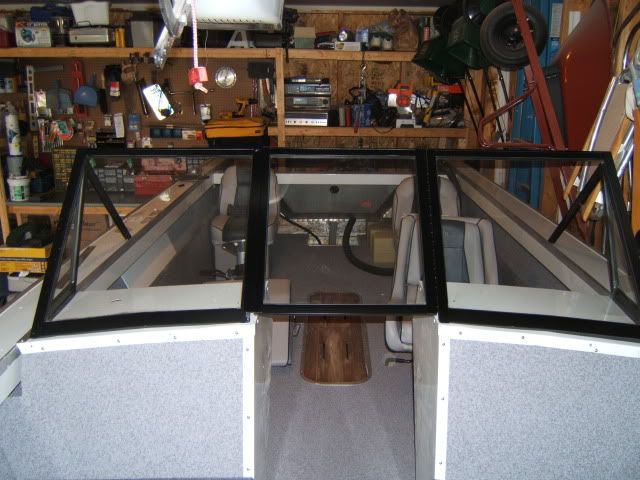
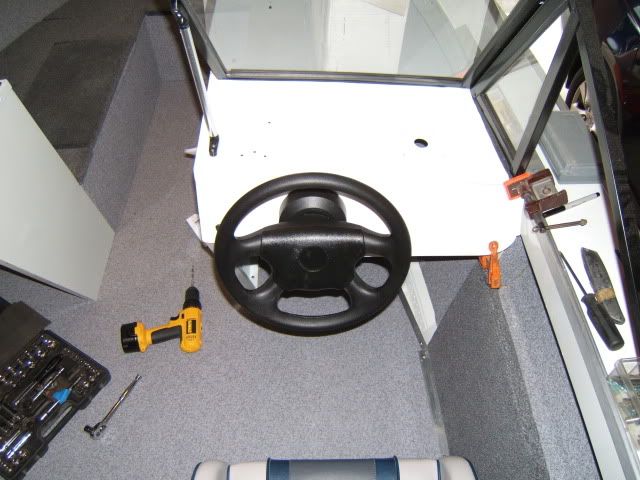
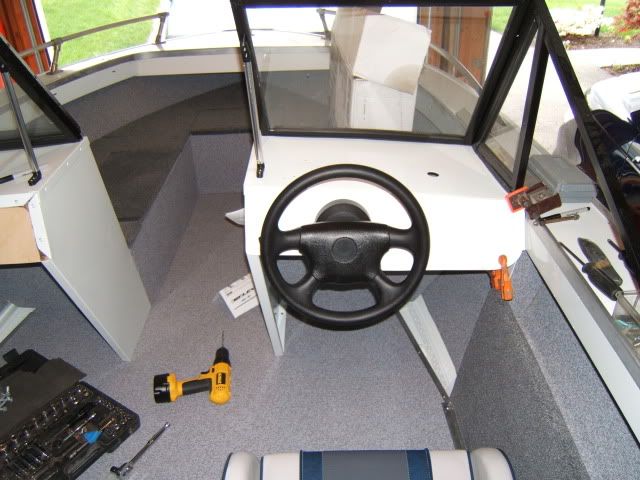
Cut dash panels and install
Paint windshield
Install windshield
Install navigation lights
Install bow rails
Seal transom
Install transom
Paint transom and splashwell
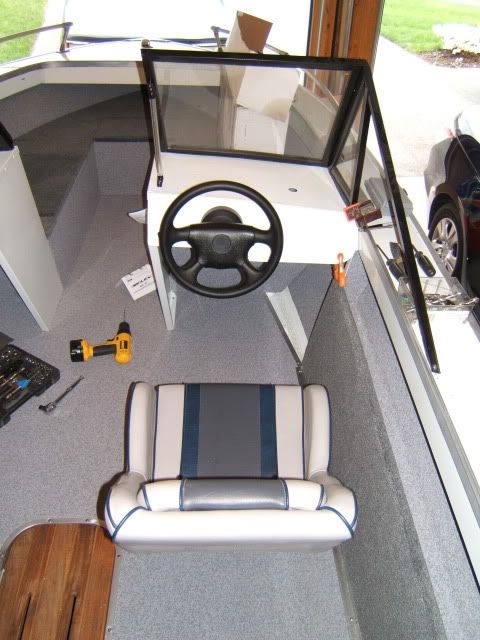
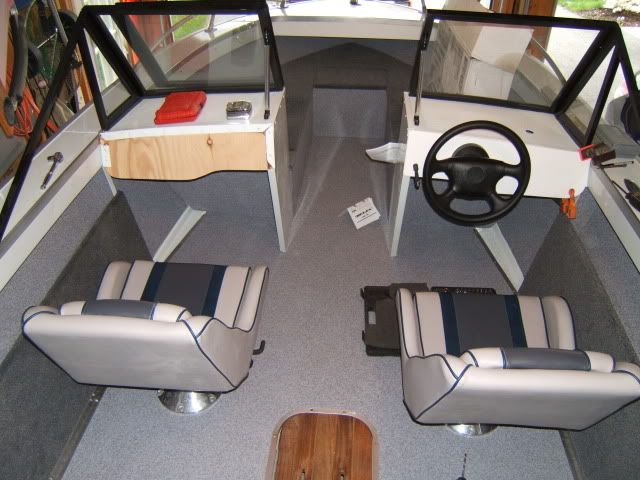
Install steering system
Install engine controls
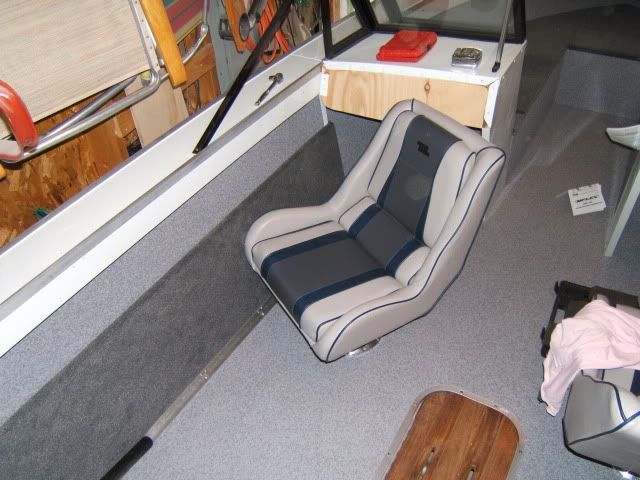
Install seats
Install motor and connect to controls
Install battery tray and battery
Install gauges
Install horn
New bearings on trailer, mount fenders and lights
Install swim platform
Install fuel tank hook ups

----At this point the boat could hit the water----

Build and install stern casting box w/ lid
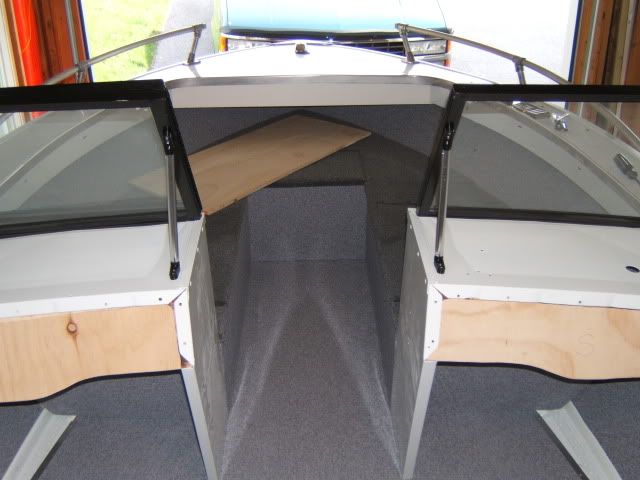
Build and install removable bow platform insert
Install fishing chair bases and pedestals
Finish teak
Paint motor
Paint motor cowl and install new decals
Mount and wire trolling motor
Install cup holders in stern box
Install flush mounted tackle storage box in dash
Install misc. storage containers
Bow combing pads
Bow back rests
Bow seat pads
 

ezmobee

Supreme Mariner
Joined
Mar 26, 2007
Messages
23,767
Re: 18' Starcraft SuperSport restoration

Sadly very little progress made on the boat this weekend. All I accomplished was cleaning up the windshield, taping it, and then finally getting a primer coat on it tonight. But a least I was doing boat-related stuff! I went over to Lancaster yesterday with my dad to pick up the 14' tinny he bought the end of last season that he was storing at my uncle's. That's now in his driveway and ready to use when the mood strikes me. That will be soon. Today I went with Tim Fives down to Havre de Grace, MD to have lunch with 7 other iboaters who boat in the upper Chesapeake area. It was a great time. They are a great bunch and Tim and I look forward to checking out that area this year.

I plan to get some black on the windshield tomorrow and also cut out my dashboard panels. I will probably also do some work on the bow rails. They aren't going to clean up real well either bit I think black bow rails would look pretty dumb and I've never liked the look of silver paint. The mounts are badly pitted. Those are replaceable but I think I use the existing ones for now. I've decided to abandon the fuel tank I got off CL. It just doesn't fit where I really want the tank and to move it would require moving the fill and other stuff. It just isn't worth it. There is a 14 gallon Moeller tank that will fit perfectly in my chosen spot and iboats has a very good price on it.
 

ezmobee

Supreme Mariner
Joined
Mar 26, 2007
Messages
23,767
Re: 18' Starcraft SuperSport restoration

Well folks there hasn't been an update in a while mainly because the frustration level has been through the roof. Finish work and details are not things I'm particularly good with and that's pretty much all that's left. Everything regarding this windshield has been a disaster. For starters, my paint job looks like he!!. This is not surprising becase me and rattle cans don't get a long. I'm hard-pressed to think of anything I've ever spray painted that came out well. I'll probably go over them again with Rusto from a can once this mess is straightened out.

Secondly, I messed up big time. I needed to have put the windshield on and leveled everything out many steps ago. The consoles are way out of whack and now I'm paying the price.

DSCF2543.jpg


It's mounted and flush on the driver's side and fairly close to level. The passenger side though is like a friggin' 1/2" off.

DSCF2542.jpg


I THINK I can replace the piece of angle aluminum that holds the console to the gunnel with a larger one and raise it up some. I can't go too high though or my nice completed console panels will be flappin' in the breeze.

DSCF2544.jpg


So I'm pretty well irritated at this point. My concurrent task is cutting and fitting the King StarBoard dash panels. They are cut now but are a little large in at least 2 dimensions (better than too small eh?) I need to figure out a way to trim those down without screwing them up.

Hopefully I'll get some transom work done this weekend. Might also be picking up a "new" tow rig tomorrow evening. More info on that if it happens.
 

ezmobee

Supreme Mariner
Joined
Mar 26, 2007
Messages
23,767
Re: 18' Starcraft SuperSport restoration

I did go from a 1/2" to a 3/4" deck. However, my boat had been refit once before and not particularly well. So it's not like everything was perfect when I got it. The piece of aliminum angle you see on the driver's side actually improves the situation. I need the same thing (and more) on the other side. This wouldn't be so bad if I had dealt with it before those console panels were cut and fit.
 

ezmobee

Supreme Mariner
Joined
Mar 26, 2007
Messages
23,767
Re: 18' Starcraft SuperSport restoration

have you thought about spliting the difference.
lifting the drivers side and lowering the pass. kinda like balancing the sides,

Thanks for the idea but the windshield is supposed to be completely flat and straight across. The drivers side is pretty darn close to level. But the passenger side is off. So all my adjusting needs to be done there. It's weird because I thought I'd already made up for the difference in the the floor thickness by mounting the consoles up a little higher.
 

ezmobee

Supreme Mariner
Joined
Mar 26, 2007
Messages
23,767
Re: 18' Starcraft SuperSport restoration

Thanks guys. I do have some fairly thick foam weatherstripping under the drivers side one. I didn't put it on the passenger side yet. It compresses a LOT so having that in there isn't going to solve my problem. It will draw tight just fine but it's the windshield that gives in not the console. So I'll have a crooked windshield. I'm hoping that moving the console up a bit, plus the weatherstripping and maybe some light shimming, will level it out and not leave my console panel hanging. We shall see this weekend.
 

ezmobee

Supreme Mariner
Joined
Mar 26, 2007
Messages
23,767
Re: 18' Starcraft SuperSport restoration

Windshield is on. Doesn't look perfect but it's acceptable. It was quite a pain. The bow rails are also now on. My dad is coming over to help me do some more work. We'll see that else we can bang out. Pictures this evening.
 

ezmobee

Supreme Mariner
Joined
Mar 26, 2007
Messages
23,767
Re: 18' Starcraft SuperSport restoration

Ok, I lied, no pictures. Nothing too interesting. However, much progress was made. My dad was a ton of help with getting the King StarBoard dash panels cut and fit perfectly. He cut out 1/2" plywood panels to fit behind the StarBoard for stiffening. I don't want any fasteners visible on the dash panels so I planned to screw in the plywood and then glue the StarBoard to it. My dad was concerned that unless we recess the plywood a bit the StarBoard would not look nice having to bend a bit around the console metal and plywood screws. So he took the plywood home and is going to rout out the edges a bit. They are going to look great.

While he was doing that, I got all the holes drilled in my transom (oversized). I then got it back out of the boat. It's ready for epoxy. I then patched a bunch of extra unneeded holes in the aluminum transom skin with JB Weld. On larger ones I used a backer of a small piece of flashing.

I'm confident I can get the transom done this week and then get the motor hung and rigged.
 

ezmobee

Supreme Mariner
Joined
Mar 26, 2007
Messages
23,767
Re: 18' Starcraft SuperSport restoration

sprintst, I had originally intended to buy 1/2" starboard but accidently ordered 1/4". At first I was pissed but then I realized it would probably look nicer not adding all that visible thickness. And I'm not sure if even the 1/2" would have been sturdy enough to support the helm without additional bracing. I think it will turn out nice. I'm going to prime it with primer meant for plastic and then painting it a medium gray for contrast.
 

ezmobee

Supreme Mariner
Joined
Mar 26, 2007
Messages
23,767
Re: 18' Starcraft SuperSport restoration

Are you thinking of painting the starboard? I'd test a piece first as I don't think anything will stick to it, well at least there's only 1 glue that will stick to it, expensive stuff. I tried some 5200 on it, and after the 5200 was cured,,, it came right off the starboard.

Fan-friggin'-tastic. Did about a half hours worth of research and completely confirmed this. There is a lovely $40-50 adhesive from 3M that will work but I can't tell how much you get for that price and it looks like a nightmare to use. They say no paint will stick to it. I really gotta wonder if that plastic primer I bought would at least sorta work.

The good news is, left white they still won't look bad. And they really won't need to be fully adhered as all my accessories like helm, gauges, switches, etc. will hold them in place. The passenger side on was going to have one of these in it http://www.consumersmarine.com/modp...e=Tackle-Storage&aID=701E&merchID=1009&r=view which would also hold it on place. I could just use 5200 to at least aid in the process.
 

ezmobee

Supreme Mariner
Joined
Mar 26, 2007
Messages
23,767
Re: 18' Starcraft SuperSport restoration

I just placed what is hopefully the last high dollar order of boat stuff. This was a biggie. Got pretty much everything I need to finish the boat.

Steering system (thanks a ton to umOrion who clued me in on an ebay seller who has these cheap)
Splashwell train tubes and cable boots
Horn and horn switch
Stern light
Battery tray
Fuel tank
Fuel vent and withdrawal line
New windshield supports
Carb and fuel pump rebuild kits
Some nifty organizer things
Dock lines

And this bad-*** transom mount tilt switch to allow me to easily tilt the motor from back
at the motor http://www.wholesalemarine.com/p/T-H-TTC-1/
 

ezmobee

Supreme Mariner
Joined
Mar 26, 2007
Messages
23,767
Re: 18' Starcraft SuperSport restoration

I got a coat of epoxy on the transom last night. I used up all my Clark Craft epoxy on the deck. I didn't know how much the transom would need and I didn't want to over order. Tim Fives graciously gave me a gallon of epoxy from a large order he got a great deal on from ebay. The plan is just to use what I need and then reimburse him for what I used. Now, not to look a gift horse in the mouth....and I really appreciate Tim helping me out, but I did have to inform him that he's going to be hating life when he goes to do his deck boards with this stuff. He did his transom with West System so he's going to be comparing it to the best. You guys thought I used a lot of epoxy before? Sheeet, this stuff is even worse. It's stinky, sticky and doesn't go far. "Special low viscosity formula" my foot. And it's still tacky (although it's been cool). Oh well. I'm not too concerned since it's not like I'll be walking on it or anything. I was hoping to get another coat on tonight but that ain't happenin'.
 

ezmobee

Supreme Mariner
Joined
Mar 26, 2007
Messages
23,767
Re: 18' Starcraft SuperSport restoration

Well all my stuff that I ordered the other day arrived. It was fun opening all that up. The first thing I did was install the new windshield supports I got. Big improvement over the rusty originals.
DSCF2584.jpg


The windshield is now done. It didn't turn out TOO bad. It's definitely higher on the passenger side but the foam fills the gap. The top alignment isn't too bad either. I'll live with it.
DSCF2583.jpg


DSCF2582.jpg


DSCF2581.jpg


I don't have much other exciting progress because the transom is eating up my time. And we all know how exciting and interesting transom pictures are
DSCF2586.jpg


It's coming along though. I have 2 coats of epoxy on the one side and the other side is prepped and ready for its first coat. I sanded down all my JB Weld hole patches on back of the boat itself and they came out very nicely. I had to put a second coat over 2 of them. Once those are sanded that area will be ready for paint. The plan is to finish epoxying the transom board, install it, install all the bolts sealing them well with 5200, attaching the splash well to the transom board with 5200 and screws and then "caulking" the splash well/transom seam with 5200. Once all the 5200 is dry, I can paint it. Once that's dry, I can finally hang the motor. My steering system will be arriving Monday so I can get that, along with the dash panels, installed. I think I am about 2-3 weeks away from splashing it. I'm feeling pretty good about that since a number of the Chesapeake Bay area guys are just splashing theirs this weekend or next so I'm hardly behind on the "season" at all.

Here's a shot I took of my dad's new tinny that we took out on Thurs. http://i176.photobucket.com/albums/w200/ezmobee/DSCF2577.jpg That's my Evinrude on it. It came with a Merc 5. I don't do Mercs :p Not bad for $600.
 

ezmobee

Supreme Mariner
Joined
Mar 26, 2007
Messages
23,767
Re: 18' Starcraft SuperSport restoration

Thanks guys.

How many gauges are you putting on the dash?

Not very many! There sure isn't much room! I think a tach, fuel, and trim. Maybe someday a volt meter.

I was originally planning on reinstalling my speedometer. As you may know, I hate boat speedometers and find them more trouble than they're worth. However mine worked well and the holes were already drilled in the transom. So I was gonna keep it. Well the other day I noticed that the lighting in it was completely missing which I knew would lead me to buying a new speedo. That's against my principles so I patched all the holes in the transom and ditched the whole idea. Probably wouldn't hardly be space for it anyway.

Are you starting from scratch with the electrical or do you have existing fuse boxes and everything?

I'm not one to ask about electrical. I tie all the blacks together, all the reds together, maybe a switch or two, call it a day :redface:
 

ezmobee

Supreme Mariner
Joined
Mar 26, 2007
Messages
23,767
Re: 18' Starcraft SuperSport restoration

Got my final coat of epoxy on the transom last night and baked the sh!t out of it with my big heater all night so it would be ready to work with today. That planned worked and the transom is now IN the boat :) Heading back out now to install all the fasterners and get 5200 all over my fingers. I'd like to get the helm installed today as well. Pics later. I am taking the camera downstairs with me.
 

ezmobee

Supreme Mariner
Joined
Mar 26, 2007
Messages
23,767
Re: 18' Starcraft SuperSport restoration

The transom is in! And everything is 5200'd that needs to be. As soon as that has cured I will be able to do my last bit of painting: the transom and splashwell. Here's the boring pics:

Here the transom is slid into the boat. The boat is all dusty as I had just sanded down my JB Weld hole patches again
DSCF2588.jpg


I really thought the added thickness of the epoxy would cause me to have to beat that board into submission but it slid easily into place and all the holes lines up
DSCF2589.jpg


Fastenners and transom eyes installed and 5200'd
DSCF2590.jpg


Splashwell seam "caulked" with 5200. Once this cures I can paint all this with the light gray (white)
DSCF2591.jpg


As you can see there's quite a bit of bare aluminum on the transom skin. I was able to pick up a can of self-etching primer at Pep Boys today. I was pretty pumped that they had it.

I was at Pep Boys to get some floor mats for our new tow-beast: '05 Jeep Grand Cherokee 4.7 V8 that I purchased on Wednesday night :)
 

ezmobee

Supreme Mariner
Joined
Mar 26, 2007
Messages
23,767
Re: 18' Starcraft SuperSport restoration

Got some good work done on the boat today. The helm is now installed and the bucket seats are bolted down.

First I screwed in the dash backer boards. I recessed the holes a little bit before I sunk the screws in so they would fit flush. I had a bunch of these white painted screws and I think they were from a screen door kit or something and I believe they won't rust. If I'm wrong, oh well. They'll be under the StarBoard panels. My dad cut these panels to shape and routed them out so they'd recess out a bit and be somewhat flush with the metal console.

DSCF2598.jpg


Helm installed:
DSCF2600.jpg


I decided to just use 5200 behind the StarBoard panels. I know it won't stick long term but they will be held in place by the helm, gauges and various accessories.
DSCF2601.jpg


My wheel is a LITTLE bit off center but not noticeably so when your sitting there. I didn't want to move the seats any further center
DSCF2599.jpg


Seats installed. They have sliding pedestals which is why they aren't aligned in this picture. The bases are aligned.
DSCF2604.jpg


The swivel isn't the greatest because with how reclined those seats are, there just isn't room for them to spin all the way around. However, there is enough room for them to almost face backward which could provide another place to sit and fish should the need arise. Works for me.
DSCF2603.jpg
 

ezmobee

Supreme Mariner
Joined
Mar 26, 2007
Messages
23,767
Re: 18' Starcraft SuperSport restoration

Next work is to paint the transom and splashwell. Then I can hang and rig the motor. We're gettin' close.
 

ezmobee

Supreme Mariner
Joined
Mar 26, 2007
Messages
23,767
Re: 18' Starcraft SuperSport restoration

Dan you are correct. You do have to mechanically fasten it. I know the 5200 will fail. I'm just going to rely on all the stuff that's going to go through it (helm, gauges, switches on the drivers side and a flush mount tackle box on the passenger side) to hold it in place. But I figured it couldn't HURT to throw some 5200 under there.
 

ezmobee

Supreme Mariner
Joined
Mar 26, 2007
Messages
23,767
Re: 18' Starcraft SuperSport restoration

Got the splash well and transom painted tonight. Still have another coat to go.

The etching primer:
DSCF2605.jpg


DSCF2606.jpg


Paint:
DSCF2608.jpg


DSCF2607.jpg


Interesting things to note.....the etching primer dries almost immediately which is awesome. The Easypoxy, as if it doesn't already have fantastic coverage, covers even better over a light coating of the primer. Also tonight I actually had to do the "tip" part of roll & tip. I guess with the warmer weather (although it's still pretty cool) I had bubbles and they weren't laying down immediately like they did over the winter when I painted. However with a light stroke of the brush all was well and now I fully understand that application method. That's still some darn good paint.
 
Top