1972 Starcraft Nova 18'

captainnate

Petty Officer 2nd Class
Joined
Apr 19, 2011
Messages
190
Re: 1972 Starcraft Nova 18'

Maybe I don't need a template; like you said the bolt pattern is already in the transom aluminum skin.
 

jasoutside

Supreme Mariner
Joined
Dec 20, 2009
Messages
13,269
Re: 1972 Starcraft Nova 18'

I think it's 2 to 2 1/8" think and it is a critical thickness. The bolt pattern is already in the transom skin.

Maybe I don't need a template; like you said the bolt pattern is already in the transom aluminum skin.

Yup, and yup ^^^^!

Time for the big tear down.

Going over the bridge in Freeland this morning, yah, the river should be reaching you by about your second cup of coffee this morning:eek:
 

captainnate

Petty Officer 2nd Class
Joined
Apr 19, 2011
Messages
190
Re: 1972 Starcraft Nova 18'

Now I'm trying to figure out how far I want to go with this. I'm pretty sure I don't want to strip it down to nothing. New paint would look nice, but what I really want is a safe, functional, and reliable boat. If I can feel comfortable taking it on Saginaw bay walleye fishing, or out on a smaller lake with the family I would be happy. The boat doesn't have to be cosmetically perfect. I do want to know the engine and outdrive are working well, and that the transom is solid and won't spring a leak and sink the boat. I'm debating what to do with the floor. It seems good everywhere except the sections on both sides of the engine. On the other hand, I have a quart of gluvit in the garage, so it might make sense to just do it. So what are the steps? I guess one of the first things is getting that engine out of the boat.
 

captainnate

Petty Officer 2nd Class
Joined
Apr 19, 2011
Messages
190
Re: 1972 Starcraft Nova 18'

So the total transom thickness (plywood plus the aluminum skin) is suppose to be between 2 and 2 1/8 inches?
 

jasoutside

Supreme Mariner
Joined
Dec 20, 2009
Messages
13,269
Re: 1972 Starcraft Nova 18'

it might make sense to just do it.

Yup!

one of the first things is getting that engine out of the boat.

No doubt;)

So the total transom thickness (plywood plus the aluminum skin) is suppose to be between 2 and 2 1/8 inches?

Yup, and parallel.

So what are the steps?

1st, homework....

http://forums.iboats.com/starcraft-boats/starcraft-rebuilds-restorations-theyre-all-here-494143.html
 

djpeters

Lieutenant Commander
Joined
Jun 9, 2010
Messages
1,824
Re: 1972 Starcraft Nova 18'

I'm not an I/o guy, but, by your pics it looks like it would be pretty straightforward. My vote would be to just do the transom now so you can use it this summer. Prolly not as bad of a job as you think....
 

Grandad

Lieutenant Commander
Joined
Jun 7, 2011
Messages
1,504
Re: 1972 Starcraft Nova 18'

PilingOn.jpg

Hi Nate, at the risk of piling on, I'd say just bite the bullet and replace the transom. I tried the red neck approach when I discovered rot starting from the top of my transom. I replaced about 11" of the top of it with new plywood, then reinforced the assembly by spanning the 2 pieces with a 2" x 4" x 1/4" aluminum C channel spanning the entire beam of the boat. It bought me a couple of years of use, but when I reversed into a rock (no motor damage at all), the shock crushed the wood below the engine enough that she started to leak and would have sunk in about a half hour had I not been watchful for damage.
My fear of doing the job right in the first place was unwarranted. I found that there was enough room in the bilge ahead of the 4 cylinder engine that I was able to slide it forward on blocks without having to remove it from the boat. After you've done your homework, start with removing the rear deck before fussing with the engine. - Grandad
 

captainnate

Petty Officer 2nd Class
Joined
Apr 19, 2011
Messages
190
Re: 1972 Starcraft Nova 18'

Thanks fellas, I think you are all right. There is no doubt in my mind that the transom must be replaced. I think I might wait on the floor, however. I guess I'm anxious to get the boat usable. I should do my homework while the weather is still crappy (about a week of rain, 30-40 degrees). I have a two car garage and a couple tarps, so I'll have to wait for some drier weather.
 

ezmobee

Supreme Mariner
Joined
Mar 26, 2007
Messages
23,767
Re: 1972 Starcraft Nova 18'

There is no doubt in my mind that the transom must be replaced. I think I might wait on the floor, however.

One of the nice things about aluminum hulls is that the deck and stringers don't typically tie into the transom at all so those two things are completely separate projects.
 

captainnate

Petty Officer 2nd Class
Joined
Apr 19, 2011
Messages
190
Re: 1972 Starcraft Nova 18'

One of the nice things about aluminum hulls is that the deck and stringers don't typically tie into the transom at all so those two things are completely separate projects.


That is how it looked to me. The seats will have to be removed, and maybe the side panels? It looks like the floor fits under the lip of the side panels. I will have to take another look.
 

Grandad

Lieutenant Commander
Joined
Jun 7, 2011
Messages
1,504
Re: 1972 Starcraft Nova 18'

One of the nice things about aluminum hulls is that the deck and stringers don't typically tie into the transom at all so those two things are completely separate projects.
Yup, and to get your priorities straight, it's probably better to put your foot through the floor into the bilge rather than the outdrive through the transom into the cockpit. - Grandad
 

captainnate

Petty Officer 2nd Class
Joined
Apr 19, 2011
Messages
190
Re: 1972 Starcraft Nova 18'

So I think I am going to get started on the transom replacement. I have a few questions about that and a few other ideas. For the transom I'm thinking marine plywood ordered from Menards sealed with spar varnish. It sounds like spar varnish might be easier to buy locally than epoxy, and maybe cheaper? For the plywood, am I right to assume most folks use two 3/4" pieces glued and screwed, with and additional 1/2" space where the transom plate attaches? I suppose 2" all around might make it stronger, but is it necessary?
 

jasoutside

Supreme Mariner
Joined
Dec 20, 2009
Messages
13,269
Re: 1972 Starcraft Nova 18'

Actually, Arauco over at Menards will be just fine at 1/2 the cost.

Yup, 3-5 coats of spar will be aok. Paint it up with Rustoleum, even better.

Yup, 2 pieces of 3/4" then a spacer to get it EXACTLY at 2" - 2 1/8" spec (flat and parallel).
 

captainnate

Petty Officer 2nd Class
Joined
Apr 19, 2011
Messages
190
Re: 1972 Starcraft Nova 18'

[h=1]Anybody use Epifanes Gloss Clear Varnish? It appears to have good reviews.[/h]
 

captainnate

Petty Officer 2nd Class
Joined
Apr 19, 2011
Messages
190
Re: 1972 Starcraft Nova 18'

Thanks Jas, so are you saying spar varnish, then Rustoleum? Or can I just use Rustoleum oil based and skip the varnish? Waterproof glue and stainless steel screws to fasten the plywood pieces together?
 

GA_Boater

Honorary Moderator Emeritus
Joined
May 24, 2011
Messages
49,038
Re: 1972 Starcraft Nova 18'

[h=1]Anybody use Epifanes Gloss Clear Varnish? It appears to have good reviews.[/h]

Hi Nate - Most of us that went with spar have used the Helmsman spar. Spar varnish remains flexible on the surface, don't know about the Epifanes. Rusto on top can't hurt a thing.

The 2-2 1/8" and flat is a critical Mercruiser transom requirement. 1 1/2" for the rest of the transom is fine. If you rough cut the opening for the outdrive, you can do some good clamping through the hole.
 

jasoutside

Supreme Mariner
Joined
Dec 20, 2009
Messages
13,269
Re: 1972 Starcraft Nova 18'

Epifanes is excellent. But, in my humble opinion, a little expensive and unnecessary with this application.

Like GA mentioned the Helmsman Spar Eurathane is great stuff. Mobetta with a few coats of Rusto or Porch N Floor Paint.
 

Woodonglass

Supreme Mariner
Joined
Dec 29, 2009
Messages
25,924
Re: 1972 Starcraft Nova 18'

Old Okie Woodworker Sealer Tip: 1 cup Boiled Linseed Oil, 1 cup Polyurethane Varnish, 2 cups Mineral spirits (yields 1 quart of material) Paint this on the wood you will be using for the transom. Really saturate the wood with it. Mix up more if needed and pay close attention to the edges letting it soak in till they won't soak in any more. Let dry 24-48 hours. Use Rustoleum Professional Oil Based Paint. Thin the first coat 30% with Mineral Spirits. Let dry 24 Hours. Two more Coats of Un-thinned Rustoleum. Transom will last DECADES!!!!! The solids contained in the BLO will seal the pores of the wood better than anything you can put on it. Will be almost like treated plywood without any of the negative effects.
 

captainnate

Petty Officer 2nd Class
Joined
Apr 19, 2011
Messages
190
Re: 1972 Starcraft Nova 18'

boat engine 017.jpgboat engine 020.jpgboat engine 021.jpg

boat engine 022.jpg

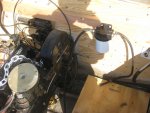
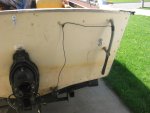
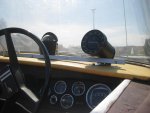
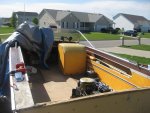
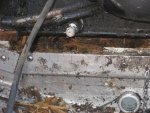
I'm making a little progress. I removed the seats to make more room to work. I am planning on just moving the engine towards the front of the boat instead of removing it. In the second picture you see an ugly looking pipe that comes out of the transom and then bends down. It has the transducer wire from the depth finder running trough it. I think I will remove that pipe and come up with something else.
 

Attachments

  • boat engine 016 1.jpg
    boat engine 016 1.jpg
    126.2 KB · Views: 1

captainnate

Petty Officer 2nd Class
Joined
Apr 19, 2011
Messages
190
Re: 1972 Starcraft Nova 18'

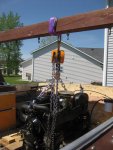
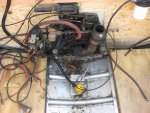
Thanks to my kids swing set and some items from Harbor Freight, I got the engine up and moved forward in the boat. There was one item I did not have to remove that the manual said to, the shift cable. It might be hard to tell from the pic but it kind of made a big loop under the engine. Is this normal? You can also see the rot under the transom plate. I dug the rotted wood out with my finger, that's how bad it was. So what else is recommend while the engine is out? inspection/replacement items? Time to get back into the manual. I guess I would like to not disassemble anything unnecessarily; the less stuff I have to put back together, the better chance I have of getting this right. Thanks for reading.
boat engine removal 018.jpgboat engine removal 020.jpgboat engine removal 016.jpg
 
Top