1995 Larson 174 SEI Complete Rebuild

Mechanicalmike08

Petty Officer 1st Class
Joined
Aug 29, 2018
Messages
308
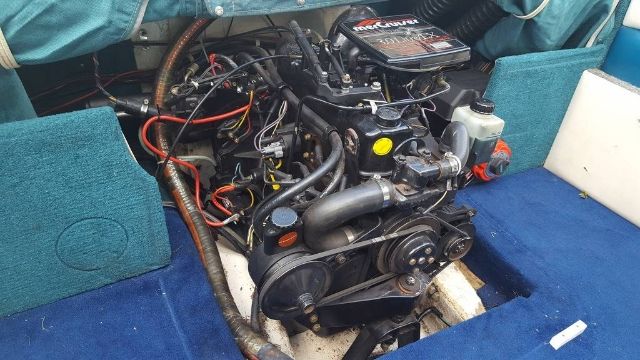
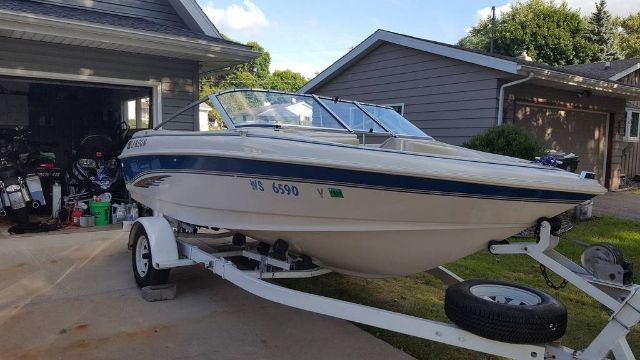
Well everybody I’m joining the family, Back in mid-August we bought our first boat. I had been looking for a little while and actually stumbled onto this site while looking at info for evaluating a used boat. We looked at a few that were just terrible, I’m not afraid of a little work but the photos sure did these boats too much justice. I had almost given up for the year when one popped up that had been for sale for quite some time. Reading the add I could see why, it read like a scam. Claimed to be a 19ft boat with a picture of 174 badge. Gave it a call anyway, super nice guy straight forward with me. Told me it had been re-decked and had paperwork on other work that had been done to it. It wasn’t perfect but thought it was decent deal. 1995 Larson 174 SEI, 3.0 Mercruiser AlphaOne. Paid $2800. With a little elbow grease the seats and lite oxidation were cleaned up:
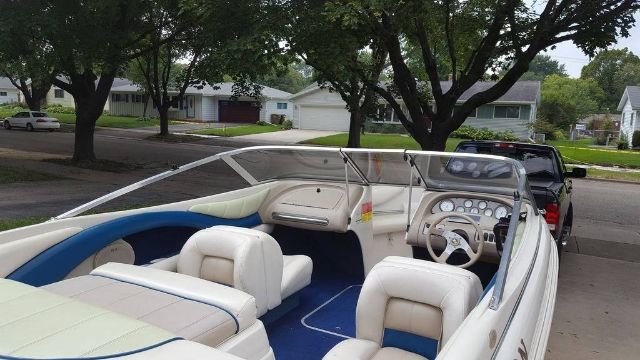
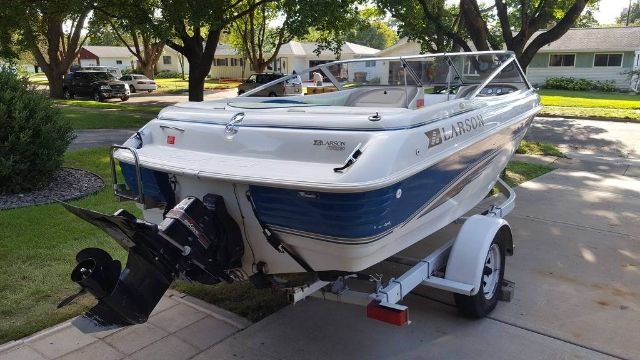

That weekend we had record rains here in Wisconsin and all the lakes around me were put on no wake restrictions. Another week goes buy and we can finally go a little more south and take here out for the first time. Ran great, didn’t seem to have the top end I thought it should but didn’t play to much with trim and the prop looked pretty new so I figured he put some cheap prop that wasn’t right for the boat.

All was good, brought it home and we got some more rain. This is when I noticed something wasn’t right. The ski locker would never dry or drain. So I grabbed a small stick to fish through the tank and see if it was plugged. I hit a spongy hard surface. Luckily the is a access panel to the gas tank, removed the panel and found what I had feared. The guy had re-decked the boat but didn’t fix any of the stringers, he then lined the gas tank area with a giant piece of rubber mat which trapped water. So I started poking more around. Motor mount and transom are soft too. So I did some more research and posted my first question on here.

I read Frisco’s entire short and long version thread as well as a few other well documented rebuilds and decided to dive in…
 
Last edited:

Mechanicalmike08

Petty Officer 1st Class
Joined
Aug 29, 2018
Messages
308
The plan:
Gut interior
Convert from back to back to pedestals and a back bench
Will gelcoat floor and make a snap in carpet
Reupholster everything and update the look

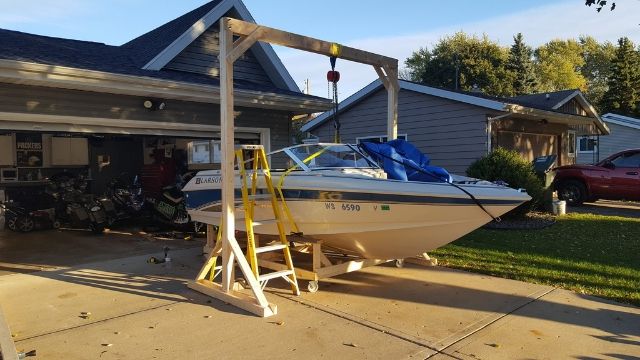
So I ripped the interior out in a few hours and started getting the motor ready to pull, Sorry I don’t have many pics of this as I was stuck working around the weather. Built a gantry style crane with a chain hoist and pulled the motor.

I want to get this done over the winter so I spent some time insulating my garage and installing a heater.

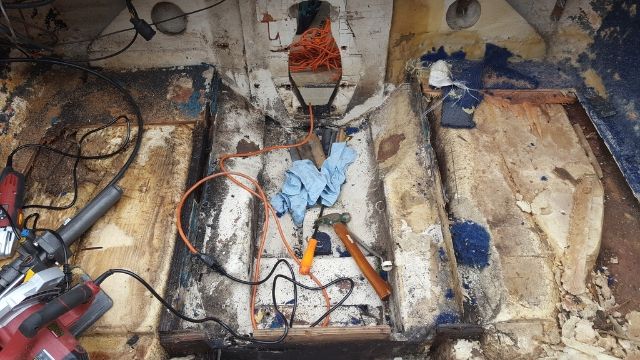
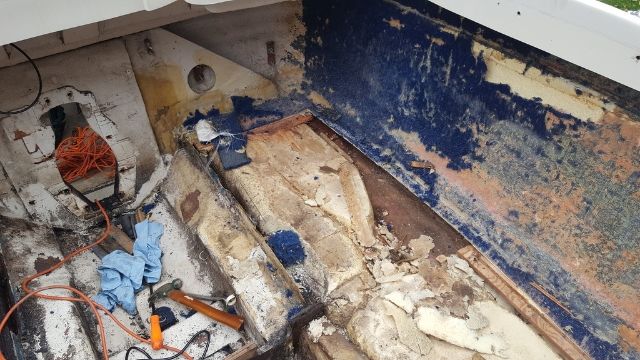
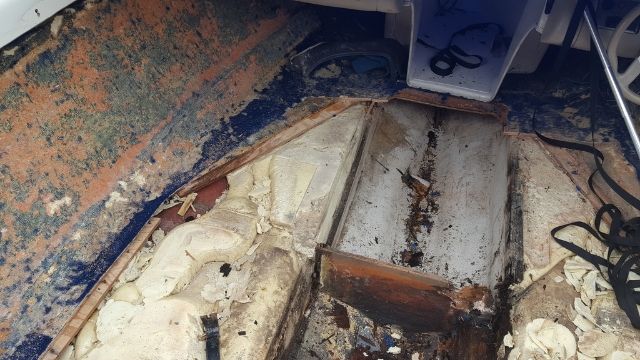
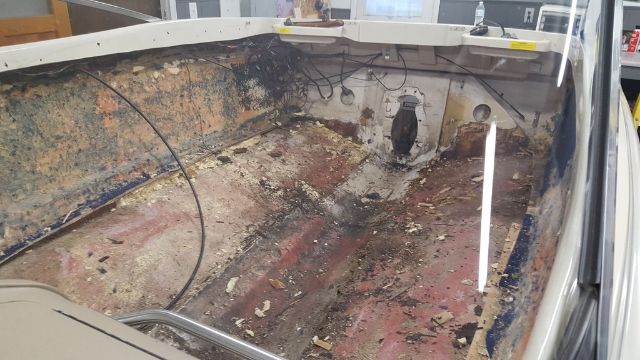
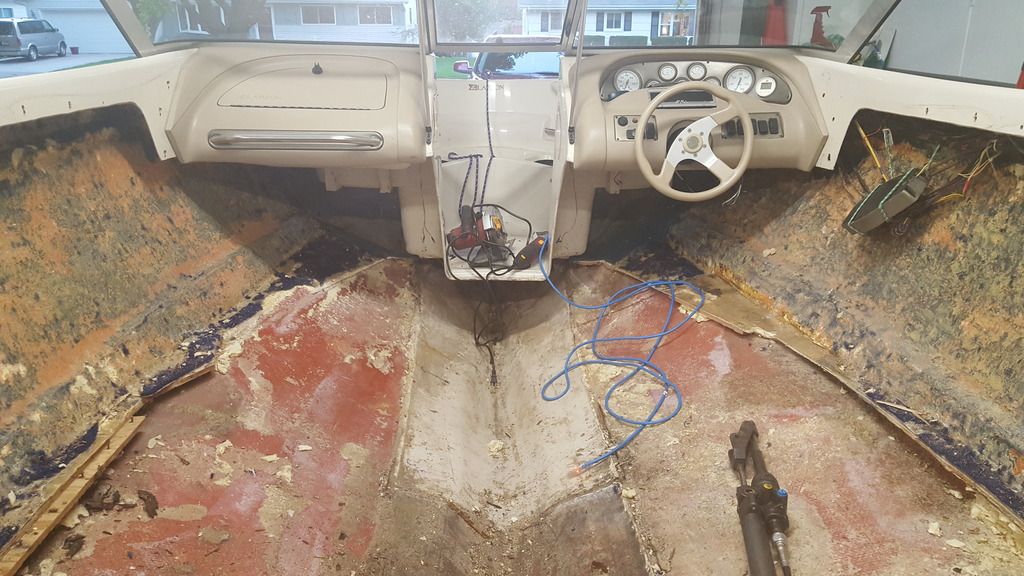
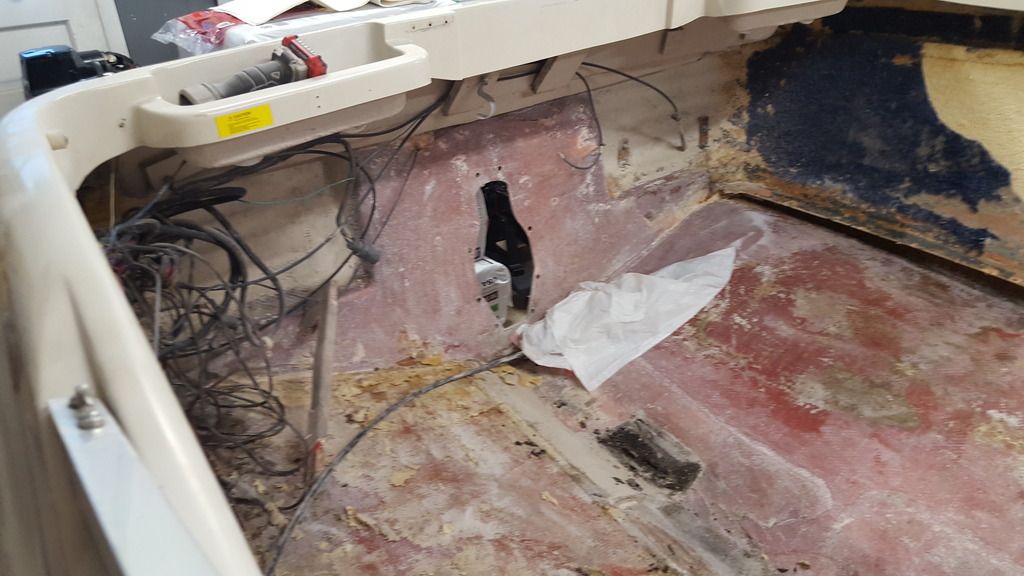
With everything off the transom and cleaned out I took a half day from work and made the first cuts in the floor and ripped it all up. What I found was pretty bad, stringers are gone bulkheads were soaked. The front motor support was basically mush. The foam wasn’t really that wet, maybe 1/8” of the bottom was wet. It all came out pretty easy.


Forgot to take some pictures of the floor cleaned out, got 90% of everything on the floor ripped out. Got some clean up towards the front and the transom to do yet.
 

Mechanicalmike08

Petty Officer 1st Class
Joined
Aug 29, 2018
Messages
308
Walking around in it with everything out made me very nervous, the hull really flexes. To fit better in the garage anyway I built a cradle that would support it better than the roller trailer. This was probably the most nervous I have been in a while, had to use the crane and ATV jack in the rear. Rolled the trailer out and the cradle in, lowered it down and added some more supports on the angle of the hull. And into the garage she went.


It’s on wheels so I can do the grinding outside before the cold snap really hits. I will be cleaning up the rest of the floor and transom the next couple nights. The wife picked up a weekend shift so I will be hitting the grinding hard this weekend.
 

chevymaher

Commander
Joined
Mar 29, 2017
Messages
2,921
They do flex when stripped don't they. Work in there a while and it feels normal. I put the bulkheads and keel in and thought wow that just got solid.

It is worth it keep going. And welcome to the site.
 

dezmond

Senior Chief Petty Officer
Joined
Jul 21, 2010
Messages
760
Gonna be a great looking boat when all done! Keep at er:) I too am doing a complete rehab on my bow rider. I was nervous at the beginning with the flexing and walking in the bare hull. Not so worried anymore and used to it. Once you start putting it back in it will be solid again. “Hey that’s what she said” Hahahahhahaha. Sorry. Had to. Good luck and I’ll be tagging along.
 

JASinIL2006

Vice Admiral
Joined
Feb 10, 2012
Messages
5,667
Looks like a good project and you are diving right in. I’ll be following along, too.
 

tpenfield

Moderator
Staff member
Joined
Jul 18, 2011
Messages
18,038
Subscribing in. Looks like you are off to a good start :thumb:
 

Mechanicalmike08

Petty Officer 1st Class
Joined
Aug 29, 2018
Messages
308
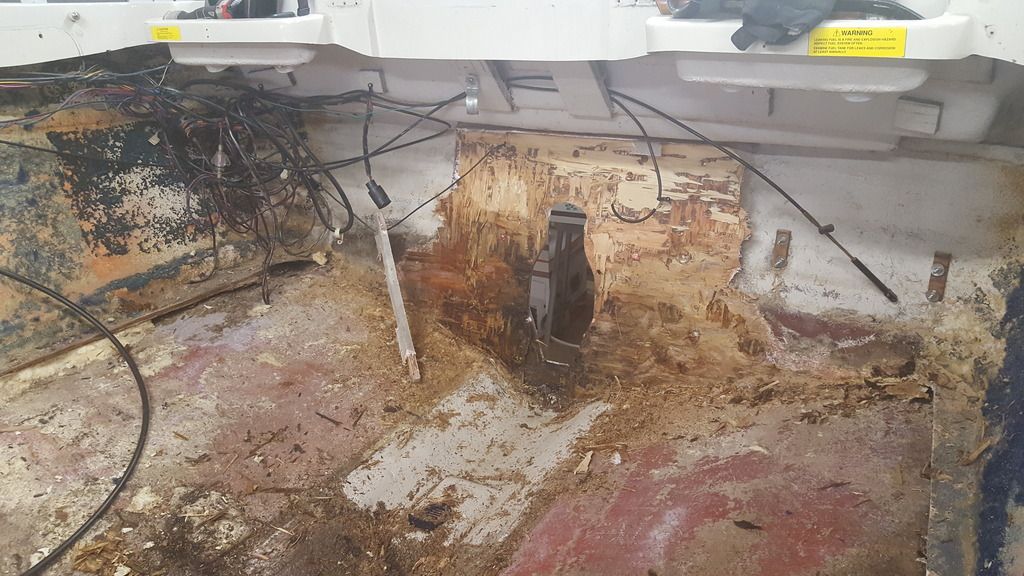
Thanks guys got in last night and cut the bilge area out and the rest of the back floor and foam. Those side bilges were thick, Im not going that thick since my motor doesn't mount there anyway and don't see myself upgrading to 4.3 anytime soon.


Tonight will be the transom and start picking at the front floor. Its strange to me how little my transom is connected to the back, hard to see in these photos but really only the center section is tied in. its open behind those round holes.
 

Chris51280

Ensign
Joined
Jan 24, 2018
Messages
932
did you remove the wood under the front bow section? How is yours tied into the deck under the fiberglass hallway
 

Mechanicalmike08

Petty Officer 1st Class
Joined
Aug 29, 2018
Messages
308
did you remove the wood under the front bow section? How is yours tied into the deck under the fiberglass hallway

I have not yet, I cut up to under the console. Plywood runs up under the fiberglass front section. Its actually in good condition because the fiberglass protects it I think. I plan on working on this area tonight. I don't want to remove the cap but i also don't want to half ass the job since Im taking it this far. The stringer under that area is also good. So my plan at the moment is try and cut the plywood back under the fiberglass a little bit and leave the small section of stringer there. When i do the deck I think i will glass the small portion that will slide under the fiberglass before i install and tab everything together.
 

Woodonglass

Supreme Mariner
Joined
Dec 29, 2009
Messages
25,927
Hopefully you took a LOT of measurements before the demolition started!!! The hull flex can and will cause serious problems when you start to rebuild unless you keep the original specs on the money.
 

harringtondav

Commander
Joined
May 26, 2018
Messages
2,439
I'll be following you closely. I have a '96 174 SEI. Last winter I pulled the engine due to frozen front mounts. I recarpeted it while I was at it. Floor, bulkheads and transom are solid. Buuut my port stringer under the front mount is a little iffy. I'm suspecting it is compromised back to the transom.

Post your rebuild so I can see what I may be getting into. If I decide to get into it I'll be asking this forum about options for a partial stringer replacement - if there are any.

Also I'd be glad to show you the dims. for the seat box and seat plywood, if you want to mimic the factory set up. My 4.3LX jumps on top of the water 2-3 seconds and does 52 mph, although I don't go there much.

Also check in with the Merc. Sterndrives and Engines team, in case your 3.0 is also a turd, or has issues. They are a good group, and can give you some evaluation tips. You'll have the perfect opportunity to address any issues with it on a cart/stand.

You'll love that boat when finished.
 

harringtondav

Commander
Joined
May 26, 2018
Messages
2,439
.....ps. That rear bench seat is great. But everyone wants to sit back there. Four people if they are willing to squeeze in. With my 4.3 it gets stern heavy fast. In medium/heavy chop the boat will slap you to death if loaded like that. I've tried bribing passengers to take a bow seat. No takers so far.:) I broke down two years ago and bought a pair of Springfield 'Easy Ride' cushioned pedestals to save my kidneys. It will be easier with your 3.0L, and an enforced seating plan.
 

Mechanicalmike08

Petty Officer 1st Class
Joined
Aug 29, 2018
Messages
308
Hopefully you took a LOT of measurements before the demolition started!!! The hull flex can and will cause serious problems when you start to rebuild unless you keep the original specs on the money.

I took measurements, not enough now I realize. I took location dimensions and floor/ motor area heights. Didn't do much with measuring the hull deflection. There were no bulkheads to speak of other than the gas tank divide but they only went to the stringers not past and up the hull sides. I built the bunk cradle to keep the shape it only flexes a little now in the gaps between my supports. I plan on running bulk heads up to better support the hull.
 

Mechanicalmike08

Petty Officer 1st Class
Joined
Aug 29, 2018
Messages
308
I'll be following you closely. I have a '96 174 SEI. Last winter I pulled the engine due to frozen front mounts. I recarpeted it while I was at it. Floor, bulkheads and transom are solid. Buuut my port stringer under the front mount is a little iffy. I'm suspecting it is compromised back to the transom.

Post your rebuild so I can see what I may be getting into. If I decide to get into it I'll be asking this forum about options for a partial stringer replacement - if there are any.

Also I'd be glad to show you the dims. for the seat box and seat plywood, if you want to mimic the factory set up. My 4.3LX jumps on top of the water 2-3 seconds and does 52 mph, although I don't go there much.

I wouldn't mind some pictures of there structure and how it's in there, you can pm me I would appreciate it. If it's anything like my boat they built it to hold water. The belly of the boat is real low so water doesn't drain. Also the front of the bow didn't protect the foam from water getting into the foam. The foam just ended from under the plywood open too the elements. I will be fixing this.
 

Mechanicalmike08

Petty Officer 1st Class
Joined
Aug 29, 2018
Messages
308
Well tonight I got the rest of the front floor and stringers out, the plywood extended under the front bow seating section and was glued to it. It was desinged to fail, the foam was open to the elements and could collect water. I will be fixing this. The plan when rebuilding will be to finish the stringers and then fully glass the front section and slide it under the bow back about 3in. Tab it in after its in place and then finish the rest of the floor the normal way. Most of it will be covered by the kick panel and will be very water proof.


Then onto the transom,most was pretty easy but the upper section was in pretty good shape and hard to get out. Still need to spend some time back there.
20181018_180748.jpg


Tomorrow should be finishing the transom and some final cuts and scraping before some major grinding this weekend.
 

harringtondav

Commander
Joined
May 26, 2018
Messages
2,439
I wouldn't mind some pictures of there structure and how it's in there, you can pm me I would appreciate it. If it's anything like my boat they built it to hold water. The belly of the boat is real low so water doesn't drain. Also the front of the bow didn't protect the foam from water getting into the foam. The foam just ended from under the plywood open too the elements. I will be fixing this.

I didn't dig deep enough to give you much info on the under-floor structure. A bulkhead behind the wake board locker - in front of the gas tank, another just behind the tank in front of the engine bay. The stringers are approx 1.5" outside of the locker cut out. The stringers sistered up to over 4" wide at the front mounts (for a V 6), and continue back to the transom. I'll PM the pics I have, once I get them down sized enough to attach.
 

Mechanicalmike08

Petty Officer 1st Class
Joined
Aug 29, 2018
Messages
308
What a beautiful day for grinding, 45 degrees and 30 mph winds....the wind kept the dust out of the boat. Rolled her out in the driveway for about 2 hours of grinding. Got the transom and most of the left side. Didn't spend as much time as I wanted because I put two new windows in the garage to help keep the heat in better. Tomorrow should be sunny and a full day or grinding.


you can see now a little bit the side walls are so thin from the previous owner replacing carpet a large section came free from the foam I had to cut out. I'm going to smooth it out with PB and put a full layer of CSM on both side walls the full length and width. I ground a little bit on the side wall carpet glue and it will be thin when I'm done so I hope a single layer of CSM will be enough.
 
Top