Custom Fiberglass Extended Swim Platform

Scott Danforth

Grumpy Vintage Moderator still playing with boats
Staff member
Joined
Jul 23, 2011
Messages
47,561
When finished, i am sur WOG will post the iBoats seal of approval...
 

tpenfield

Moderator
Staff member
Joined
Jul 18, 2011
Messages
17,711
Quick update . . .

I found a few 'voids' under the gelcoat, some by 'tapping' and others by using a jet spray from the garden hose. Basically, these spots are where the resin did not soak enough through the 1708 and into the CSM layer that is up against the gelcoat.

So, far I fixed a few by opening them up and applying resin and gelcoat. Still have to open up the remaining ones. Before I do that, just wondering if anyone has any ideas/tips/tricks on repairing them.
 
Last edited:

JASinIL2006

Vice Admiral
Joined
Feb 10, 2012
Messages
5,548
I got a large hypodermic needle from a farm goods store (we have a lot of them in the Midwest!) and drilled a tiny hole in the 'glass, into which I injected the resin. I wouldn't use it for large voids, but for small bubbles, it filled them right up and required minimal sanding, etc. to repair the hole.
 

tpenfield

Moderator
Staff member
Joined
Jul 18, 2011
Messages
17,711
Test Fitting . . .

I did a test fitting of the platform to see if it needs any trimming or adjustments prior to applying the 4200 UV adhesive.

I had to make the holes in the existing swim deck elongated since the sides are a tight fit. Here are a couple of pictures . . .

IMG_2619.JPG
.
I was about 1/4" off on the side trim. So I'll cut a little bit away
.
IMG_2620.JPG
.
The underneath clearances look fine. . .

IMG_2622.JPG


I'll probably secure the platform for real tomorrow.
 

Attachments

  • IMG_2621.JPG
    IMG_2621.JPG
    72.2 KB · Views: 1

tpenfield

Moderator
Staff member
Joined
Jul 18, 2011
Messages
17,711
It's installed . . .

At least the adhesive is done. Still got to do the hardware and fasteners underneath.

Here are a few update pictures . . .

IMG_2627.JPG
.

Here is a close-up of the seam where the platform meets the stern of the boat.

IMG_2625.JPG
.

I have about 200 lbs of water and other stuff holding the platform down for the next few days until the 3M 4200 UV cures.
 

sopwithcamel74

Petty Officer 1st Class
Joined
Aug 15, 2018
Messages
203
Fantastic. Have enjoyed watching this one come together, and looking forward to you putting it through it's paces!
 

Scott Danforth

Grumpy Vintage Moderator still playing with boats
Staff member
Joined
Jul 23, 2011
Messages
47,561
Ted.... Getting closer to that selfie of you enjoying an adult beverage while sitting on it in the water....
 

Sea18Horse

Chief Petty Officer
Joined
Jun 1, 2008
Messages
626
Very impressive accomplishment.:yo:

Cheers...............................Todd
 

tpenfield

Moderator
Staff member
Joined
Jul 18, 2011
Messages
17,711
Mechanical fastening update . . .

There are a total of 26 bolts which will hold the swim platform to the boat, along with the adhesive.

I got 18 of them done today, so 8 more to go.

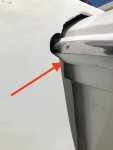
Here are a couple of pictures of the underside where all the support hardware resides.

Here are the 8 fastening bolts for the 4 main struts that will support the platform. Also the side strap in the distance.

Click image for larger version  Name:	IMG_2628.JPG Views:	1 Size:	238.3 KB ID:	10752965
.

Here are the struts fastened to the platform.
.
Click image for larger version  Name:	IMG_2631.JPG Views:	1 Size:	203.6 KB ID:	10752966
.
I had to offset them from the platform with the white spacers you see, because the studs were not 100% threaded and needed a standoff. There will be 8 (or maybe 12) mating bolts on the underside to the boats swim deck/transom area. I need to make some similar spacers, but they vary in thickness from 11/16" to 7/8". I might try to find some 1" thick synthetic trim board and use my planer to fine tune them.

Getting the bolts in there is going to be tricky. I may decide to cut a deck plate for access and then to seal it up.
 
Top