1959 Luger Fleetwood Restoration: Getting my feet wet.

Roadside Design

Seaman Apprentice
Joined
Feb 21, 2017
Messages
40
I felt I should give a thank you, I've lurked on the site for a couple years and without you guys, my journey wouldn't be as fun as it has been.

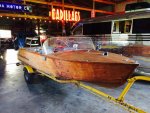
I've restored lots of things in my life (hot rods, buildings, campers etc.) and welcomed new challenges, so when a craigslist ad suckered me into a 1959 Luger wooden boat I had to bring it home. Never really been around boating, but hey I have two boys and space so sounded perfect, besides $600 bucks what could go wrong? Luckily before I ran out I consulted iBOATSt for days and found issues I needed to know and what i was getting into. Confident we started a new chapter, and so it began...

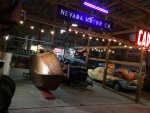
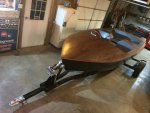
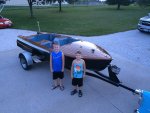
Boys, my lovely wife and I drove the 3 hours to the middle of KS and made the deal, here's what we know now: This was a kit boat built by a young college man and wife in 1959. Using the name and address stenciled on the trailer I was able to track down a relative who let me know the story, built in Chicago it was lightly used, always in meticulous detail and garaged. Eventually brought to KS where it sat winterized, the couple passed young with no children It was forgotten about. A bidding mistake at an estate auction put it in the hands of the second owner 6 years ago, uncovered and well preserved. He put on on water to test and after a run decided to scrape (make that mechanically sand and chisel, Arrr) the finish off. Discouraged It sat outside in a lean to garage with the african mahogany exposed for 4 years. We answered the ad and hit the road to save it!
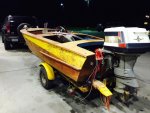
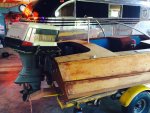
IMG_3792.jpg IMG_3797.jpg IMG_3796.jpg
 

Roadside Design

Seaman Apprentice
Joined
Feb 21, 2017
Messages
40
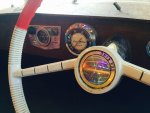
First thing was to reassemble all that parts and take inventory, luckily the previous owner kept everything and were able to put it back in place. Some things tell a story and the we were finding the low use true. Hardly any wear on items, steering wheel paint looked fresh, the engine still had the original plugs, white grease on linkages was still soft. The windshield showed no signs of age, deep scratch but no yellowing or or cracking around any edges. The bottom was glassed but still intact. I poked lots of places but no rot. IMG_3805.jpg IMG_3808.jpg IMG_3816.jpg
 

Roadside Design

Seaman Apprentice
Joined
Feb 21, 2017
Messages
40
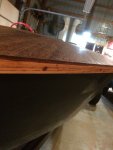
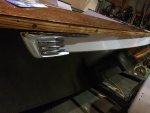
Two big issues were the the exposed wood. The sides were simple as I didn't like the look of a vertical seam on one side and with all the gouging and sanding marks, also the stainless trim had been pulled off and bent badly, I can straighten trim but this was past it and torn, I couldn't match it, so wood dowels and epoxy filled the holes, lots of sanding and blocking. The weather checked top decking would be another challenge. The mahogany had a tendency to lift along the grain, other areas had sank slightly another area had been over sanded through into the secondly wood. After reading and weighing the post here I encapsulated everything in epoxy. I know some people don't like that approach but it worked for me and several others here, also remember this is a cheap boat, so budget has to be kept mindful. The paint scheme I chose would let me paint the sides, so lots of sanding and blocking, priming and repeat.
I made a cradle and lifted the boat in the shop to access. IMG_5512.jpg
 
Last edited by a moderator:

Roadside Design

Seaman Apprentice
Joined
Feb 21, 2017
Messages
40
While this was going on the boys kept polishing the shiny bits. Again, we were lucky everything was dirty, but near perfect under the crud. Two pot metal windshield brackets are all that needed rechromed. and that kept them busy.

I kept on the paintwork, rolled then sprayed sand repeat. the issue with the black sides is how far do you go? If it was a car or fiberglass lots of wet anding and blocking plus nice urethane paints. But this is a wood boat done the late 50's way, so I left the finish about 95% where I wanted to take it, It doesn't look like a fiberglass boat and right for me anyway. Lot's more on the topside, it was becoming a real challenge, but finally got it blocked where it was taking shape.
IMG_6239.jpg IMG_6238.jpg
 

Roadside Design

Seaman Apprentice
Joined
Feb 21, 2017
Messages
40
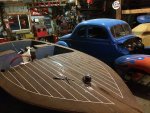
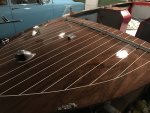
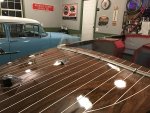
Remember the weathered top? Well I needed to hide some areas of damage, and while it wasn't original my wife and I like the deck stripes. FJ_Russo had a Matador resto that helped seal the deal. Also brings the white color, it's 50's and tri-color was the style... for cars anyway.
IMG_6883.jpg IMG_7176.jpg
 

Roadside Design

Seaman Apprentice
Joined
Feb 21, 2017
Messages
40
Thanks guys, couple more pics to upload of how it sits now.
hen I can start asking my crazy questions!
 

Roadside Design

Seaman Apprentice
Joined
Feb 21, 2017
Messages
40
Added the topcoat, more blocking, sanding, repeat. and repeat and again. Boys are happy, my sanding arm isnt.
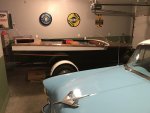
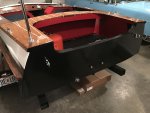
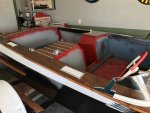
Moved it up to the house for the winter work. blocked in the interior color too. IMG_8019.jpg IMG_8012.jpg IMG_7193.jpg IMG_8015.jpg IMG_7197.jpg IMG_8050.jpg
 

Roadside Design

Seaman Apprentice
Joined
Feb 21, 2017
Messages
40
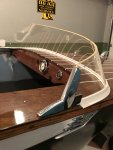
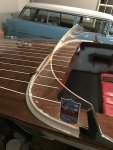
Some may hate this, look away. Im building this like I feel a guy who read a lot of Hot Rod magazines would have built it in '59. I also had a deep scratch in the upper windshield do whats a guy to do? Well I chopped it to look faster. I plan to sandcast a center bracket similar to Aristocraft. Forgive me. IMG_8036.jpg IMG_8049.jpg
 

Roadside Design

Seaman Apprentice
Joined
Feb 21, 2017
Messages
40
IMG_8042.jpg
IMG_8064.jpg
IMG_8124.jpg


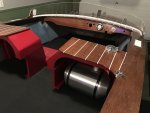
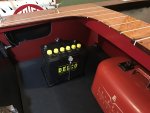
Last couple of weeks I've been having fun, made new step plate rubbers out of industrial floor trim edging, close match and under 10 bucks. note the seam in the rear wasnt glued yet, test fitting. The opened a Menards hardware in our area, I discovered a heavy rubber 3/8 thick material with fine lines that was perfect for the flooring (the sides are ready for red vintage auto loop carpet). I also added a spun moon tank and flip cap, keeps with the hot rod build theme. Originally this had a truck tank under the front seat and appears the boat was built around it, with no way to take it out to properly boil the spun tank seemed ideal. Plus I can match up the filler neck location. added a vintage battery because I get hung on the details. Modern black battery with a decal and 30 dollar retro topper.
 

hvymtl939

Chief Petty Officer
Joined
Feb 6, 2017
Messages
495
What an awesome build, and what a cool shop you have! Where do you boat at here in Kansas?
 

Roadside Design

Seaman Apprentice
Joined
Feb 21, 2017
Messages
40
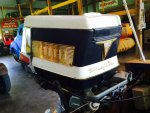
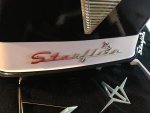
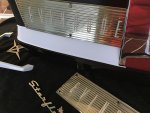
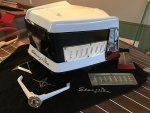
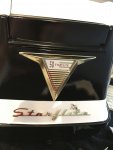
And to last weekend... with great weather I took advantage and painted the engine cover. In a way I felt guilty, the paint was great and sure any collector would have polished it up. There were two or three chips and the paint over the fiberglass had shrunk which was ok, but my boat is black red and white so the factory blue looked odd. Remember that fictitious kid who read Hop UP and Speed & Style and would have been assembling this kit? I'm sure he would have changed the color too. I sprayed it with a little peal to match the original and took care so it didn't look like a new high dollar dollar paint job. Still lucky, the plastic emblems had no fade and minimal issues, easy polishing. Metal badges were washed in water and waxed. Pre assembly pics.

I work in advertising, honestly how many names does an engine need? IMG_8160.jpg
IMG_8162.jpg
IMG_8158.jpg
IMG_8163.jpg
 
Last edited:

Roadside Design

Seaman Apprentice
Joined
Feb 21, 2017
Messages
40
What an awesome build, and what a cool shop you have! Where do you boat at here in Kansas?


Thanks. I hope we can be on the water in a few months, were on the Missouri side (KC) and will run around local lakes maybe Table Rock. We built it for family fun first but I've seen a couple vintage boat show cruises south, I'd love to find out more about these and go!
 

Tnstratofam

Commander
Joined
Aug 18, 2013
Messages
2,679
Wow!! Beautiful work on your boat so far. I like the idea/theme of a Hot Rodder from the 50's/60's building it too. The windshield is cool.

Also if that's your shop #1 I'm Super jealous and impressed, and #2 I really like your other toys!:hail:
 

Roadside Design

Seaman Apprentice
Joined
Feb 21, 2017
Messages
40
Wow!! Beautiful work on your boat so far. I like the idea/theme of a Hot Rodder from the 50's/60's building it too. The windshield is cool.

Also if that's your shop #1 I'm Super jealous and impressed, and #2 I really like your other toys!:hail:

Thanks. Its more of a mild hot rod era style mindset. If a guy really was after speed then it would have been an inboard 283 - thats what I tell myself. Yes and thanks again for shop and stuff comment, space to work and usually in some project.
 

Baylinerchuck

Commander
Joined
Jul 29, 2016
Messages
2,726
Simply awesome. That's one cool boat!! She was lucky to be saved by someone as detail oriented as you appear to be. Great work thus far. Looking forward to updates.
 

hvymtl939

Chief Petty Officer
Joined
Feb 6, 2017
Messages
495
Thanks. I hope we can be on the water in a few months, were on the Missouri side (KC) and will run around local lakes maybe Table Rock. We built it for family fun first but I've seen a couple vintage boat show cruises south, I'd love to find out more about these and go!


Man, if you have any more info on those, I'd love to hear about them. I have a 75 Glastron and would love to bring it out, even though it's not super vintage.
 

Roadside Design

Seaman Apprentice
Joined
Feb 21, 2017
Messages
40
Cleaned and greased the control unit last night. Forgive the roughly painted side panel its temporarily mounted to, the sides are to be carpeted. Paint is original and have fought temptation to paint it black like everything else, I will paint the knob a better shade of red. Only issue is a SLOW sticker I might need to repop or remove. The previous owner replaced some damaged control cables, These are too long and need to be shortened but will also give me a change to reroute through the front seat.
 

Attachments

  • IMG_8178.jpg
    IMG_8178.jpg
    106.6 KB · Views: 0
Top