Water in cylinders merc 7.5 1972

Michawilden

Petty Officer 2nd Class
Joined
Apr 4, 2015
Messages
153
Hi everybody,

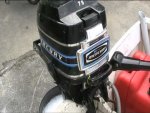
​I have a problem with my 1972? Mercury 7.5 hp thunderbolt. (stole a picture from the internet) I got this one for a few euro's. Previous owner told me that the motor ran well some years back and then graduately began to run worse and worse. I'd figured that a good clean up of the carb would solve it but no such thing. The wiring was very bad. The inner core was visable on each wire so I replaced the wiring and it started up.
The first time I ran it was in a barrel. It started up good but began to hasitate and stall. Inspecting the plugs gave me an indication of the problem. There was water in the bottom cilinder. It was clearly visable on the plug and on the piston.
To rule out water in the gas I removed the lower unit and placed the engine in the barrel again. Now the motor ran like a champ. Nice idle and no hick-ups or hesitation. Shutted the motor down before it would become to hot. And, after removing the plugs, no water in the cylinders.
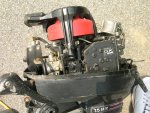
Next was a compression test. Both cylinders in the 100 psi area so a crack in the cylinderhead was ruled out. My thoughts go out to the baffle plate or a gasket arround that area. The only other source where water can come from is the powerhead gasket . I thought it would be more likely that the waters came from the baffle area. However, how likely is that? The picture provided proves that it is going to be a big job to the move the exhaust cover since all bolts are very stubborn. I think that they all will snap if i try to remove them.
My questions are, Is there a way to test if the baffle plate/ gasket is at fault? Are these baffle plates normal steel or are they stainless? If it is the baffle plate than there is no other option than to remove the bolt but i like to save myself from such a job. Help is very much appreciated.
 

Attachments

  • merc.jpg
    merc.jpg
    20.3 KB · Views: 0
  • 20160416_193225.jpg
    20160416_193225.jpg
    191 KB · Views: 0

Texasmark

Supreme Mariner
Joined
Dec 20, 2005
Messages
14,683
That second picture is your exhaust manifold water jacket cover. There is the cover, a gasket, a separation plate between the water and engine exhaust, a gasket, and the block. A hole in the plate from corrosion could possibly cause you to have water in the lower cylinder as could a hole in the wall of the cylinder. Second picture shows some corrosion. Neither would have that much of an effect on your compression balance between cylinders.
 

Michawilden

Petty Officer 2nd Class
Joined
Apr 4, 2015
Messages
153
Texasmark, thank you for your answer. I was hoping for some sort of test to see if it is the separation plate or the powerhead gasket. I think I am going to pull the powerhead and see if the gasket is at fault there, If it is not I can only conclude that it is my separation plate or a crack in the cilinder over there. The last would be a shame since the engine runs fine.
 

Texasmark

Supreme Mariner
Joined
Dec 20, 2005
Messages
14,683
Powerhead gasket? You talking about the Head Gasket? Merc didn't use a separate head for eons.....not till they started using the lost foam type of block casting and not sure which engines had separate heads....think the V6's do. I had a '74 7.5 and it had no head gasket. Look carefully at the plate on the rear of the block with the spark plugs protruding. Check the side of it where it and the block interface. If you only have one plate (the outer one mentioned) and one gasket, your head is an integral part of the block casting.....no separate head and no head gasket to blow.

When you pull the exhaust manifold plate and inspect it, if it or the gasket associated with it aren't leaking...pin holed, what is the condition of the water side of the plate. If highly corroded and the plate isn't at fault then you must have a pinhole in your cylinder.....I had one on a 1960's 22 hp Scott Atwater 22 hp caused by salt water corrosion.
 

Michawilden

Petty Officer 2nd Class
Joined
Apr 4, 2015
Messages
153
I was not talking about the head gasket. I am a Dutchman so english isn't my best language. By powerhead gasket I mean the gasket between the powerhead and the midsection. I know that this cylinder head is cast in. The reason that I will not yet pull my exhaust manifold plate is that I will likely break all the bolts over there, I tried to loosen two and they broke of before i could only make a fraction of a turn.
Yet, i tried to test if the leakage came from that direction. I laid the engine on its side, with the exhaus manifold plate pointing upwards, like in the picture. The lower unit was still of so with a hose connected to the cooling tube I watched thru the plugs holes to see if i saw some water leaking in there. I could see water dripping in both cilinders so that concludes that I have a leak at the exhaust manifold. Now I am in dubio what I will do with the outboard. I am certain that all the bolts will break if I remove the exhaust manifold. However, I hate to see a good running engine being scrapped for this reason. DSCN3795.JPG
 

Texasmark

Supreme Mariner
Joined
Dec 20, 2005
Messages
14,683
I can't answer the question as to whether or not the gasket between the powerhead and midsection, if leaking can cause water to be present in #2 cylinder.

My gut answer is no since the water goes down trough the midsection and there is essentially no resistance to inhibit flow thus making a case for a bad seal to allow water to go back up against gravity and normal flow,.
 

60sboater

Petty Officer 1st Class
Joined
Jun 18, 2015
Messages
307
The PH is not too hard to remove from the mid. You could take the PH to a machine shop to have the bolts removed and holes repaired or try it yourself if you have the tools and experience. I have a '73 9.8 which had ignition problems but not water in cyls.
 

Texasmark

Supreme Mariner
Joined
Dec 20, 2005
Messages
14,683
I was thinking last night after my posting that this is a 7 ?, commonly used on rental boats, hauled around in car trunks, pickup trucks, et al. Do you do that? If so, how do you stow it and do you ever lift the lower unit higher than the power head? What side do you put down? Is it the same way each time or sometimes one side and other times the other. Point here is that your water in the lower cylinder could be self inflicted from how you carry and stow your engine.
 

Michawilden

Petty Officer 2nd Class
Joined
Apr 4, 2015
Messages
153
I followed the advice on 60sboater. Though I have not done it with a merc, I pulled a powerhead many times on other motors so I thought i gave it a try. These bolts came off very easily. Since the baffle plate was the main suspect, I inspected that first. Through the exhaust I could see a crack in the separation plate.
One can see in the pictures provided. 20160419_140219.jpg crack.jpg 20160419_140207.jpg

The crack had beel filled with a resin type so It is probably an older repair. When I put some air pressure on the water passages I could feel air passing through there.
I think that the crack just becam bigger and the repair did not last. I seems to me that this is impossible to repair without removing the exhaust cover. Since the powerhead is off now I will try to remove the bolts with a lot of patience and wd40 and hope they do not all break.
I can repair the damage myself but its not my favourite work to drill out and tap 10 new threads.
 

60sboater

Petty Officer 1st Class
Joined
Jun 18, 2015
Messages
307
Good work finding that leak! PB Blaster works better at freeing stuck/rusted bolts/nuts. Maybe YouTube has some helpful videos.
 

Texasmark

Supreme Mariner
Joined
Dec 20, 2005
Messages
14,683
I just commented the last few days about on this forum within a few threads of this one about my method of removing old bolts/nuts and it takes more than WD 40...PB blaster or better and impact, plus several trips around the lot with soaking and more aggressive impacting till rotating somewhat easily. Just brute force on the end of a box end it just asking for it.....BTDT If you don't have an air or electric impact, use a hammer on the end of your boxed end and let it do the twisting. Glad you are making headway. for me, getting the surface roughed up good and clean of grease and everything else.....I use spray brake cleaner...works great, then a good application of JB weld. I've welded a cracked chevy block in one of my boats with it and it was working the last time I saw it.
 

racerone

Supreme Mariner
Joined
Dec 28, 2013
Messages
38,022
????---Cut the heads off the bolts.----Now remove the covers.---You will have studs sticking out of the block..---Use heat and a vicegrip to get those studs out.
 

Texasmark

Supreme Mariner
Joined
Dec 20, 2005
Messages
14,683
????---Cut the heads off the bolts.----Now remove the covers.---You will have studs sticking out of the block..---Use heat and a vicegrip to get those studs out.

Now that's a good idea....sounds like what a mechanic would do since his livelihood depends on getting the engine fixed and out the door in a reasonable period of time with no time consuming surprises.
 

Michawilden

Petty Officer 2nd Class
Joined
Apr 4, 2015
Messages
153
I have an air wrench in my posession so I will try that. Here in the Netherlands PB blaster is not available so I will heve to do with wd40 and other household items. All bolts already made a half turn. It feels like the bottom right bolt will break but the others seem to want to come loose. I have a lot of patience. I soak it in wd40 every day and turn the bolts just a little bit. I have heard a tip using acetone and atf. I might try that if I can get atf somehere. Removing all bolt heads and using a vice is not preferred. Het bolts are seized in the threads so it would only make them harder to remove.( in my opinion)

I have an other, younger, 7.5 hp powerhead. This has the cdi ignition. I am planning to pull the baffle plate from this motor. Are there interchangeble? I can also use this cover if my cover would be destroyed.
 
Last edited:

racerone

Supreme Mariner
Joined
Dec 28, 2013
Messages
38,022
????---The bolts are steel.---The block is aluminum.---Heat expands the aluminum at twice the rate of steel.----Therefor most studs would come out with vicegrip pliers.
 

Michawilden

Petty Officer 2nd Class
Joined
Apr 4, 2015
Messages
153
But what is the advantage of removing the bolt heads and pulling the ends out with pliers? Now I can put a wrench on the bolt heads. Applying heat is also possible.
 

60sboater

Petty Officer 1st Class
Joined
Jun 18, 2015
Messages
307
Your photo in block #9 shows the bolt heads are gone so vice grips seem like the easiest way to turn what remains of them.

My Seloc manual shows all the 7.5s are 10.9 c.i. and have the same bore and stroke. I believe those covers are the same.
 

Texasmark

Supreme Mariner
Joined
Dec 20, 2005
Messages
14,683
????---The bolts are steel.---The block is aluminum.---Heat expands the aluminum at twice the rate of steel.----Therefor most studs would come out with vicegrip pliers.

I agree and still feel that plenty of penetrating oil and impact, be it a hammer or what have you, even on your vise grips will prevent the shank of the bolt from twisting off. Something else you might do is to turn the bolt back into the block once you know you are getting penetrating oil in the threads. By having a thread out and coating with oil, when you screw it back in you oil part of the block threads that were dry before. Keep doing that and you can work it out.

I agree too on the acetone and atf. ATF is what goes in cars transmissions. Surely if you can find oil for your engine in your car you can find ATF.
 

Michawilden

Petty Officer 2nd Class
Joined
Apr 4, 2015
Messages
153
After soaking and whacking it with a hammer and using the air wrench I tried to free the bolts. This ended up in decapitating all bolts and leaving small studs behind in the casing. 20160426_155706.jpg
Most of the studs only had a few mm left. With a few mm I could not use a vicegrip so I decided to drill all studs with a small drill while the exhaust cover was still on./ Preventing to contaminate the cilinders. The plan is to drill all studs to 4.5 mm and tap m5 thread inside. Most of the studs went fine. Two drill sessions went crooked so the new stud will not be straight bus I am willing to take the risk.

20160426_160224.jpg
20160426_155954.jpg
The crack is visable in the last picture. I think it is due to corrosion. The donor casing has a good baffle plate so I will use that one and hope to god that all the work was not for nothing and no water will leak into the exhaust chamber.
 

Attachments

  • 20160426_155946.jpg
    20160426_155946.jpg
    177.4 KB · Views: 0
Top