Uh oh..New Transom?

Status
Not open for further replies.

Watermann

Starmada Splash of the Year 2014
Joined
Jan 12, 2013
Messages
13,787
While you have the SW out, think about putting in a spin out deck plate in for bilge access like all the newer boats have. I installed an 8" in mine.

y4meRY97ghBGugd0iIFPdyCiv2morhSjkqaG22_m11Bhvu8R9LEmIfD80fgC9jqITzwfZZa_x2an-8WGxSJ5vdveTg_s2YpWyLHtXC-uWOL1O61VXR4VkfsgF3xWvTFNulsmeNT6HxrEpUU6QwABS8PwDTvYyyMuNIIxzd8PXeEi03p6ZTMkAFlqyj19AtWOvDskwzAcNsNrMnYoFJcVorjnw
 

classiccat

"Captain" + Starmada Splash Of The Year 2020
Joined
Dec 20, 2010
Messages
3,412
Update a short questions. Classiccat, did you add filler just for the holes? And did you chamfer after drilling the epoxy, or before filling the holes?

You want to chamfer the oversized holes before adding filler. If for whatever reason the epoxy lost adhesion, it would remain locked in place (that's never happened to me).

Here's a diagram I drew for 1 side chamfered. I actually chamfer both.

iwVqeG8.jpg


Once you drill it, put tape on the "beauty side" to minimize the amount of sanding you have to do...there are examples of this in my recent posts in my rebuild thread.

Add the epoxy/silica mixture to a baggie, cut the tip off and squeeze into the hole.

Once cured, then you can drill your holes.


I have a few unused holes in the back aluminum transom enclosure (bad terminology). I have some fluxless aluminum brazing rods and map torch. I was thinking of tackling those from the inside where the raw aluminum is, rather that more silicone plugs as it was when I got it. Is this advisable?

If they're single holes, most of us use solid rivets coated with 5200.

In a pinch you can use a stainless steel nut/bolt coated with 5200 and nylon washers front/back.

I personally like solid rivets b/c the aluminum fills the hole and you don't have to worry about any galvanic reaction.

another option is aluminum closed-end blind rivets coated with 5200.


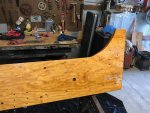
We ripped the 3/4" ply lengthwise and cut 2ft off the end. Perfect size for one transom sadwhich. I used half a quart of 5:1 epoxy, spread with a 5" putty knife, to glue the two sheets together. I hope that was enough. It seemed like a nice wet coat, but only a little squished out from the edges. I screwed it together with ss woodscrews after predrilling through the top sheet so as to pull it tight against the bottom one. I mimicked your screw pattern, though it doesn't look quite as polished as yours. It's been almost 24 hours, and I'll cut the transom out tomorrow. I traced the transom first before gluing so I could mark my wood screw holes in locations that wouldn't interfere with the cut and mounting holes later.

that should be pretty solid! did you add any filler to the epoxy? Colloidal silica is popular when bonding.

I was planning on putting the screw side facing the aluminum part of the transom so the screws will be hidden. Do you see this causing any issues, or should I put the screwed side facing the bow to avoid any metal/metal contact between screw heads and aluminum?

It won't matter if you're adding glass cloth... since it will serve as a barrier.

you may want to make a map/template of where you put those screws in case you add something down the road (swim ladder, smart tabs, etc.)


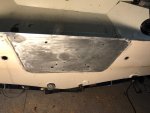
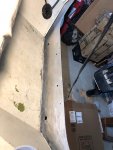
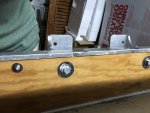
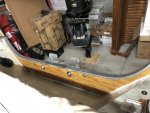
Finally, I removed some rotten flooring from the back corners which gave me a better view of whats going on back there. Some pesky water kept creeping in to my photos. Here is what the knee brace and back rivets look like. The bilge area looks nastier than it is because of the brackish water that has apparently been sitting there for a few weeks. It did not look like that when I first bought the boat.

That knee brace looks good! I'm really surprised considering how much that old transom was flexing on ya.

+1 on what Watermann said...you'll really want to clean up that transom skin corrosion and its much much easier with the splashwell removed.

the rest of the aluminum in the bottom hull skin looks pretty good...even through the muck...no obvious signs of serious corrosion there.
 

MonkeyBird747

Petty Officer 2nd Class
Joined
Aug 5, 2020
Messages
112
Good stuff from everyone. I did not use any filler for my epoxy for the lamination. Wasn’t planning on adding glass cloth, but I suppose I could. I understand the chamfer now. Thanks for the diagram.

Skin will get cleaned up for sure. I guess I’ll bite the bullet and remove the splash well. That bilge plug is cool. I have to cut a piece of new decking anyway. I’ll check in to that.

I bought a big box of assorted blind rivets, so maybe that would be easier for plugging holes than the aluminum rods. I think there are 6-8 holes that need to be re-plugged.

Glad to hear the knee brace is in good shape! One less thing to worry about.
 

classiccat

"Captain" + Starmada Splash Of The Year 2020
Joined
Dec 20, 2010
Messages
3,412
Good stuff from everyone. I did not use any filler for my epoxy for the lamination. Wasn’t planning on adding glass cloth, but I suppose I could. I understand the chamfer now. Thanks for the diagram.

Skin will get cleaned up for sure. I guess I’ll bite the bullet and remove the splash well. That bilge plug is cool. I have to cut a piece of new decking anyway. I’ll check in to that.

I bought a big box of assorted blind rivets, so maybe that would be easier for plugging holes than the aluminum rods. I think there are 6-8 holes that need to be re-plugged.

Glad to hear the knee brace is in good shape! One less thing to worry about.

The glass cloth does a few things...keeps the grains from checking and also adds strength.

It's a little pricey and drinks epoxy but you'll be glad in the end.

On the blind rivets, make sure they're closed blind rivets.
AD46AH.jpg
 

Watermann

Starmada Splash of the Year 2014
Joined
Jan 12, 2013
Messages
13,787
Blinds are alright to plug holes in the transom but only if the holes are under the transom wood otherwise their big bucktail is going to be a problem.

Trying to use those brazing rods, I'v not seen anyone have much luck there and I'd be concerned the stuff would fall out down the road.
 

MonkeyBird747

Petty Officer 2nd Class
Joined
Aug 5, 2020
Messages
112
Here is today's update:

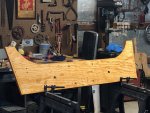
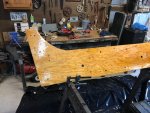
Final coats of epoxy were applied. Tomorrow I'll begin sealing with spar varnish. Only a small portion of one side of the transom is exposed to the elements, so I will just varnish that one side. I'll also cut out the transom brace board that goes on the outer aluminum transom skin. I was also thinking of making a bracing board for the inboard side of the transom to distribute the load of the upper motor mounting bolts. The motor mount bracing board is getting the same treatment as the transom with multiple epoxy coats, then spar varnish. I want to leave the natural wood showing, and was not planning on paining it.

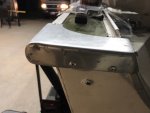
I cleaned up the aluminum with a SS wire wheel on a long drill extension. Was able to get to everything without removing the splash well, thankfully. I have roughly a dozen 1/8" to 1/4" unneeded hols in the rear of the transom, all below the lower transom bracket rivet line (and water line). I think I'll go for the SS truss head screws, washer, and nylock nut method. Dipped in 5200. There are two behind the bracing board that will need to be dealt with. Can't have screw heads or rivets back there. Maybe some JB water weld or a generous amount of 5200 will do since they will be sealed behind the bracing board. I believe all the extra holes, sealed in various ways, were contributing to my leak. Some of them were not sealed well, and a few were missing their backup nuts.
Too bad about the brazing rods. These are the rivets I have. I don't think any of them are closed end. I'll just use them for the corner caps.

https://www.amazon.com/gp/product/B0...?ie=UTF8&psc=1

I forgot about the transom aluminum top cap. It was held on by what look like stainless steel nails/brads with a rounded head. I think I can reuse them, and looks like I'll need to pre-drill the holes so I don't bend the brads when tapping them in. Still need to predrill the 50 or so wood screew holes that hold the splash well to the transom, and the transom bracket screws also.

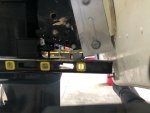
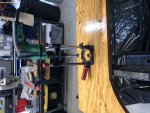
With any luck I can install this thing on Sunday/Monday and hang the motor. I'm still mulling over if I'm going to install the manual jackplate again. The motor mounting holes in the plate are 1.5" higher than standard transom mounting holes. When I checked the anti-ventilation plate level against the bottom of the boat it seems on the high side. But I've never run one of these before, so maybe it is worth testing. Pic attached below.


photo339230.jpg
 

Attachments

  • photo339231.jpg
    photo339231.jpg
    581.1 KB · Views: 9
  • photo339232.jpg
    photo339232.jpg
    665.2 KB · Views: 9
  • photo339233.jpg
    photo339233.jpg
    916.1 KB · Views: 8
  • photo339234.jpg
    photo339234.jpg
    638.9 KB · Views: 10
  • photo339235.jpg
    photo339235.jpg
    887.1 KB · Views: 8

Watermann

Starmada Splash of the Year 2014
Joined
Jan 12, 2013
Messages
13,787
Yeah you have the level on the wrong plate, drop it down on the AV plate and you should be right on the money.

fetch
 

Watermann

Starmada Splash of the Year 2014
Joined
Jan 12, 2013
Messages
13,787
You can plug the through the head holes in those blind rivets with 5200 or some JB weld, while not as aesthetically pleasing they won't leak.
 

MonkeyBird747

Petty Officer 2nd Class
Joined
Aug 5, 2020
Messages
112
Yeah you have the level on the wrong plate, drop it down on the AV plate and you should be right on the money.

[IMG2=JSON]{"data-align":"none","data-size":"full","height":"480","width":"640","src":"https:\/\/forums.iboats.com\/filedata\/fetch?photoid=10926973"**[/IMG2]

Oh brother. Well....that makes a big difference. Thanks for setting me straight. In that case I have room for adjustment.
 

MonkeyBird747

Petty Officer 2nd Class
Joined
Aug 5, 2020
Messages
112
You can plug the through the head holes in those blind rivets with 5200 or some JB weld, while not as aesthetically pleasing they won't leak.

Ok, good to know. I have one or two that are so close to the transom support bracket that I can't get a nut on the back to use a screw to plug them. That trick might be just right for those. Some others are up above the transom bracket rivet line, so anything that plugs them will have to go into the wood as well. I was thinking wood screws with 5200 on the heads. The others I used some 10-24 SS pan screws dipped in 5200, with nylocks and washers on the inside.

All varnished up. Just need to finish up the bracing wood for the back of the transom skin. Was going to varnish, but now thinking just paint it instead.
 

Watermann

Starmada Splash of the Year 2014
Joined
Jan 12, 2013
Messages
13,787
I would skip putting that wood motor pad on the outside, it really serves no purpose other than to compress, rot or corrode the transom skin. My SS had one too that I replaced with an AL plate to cover up non BIA standard OB mounting holes and some corrosion pits from the wood. Otherwise I'd have just deleted the wood and mounted the CMC directly.

y4mu38rhIrmuKk21IUF35kByWFGi-VVoXL6lj5GGyM2Rd7nQFfewaqxQICrKPgQ17jIIHOn7UoSqJG1UrLyLC1RLn0GAfF8EQkttHFIh2frvE2bRHiuypIP8iUDRpDtVHA-1961i6jBngefDthsWUxoa9w5_f8ZwXXgd57n66CNH2KWLEsGQ89rZ4JvaS6OqAfOhsSAZOs_61gg_0YxbVivew
 

MonkeyBird747

Petty Officer 2nd Class
Joined
Aug 5, 2020
Messages
112
Hey, that looks great. I like that idea. I have two 1/2” nonstandard holes as well that need to be plugged. Is that 1/8” aluminum?
 

MonkeyBird747

Petty Officer 2nd Class
Joined
Aug 5, 2020
Messages
112
How about for the inboard exposed transom wood? Should I put something where the two upper motor bolts will be to protect the wood from the metal washers? I have 1” and 2” stainless washers I was going to stack. I went ahead and cut a piece of 1/2 ply and epoxied/varnished it, just in case.
 

Watermann

Starmada Splash of the Year 2014
Joined
Jan 12, 2013
Messages
13,787
I used the same thickness as the transom skin for the outside plate, 5250 .100 AL that was an old road sign.

I used CMC's transom savor plates top and bottom but the top is 100% covered by the splashwell on my V5 with no exposed wood. Pic was when I had my Inline 6 Merc on with the top being clamps.

s-l1600.jpg


https://www.ebay.com/itm/CMC-Machine...-/312846238887

y4mmdWPMnmCBtWnQ_bw39OhcbFyIGjVxSp9Hx75k38rZMcDhnwd7BMnACYcA2LaUfS_VKioebFZxpVVj893pGPrW8MBunuO-c7Pivn-7MCcGVwd7Yw8Q4Rs1vcGfECwJ_LOs4nGZKBx-0xKiwppEphetzeQUkNiNlBL1sT4UmtLV82sKt_I7qUU_bHVd7eeRhiR5QX1XCTPc1e1WUwEJmG9tQ
 
Last edited:

MonkeyBird747

Petty Officer 2nd Class
Joined
Aug 5, 2020
Messages
112
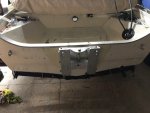
photo339386.jpg Well, another long day but we got the new transom installed. Minimal amount of fuss going back in, and only one hiccup. I had to tap one of the motor bracket bolts through because it was a little snug. On the way through it splintered a small surface piece of the varnished side of the new transom wood. Not that big a deal as I’ll just epoxy it back down. It’s mostly under one of the motor mount bolt washers anyway.

I plugged all the unused holes with bolts/washers and 5200. One got the pop river/5200 combo because I couldn’t get a bit on the back side. Riveted on the corner caps. Sealed the splash deck. Installed the jack plate. Just have to hang the motor, wire remote trim, tach, and warning horn and light.

I heeded a lot of the good advice given here. Some advice will be implemented at a future date. It’s not perfect, but it’s strong and should last a good long time.
 

Attachments

  • photo339387.jpg
    photo339387.jpg
    287.2 KB · Views: 7
  • photo339388.jpg
    photo339388.jpg
    340.7 KB · Views: 7
  • photo339389.jpg
    photo339389.jpg
    244.9 KB · Views: 7
  • photo339390.jpg
    photo339390.jpg
    259.4 KB · Views: 6

MonkeyBird747

Petty Officer 2nd Class
Joined
Aug 5, 2020
Messages
112
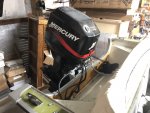
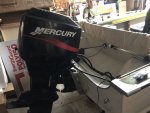
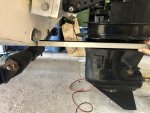
photo339475.jpgphoto339476.jpgphoto339477.jpg Boat is back in one piece finally. Motor was mounted on the jack plate, and now that I’m measuring from the actual AV plate the height looks good. I think I can actually raise it an inch or so to account for the 4.5” of setback. More importantly the transom is rock solid with me bouncing up and down in the motor AV plate.
 

SHSU

Lieutenant Junior+Starmada Splash Of The Year 2019
Joined
Mar 8, 2017
Messages
1,725
Good work!!! Nothing like hard work paying off.

You going to install/use a transom saver as well for travel?

SHSU
 

MonkeyBird747

Petty Officer 2nd Class
Joined
Aug 5, 2020
Messages
112
Yes, I have one that I need to beef up the rubber on. Using it with electric trim do you just run the trim down until the pressure seems like it’s mostly off the actuator?
 

SHSU

Lieutenant Junior+Starmada Splash Of The Year 2019
Joined
Mar 8, 2017
Messages
1,725
So for me, my trim/tilt has a sweet spot where it has engaged the transom saver and if I try and bump it up, you hear the motor run but no movement of the motor. My thought is that it removing the pressure from the hydraulics trying to control downward force.

Now is that actually what is happening.... I don't know, but seems to work for me.

SHSU
 
Status
Not open for further replies.
Top