Transom woes.

starry-eyed

Seaman Apprentice
Joined
Sep 19, 2016
Messages
36
Thanks, Ron I already removed the many (many) lower inside SW screws and my old shoulders are still crying from having to lay on my belly and stretch underneath there. The boat does not have the supports from the deck to the crossmember. Is it necessary to provide some sort of support to the upper hull prior to removal od the crossmember and SW?
 

oldhaven

Chief Petty Officer
Joined
Aug 30, 2015
Messages
576
It's a rainy day here and I am spending too much time on the interweb. Anyway, mine was not supported while the well was out, but I was not flipping it over or doing anything drastic. I did notice that the gunwales were flexing as I crawled in and out a thousand times from step fenders to the deck. This could stress and loosen the gunwale fasteners under the outer rub rail. It sounds like you have already done a lot of the boat earlier, so if you are just doing the transom, I would say no need to temporarily brace across there. I would though consider adding in some kind of support to replace the after vertical braces. That is a critical area to support the well, which is a primary support for the transom and motor thrust. It also ties the side panels into deck and gunwales. There was an interesting discussion about a year ago about how these thin aluminum hulls depend on the bracing of their internal wood and aluminum supports for rigidity. The tied together supports make a sequence of interlocking box structures that prevent flexing and metal fatigue. Let the wood go rotten or remove the light looking supports and the boats start to crack and fail. You would not have to duplicate the original design of those braces, and could use commonly available channel or angle and rivets to do something that works. If the 1966 OB Chiefs did not have them originally, they found the need to add them the next year.

Ron
 

starry-eyed

Seaman Apprentice
Joined
Sep 19, 2016
Messages
36
No Title

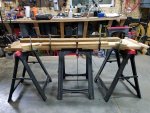
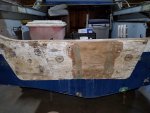
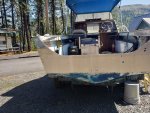
Starry here again . . . . . I took some time off and went camping to get away from this grim task. Now, back at it again and have finally gotten the splash well removed. I found concealed angle braces that were bolted from underneath the top of the gunwale on each side to the ends of the cross-brace. They were rusted and had to be cut with my handy-dandy oscillating tool. Boy, that tool continues to pay for itself!

The only thing left is to remove the four slotted-head bolts on each side of the exterior of the transom. The threaded ends of all eight are buggered (probably intentionally at manufacure to keep them from loosening) and the nuts will not come off. Six of them are reasonably accessible and I will attempt to grind the nut ends clean so the nuts can turn off. The remaining two are at the top underneath the gunwale and I'm not sure yet how to get them.

When these last eight are removed, I should be able to slide the plywood transom up. I hope it remains intact to serve as a template. The two upper corners which are seperate pieces, however, will probably crumble, as they are extremely rotten.
 

Attachments

  • photo253499.jpg
    photo253499.jpg
    46.8 KB · Views: 3
  • photo253500.jpg
    photo253500.jpg
    48.5 KB · Views: 11

Watermann

Starmada Splash of the Year 2014
Joined
Jan 12, 2013
Messages
13,787
Now that opens things up for a proper perspective of what's up under there. The brackets up under the gunnels have 2 wood screws in them and should be pretty loose if the woods rotten. I didn't bother trying to unscrew them and used a saws-all with a metal blade, slide it in between the gunnel and the transom wood cutting through the screws.

Looks like the old original white washed SC transom.

fetch
 

starry-eyed

Seaman Apprentice
Joined
Sep 19, 2016
Messages
36
Hey - its me again. Elk hunting season is nearly closed so its time to get back to my transom woes. I finally got those last four pesky bolts out of each end of the transom outside edge.

The tramsom plywood consists of three pieces - the main board and two upper corner ears which crumble when I attempt to pull them out. The main section is still reasonably intact. How in the dickens does one extract it? There seems to be no way to hook onto it!
 

jbcurt00

Moderator
Staff member
Joined
Oct 25, 2011
Messages
25,036
Screw an eye hook down into it and lift w an engine hoist.

Screw a 2X4 to it and pry up on the 2X4 w another 2X4 lever over some plywood and blocking across a couple ribs.

Or by any means necessary.......
 

starry-eyed

Seaman Apprentice
Joined
Sep 19, 2016
Messages
36
Starrey-eyed here again. Winter finally let go of of a few weeks ago, we took a long RV trip to Georgia and on the road for 5 weeks, now back home and on the Starchief again. Today I attached three 2X4 blocks to the inside of the transom board and levered that rascal right out of its nest. The rear of the hull has many extra holes and decomposition so I asked the local boat builder to take a look at it for aluminum repair. More after he comes by for the Rx.
 

Watermann

Starmada Splash of the Year 2014
Joined
Jan 12, 2013
Messages
13,787
Post up some pics of the "extra holes and decomposition" we all deal with the corrosion and extra holes issue found on the inner transom skin if that's what you're referring to.
 

starry-eyed

Seaman Apprentice
Joined
Sep 19, 2016
Messages
36
Starry-eyed here, back again following full shoulder replacement and extended recovery. Poor old boat has been sitting for well over a year waiting for installation of a new plywood transom. I bought a sheet of 3/4 ACX plywood last week and by using the old transom for a template, I cut out two pieces to laminate.

Having never done this type of work before, I am unaware of what glue and resin (?) I should use. How many coats? The closest materials supplier (Home Depot) is over 50 miles away and I don't want to waste trips by getting the wrong stuff or not enough of the right stuff.

Any tips and advice on laminating and finishing will be greatly appreciated. The winter weather is lousy, another inch of snow today and the weatherman says we will see single digits later in the week. The shop wood stove will keep it warm enough to complete the lamination and final shaping for fitment but I'll probably have to wait for a little warmer weather to apply the resin. Will need some ventilation to breathe and to keep from blowing up the shop.
 

Watermann

Starmada Splash of the Year 2014
Joined
Jan 12, 2013
Messages
13,787
Tite Bond III is the most foolproof way to laminate the 2 pieces together.

Your transom is exposed to the sun, partially at least so I would grab a qt of Helmsman Spar urethane to seal it up with a few coats after drilling out the bolt holes. You may want some paint too on the exposed part if the wood look isn't what you want.
 

Scott Danforth

Grumpy Vintage Moderator still playing with boats
Staff member
Joined
Jul 23, 2011
Messages
49,588
agree on the tite-bond III

also, you could simply use oil-based enamel on a tinny transom.
 

starry-eyed

Seaman Apprentice
Joined
Sep 19, 2016
Messages
36
In addition to gluing the two transom pieces together should I use some stainless wood screws as well?
 

No-AH

Petty Officer 1st Class
Joined
Oct 20, 2016
Messages
234
Any tips and advice on laminating and finishing will be greatly appreciated.

Glad to see you back at it. Seems like you had success with your shoulder procedure. Bravo!
When I replaced my wood at the transom, I cut the 2 pieces needed to be laminated from one 4x8' sheet of 3/4" marine plywood and used the original transom as the template. I also made sure i added the sections or wings that supported the gunnels on either end in the template so that it's all as 1 piece unlike what starcraft did in adding them separately.
I moistened the faces to be glued beforehand with water and out of direct sunlight as recommended on the label. I found rolling the tite bond on with a wetish foam roller assured of a more uniform method of applying adequate amount of glue to both faces before clamping them.
I used wood screws here and there in the thought of aiding a more uniform adhesion then I just laid the sections down on a flat section of my garage floor and laid heavy weights on top until cured, then I removed the screws and filled the voids with a waterproof wood filler, then sealed with 2 coats of spar on both faces and making sure to hit the outer edges twice for every coat. All the fasteners required to install the new transom to the boat should only be stainless with 5200.
Hope this addresses your last question?
 
Last edited:

starry-eyed

Seaman Apprentice
Joined
Sep 19, 2016
Messages
36
No-AH, thanks for the reply. I cut the plywood with the wings separate in order to "save" the larger piece for another project (vintage trailer repair). I'll drill and attach them as originally done. I like the idea of screws, weights, and filler for the lamination process.

Now, just waiting for this arctic blast to end so I can get back in the shop! Off tomorrow to Home Depot for screws, glue, and spar. . . .
 

starry-eyed

Seaman Apprentice
Joined
Sep 19, 2016
Messages
36
Well, I finally got back to the Starchief; transom is cut and glued with the large piece and the two ears and some of the holes drilled. I will have to fill several holes in the aluminum the POs drilled prior to my ownership then mark and drill the plywood for the remaining ones to be used (drain tubes, motor mounts, etc.) I will clean up the inside face of the aluminum hull (transom) and prime it for a good finish between the wood and aluminum. What should I use for primer? Pics of the new transom board are attached.

I recently became aware of King Starboard and am thinking I will use that to replace the 1/2 inch plywood that had previously been attached to the exterior side of the transom. I do not know if that was factory or something a PO had added.

Pics are attached showing the transom with and without the plywood pieces. The smaller piece on the port side is for the kicker mount. I'm thinking I will make the new King Starboard wider than the two combined so it will look more balanced rather than lopsided as it is now.

I am unfamiliar with the various sealers and adhesives used for aluminum boat repairs and need help in that area. If I attach a new exterior King Starboard piece, how is the best way to seal it to the aluminum. Also, when I re-attach other components (mounting bolts, transducer and speedo pickup etc.) what sealer should be used?
 

Attachments

  • photo313730.jpg
    photo313730.jpg
    773.6 KB · Views: 3
  • photo313731.jpg
    photo313731.jpg
    1.1 MB · Views: 3
  • photo313732.jpg
    photo313732.jpg
    1.2 MB · Views: 3
  • photo313733.jpg
    photo313733.jpg
    906.3 KB · Views: 3

Watermann

Starmada Splash of the Year 2014
Joined
Jan 12, 2013
Messages
13,787
I use 3M 5200 for all transom sealing, I even back buttered my AL motor pad with it. Also you do not need that pad, I only replaced mine with an AL plate because of non-standard motor mounting holes and I wanted the mounting holes to be BIA standard.

IMAG2317.jpg
 

starry-eyed

Seaman Apprentice
Joined
Sep 19, 2016
Messages
36
Starrey again, its been a while for any posts but I have been working on that darn boat. . . . . Finally, my pal Joey (the boat guy) came to the house, took the boat to his place, repaired the trailer tongue, and fabricated an aluminum transom cap. Joey doesn't get excited too much so it took nearly a month to get the boat back. I have drilled and fitted the transom plate and the transom board and will apply the West Systems finish to the board in the next few days. Next I plan on sealing with 5200 (attaching) the new plate to the existing metal transom and then fill in the old rot and existing holes that won't be re-used with JB Weld. Prior to attaching the new to the old, I'll wash both surfaces with white vinegar and metal prep. I have already scraped and wire and nylac (sp?) brushed the corrosion off. Having not used 5200 before, how thick should it be applied and what is the coverage area for one tube? I assume that it should be spread (buttered) and is it to be applied to each surface as in using contact cement? My surface is about seven square feet? I will use various clamps and clamping methods to assure adequate pressure during curing time. Any tips for this process will be greatly appreciated. It has been in the mid-to-high 90s for a few weeks so work has been slow. . . . How will this heat effect curing time?

I have spent parts of the last few days cleaning up parts previously removed for this repair and will refinish the plywood deck before the job is completed. I plan on matching the existing boat exterior color for repainting the new aluminum transom plate, as well as the original stern, and wonder if I can use oil-based paint on the wood deck as well as the aluminum. Pros and cons? I'll use POR-15 on the aluminum before applying the blue finish coat. Is it best to use aluminum or brass splash-well drain tubes and how are they flared at installation?

I have also considered installing a belly fuel tank before re-installing the deck and could use use some input. Where do I look for a tank? Besides a fill, sending unit, wires, fuel line, and vent what else is necessary? I remember that Newhaven (if I remember correctly) installed one previously.
 

Attachments

  • photo319112.jpg
    photo319112.jpg
    981.6 KB · Views: 4
  • photo319113.jpg
    photo319113.jpg
    1.5 MB · Views: 4

Watermann

Starmada Splash of the Year 2014
Joined
Jan 12, 2013
Messages
13,787
You have the right idea on the 5200 too much and it will run out so I would back butter only one side. I wouldn't let it sit in direct sunlight while curing.

SW tube should be aluminum if your going that route. Some of us have gone to using the nylon 2 piece ones.

A number of us have installed belly tanks, I have a 35 gal tank. Bedding for the tank is high density neoprene if sat on the ribs.
 

starry-eyed

Seaman Apprentice
Joined
Sep 19, 2016
Messages
36
Thanks, Waterman, I don't want any boo boos when I attach the new plate. As hot as it has been lately has made the various metal tools difficult to handle, let alone the plate. I had become aware of the two-piece nylon tubes a while back and they looked good - obviously much easier to install. I'll follow your lead.

When I apply the 5200 and attach it, I suspect that I should NOT use any mounting bolts or screws, along with the clamps, to help secure it in place. It seems that doing so would risk gluing the bolts in place (but it would sure help in attachment, alignment, and setting up). Any thoughts on this?
 

Watermann

Starmada Splash of the Year 2014
Joined
Jan 12, 2013
Messages
13,787
I used all the bolts on mine where I could and clamps as well, left it alone for a good week to set up. People get way too worked up about 5200, it can't stand up to the torque applied to a bolt with a ratchet on one side and wrench on the other, it'll let go just fine.

Here's my home plate motor pad I put on with it back buttered with 5200.

y4m134e5n4KWFb6Px-k2aeamcIdytX0Vxf_Llydv6Nan9dg-FKIyhAHvYFISBzqY0pRGgkswPMygFZTTsc-6H666Rz0tR01inwhz-_9-8JlfyZDpVyDO9i-sTVrkxE9YqLJDSr26D7NybCC_sKRWeQXDSQdnxhX7d7bpWQC_1Yg3GL1QR2fQPuDa5yCib0uCTnsILoDnnZvVdczkaBt8lKYSg
 
Top