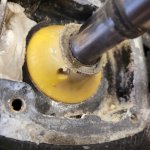
Thank you. Also, this yellow part will not come out. Is there a special tool for that You can see definitely need to be changed
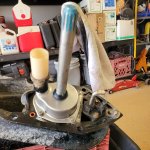
I fabbed up these puller hooks. I put a small hose clamp around the rods above the carrier to hold the points in the holes in the seal carrier, and a smaller hose under the handles to keep them aligned.
I've had to whack the handles up with a hammer on tough carriers.
Do not gum out the holes on the carrier, or you'll be forced to cut it out with a multi function tool. .....carefully to not damage the seal surfaces in the housing and on the shaft.
Best to buy the complete carrier assembly, Mercury 807929A1.
Also be sure to pack the space between the shaft seals with a waterproof grease. Merc 2-4-C w/Teflon is the best. Also grease up the carrier bore before driving it home.