The best way to bring a boat back to life

ihc1470

Seaman
Joined
Jun 21, 2015
Messages
65
No Title

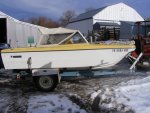
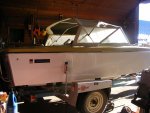
The weather finally got warm enough the ice melted that was holding the shop door in place so today was able to get the door open and move the boat from one building to another. So things accomplished today was the move, finished up the brake install on the right side of trailer, primed the oil system on the engine until I could see oil flow at the rocker arms and reinstalled the distributor and timed. I also cycled the stern drive up and down a couple of times. The gaskets, seals and water pump parts have arrived. Will tackle the stern drive before long. Still need to replace the fuel line but have not been to the parts store when they have been open. As promised a few pictures as it was coming out of the shed. First time in 24 years or so. I want to get the main power going then I will tackle the trolling motor.
 

Attachments

  • photo236904.JPG
    photo236904.JPG
    267 KB · Views: 0
  • photo236905.JPG
    photo236905.JPG
    243.7 KB · Views: 0
  • photo236906.JPG
    photo236906.JPG
    296 KB · Views: 0
  • photo236907.JPG
    photo236907.JPG
    202 KB · Views: 0
Last edited:
Bayou Dave

Lieutenant Commander
Joined
Dec 13, 2012
Messages
1,780
She finally sees some sunlight! She looks to be in pretty good shape on the outside.
 

ihc1470

Seaman
Joined
Jun 21, 2015
Messages
65
The oil is draining out of the stern drive tonight. So next time I get back to it should be ready to come apart. Worked on adjusting the brakes on the trailer, got one done and the other was giving me fits, my hand was getting tired so gave up and will tackle it another day. For some reason there is very little access to the adjuster hole.

Finally have run across a couple of small issues. The hoses for the lift cylinders are showing their age. Having sit in the up position as long as they have the outer covering is flaking off now that they have been flexed. The second issue the stern drive did now want to come up today when I wanted to raise it to pull the prop (no electrical power). So I finally jumped across the solenoid to get the pump to run. So will have to look at an electrical diagram and go from there.
 

NHGuy

Captain
Joined
May 21, 2009
Messages
3,631
Hey, I just came across the tubing you will need for your fuel pump tell tale vent. $7 at Summit racing. Type in marine fuel pumps and go the the bottom of the list!
 

ihc1470

Seaman
Joined
Jun 21, 2015
Messages
65
Thank you for the information NHGuy. Rock Auto has the same part and price so that is 2 sources. Now to see who has the best freight charges.
Been looking at wiring diagrams this evening. See they used a couple of lock out switches so am guessing on of those is not making contact. The trim did work yesterday first time I tried it but today would not go up when using the switches. Probably gummy from many years of sitting.
 

ihc1470

Seaman
Joined
Jun 21, 2015
Messages
65
Got to town today and picked up fuel line and one hyd hose for the trim cylinders, While I was pulling a hose to take with me I looked at the oil that had drained out of the lower unit. Was only a little over a pint. No signs of water. Manual would seem to indicate that it held a quart. Mind you this has sit for 20 plus years and I do not know if it was full when parked. Any place I should be looking at for leakage that is known to leak or just keep my eyes open. Think this is a mercruiser 1 serial number is 3990794 on the drive.
 

ihc1470

Seaman
Joined
Jun 21, 2015
Messages
65
So I have the drive off the back. While off is there any reason that I can not run the motor. I have the oil changed, distributor is back in, fuel pump is on, so it should be ready to fire up. If I connect water to the hose fitting on the transom that should keep the engine supplied I would think. I would assume I would not want to turn on the water until engine is running and probably shut it off before shutting down the engine so there would be no chance of it back feeding into the exhaust. Am I missing something here? Thanks for the thoughts.
 

HT32BSX115

Supreme Mariner
Joined
Dec 8, 2005
Messages
10,083
I would assume I would not want to turn on the water until engine is running and probably shut it off before shutting down the engine so there would be no chance of it back feeding into the exhaust. Am I missing something here? Thanks for the thoughts.
You really don't have to. That's what the "Riser" is for. It prevents water from getting back into the exhaust. (unless it's rusted through or the [riser] gasket is leaking severely.

That would be another inspection point for you to check by the way. (the riser-to-manifold gasket and connection)
 

ihc1470

Seaman
Joined
Jun 21, 2015
Messages
65
What do I need to remove to inspect that? Guessing the flex joint at the exhaust manifold is where that is located. Thank you for the suggestion.
 

HT32BSX115

Supreme Mariner
Joined
Dec 8, 2005
Messages
10,083
What do I need to remove to inspect that? Guessing the flex joint at the exhaust manifold is where that is located. Thank you for the suggestion.

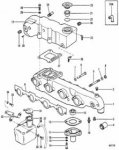
The riser/elbow is a jacketed cast-iron exhaust fitting bolted to the exhaust manifold (+gasket) to connect that flexible hose to the exhaust manifold. On closed cooled engines like the 470, it'll have raw water flowing through it so that the water + the exhaust go out that rubber coupling to the exhaust fitting that connects to the transom and send the water and exhaust out through the prop.


Here's an example:

40179.gif

MUST be mixed with the exhaust at the latest point (where gravity will prevent it from running back into the engine) so that the exhaust will be cool enough not to burn anything on it's way to the drive and out the (center of the) prop.

If the gasket (#27 were to leak) after shut-down, a small amount of water *could* run back into an open exhaust valve and sit there (on top of a piston) until the engine was started again. If that was several months later there'd be significant corrosion by then.........so you don't want that gasket leaking. It should be inspected (and replaced) on a somewhat regular basis. You don't want to be replacing it when there's evidence of leaking. (it's sort of too late by then)
 

ihc1470

Seaman
Joined
Jun 21, 2015
Messages
65
The slumbering GM 4 banger awoke today. Pretty much as if it had been shut off last week instead of 25 years ago. I did prime the carburetor as the battery sound like it was going to get tired and that just turned out to be a connection I did not have quite tight. I only ran it about 30 seconds a couple different times as I did not get it hooked up to water. I did take the belt loose from the water pump as I did not want to run it dry as long as it has sit. The stern drive is off the boat at the moment so could not hurt the fresh water pump either even though it is junk and is being replaced. Looking at the alternator/water pump belt I think a new one is in order just due to age. So how much of the front engine mount do I have to remove to get the belt out. If I pull the four bolts going into the block and loosen the two that attach it to the hull will that give me room enough to get the belt out? Or is there something that I am missing. I do realize that I will have to support the front of the motor while I am doing that. Anyway it is nice to know that there is hope for this project. Unless some water damage shows up when I get that hooked back up I think it will be a survivor.
 

HT32BSX115

Supreme Mariner
Joined
Dec 8, 2005
Messages
10,083
So how much of the front engine mount do I have to remove to get the belt out. If I pull the four bolts going into the block and loosen the two that attach it to the hull will that give me room enough to get the belt out? Or is there something that I am missing. I do realize that I will have to support the front of the motor while I am doing that.
It should be fairly obvious what you have to remove to get the belt off. Sounds like you'll have that 120 on the water this summer!

Since you have the drive off and you've disturbed the engine mounts, you'll also want to obtain an alignment tool to check/set the alignment before putting the drive back on....(if you have access to a lathe, you can make one too.)

Info on dimensions here: http://forums.iboats.com/forum/engi...s/338200-miscellaneous-mercruiser-information
 

ihc1470

Seaman
Joined
Jun 21, 2015
Messages
65
Ready to proceed with the belt change and then alignment. Right now as it sits before doing anything it is dragging heavy on the top side of the bar. Does that imply that the front of the motor needs to go down?

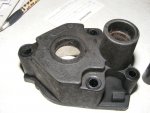
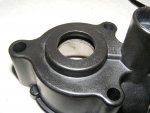
Second question started installing the lower water pump tonight and have a question about the upper housing. Parts book talks about an oil seal #26-31507 early model only. The original housing did not have a seal in it. The replacement housing looks as if a seal could be installed but it does not have one. Can I assume it is not needed and you just install the centrifugal slinger #25-30271on the outside of the housing?
 

Attachments

  • old water pump.JPG
    old water pump.JPG
    84.8 KB · Views: 0
  • new water pump.JPG
    new water pump.JPG
    79.4 KB · Views: 0

ihc1470

Seaman
Joined
Jun 21, 2015
Messages
65
The belt is changed and the motor is aligned. The alignment seemed to be way off. For the bar to slide easily into place I ended up dropping the front of the engine down until I just about ran out of adjustment. I have to wonder why it was so far off. The weather is very nice here today so I pulled it out of the shop so I could run it for awhile. Ran it for about 20 minutes and all seems fine. Need to set timing and carb and then guess back into the shop and start putting the stern drive back into place.

Anyone have thoughts on the engine alignment? It seemed to be heavy on the top side of the shaft, In fact, the shaft would not go in more than about 1/2 inch into the coupler before it would bind and stop. Now where it is sit you can push it all the way into place and it seems to have a good grease pattern around the shaft. I am guessing I dropped the engine close to one inch on the adjuster.
 

ihc1470

Seaman
Joined
Jun 21, 2015
Messages
65
This unit does not use the trim indicator gauge. The trim limit switch at the top of the gimbal ring shows about 600 ohms resistance when closed. Can that switch be taken apart and cleaned? I can only get the trim to work in the up position when throttle shift lever is in forward. Operation manual indicates it should also operate in neutral. Where is the switch located that controls that function? This is a single solenoid system with what the operators manual calls a panel control throttle. It is the one with the button in the middle that you push in to disengage the shift cable.The wiring diagram does not show switch that I can find.

Question 2. What is the function of the reverse lock valve? What wiring diagram shows it?

I am using Mercruiser service manual #2.

Thanks for the help.

Dennis
 

ihc1470

Seaman
Joined
Jun 21, 2015
Messages
65
I took the trim limit switch out and apart and cleaned the contacts as they were black. That brought the resistance back down to zero. While I had the switch out I replaced the wires going into it as the insulation was brittle and starting to break apart. The reverse interlock switch was out of adjustment. I found you had to be at about 1/4 throttle or more forward for it to close and allow power to the pump for up trim. After adjustment the system now will work in neutral or forward as the operators manual says it should.

So time to start installing bellows. Any tricks to pulling the drive shaft bellows out into place? I have the tool for the exhaust bellows.
 
Last edited:

Bondo

Moderator
Staff member
Joined
Apr 17, 2002
Messages
70,995
Any tricks to pulling the drive shaft bellows out into place?

Ayuh,.... Install it on the bellhousin', Then the transom plate,.....
 

ihc1470

Seaman
Joined
Jun 21, 2015
Messages
65
The drive is married back to the boat. Still a couple of things to do, such as torquing the 6 mounting bolts and putting the little clamp on the shift cable boot. Since I changed out all 4 hoses on the lift cylinders will need to top of the oil. Have a question about the shift cable adjustment. I have all the measurements set. It locks up both in reverse and forward. The question it ratchets a little harder in forward then what it does in reverse. Is this normal or should it be the same going both ways? I did not try to measure the pull it took but it does not take as much in reverse as it does forward to turn the prop.
 

harleyman1975

Ensign
Joined
May 12, 2003
Messages
959
How are the stringers nothing is rotten in the engine mount areas is there? Worries me too as to why it had to be adjusted so far.
 
Top