Swim deck kicker mount

tatoo844

Recruit
Joined
Mar 29, 2021
Messages
4
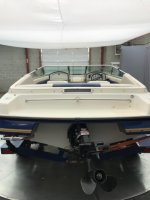
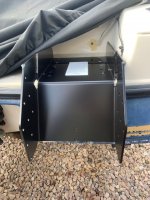
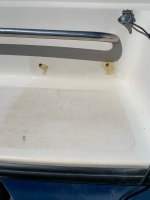
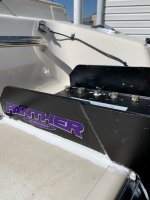
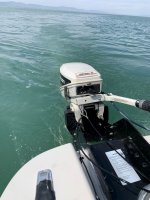
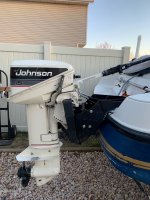
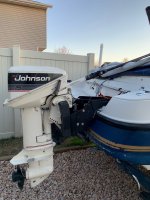
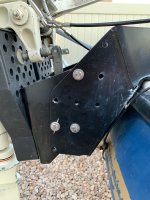
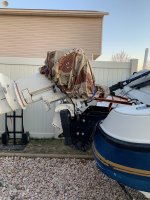
Hello all I need some advice/guidance from this great group. I have a 93 18.5 foot crown line that I love. It to me is perfect. Fishing and playing on the water, mostly fishing. I currently have a trolling plate on the I/O 4.3 motor. It does its job to slow me down. However I am adding a kicker onto the swim deck. 1 to save on gas consumption and 2 as a backup engine to get me off the water in an emergency. I have a panther marine swim deck mount that I just got. My question is I cannot access below my swim deck where I want to put the bracket. I have a few ideas however. 1 is drill from my engine bay into the swim deck pontoon so i can access bolts. 2 which I am going to try is install some nut trivets down from the top into the blind holes and coat them with epoxy to add strength. The kicker is a small 15 hp johnson. The bracket also comes with a support tube to attach to the transom as well. I plan on securing the kicker to the grab rail with a ratcheting strap for additional support. As you can see from the first picture, someone had a electric motor or kicker on there before. Any and all advice is welcomed.
 

Attachments

  • crown line.jpg
    crown line.jpg
    47.6 KB · Views: 17
  • panther mount.jpg
    panther mount.jpg
    111.3 KB · Views: 17

Grub54891

Admiral
Joined
Jun 17, 2012
Messages
6,097
If you can access the inside of the platform, you can add an aluminum plate under there for strength. Then you wouldn't need an ugly bracket/strap showing on top. Edit: How about putting a deck plate next to the bracket to access the inside of the platform? Then you could put aluminum bar stock under there.
 

tatoo844

Recruit
Joined
Mar 29, 2021
Messages
4
If you can access the inside of the platform, you can add an aluminum plate under there for strength. Then you wouldn't need an ugly bracket/strap showing on top.
Do I just get brave and cut a access hole in it? I can see the upper holes by the battery compartment. But when I try and access the lower portion where the swim deck is there is a fiberglass wall. I would think i can make a hole and cut through the expansion foam to access below the plate. There has to be a way. Otherwise you could never replace the tiedowns.
 

Grub54891

Admiral
Joined
Jun 17, 2012
Messages
6,097
I'd put the access plate out next to the kicker bracket. Almost looks like the first pic is from a swim ladder mount. If there is foam in there it may get interesting. Possibly you could add a flush mount drop in storage locker on the platform back there wich would make a bigger hole and easier access? Some investigating should be done first.Edit again:Don't look like much room for a locker.....
 

JimS123

Fleet Admiral
Joined
Jul 27, 2007
Messages
8,187
I have that same bracket. Of all the kickers I've mounted that was the best bracket ever.

I mounted mine using 5/16" SS threaded rod. Drilled right thru the swim platform and out the bottom. I cut out a portion of the SeaDek slightly smaller than the bracket, and then mounted a plate to shim the bracket level with the surface. Another plate was mounted on the bottom. Decorative acorn nuts on top and locknuts on the bottom. Secured everything with 5200.

After installing everything and seeing how secure it is, I didn't bother adding the support tube. The kicker has a tilt lock, so no need for a strap either. I do have a bungie cord on the tilt lock lever just so it can't move. The engine is also bolted to the bracket so it ain't gonna come off...

Two full seasons on the setup and it's a winner.

P3310003web.jpgP6090868web.jpg
 

tatoo844

Recruit
Joined
Mar 29, 2021
Messages
4
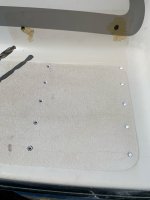
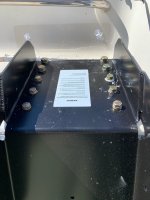
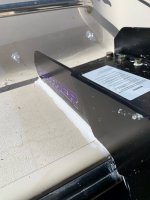
Update. Sucess! thanks for all the great tips and ideas. It was easier than I thought. There is 1/2 or 3/4 inch plywood running under the entire swim deck. I was able to get minimal access to below the deck. My initial plan was to have 4 bolts at the front of the bracket/front towards the boat. And then put more towards the back. There was very little room to do this and I am not a very good contortionist. What I ended up using was 10 rivet nuts. I used 1/2 inch bolts for the 4 forward bolts and 7/16 bolts for the 6 aft bolts. I pre-drilled and countersunk the holes to protect the gel coat from cracking. Before I placed the rivet nuts in I filled the holes with 5200 fast curing adhesive. I then tapped the rivet nuts in and cranked them into position. When I threaded the bolts in I used my small impact driver to run them in and gave it a few good hits. It was solid! I may or may not put the lower support tube on just for peace of mind but I can always add that later. Thanks for all the tips. I will post more pictures with the kicker on later.
 

Attachments

  • kicker 5.jpg
    kicker 5.jpg
    526.5 KB · Views: 7
  • kicker 4.jpg
    kicker 4.jpg
    674.4 KB · Views: 7
  • kicker 3.jpg
    kicker 3.jpg
    639.8 KB · Views: 7
  • kicker 2.jpg
    kicker 2.jpg
    501.2 KB · Views: 7
  • kicker 1.jpg
    kicker 1.jpg
    503.5 KB · Views: 7

Grub54891

Admiral
Joined
Jun 17, 2012
Messages
6,097
That's not going anywhere. It might be just me but I think you overdid the 5200. No need to have it all over like that.
 

tatoo844

Recruit
Joined
Mar 29, 2021
Messages
4
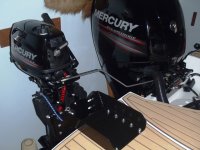
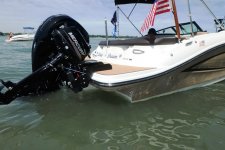
Thought I would post some finished pictures. The setup works great! I did end up raising the motor up one notch but that was the only adjustment needed. My big motor has power steering and doesn't want to turn real easy when its not running so I just used a kicker handle extension. I probably didn't need that much 5200. However I wanted it to make a seal to prevent the water from going fully under the plate. Also I will be able to see if it breaks away at all. The strap is just for hauling to the marina. I take it off when I take the boat straps off. Makes me feel better going down the road.
 

Attachments

  • finished kicker 5.jpg
    finished kicker 5.jpg
    651.5 KB · Views: 8
  • finished kicker 4.jpg
    finished kicker 4.jpg
    667.5 KB · Views: 8
  • finished kicker 3.jpg
    finished kicker 3.jpg
    642.3 KB · Views: 8
  • finished kicker 2.jpg
    finished kicker 2.jpg
    695.6 KB · Views: 8
  • finished kicker 1.jpg
    finished kicker 1.jpg
    713.8 KB · Views: 8

JimS123

Fleet Admiral
Joined
Jul 27, 2007
Messages
8,187
Looks like a good workable setup. When you are on the highway, if you must leave the motor on the bracket, I would advise you to have it in the down position to minimize the torque on the system.
 
Top