


I figured I would share my build since I couldn’t find anything online that would leave me in a good direction.
After scouring online I decided just to create my own mount my bow had a 3 inch drop on the front and was curved all around.
I started with holding my motor up and seeing where I would need it to sit and then taped up that area of the boat laid on six layers of fiberglass after taping waited to dry in there I had my sheep of my bow.
After that cured I removed it and cut it to the shape of the Minnkota trolling motor quick release bracket then placed it back on the boat and used a level to see how high I need at each point from the highest point to create a level top platform
Are used angled aluminum to create my stanchions to make the height that I need and all four corners to equal a level platform after that point I super glued on a piece of MDF three-quarter inch on the top of it to create that top platform
After test fitting and making sure we were fully level still high then wrapped the entire piece with a sheet of fleece hot gluing it into place on the bottom.
After that point I use fiberglass resin directly onto the fleece to create a sealed resin shape of everything that I needed and then ground off the excess one secured on the bottom to keep my same flat bottom shape.
Once that dried and cured I drilled a hole into the top of it filled it with fiberglass matting that was shredded and then fill the entire unit up with resin at that point to create a solid mount
Once that cured I drilled holes so that it would line up to the Minnkota trolling motor bracket at an angle so that it would sit on the underside of the fiberglass in a flat form so that large washers can be able to absorb the pressure of the motor
I’ve been wrapped them out with white vinyl to match the seats test fit it in the position drill my holes put in my stainless steel bolts and voilà completed trolling motor mount
Attachments
-
 photo323160.jpg23.3 KB · Views: 3
 -
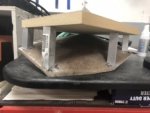 photo323161.jpg23.3 KB · Views: 1
 -
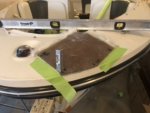 photo323162.jpg23.8 KB · Views: 1
 -
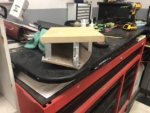 photo323163.jpg29.6 KB · Views: 1
 -
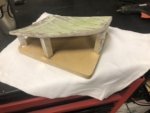 photo323164.jpg20.7 KB · Views: 1
 -
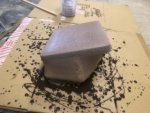 photo323165.jpg29.6 KB · Views: 1
 -
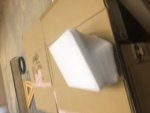 photo323166.jpg15.7 KB · Views: 1
 -
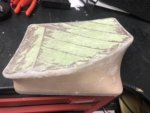 photo323167.jpg24.3 KB · Views: 1
 -
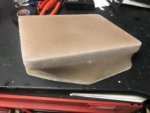 photo323168.jpg23.3 KB · Views: 1
 -
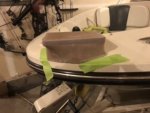 photo323169.jpg24.7 KB · Views: 3
 -
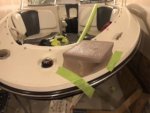 photo323170.jpg24.1 KB · Views: 3
 -
 photo323171.jpg20 KB · Views: 3
 -
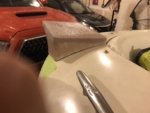 photo323172.jpg20.8 KB · Views: 1
 -
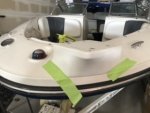 photo323173.jpg23.7 KB · Views: 1
 -
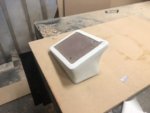 photo323174.jpg19.4 KB · Views: 1
 -
 photo323175.jpg22.4 KB · Views: 3
 -
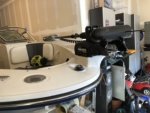 photo323176.jpg27.1 KB · Views: 3
 -
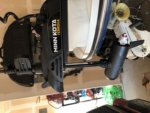 photo323177.jpg28.1 KB · Views: 3