Restoring 1983 Stur Dee Dory 14 ft

Joined
Jul 9, 2017
Messages
26
Hey everyone, I'm planning to restore/repair a 14 foot Dory. Deck's gel coat is pitted/rough and mossy. The wood benches are rotten and need to be replaced. I want to cutout a couple of compartments for storage. And lastly, I have to repair or replace the transom. Two puncture holes sit where a boat motor once was clamped. The wood exposed is soaked and even mushy. Rest of the transo looks dry and fine but the boat motor area is bad. Any advice? Never repaired boats but I love to learn and I love projects. Projects in my home become mediums for father-son time with my 9 yr old, the co-capitan when this Dory is finished.
 
Joined
Jul 9, 2017
Messages
26
No Title

Photos
 

Attachments

  • photo271086.PNG
    photo271086.PNG
    1.3 MB · Views: 1
  • photo271087.PNG
    photo271087.PNG
    1.5 MB · Views: 2
  • photo271088.PNG
    photo271088.PNG
    1.3 MB · Views: 1
  • photo271089.PNG
    photo271089.PNG
    1.3 MB · Views: 2

kcassells

Fleet Admiral
Joined
Oct 16, 2012
Messages
8,741
Hey BlockHead welcome. Thats a total gut and rehab. Being such a nice size the fix will be easy. Little time, money and labor. Cool crabbing fishing boat. Start taking the bad out, take pics and post. The pics will surely help us to see what you are seeing and make recommendations. Search around the forum. Check out Woodonglass thread.
KC
 
Joined
Jul 9, 2017
Messages
26
Thanks kcassels. i read some of his thread. From what I saw, it was loaded with tips, but not really a how to. I'm wondering how I should begin. Tomorrow I was gonna remove the diamond plate on the back and then cut off the transom with a sawsall.
 

Woodonglass

Supreme Mariner
Joined
Dec 29, 2009
Messages
25,932
You might find the 2nd link in my signature line below helpful. If covers details on all aspects of restoring a boats major components
 
Joined
Jul 9, 2017
Messages
26
Hey woodonglass, thanks for the tip. I did read through it before posting but found it difficult to understand since I've never done this before. Then again, I only looked at the posts that it directly links to and didn't pour over the entire thread. I'll give it another go.

Currently, I'm not sure on how to proceed. Im assuming the transom plywood is wet else where because I can see bits of wood exposed on the deck side of it. Could I take a Jig saw and carefully cut it out? I know to avoid the hull at all costs. I've been reading here and there and trying to piece together a start-to-finish how-to as a map of general direction for this project. Once I have that, i figured the iboats community can help me fill in the blanks :)
 
Joined
Jul 9, 2017
Messages
26
I went ahead today and began stripping the boat down. I hosed off the deck then I went at with a brush and some muriatic acid. Killed off all the moss growing on it. I didn't let it sit for more than a few minutes before hosing it off. I can't find someone with a pressure cleaner so I'll have to scrub the deck clean. Work was cut short today by the rain coming down. The deck side of the transom has glass peeling off of it. I would've like to have removed the transoms from inside the deck while preserving the hull and gel coat, but I have limited access to the bottom of the transom on either side. At the same time, I want to cut those bench areas open and use one for storing my battery and electronic accessories, and the other for storing life jackets. I also want to cut open a portion of the deck on the bow, its raised and looks like I could have a good cubby for a live well or small cooler. Admittedly these ideas aren't mine, I saw another iboat member execute them nicely. Pics coming as soon as I can resize them.
 

sberl

Petty Officer 3rd Class
Joined
Jul 15, 2017
Messages
97
Hey Blockhead! Looks like a fun project! Sorry I don't have anything to add as I'm just starting my first restore myself.

Projects in my home become mediums for father-son time with my 9 yr old, the co-capitan when this Dory is finished.

True here as well even though my son is 25 years old. He lives a couple hours north but I'm looking forward to him coming home tomorrow so we can lift out the old waterlogged flooring.
 
Joined
Jul 9, 2017
Messages
26
Hey Blockhead! Looks like a fun project! Sorry I don't have anything to add as I'm just starting my first restore myself.


True here as well even though my son is 25 years old. He lives a couple hours north but I'm looking forward to him coming home tomorrow so we can lift out the old waterlogged flooring.

How's your project going?

And that's great. Right now I'm doing the work that only I can do. Mommy wouldn't appreciate our son playing with muriatic acid anyway lol.
 
Joined
Jul 9, 2017
Messages
26
Pics! And their explanation. I removed the corner blocks of wood that braced the hull. I then removed the fish finder bracket that came attached to the boat. It was not sealed boat installation. Couple drops of water leaked out when I unscrewed it. I then removed the metal brace and steel diamond plate. The wood underneath the brace was soaked. The diamond plate was sealed along the edges with silicon, however I think they coated its underside with axle grease? Weird.

Anyway I took my jig saw to the transom. Two blades later I cut it with about 1 inch from the edge of the transoms's wood. When I got to the bottom... well some sandy wet stuff came out, some water... and the more sandy wet stuff and water on the other side.
 
Joined
Jul 9, 2017
Messages
26
No Title
 

Attachments

  • photo271450.PNG
    photo271450.PNG
    778.6 KB · Views: 3
  • photo271451.PNG
    photo271451.PNG
    1.2 MB · Views: 2
  • photo271452.PNG
    photo271452.PNG
    1.3 MB · Views: 3
  • photo271453.PNG
    photo271453.PNG
    1.2 MB · Views: 2
  • photo271454.PNG
    photo271454.PNG
    813.7 KB · Views: 3
  • photo271455.PNG
    photo271455.PNG
    1.4 MB · Views: 2
  • photo271456.PNG
    photo271456.PNG
    908.7 KB · Views: 5
  • photo271457.PNG
    photo271457.PNG
    813.7 KB · Views: 3
  • photo271458.PNG
    photo271458.PNG
    841.9 KB · Views: 2

Woodonglass

Supreme Mariner
Joined
Dec 29, 2009
Messages
25,932
It's really hard to tell the overall structure of your transom from the pics. Is there wood between the inner and outer layers of fiberglass and does it extend top to bottom and side to side? The Outer piece of plywood served more as a reinforcement for the main transom IMHO. As stated in the link the best method for removing and installing a new transom is to cut away the deck to give full access to the entire inner stern of the boat, then cut away the inner skin using a skil saw set to proper depth and cut a 3" grid from top to bottom and side to side to make the removal of the old wood and glass fairly simple.
 
Joined
Jul 9, 2017
Messages
26
It's really hard to tell the overall structure of your transom from the pics. Is there wood between the inner and outer layers of fiberglass and does it extend top to bottom and side to side? The Outer piece of plywood served more as a reinforcement for the main transom IMHO. As stated in the link the best method for removing and installing a new transom is to cut away the deck to give full access to the entire inner stern of the boat, then cut away the inner skin using a skil saw set to proper depth and cut a 3" grid from top to bottom and side to side to make the removal of the old wood and glass fairly simple.

Bud, call me blockhead because I clicked the link but did not see the info you're referring to. Just read some updates about applying epoxy and what not. Must've missed it.

The transom structure has plywood sandwiched between an inner and outer layer of glass. The hull side layer being thicker than the deck side with the deck being almost paper thin. The plywood also extends side to side and top to bottom. I wish I could post full res pics but I'm limited by my phone at the moment. The area where the motor would clamp to has a trapezoid shaped piece of plywood that thickens that particular spot to double its normal width. The plywood sides soaked and rotten as well. It's all wet and mushy. I really wish I would've seen your info sooner bud. Also I'd like to better orient the pics to the explanations I post but I'm limited by the capabilities of my phone at the moment.
 

kcassells

Fleet Admiral
Joined
Oct 16, 2012
Messages
8,741
Just step back for wider shots. You will neen to lose most of the glass inside the hull. All around the transom. The deck needs to come out also. Typically a skill saw set @ 1/2"to 1" based on your depts to start. Other tools to start investigationa are sawsalls{ metal and wood blades} grinders with metal blades are sweet too. The idea is to explore, make openings, the decide what tool will do the next part of the job demo better or a combination of tools. Floor out, all wood out, no glass will be left on the interior of that vessel.
 

Woodonglass

Supreme Mariner
Joined
Dec 29, 2009
Messages
25,932
Maybe you didn't scroll down far enuf on the page...

Transoms (updated 06/28/2016):

Epoxy

When using Epoxy for your transom it's basically the same as for Stringers. You'll use 17 oz Cloth instead of 1708 Biaxial and NO CSM! You could also use a couple of layers of 8.5oz glass. With epoxy lighter weight glass and multiple layers is sometimes a better method to build bulk and strength. Everything else is basically the same. Always precoat your wood with a coat of resin then apply you first layer of cloth. Ensure all air bubbles are worked out Pay attention to the edges.

For aluminum boats the use of 17oz fabric is optional. Doesn?t really matter. 3-4 coats of epoxy followed by Paint will yield a transom that will last LONG time as long as you take care to ALWAYS predrill and then coat the holes and the Hardware with epoxy at the time of installation.


Polyester Resin


Note: When using screws as clamps, it's best to predrill the holes a bit oversiized on one piece of the transom. This keeps the piece from catching the screw threads and allows the other piece to be drawn up tight against the pre-drilled piece.


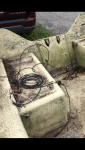
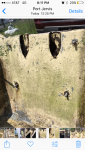
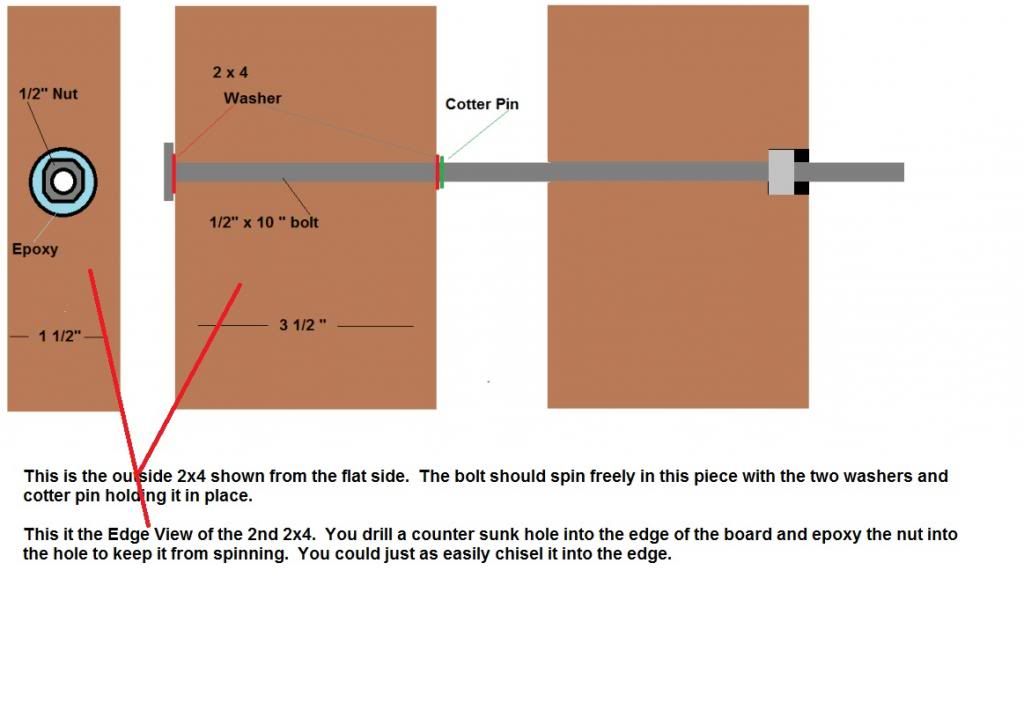
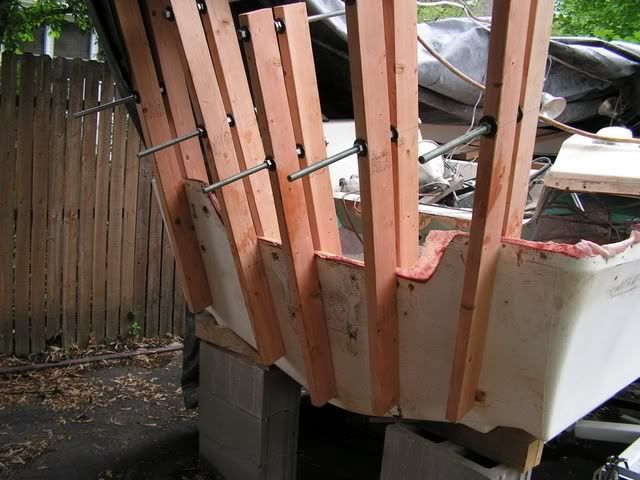
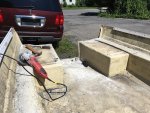
Pics of clamps I recommend for clamping an Outboard Style Transom when the top cap of the boat has been removed. I modified the construction of them just a bit using bolts instead of all thread. Takes a bit longer to build em but I like em better. Doing it this way I can use my 3/8" air drive ratchet to tighten em down which make is a lot faster to clamp em down. You need to be as fast as possible when you are using that much PB. Don't want it to set up on you before you get it clamped in place. Speed is of the essence!!!!:D

Clamps.jpg


transomClamps.jpg


FINISHING UP THE TRANSOM INSTALL.

Once the transom is clamped into the boat, All that's left is to form the fillets and lay the glass. During clamp up, If you elected to create the OOZE holes you'll need to be prepared to smooth out the PB as it oozes out of the holes as well as form the fillets from the ooze out around the edges of the transom. You'll probably need to have a bit extra PB to form the fillets. A large Plastic Spoon is a great tool for forming these fillets and a bondo spreader is great for cleaning up the fillets and knocking down the inevitable left over waste and nubs that will occur. The cleaner and smoother you can make these fillets now the less work you'll have later when it all cures. After everything cures in a couple of hours you can remove the clamps and check for any rough spots on the fillets and sand them smooth. Cut your first layer of 1708 glass so it will extend out onto the sides and bottom of the hull approx 4-5 inches. I like to use Masking tape to hold it in place along the top edge of the transom and hull sides while I fit it in place and make my cuts. You can then start applying resin. Once the first layer starts to "Kick" and harden You can prepare to do the next layer and have it extend out onto the hull approx. 8-10". and repeat the resin process. If you want a smoother appearance you can follow up with a layer of 1.5 oz CSM to Hide the weave of the 1708 fabric. The Transom installation is now complete.
 
Joined
Jul 9, 2017
Messages
26
I did read through that. I don't see where you discuss removal of the transom. I read through it all again and still don't see where you mention approaching the removal from the deck side, etc.

So first, I'm not trying to be rude, and I know I'm new to this forum, but not to forums in general. I came on here looking for help. What's obvious to you isn't so obvious to me; apparently I'm missing something here.

Second, the first thing I did before posting was read through the how to for transom that's stickied here. The REMOVAL/DEMOLITION portion of that how-to was not existent and still is apparently. I'm not trying to be a jerk, I want any help I can get.

I do see where it references to removal of pieces of the transom but that's about it.
 
Last edited:
Joined
Jul 9, 2017
Messages
26
No Title

The pictures posted show the condition of the transom, which was soaked and mushy. I then took a photo of what remained: the other piece of wood and surrounding glass. I took a grind wheel to it all and removed the remaining glass and wood. I then proceeded to chisel out the plywood that remained. Every time I struck it with hammer and chisel, a bead of water came out. One side had a length about 4 inches that was mush and came our easily.

I want to remove some or most of the foam from those side areas and open it up for storage. Probably will do that tomorrow.

I'm tempted to cut open the deck and see what that looks like. I'm afraid I'll bite off more than I can chew though.
 

Attachments

  • photo271626.jpg
    photo271626.jpg
    354.5 KB · Views: 3
  • photo271627.jpg
    photo271627.jpg
    172.9 KB · Views: 2
  • photo271628.jpg
    photo271628.jpg
    146.5 KB · Views: 2
  • photo271629.jpg
    photo271629.jpg
    140.6 KB · Views: 2
  • photo271630.jpg
    photo271630.jpg
    196.6 KB · Views: 3
  • photo271631.jpg
    photo271631.jpg
    194.9 KB · Views: 2
  • photo271632.jpg
    photo271632.jpg
    147.8 KB · Views: 2
  • photo271633.jpg
    photo271633.jpg
    321.8 KB · Views: 3
  • photo271634.jpg
    photo271634.jpg
    111.1 KB · Views: 2
Top