garbageguy
Lieutenant Commander
- Joined
- May 8, 2012
- Messages
- 1,643
Looking good - nice work, thanks for sharing
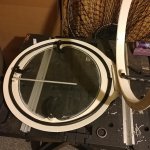
The new LED's are great - been installing/learning more about them lately. Suggest indirect lighting is the way to go in a lot of cases. I put some behind the bed frame - thy're all adjustable by remote, make great low-level and night lighting in the room. Thinking about doing similar in the boat this season with other projects, including resealing hatch and cabin door
The new LED's are great - been installing/learning more about them lately. Suggest indirect lighting is the way to go in a lot of cases. I put some behind the bed frame - thy're all adjustable by remote, make great low-level and night lighting in the room. Thinking about doing similar in the boat this season with other projects, including resealing hatch and cabin door