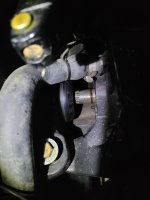
Replacing an Alpha1 Gen1 205 V6 for 87 Cobalt 17BR

vegaschef364

Cadet
Joined
Jun 24, 2022
Messages
24
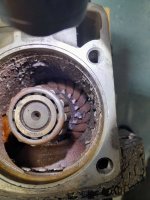
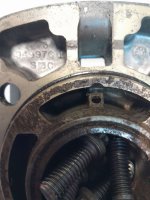
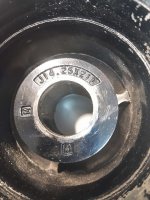
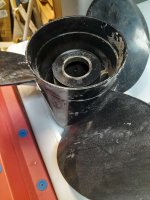
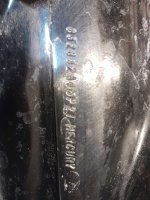
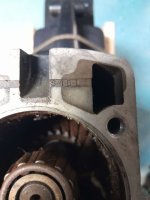
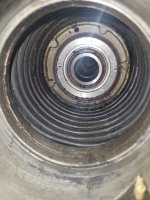
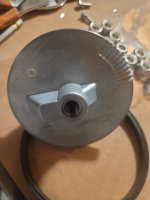
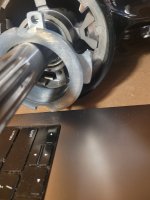
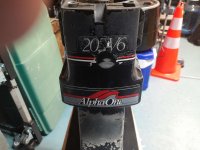
Hello all, I am new to owning a boat, 3 years in, but it sits 1200 miles away from where I live. Last summer I spent my entire 4 week vacation with my head in the engine compartment of either a boat or a PWC. I don't want to do that this year. Long story short, after I got the boat in the water, it wouldn't move, only rev. Got it out of the water and opened up the top of the upper unit and the teeth from the driveshaft were gone. Took the whole thing off and brought it home hoping to fix it, decided to just buy a new one. I know the gear ratio is the most important thing so trying to figure that out without having the boat here. The only numbers I can see are inside the top cover 94997C-1. Not sure if that is a part number just for the cover or what. It looks like there are 19 teeth on the upper gear, the one that didn't shred. There are 17 teeth on the end of the drive shaft that goes into the engine. I have the title that shows the manufacturers ID#. From the research I have done it would be a 1.81 ratio. I am looking to buy an SEI to replace it, from what I have read they are comparable to the Merc, but half the price. Any info on this, or how to find out the ratio without having the boat would be much appreciated.back-of-od.jpginside-top-upper.jpgod-lid.jpgprop-num.jpgprop.jpgside-of-prop.jpgtop-of-upper-unit.jpgupper-shaft.jpg
 

Scott06

Admiral
Joined
Apr 20, 2014
Messages
6,423
Yes a 4.3 V6 engine will use a 1.81 ratio drive. Yours is an alpha gen 1 so an SEI drive in that ratio is the easiest bolt in replacement .

usually when the upper gear shred it is low on lube. I would frequently check the lube level. likely the input shaft seal leaked oil into the bellows and ran dry

this is the one you want available direct or through marine stores


Bondo

Moderator
Staff member
Joined
Apr 17, 2002
Messages
70,952
I know the gear ratio is the most important thing so trying to figure that out without having the boat here.
Ayuh,..... The 4.3l motor has been used with the 1.81-1 gear ratio, 'n with the 1.65-1 ratio,....
The 1.81-1 for heavier hulls, the 1.65-1 in lighter hulls,....

The lower units of the Alpha 1's are 1.65-1, when combined with the lower units, for final drive ratios of 1.5-1,... 1.65-1,... 1.81-1,.... or 1.98-1,....
 

Scott06

Admiral
Joined
Apr 20, 2014
Messages
6,423
Additionally the ratio should be stamped on port side below the vent plug on upper.
 

vegaschef364

Cadet
Joined
Jun 24, 2022
Messages
24
Ok, so got the SEI outdrive, and the install kit and annode kit with it. At the lake now hoping to do the install tonight. This video seems to be a good walkthrough to me, Anything that might be missing any tips/tricks to the install, or is there a better walkthrough out there?
Thanks for all the help!
 

Scott06

Admiral
Joined
Apr 20, 2014
Messages
6,423
Use a little grease to hold the roller and shift cable end together.

put it in fwd hold prop counter clockwise with bungee cord to keep it from popping out of gear you can turn it ccw to line up splines so it wont pop out of gear. Check your alignment. Should slide on with out too much work if it is lined up With shift linkage splines etc. No more than a good shove …
 

vegaschef364

Cadet
Joined
Jun 24, 2022
Messages
24
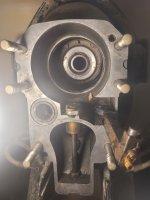
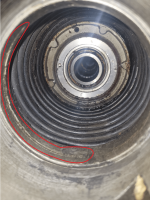
Ok, just about ready to put this on but I have a couple more questions. Image #1 first off does it look clean enough? Not sure how far to go, and if I can use degreaser or a wire brush. Image #6 and #7 do I need to clean any more of that stuff out, also there is a pretty good sized gash going most of the way around the inside there, is that ok, and what could have caused it? Image #9, #12 the Annode I think it's called, is that the correct way it goes on? Also there are the notches on the bottom which, look like it might need to be turned a degree or so depending on needs, or does it go straight front to back like in the pic. Image #14 is that the way that part will go on, or spun 180. I think that's all, again thanks for all the help!1.jpg6.jpg7.jpg9.jpg12.jpg14.jpg
 

Bondo

Moderator
Staff member
Joined
Apr 17, 2002
Messages
70,952
Ayuh,.... I see a speck of ole gasket, bottom side, under the stud, on the left of the picture,....

It appears there's some sorta wrinkle in the bellows, exactly opposite where you took the picture of the bonding wire in the bellows,....

The trim tab anode you've got, may, or may not clear the prop, 'n yes, it's backwards, points the other way,....
The little row of bumps are so you can turn it left/ right, to counter prop torque,.... it moves a few degrees each way,...
They come in several lengths, or a flat plate if you have P/S,.....
If yer Is to long, an angle grinder will cure that,.... it just needs to clear the prop,...
 

Scott06

Admiral
Joined
Apr 20, 2014
Messages
6,423
When you say there is a gash in there do you mean tear in the bellows? If so need to replace them, they are clean enough.
last pic yes that is where the annode goes
 

vegaschef364

Cadet
Joined
Jun 24, 2022
Messages
24
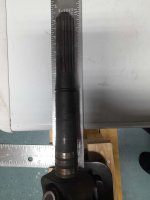
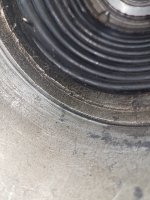
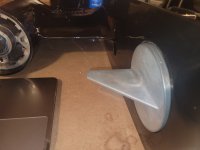
Sorry, guess it's kind of hard to see by the pic, but there is a good sized scratch in the metal just before the bellows that goes about half way around. Maybe 2mm deep. But I did finally get it in, it was really difficult to get set right. Multiple times I tried it I would get stuck just before the bolts would go into the drive. Finally I built a little stand and managed to get it on. But of course now I have 1 more question. When looking at it from inside the boat there seems to be a lot of the shaft sticking out, you can even see the oring, wish I had a pic of what it looked like with my old one in. But in rereading the details on the sei page it says it comes with a 9 9/16 input yoke, they refer to it as the old style, and the one that it is replacing must have the same, thankfully I do have a pic of that from my old one which seems to be correct, it is in one of the posts above. gash-min.pngshaft.jpg. So old one had a short yoke, new one does as well, I guess I have to believe that my old one would have stuck out the same? Sound right or am I missing something here? Thanks again for all the help. Really hoping to get the kids out on the lake.
 

dubs283

Vice Admiral
Joined
Jul 27, 2005
Messages
5,322
Coupler/shaft depth looks normal to me

The o ring is there as a seal for couplers with a snout on the aft end that fits to where the o ring is on the shaft. You're good

Go boating, have fun!
 

vegaschef364

Cadet
Joined
Jun 24, 2022
Messages
24
I just wanted to thank everyone for all the help with this. It took a while to get it on the bolts, ended up building a little stand for it. But got it on and it worked great the whole vacation. Looking forward to many more with it. I can't speak yet on the longevity of the SEI aftermarket part but now that I have a much better idea of how to take care of it hopefully it will last just as long as a Merc would. You guys definitely helped save this vacation so thank you again for taking the time to help a complete stranger.
 
Top