Question about lower unit leakage

emoney

Commander
Joined
Jul 19, 2010
Messages
2,551
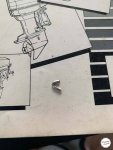
Well, I’ve found a way to get the little broken tab out of the gear case; I have no choice but to pull the gears because I’ve got a leak coming out right at bearing carrier. Well, that’s where the new fluid is pooling anyway. I’ve got a manual and I think I’m capable of taking it out, but what am I looking for or is it just a “replace all the seals” thing?

At the same time, i can’t Read the serial number anymore on the plate; looks like the salt got to it. I can see the stamp date of the bracket easy enough 11/1993. But isn’t there another stamp somewhere on the top that I must not have found yet? I want to order this seal kit but it’s not easy without the serial number.

Thanks in advance and I’ll try to document the process
 

Texasmark

Supreme Mariner
Joined
Dec 20, 2005
Messages
14,574
Get yourself a manual and have at it. Iboats sells them....see top of the page here. IMO pulling and reinstalling the LU is the biggest part of the problem. Once you get it out, you have the following seals to replace:

Drive shaft seal....under the water pump housing.....change your impeller and the whole pump assy if necessary while it's out.....ensure that you put the locking key in place (on the drive shaft) before sliding the impeller down into the pump housing. Probably 2 seals back to back....one to keep oil in and the other to keep water out....Merc parts lists are online with Illustrations showing what fits where and part numbers.

Shift shaft seal...seals the shifter stub.....upon removing the LU, ensure that the upper shift shaft separates concurrently from the splined stub in the LU as it comes apart....it's only about an inch long and not that easy to get to. Salt water corrosion could make it difficult. Otherwise you will be re-stabbing your shifter shaft to shifting cam which means you have to gut the housing.

Bearing carrier and prop shaft seals.....2 nuts and the BC comes out, Oring outer seal and back to back prop shaft seals. If you'd rather, and a much simpler solution, is to fish the seals out with the carrier installed in the LU.....drill little holes in the SS seal housing and using a pic, pick it out.

Drain/Vent screw seals, 3 ea.
 

emoney

Commander
Joined
Jul 19, 2010
Messages
2,551
I have the Factory Manual, thank goodness. If not, I'd never tackle it. I got lucky and even found the "Mechanics Tips" (?) manual that Mercury sent to the dealers to go along with the main one. It doesn't seem like a major undertaking, as long as I can get those SS seals out. I've ordered the seal kit, so whenever it gets here I'll tackle it. Already had the LU out because I did the waterpump gaskets and that's how I noticed the leaking. I did NOT change the gasket under the Water Pump Base, because the manual says you don't have to? Even though that gasket was provided in the Water Pump kit that I got? It wouldn't lift off so I didn't push the envelope but now that I need to pull the gears I will go ahead and pry that thing off and put the new gasket in place. I need to open up as many avenues as I can in order to fish that broken little tab out anyway.

This week I plan to build some kind of stand to get the LU up off the floor. I'm too old to be laying on the concrete trying to complete this repair, lol. May try and see if my bench vise will hold it. Not horribly heavy with the SS prop off. Need something to do while I wait for the seals anyway. Wish me luck!
 

emoney

Commander
Joined
Jul 19, 2010
Messages
2,551
Bearing carrier and prop shaft seals.....2 nuts and the BC comes out, Oring outer seal and back to back prop shaft seals. If you'd rather, and a much simpler solution, is to fish the seals out with the carrier installed in the LU.....drill little holes in the SS seal housing and using a pic, pick it out.

Drain/Vent screw seals, 3 ea.

I thought I'd pick up a Seal Puller from either Harbor Freight or Autozone, unless you think that's a bad idea. I need to get that Bearing Carrier out in order to fish out that broken off tab anyway.
Where you say, "Drain/Vent screw seals, 3 ea".....what do you mean? There's supposed to be 3 seals on both those screws/plugs? I've got a flat, crush washer on the vent plug and a small o-ring on the drain plug. Thanks for your help, Mark.
 

Texasmark

Supreme Mariner
Joined
Dec 20, 2005
Messages
14,574
"I've got a flat, crush washer on the vent plug and a small o-ring on the drain plug."

Say What? The later model LU, picked up in the 98 and newer engine manual has 3 screws for fluid servicing: The obvious SS drain screw and up on the Port side, above the AV plate, 2 vent screws.....the most forward one is the initial vent.....with both open, fill from the bottom till solid oil comes out the front hole, seal and continue filling till the same clear fluid comes out the second. Your engine may not have the second. One flat fiber washer per screw; 3 screws.

Current fiber washers for those plugs are blue and very hard. On one occasion I saw a supposedly new type that was an Oring incased in a SS frame....like some intake manifold to engine block seals these days where there is an aluminum frame filled with an Oring or silicon. The frame allows for the proper seal tension and the rubber does the sealing.

Your problem may just be your seals on the screws, and even if it isn't you need to have them sealed properly anyway.
------------------
If you are going to remove the Bearing Carrier then you can just drive the prop shaft out with a punch once you remove the prop shaft and rear gear and attached bearing half. If like the later models there are 2 seals back to back...front to front whatever......one keeps oil in the second water out. Be sure you cleanup the lower unit casting where the BC large diameter sealing O ring rides to ensure a good seal.
 

emoney

Commander
Joined
Jul 19, 2010
Messages
2,551
Mine is a 93 I see a 2nd screw forward of the top vent but it’s much smaller than a plug so I assumed it was shift shaft related. I’ll check the book tho to confirm and if it is a peep hole for the fluid I’ll change that seal too. Sadly it’s definitely not the plug seals because I found this problem after changing the LU fluid. Fresh new blue stuff coming out at the bottom of the shaft seal that you can see. This carrier is being a bear so I’m sure it’s “salt water stuck”. I’ve soaked some lubricant in there and I’m going to see if I can jimmy up a puller to help get it out. I’m worried that this leak existed for a while as there’s evidence where somebody tried the flat screwdriver trick to pry it off.

I do have some great news; the SS tab came out when I drained the new fluid out!!! This is a huge relief!
 

Texasmark

Supreme Mariner
Joined
Dec 20, 2005
Messages
14,574
Don't tear something up. The only reason you were going to pull the carrier was because the tab. It's no longer an issue. Do as I suggested.....fish the seals out. I have done it and with out today's variety of tools available. You get a hole drilled in it (Dremel tool can do that) and using a SS pick C shaped, pointed pick, like Harbor Freight (for one) sells and pry it out. Other option would be a Dremel tool sanding disc to cut slices in the steel that could be bent up such that a pair of long nosed pliers could grasp it.
 

emoney

Commander
Joined
Jul 19, 2010
Messages
2,551
That’s what I’m planning to do. This carrier is mega stuck anyway. The book says to put Locktite on the new seals when I put them back in; just regular, red locktite? I’ll let you know how it goes.
 

Texasmark

Supreme Mariner
Joined
Dec 20, 2005
Messages
14,574
That’s what I’m planning to do. This carrier is mega stuck anyway. The book says to put Locktite on the new seals when I put them back in; just regular, red locktite? I’ll let you know how it goes.

Red is recommended in the manual. I used blue in industry as blue is for removable fasteners and such. Didn't used to be popular in auto parts stores. Nice that it's available now.....course the bad part is you will have to tug harder to get your seals out as it's on the seal to housing interference fit which is what activates locktite.
 

emoney

Commander
Joined
Jul 19, 2010
Messages
2,551
Ok, I'll pick up some today. Still waiting on iBoats to process the order for the seals. I paid to have them overnighted so I can get this done by the weekend. I'll keep you posted.
 

emoney

Commander
Joined
Jul 19, 2010
Messages
2,551
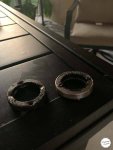
Got em! Stainless is NOT easy to drill into but I finally got two tiny holes in each side since I could not get a pick or a screwdriver beside the outer one. Used a tiny drill bit but then one a little larger, enough to thread two short drywall screws in. After that it was a 5 lb hammer on two pry bars. The inner one was a piece of cake.

Now I just need my new ones to ship and I’ll get this all back together. May even call the local Merc dealer to see if he has any in stock. I could be fishing by the weekend if so!
 

Attachments

  • photo332198.jpg
    photo332198.jpg
    33.3 KB · Views: 0

Texasmark

Supreme Mariner
Joined
Dec 20, 2005
Messages
14,574
The sheet metal screw was a slick idea. Will keep that in mind. See, in attempting to help you, I picked up on a trick that I know I will use at a later date......got my thanks already. Wink!
 

emoney

Commander
Joined
Jul 19, 2010
Messages
2,551
The sheet metal screw was a slick idea. Will keep that in mind. See, in attempting to help you, I picked up on a trick that I know I will use at a later date......got my thanks already. Wink!

Wait a minute, I'm supposed to do all the learning around here, lol.

So the tip I got on the drywall screws came from BornAgainBoating on YouTube. They're a repair shop down in the Keys. He suggested putting an O-ring in between each of the seals when I'm reinstalling the new ones. Said it was "extra protection against leaks". Is that something that makes sense to you, or you've done before? The manual, of course, doesn't mention any o-ring, just says to put grease between the two as I'm inserting them. Just wanted to get your thoughts on the idea, since it does seem like it makes sense, but I don't know how much room is actually between these two seals when they're in place.

Edit; Answered my own question about cleaning, however, I'm replacing it with this question; Is the Red Permatex a good substitute for the Red Loctite the manual talks about on the outside of the seals? I'm asking because I know there's Red "thread locker" and "thread sealant". It seems logical to me we're talking about the sealant, otherwise how in the heck would I ever change these things in the future if I used the thread locker? Just want to make absolutely sure, tho, before I go coating it with the Permatex, which I just so happen to have because it calls for the bead in front of the water pump.
 
Last edited:

Texasmark

Supreme Mariner
Joined
Dec 20, 2005
Messages
14,574
I think they are playing on words.....mfgr. competition. Locktite got it's name as a thread locker. Permatex got it's name as a gasket sealer. Using Locktite eliminates the requirement for any other type of mechanism to keep screws from loosening. Red can require heat to loosen for removal in the event it is required.....that's why serviceable equipment uses the blue. it locks but a wrench/screwdriver/hex allen, can remove the fastener without any help.

The product is about like 10w oil, not oily however, and clear other than being red/blue/green (I've seen) dyed. Does nothing, is not sticky or any of that....flows freely from the bottle to the thread and clings in liquid form nicely. Nothing happens till you put it in compression where it sets up. Once setup, like if you lock a screw down, give a bit of time to harden and back the screw out you will find red/blue/green chalky, pasty goo in the threads....if you can get it out.

I never used locktite on a seal and never had one leak.....except for LU seals and I use blue for blue's reason....my engine, my choice, I'm the one that has to get back in if necessary. If they are a shop, doing business, good reputation and all, surely it (the Oring) works for them. With the locktite, I wouldn't go to the trouble. Just something else to worry about....did I this or did it that......
 
Last edited:

emoney

Commander
Joined
Jul 19, 2010
Messages
2,551
As they say “two great minds think alike”, lol. I picked up the Blue on the way home before I got to see your reply. Didn’t make sense to me to put a seal somewhere permanently...since they’re designed to be replaceable. Knowing now that Loctite doesn’t even sell a “type A”, I wonder if they didn’t mean blue anyway? The tube is still red lol🌡
 

emoney

Commander
Joined
Jul 19, 2010
Messages
2,551
Well, I got them in. Went in easier than I thought they would but I think that’s because I went and picked up a piece of 1 1/4” schedule 40 to use as an install tool. Had to tap them a couple times each with my 5lb sledge but pretty smooth. I ended up using Blue because I was afraid I would screw something up on the install and wanted them to be able to come out if so. That caused me a little issue because it was runnier that I was expecting so in the mad dash to clean up what I spilled I didn’t get but a tiny bit of grease between the two. There’s no room now since I did it with the BC still installed but it is what it is.

Boats got 900 hours on it and under the cowl confirms that If not less. I have a feeling these were the original, factory seals so I’m hoping I’ve solved my leak. We will know by tomorrow so wish me luck!
 

Texasmark

Supreme Mariner
Joined
Dec 20, 2005
Messages
14,574
Good luck. Grin.....got her back together so you could go out this weekend. Made your goal. Wink. PVC is another great idea for seating...again, another trick I learned!
 

emoney

Commander
Joined
Jul 19, 2010
Messages
2,551
Good news...bad news...which is basically the norm around the Emoney garage, lol. No leaks!!! Which it’s been 24 hours so I’m not out of the woods yet got to do the water test first. And, of course, had a water pump bolt sheer off DEEP even tho I tried cleaning out all the gunk and greasing the new bolts. My fault cuz I said to myself, “you oughta buy new bolts because these are probably 25 years old. Coulda, woulda, shoulda...didn’t.

So, now I have another question; I went and got an extractor but it sheered off right at the bottom of the water pump base. The manual says to use a screwdriver and pry up but I’m getting nowhere that way. The black silicone around the base looks to possibly be factory applied so it’s been sitting there for a long time. There’s a chance there’s a small bit of the bolt still poking above the top of the case, so I’m hoping I can get this off since i already have a new gasket anyway. Any ideas?

Ice wisely walked away from it for the night but hope to be back on it tomorrow afternoon. Grandkids in the morning will lift my spirits, lol.
 

Texasmark

Supreme Mariner
Joined
Dec 20, 2005
Messages
14,574
That's a small bolt to drill and easy out. Not a good place and too small to weld a nut on it. Ask Faztbullet. Surely he has been there more than once.
 
Top