My '72 Starcraft 18' SS 140 Mercruiser Project

Gammtka

Seaman
Joined
Oct 30, 2013
Messages
71
Re: My '72 Starcraft 18' SS 140 Mercruiser Project

No, I am talking about the two braces at the aft end of the side panels. I looked at them again and I will install them first, before the panels in the original holes. I had to adjust the bottom L bracket on both of them and extend it by about a quarter inch to reach the new floor.

I hope to install the side and console panels tomorrow. Hopefully I have enough rivets left. Since I am going to create three hatches in the bow area, I guess I will need to order more anyway as I want to permanently install the three forward boards.

I have seen pictures of various mounts for the mercruiser controls. We will have pedestal seats so I am going to try to put the controls about midway between where they are now and the top of the side panel.

Sorry for all the mis-spellings in my posts. Ipads are not meant for alot of typing for folks with big fingers!
 

GA_Boater

Honorary Moderator Emeritus
Joined
May 24, 2011
Messages
49,038
Re: My '72 Starcraft 18' SS 140 Mercruiser Project

Sounds like you are talking about the vertical angle pieces from the gunnel to the floor. They have the recess for the side panels away from the stern.

You are allowed two mis-speelings per post. :joyous:
 

Grandad

Lieutenant Commander
Joined
Jun 7, 2011
Messages
1,504
Re: My '72 Starcraft 18' SS 140 Mercruiser Project

i wondered if this might be why they didn't come that way from the factory. so are you suggesting that you think it's a bad idea to ground the filler , or simply unnecessary?
Hi barato. I think it's unnecessary, but won't hurt to add it, with one provisio. For those that have elected to keep their hulls isolated from the negative, I think it would now be foolish to add a bond wire to the filler. Why foolish? Cuz you just connected your hull to the negative via the filler. What are you gonna do now? Well, I suppose you could try to isolate the filler from the deck and you could be successful at that. But now you have the filler and the deck, both conductive materials, both capable of carrying a static charge at different electrical potentials. You just went from the frying pan into the fire. To have a fill pipe at a different potential voltage from your deck located perhaps 1/32" apart is just asking for a spark. Bottom line: In an aluminum boat, make sure that the filler and the deck are solidly connected together. Second, make sure that your hull is solidly connected to the negative battery terminal. As long as all conductive materials are bonded together, you can't get a spark to ignite fuel. - Grandad
 

Gammtka

Seaman
Joined
Oct 30, 2013
Messages
71
Re: My '72 Starcraft 18' SS 140 Mercruiser Project

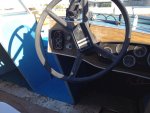
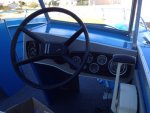
I thought I had cleaned the steering wheel off with Simple Green, but it didn't work. I am aware of Back to Bkack, but I was wondering if there is some household chemical that would clean of the white junk. See pic. Thanks.
image.jpg
 

barato2

Commander
Joined
Dec 7, 2010
Messages
2,956
Re: My '72 Starcraft 18' SS 140 Mercruiser Project

i'd be careful with simple Green on old plastic....Arai and Shoei both warn that it will screw up the lexan faceshield on their helmets. maybe try a well worn scotchbrite pad with some vinegar?

Grandad, thanks for the explanation. makes sense.
 
Last edited:

Gammtka

Seaman
Joined
Oct 30, 2013
Messages
71
Re: My '72 Starcraft 18' SS 140 Mercruiser Project

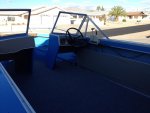
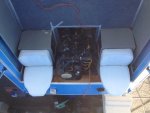
I got a lot of work done on the boat today. I wired for the gas gauge I will be installing - still waiting for the gauge to arrive. I also put both consoles back of. Getting the gauges to all line up was quite a bit of work. I put the steering wheel back on even though I wasnt able to get it cleaned up. Vinegar didnt work. I quess I will have to spring for some Back to Black to see if that works.

My seats, bimini, cover, hinges and more rivets arrived yesterday and today. Now that I have the seats I can begin rebuilding the doghouse. I am going to decrease the with of the tubular frames for the jump seats and lower the upper half of the folding seats so there is no gap to see though.

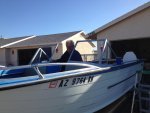
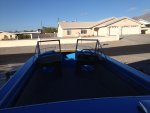
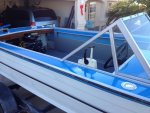
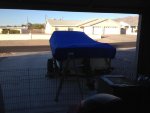
I installed some new jewelry as well. Here are some pics of my progress.

It may rain tomorrow so I will be working on the jump seat reengineering in the garage. Now that I have the hinges I can also make my cut out for the front bow piece, which will allow a nice flip up compartment for my trolling motor battery(still waiting for that to arrive).

image.jpgimage.jpgimage.jpgimage.jpgimage.jpgimage.jpg
 

GA_Boater

Honorary Moderator Emeritus
Joined
May 24, 2011
Messages
49,038
Re: My '72 Starcraft 18' SS 140 Mercruiser Project

Looking sweet, Gam. :joyous: 'cept for that steering wheel. :grumpy: Don't give up on it. Have you tried Armor-All?
 

Gammtka

Seaman
Joined
Oct 30, 2013
Messages
71
Re: My '72 Starcraft 18' SS 140 Mercruiser Project

I have some Armorall and I will give that a try. Does anyone have any other suggestions? I will go through the entire Periodic Table if need be.
 

dozerII

Admiral
Joined
Oct 25, 2009
Messages
6,527
Re: My '72 Starcraft 18' SS 140 Mercruiser Project

Your project is looking real good Gam, Armor-all is what I use. really soak the wheel and let is sit then soak it again, the polish the dickens out of it.
 

Gammtka

Seaman
Joined
Oct 30, 2013
Messages
71
Re: My '72 Starcraft 18' SS 140 Mercruiser Project

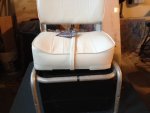
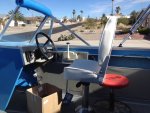
I took out a couple of inches of width for the jump seat frames to they were just about the width of my new seats. As you can see from the licture, I lowered the seat back too so there isnt a gap. After recovering the panels and putting them in the boat I can now get a better idea of how wide my new doghouse will be.

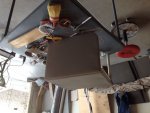
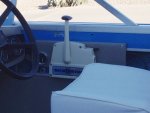
I also made a panel to mount the Mercruiser controls, a gas gauge and 12 volt outlet. See picture. The pedestals on the two front seats are about three inches or more too high. I am assuming I can just cut them down with a hacksaw, right?
image.jpgimage.jpgimage.jpgimage.jpg
 

jbcurt00

Moderator
Staff member
Joined
Oct 25, 2011
Messages
25,030
Re: My '72 Starcraft 18' SS 140 Mercruiser Project

Depends on your seat pedestals, some yes, mine have notches to lock swivel, so I'd have to cut the bottom of the post & w/ factory crimp on 1 set & weld on the other, I'm not sure I can cut any off the bottom either.................

This post probably yes:
a20792a130510776b12e0a_s.JPG


this post maybe not, depends on how it's attached to the base plate & what those notches are for:
a20792a1305107ed39fc43_m.jpg
 

barato2

Commander
Joined
Dec 7, 2010
Messages
2,956
Re: My '72 Starcraft 18' SS 140 Mercruiser Project

i realize this is boat working season in AZ, but you are really flying on this resto. nice work, and i love the interior color.

seems like an odd place to put the gas gauge...is there a reason i'm not aware of that you didn't want to put it with the other gauges?
 

Gammtka

Seaman
Joined
Oct 30, 2013
Messages
71
Re: My '72 Starcraft 18' SS 140 Mercruiser Project

My mounts are just a friction mount so I will just use a hacksaw. There was no room on the dash for anything more. image.jpg

The restoration is going smoothly and a Christmas launch is still my goal - if the weather cooperates.
 

Gammtka

Seaman
Joined
Oct 30, 2013
Messages
71
Re: My '72 Starcraft 18' SS 140 Mercruiser Project

Here is another picture of the side mount. I kinda like where the gas gauge is. I thought about dropping a gauge from the dash cluster and adding it there, but For my purposes it works being where it is.image.jpg
 

Gammtka

Seaman
Joined
Oct 30, 2013
Messages
71
Re: My '72 Starcraft 18' SS 140 Mercruiser Project

My other goal was to keep the total cost of the project, purchase price and restoration at $2,500 or less. Right now I am at $2,548, so it's close.
 

barato2

Commander
Joined
Dec 7, 2010
Messages
2,956
Re: My '72 Starcraft 18' SS 140 Mercruiser Project

makes sense. hope you didn't take that as criticism; just curious. and you're at about half what $ i have in my holiner so you're doing great there too
 

Gammtka

Seaman
Joined
Oct 30, 2013
Messages
71
Re: My '72 Starcraft 18' SS 140 Mercruiser Project

I was able to pick up some nice stuff at garage sales, probably saved $100 or more on that stuff. Also, I was able to sell some stuff off the boat that I wouldn't be using for another $175. Now that I ordered a new trolling motor I am seeing used ones on Craigslist. Oh well.

Tomorrow I will be working on the front three bow boards. They will need a little trimming as I will be covering them in carpet and installing the lid on the front piece. Hopefully I will also be able to cut the pedestals.

It is suprising how many people are familiar with the 140 motor. Even the UPS guys was commenting on it. I guess it has a long and well deserved history in the boating world.
 

barato2

Commander
Joined
Dec 7, 2010
Messages
2,956
Re: My '72 Starcraft 18' SS 140 Mercruiser Project

in its various incarnations (2.5 and 3 liter), it's probably one of the most common I/Os out there. it's interesting how much more power Murkcruiser got out of it, apparently without harming reliability, than GM did in the car versions....IIRC, the car versions were never rated more than about 90 hp, even when they used SAE gross ratings.
 

fishrdan

Admiral
Joined
Jan 25, 2008
Messages
6,989
Re: My '72 Starcraft 18' SS 140 Mercruiser Project

Speaking of Mercruiser, what kind of maintenance has been done, or you are planning, for the engine and drive?

Tune-up, filters, bellows, impeller, etc....

Have you fired up the engine on the muffs yet, to see how the engine and drive work?
 

Gammtka

Seaman
Joined
Oct 30, 2013
Messages
71
Re: My '72 Starcraft 18' SS 140 Mercruiser Project

I have seen the engine run. It has recently had a new impeller, and bellows along with some other things. The oil looks clean and the tilt reservoir is full. The only thing I know didnt work was the up tilt. I have replaced a button that was shot, but I havent tested it yet. The battery hasnt been in the boat since I started the teardown.

I finished with all of the wiring today and cut the seat pedestals down to the appropriate height. I also cut tHe front bow piece. Tomorrow I will carpet the bow boards, install the pedestals and maybe start on the doghouse. The weather is getting a little warmer so outside work can proceed. My trolling motor arrived today so that is on the list of things to install.
 
Top