merc 650 4 cyl (1967?) timing and pickup

CamaroMan

Petty Officer 1st Class
Joined
Mar 18, 2016
Messages
330
Hi all.. trying to determine the timing setup on my 650 merc - currently tdc marks verified with dial gauge - its spot on. I put in new rings..

currently can only get it to idle at a few degrees ATDC, but from my understanding the motor shd idle retarded and make that chunky sound..

How do I reduce the advance without affecting the idle? I havent had it on a boat yet.. also - noticed grey drops (water/oil mixed?) coming from leg, I did put in a new exhaust plate gasket and seal it all up well.. not sure where thats coming from -

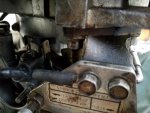
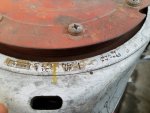
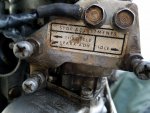
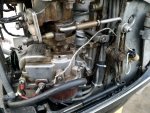
there are 3 screw on the front, one is for max advance (not concerned right now about that), another says idle (this seems to move the dizzy first from the cable slider), and another one says pickup. I noticed my pickup is touching the carbs even at idle, they seem to close though but ill have to double check - the pickup arm looks a little bent imo -

I have been following this gr8 write up -
 

CamaroMan

Petty Officer 1st Class
Joined
Mar 18, 2016
Messages
330
[No message]
 

Attachments

  • photo303068.jpg
    photo303068.jpg
    403.4 KB · Views: 0
  • photo303069.jpg
    photo303069.jpg
    474.9 KB · Views: 0
  • photo303070.jpg
    photo303070.jpg
    462.3 KB · Views: 0
  • photo303071.jpg
    photo303071.jpg
    557.7 KB · Views: 0

jimmbo

Supreme Mariner
Joined
May 24, 2004
Messages
13,484
The retardation of the timing is what controls the idle speed. As the idle speed is set while the engine is under load, the actual timing will vary depending on the load on the engine, meaning a change in props can affect the setting. Therefore there is no spec for timing at idle

The carbs are to be fully closed at idle regardless of the speed. The max advance is self explainitory, the primary pickup is the timing spec where the carbs are about to crack open but haven't moved yet. Max advance will be attained long before the carbs have opened very much
 

Tassie 1

Chief Petty Officer
Joined
Apr 13, 2018
Messages
584
Got nuthin' lol

Following this for motivation to get my au $50 50 hp up and running
thanks
lol
 

CamaroMan

Petty Officer 1st Class
Joined
Mar 18, 2016
Messages
330
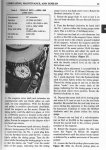
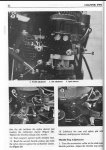
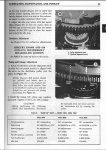
Hi merc thanks for the scans - i do have a pdf version with low quality images- when I had the dizzy open i set the gap - not sure how i can check the dwell tho - is the pin on the outside of the dizzy (where the kill switch attaches) connected to the condenser? My timing light does have the dwell feature - it seems the pickup is already touching at idle, and my arm is not at a 90 degree angle, looks like someone might have bent it in the past, its past 90 degrees and looks a little off..

Looks like i find 0.222" btdc on #1, then lightly seat/tighten the spark adv screw. Now the pickup - since i dont have the tool - what exactly is points 9-10 doing? it says "turn the flywheel slowly" - in what direction? How do I do this with a dial gauge?

I know its better to have some advance kick in before the carb/primary pickup - ill read thru the docs and try again later.

I still have to convert the larsons transom from sterndrive to take the motor so will be a while till i have it on a boat -

I also did set the timing up when I had the dizzy and pulley wheel off.. it starts pretty well but I want to dial it in REAL good so I can get that merc whine when shes moving :)
 
Last edited:

merc850

Commander
Joined
Jul 7, 2010
Messages
2,046
First is the small arrow aligned with the mark on the flywheel?
To do this easily I remove the magneto and disconnect the condenser then put it back with 1 bolt holding then connect a VOM to the side post and ground. That external piece connected to the side post is a mercury switch that can be removed while doing the setup.
You turn the flywheel CW until it is at .222" then turn the magneto CCW until the points open, that is max. spark adv. Set the screw and lock it. This is where the throttle pickup touches the pickup plate if it doesn't or is too far loosen the plate and make it do so; as in fig 28-29. If the 2nd throttle pin is bent then carefully straighten it.
When you have done the setup connect the throttle cable to its position then you can adjust the idle by turning the brass barrel long or short - you need the cable on to hold the settings.

cable-adjt..jpg
 

CamaroMan

Petty Officer 1st Class
Joined
Mar 18, 2016
Messages
330
merc thanks - yes I actually had that lock nut off last night b4 it got a little dark - the timing marks did line up when i did it.. currently the tdc mark idles in the pickup area on the strips.. ill have a look later and see if i can get it dialed in nice. My timing light is the pro version so i can actually adjust it to get an exact tdc number with just the tdc mark.

Another question ive had for a long time is all the merc manuals ive read seem to use the first tdc mark as the primary area, NOT the center of the tdc dwell like one would do with a piston stop for example.. esp with the depth before tdc.. whats your take on this?
 

merc850

Commander
Joined
Jul 7, 2010
Messages
2,046
The initial alignment is to set the mag in the area of spark production; the .222" BTDC mark is to make sure that the spark doesn't overadvance causing detonation.
 

CamaroMan

Petty Officer 1st Class
Joined
Mar 18, 2016
Messages
330
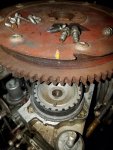
is this the correct belt setup? This is at TDC (soon as dial gauge stops climbing)- got the dizzy off and set dwell at 45 degrees exactly (stamped on it was 48), this leaves a little wear room on the dwell.. and its close enough imo.. i fiddled with it for a while to get it that close using my degree wheel
 

Attachments

  • photo303161.jpg
    photo303161.jpg
    712.2 KB · Views: 0
Last edited:

merc850

Commander
Joined
Jul 7, 2010
Messages
2,046
There's usually a small arrow on the magneto pulley that lines up with the mark on the flywheel but if not maybe there's a mark on the pulley cover that will; put it on and see; whatever the case you can use the .222" setting to set max spark (points just opening). 45* is good but 48* will allow for wearing in; did you check the cam wick? it rides 1/64th" (.015') from the flat of the cam and it must be right to stop the points or cam from wearing.
 
Top