Larson SEI 180 Complete Rebuild

adam619

Cadet
Joined
Jul 9, 2018
Messages
27
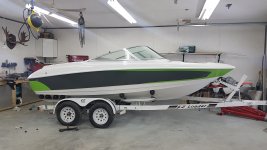
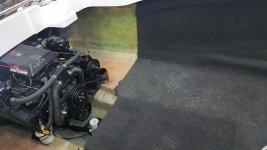
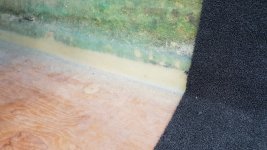
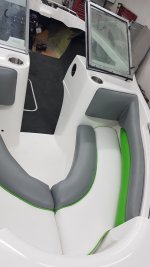
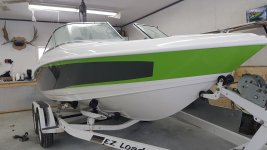
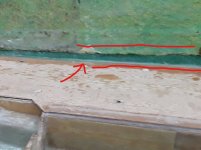
Hi to all, this was my last post Floor replacement on Larson SEI180 | Boating Forum - iboats Boating Forums in regards to rebuilding flooring, the solution I have found to this problem of finishing the hollow section above the joint of floor to hull is as follows... In the 2-3inch gap about 1/2'' thickness i used 2#lbs density foam and parged it in that gap and held it it with pieces of 1/8 plywood until it cured. Then I cut off excess foam flush with a long knife to follow the shape of the hull. After I plastered it with thickened epoxy then filleted and covered with 2 layers 12oz biaxial cloth. Then the real work began. Sprayed 3 colors of gel coat with 2.5mm HVLP gun , it takes a lot of cups for almost 5 gallon btw. Polished and reassembled hull to deck, used sikaflex 292 for the joint and installed new Barbour Plastics rub rail, it is starting to look like a boat. The finish turned out flawless but almost ran out of elbow grease. The engine is now in it. Bought a Reliable barracuda walking foot sewing machine and giving it a crack on the upholstery. The dashboards are vinyl covered and are faded in relation to everything else that is new, not sure I would refinish them other than spraying with plasti-dip or possibly HVLP gun with acrylic enamel single stage paint with flexabilizer, anybody have suggestions if anywhere can vacuum form new vinyl??? The floor is now totally sealed and every square inch covered with 6oz cloth. Should outlast me if I ever complete it. Here are pictures....

Let me know if you guys have other ideas for the refinishing of dashboards

Thanks
 

Attachments

  • 20210224_103049.jpg
    20210224_103049.jpg
    2.9 MB · Views: 24
  • 20210224_103118.jpg
    20210224_103118.jpg
    4.1 MB · Views: 23
  • 20210224_114334.jpg
    20210224_114334.jpg
    4.3 MB · Views: 22
  • 20210224_114512.jpg
    20210224_114512.jpg
    860.3 KB · Views: 19
  • 20210224_114527.jpg
    20210224_114527.jpg
    2.6 MB · Views: 20
  • photo327022.jpg
    photo327022.jpg
    122.2 KB · Views: 22

adam619

Cadet
Joined
Jul 9, 2018
Messages
27
To anyone interested here are some supplies used...
Epoxy used was ARK with metered pumps (3gallons+)
Polishing compound 3m Imperial
Rotary polisher with 3m wool Pad
1 x 3/4'' and 3 x 1/2'' marine grade A/B douglas fir plywood (olay F**** $$$)
Polishing steps: DA air sander 400 Dry to take out most orange peel, then block with 400 wet , 800 wet , 1000 wet then polish for white , for color additional 2000 wet and 3000 DA wet then polish
Bayshore 96'' marine carpet
AAD 390 carpet glue 1.5 gallon
ES G860 2.5mm gel coat gun
Gel coat AOC Vibrin G315
Barbour plastic rub rail R1078/F878 (integrity marine corp)
 

todhunter

Canoeist
Joined
Sep 15, 2020
Messages
1,308
The gelcoat and the interior look great in the pictures. I may try to redo the gelcoat on my boat next winter - doing multiple colors with all the taping and untaping seems like a chore, and makes me a little nervous.
 

adam619

Cadet
Joined
Jul 9, 2018
Messages
27
The gelcoat and the interior look great in the pictures. I may try to redo the gelcoat on my boat next winter - doing multiple colors with all the taping and untaping seems like a chore, and makes me a little nervous.
It is painfully long to polish, although i am unsure if it is normal could not shoot without orange peel for the life of me...but my first time(and also last hopefully) and did not want to use too much styrene as a thinner to have yellowing of the white. I based my pattern of mastercraft and that took about 20hrs of masking making both side identical. I pulled of one layer of tape after each coat while wet and it created really smooth line/transition between colors, original gel coat at line between colors was covered with pinstripe sticker and was messy but now it is nice clean line. I was split at first between paint and gelcoat, came to conclusion that bottom of hull and deck was better gelcoat as it is prone to damage and paint cannot be repaired and gel is better below waterline, then figured may as well make the colors gel coat as well since I was already there.
 

JASinIL2006

Vice Admiral
Joined
Feb 10, 2012
Messages
5,673
That's some nice work! Your boat looks brand new... better than new, actually! It is clear how much work you put into it. Well done!
 
Top