Impeller Job - Mating Surface Corrosion

gsbarry

Recruit
Joined
Dec 23, 2024
Messages
5
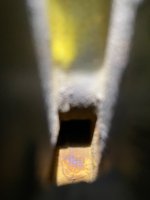
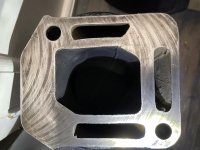
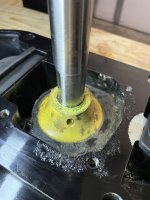
First time doing an impeller job. How would y’all address the pitting/corrosion on the mating surface of the outdrive case in the picture below? Would you:
1) just put the new gasket on and don’t worry about it
2) apply RTV to the new gasket
3) sand the surface down as smooth as possible
4) something else?

Thanks for any advice.

IMG_7845.jpeg
 

muc

"Retired" Association of Marine Technicians...
Joined
Jul 7, 2004
Messages
2,152
Yes there is a gasket there.

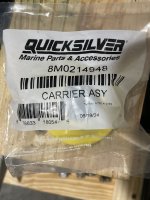
1. replace yellow seal carrier, it's melted and a weak point. Clean driveshaft with sandpaper before installing new one. Pack the area between the seals with 2-4-C.
2. scrape loose paint with gasket scraper or razor blade.
3. paint that surface with perfect seal.
4. follow the manual MCM #14 8M0065951

Follow the manual! This is an job that's easy to screw up.

Merry Christmas
 

gsbarry

Recruit
Joined
Dec 23, 2024
Messages
5
Yes there is a gasket there.

1. replace yellow seal carrier, it's melted and a weak point. Clean driveshaft with sandpaper before installing new one. Pack the area between the seals with 2-4-C.
2. scrape loose paint with gasket scraper or razor blade.
3. paint that surface with perfect seal.
4. follow the manual MCM #14 8M0065951

Follow the manual! This is an job that's easy to screw up.

Merry Christmas

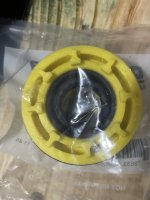
Thanks. I lightly wet sanded the surface smooth and will use perfect seal/permatex #3. I ordered the oil seal carrier as well and will replace. Hopefully it comes with the seals pre-installed (821759A2 - CARRIER ASSEMBLY). I have manual #14 and have read the relevant directions, but i also find it helpful to get input/advice from others with experience, so thanks for that! The manual indicates that perfect seal should be applied to the lower most (small hole) gasket, but doesn't specify if that's both sides or just the bottom side. Do y'all apply perfect seal to both sides of the lower gasket? And then not apply perfect seal to the upper (large hole) gasket at all?

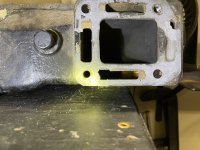
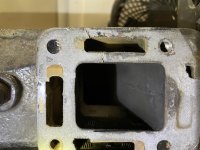
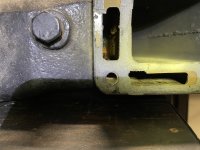
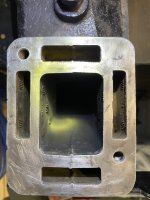
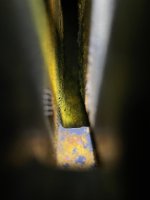
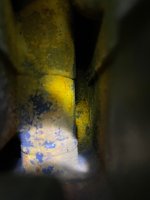
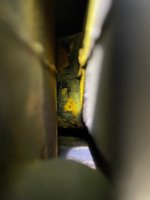
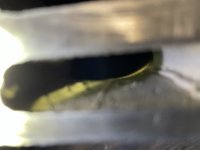
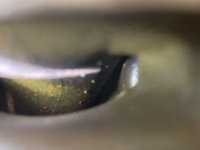
The upper water guide tube was also melted around the lower water tube, so ordered one of those as well and did some further inspection of the exhaust. I found that the exhaust shutter/flapper was also melted (ordered one of those as well). I pulled the exhaust manifold (pics below) as well. I noticed some minor corrosion in the water jackets, but it doesn't look too bad to me. What do y'all think about the condition of the exhaust manifold? Is there something I should do other than a visual inspection on the manifold? What else do y'all think I should check given the multiple melted parts? Perhaps replace thermostat while I'm at it? FWIW, prior to disassembly the engine did not show any signs of overheating while running on the hose (steady temp at ~170*). IMG_7848.jpgIMG_7847.jpgIMG_7846.jpg?
 

Chris1956

Supreme Mariner
Joined
Mar 25, 2004
Messages
27,911
Gee, scrape off the old gasket material on the exhaust manifold and riser. Now, glue a sheet of new, fine sandpaper on a piece of plate glass and sand (in a figure 8) the mating surface's of the manifolds and risers smooth and flat. Now reinstall with MerCruiser gaskets that match the water passages.
 

muc

"Retired" Association of Marine Technicians...
Joined
Jul 7, 2004
Messages
2,152
821759A2 is a very old part number, Yellow ones had problems, you want the black one with 8 feet on the bottom --- it's covered in the manual. It will come with seal and O-ring installed.
Just paint the bottom of the bottom gasket and the gear case where you removed the paint. Top gasket already has sealer applied.
You need to clean the gasket surfaces of the exhaust manifold and elbow to inspect them, scraper or razor blade followed with long file to check flatness. Use perfect seal on both sides of new gasket. What I can see of the water passages looks very good.
Melted water shutter? Check the 2 rubber exhaust tubes, they need to be fairly flexible. Make sure the rubber plug just aft of the water pump is still flexible and tight fitting. Make sure the water dam just above it in the upper is still there and tight fitting. I didn't work on many 3.0L so I don't know if this applies to you, but after a overheat I always liked to pull the top cap on the upper and check the rubber plug to make sure it's still tight. It only costs one O-ring, found more then a few bad, so worth it. Replace the seals at both ends of the water tube. Paint a light coat of perfect seal on all bolts that go into aluminum.
Thermostat has nothing to do with exhaust or drive overheat, it just controls engine temp.
I like to put the impeller in the housing first and then slide it down the shaft, I find I'm less likely to tear the upper gasket, but that's just me. If you do, keep a close eye on the impeller key. Either way a little Glycerin or dish soap in the housing helps. Don't use grease unless your going to run it in soon.
Don't worry about that little bit of paint flaking off, almost every drive I see is worse.

Remember to pull up on the drive shaft when setting the face seal/slinger, most common mistake I see.
 
Top