Re: Found My Boat - Water Ready 21' 1974 Chieftain
Glad to hear that my posts are helpful. Thanks! She is a sweet ride (no pun intended). I thought you guys might like an update on the work to date.
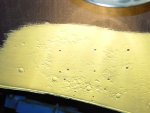
After removing all of the paint and uncovering the corrosion that was hidden from me, I painted the the aluminum with strontium chromate epoxy primer - the yellow paint. I then filled the crevices with JB weld and repaired the old screw holes. After that I added two coats of Pettit Tie Coat Epoxy (rubber compound paint) and four coats of Vivid Free Hard Ablative Anti Fouling paint - forgot to take pictures throughout the whole process. The end result looks pretty good I think.
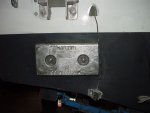
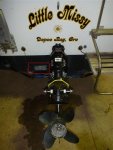
Since I didn't have the aluminum hull anode at the time of painting I painted the whole transom. Once I had the anode made by Martyr (good choice barato2) in hand it took me a bit of time to figure out where I should locate the anode. I couldn't use the original location, because much of that aluminum had been covered with JB. I thought about placing the anode under the swim ladder, but I had two transducers on that side. I was concerned that the anode would somehow negatively impact tranducer readings - on steel boats you can't have the anode in line with transducer. So I decided to place the anode on the port side. After lots of measurements I lined up the anode to be below the water line and the bolt holes with the transom board and the deck (I wanted the bolt mounts to go through the transom wood, but be above the deck for easy access). I then removed the paint for the the size of the anode. What I found out was the paint job I did was strong. It took good angle grinder with a wire brush to remove the paint layer by layer.
After more measuring, I took a deep breadth and started drilling the holes. I started with a small bit and gradually increased the hole size to a 1/2", the size of the mounting bolts. Once the holes were drilled, I filled them with Dolfinite bedding compound then inserted the bolts. The bedding compound will seal the holds so water can't get in, but allow me to remove the bolts if needed. I used 3 1/2" stainless steal mounting bolts with star lock washers. I could have used 3" length bolts, but I prefer the bolts to be bit longer than needed. For good measure, on the outside of the bolts, against the hull I used a small amount of 5200 to fill the space between the bolts and the holes. The end result is what you see in the picture.
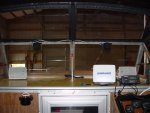
Other work completed includes mounting and wiring two windshield wipers, temporarily fixing the dog house (the edges were fraid, so I glued them and added cover the edges with Gorilla tape). I added some cup holders I had laying around from another boat to hold weights, a cheap cutting board to cut bait, rod holders (3 each side of the dog house) and a tool holder on the front for easy access to pliers, scissors and knives.
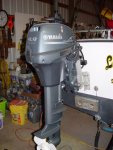
After much heartache trying to find a good 4 stroke extra long shaft kicker with electric and manual start, I broke down, sold some stuff I wasn't using and bought a new Yamaha 9.9 High Thrust kicker motor. After speaking with a lot of folks, I really wanted a kicker with auto tilt and F-N-R controls on the tiller. Yamaha seemed the best way to go. Its a new 2011 model I picked-up on sale. Plus, I rationalized to my better half that I need a new reliable motor in case the old 165 brokedown.
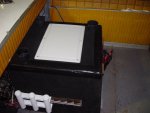
Next step is to hang two 1/4" thick rubber mats between the dog house, the sides and the floor to stop spray from entering the engine/battery compartments. I originally had more elaborate plans, but that will make a good winter project.
Tight Lines!
