Engine allignment Merc 120

italianstal27

Chief Petty Officer
Joined
Feb 18, 2017
Messages
403
Hi friends,

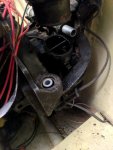
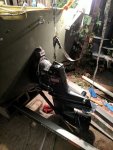
Continuing the epic saga. We got the engine in, phenomenal. Went smooth. Getting the allignment tool in there has been problematic. It continues to hit the top of the splines. We moved the front nut all the way up and down trying to adjust pitch; still hitting top of splines.

From the transom assembly, we have felt washer, double spiral lock nut, and then engine sits on the lock washer.

Has anyone found that a 1973 engine settles over time and needs to be shimmed up with washers on the transom plate in order to get the allignment tool into the splines?

Thanks,
-John
 

achris

More fish than mountain goat
Joined
May 19, 2004
Messages
27,468
Sounds like the rubber bushings (in the flywheel housing) need replacing. Yes, they do age. No point 'shimming' as they will just get worse...

Chris...........
 

achris

More fish than mountain goat
Joined
May 19, 2004
Messages
27,468
It's an easy fix. Lift the engine, drive the old bushings out and press the new ones in...Don't even need to pull the housing off the back of the engine...
 

italianstal27

Chief Petty Officer
Joined
Feb 18, 2017
Messages
403
I'm having difficultly finding the names of what these bushings are called for a pre alpha assembly. I tried flywheel bushings to no avail
 

italianstal27

Chief Petty Officer
Joined
Feb 18, 2017
Messages
403
AH! It's called a rear mount kit.

Does anyone know if the alpha one kit is backwards compatible with a pre alpha assembly?
 

Bt Doctur

Supreme Mariner
Joined
Aug 29, 2004
Messages
19,302
the rear bushing are compatable with all years.the old style has flat ends and uses the spirial washer The new type has a knurled end and does not use the spirial washer but a flat washer if needed.The knurled end faces down on the transom. [h=2]Item Number: 8M0103028, Replaces MerCruiser part #865329A02, Sierra Item Number: 18-2193[/h]
 

italianstal27

Chief Petty Officer
Joined
Feb 18, 2017
Messages
403
ok we got the bushings out... it SUCKED. This is why people buy presses I guess.

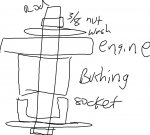
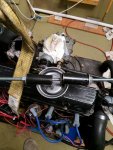
So we're having difficulty getting the bearings *in* without them going cockeyed... Is it possible, in a layman's garage (we have a SWEET collection of harbor freight tools. The greatest.) to press these bearings in?

We're thinking: from top to bottom: actually you know what I'll draw a picture.

Bearing.jpeg

Thanks,
-John
 

achris

More fish than mountain goat
Joined
May 19, 2004
Messages
27,468
Hey BT, nice picture of a tree. What's that fuzzy thing in the foreground? :D :D :D

Jokes aside, that set up you (OP) drew is exactly how I do it if I don't have access to a press. The secret is keeping it all square.

Chris....
 

Bt Doctur

Supreme Mariner
Joined
Aug 29, 2004
Messages
19,302
The part on the left with the short skirt locates the bolt exactly dead center in the housing. The one on the right is a light press fit into the housing. Just a few thou undersized of the bushing.but still large enough to support the bushing. Once started straight ,tightening the bolt installs the bushing.
I install the spacer in the housing first then pull the bushing in.
 

italianstal27

Chief Petty Officer
Joined
Feb 18, 2017
Messages
403
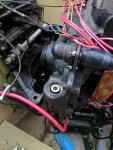
Ok well we got them in last night! Not without a little metal shavings, but it's looking rock solid.

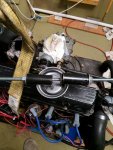
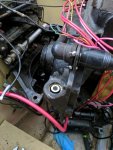
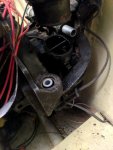
I installed the spacer about 1mm below the actual ridge it is supposed to rest against. Then used the 2 sockets with an ocassional whack from a rubber mallet to get them to continue spinning upwards. Used a 7/16" rod.

Bent the hell out of the rod.When the bushings is alligned, it goes in super smoothly. As soon as it gets tight, you know you need to readjust.

IMG_20170926_192525.jpg

IMG_20170926_185143.jpg
IMG_20170926_192344.jpg

So we just kept turning the nuts until the spacer topped out. Once it topped out it was TOPPED OUT. Very noticeable how hard it was to turn the wrench.

And I can say there is a HUGE difference in height between the old bushing and the new bushing. I must have spent 20 minutes checking if I had installed it incorrectly, but nope. HUGE difference.

No wonder the engine allignment tool wouldn't slide in....

Anyway, much appreciated for the help gentlemen. Bolts arrive tomorrow and hopefully she lines up swell!

Thanks,
-John
 

Attachments

  • IMG_20170926_192525.jpg
    IMG_20170926_192525.jpg
    152.8 KB · Views: 0
  • IMG_20170926_185143.jpg
    IMG_20170926_185143.jpg
    143.6 KB · Views: 0
  • IMG_20170926_192344.jpg
    IMG_20170926_192344.jpg
    113 KB · Views: 0

italianstal27

Chief Petty Officer
Joined
Feb 18, 2017
Messages
403
Doing a merc 140 rebuild as my winter project, and this will definitely be happening OUT of the boat next time ;)
 

italianstal27

Chief Petty Officer
Joined
Feb 18, 2017
Messages
403
Well we did it!

Alignment went well.... but we did have to back out the lock nut a little. Instead of torquing down to 25 ft-lbs, we actually had to raise the rear by maybe 3/4 turn to get the alignment bar to slide in.

Once we had that done, we had fairly even spline marks top and bottom. Not as perfect as the videos we've seen but 3 fingers got the bar in no problems.

When we went to put the drive on, it slide in perfectly. No kick or anything, literally just slid right on!

Is the alignment bar a "tighter" spec than the actual sterndrive itself?

Anyway.... thanks again for the help guys! At this point I think we can say mission accomplished on the alignment?!

-John

IMG_20170929_212806.jpg
 
Top