GT1000000
Rear Admiral
- Joined
- Jul 13, 2011
- Messages
- 4,916
Re: Drilling a hole in the water jacket cover for the installation of a temp sending
Finally, after much figuring I think I came up with a mounting solution for the temp sending unit...
Clearances wouldn't allow me to mount the sending unit using a Z bracket and I decided against making any attempt at loosening the head bolts and fabbing up the previously sketched bracket...
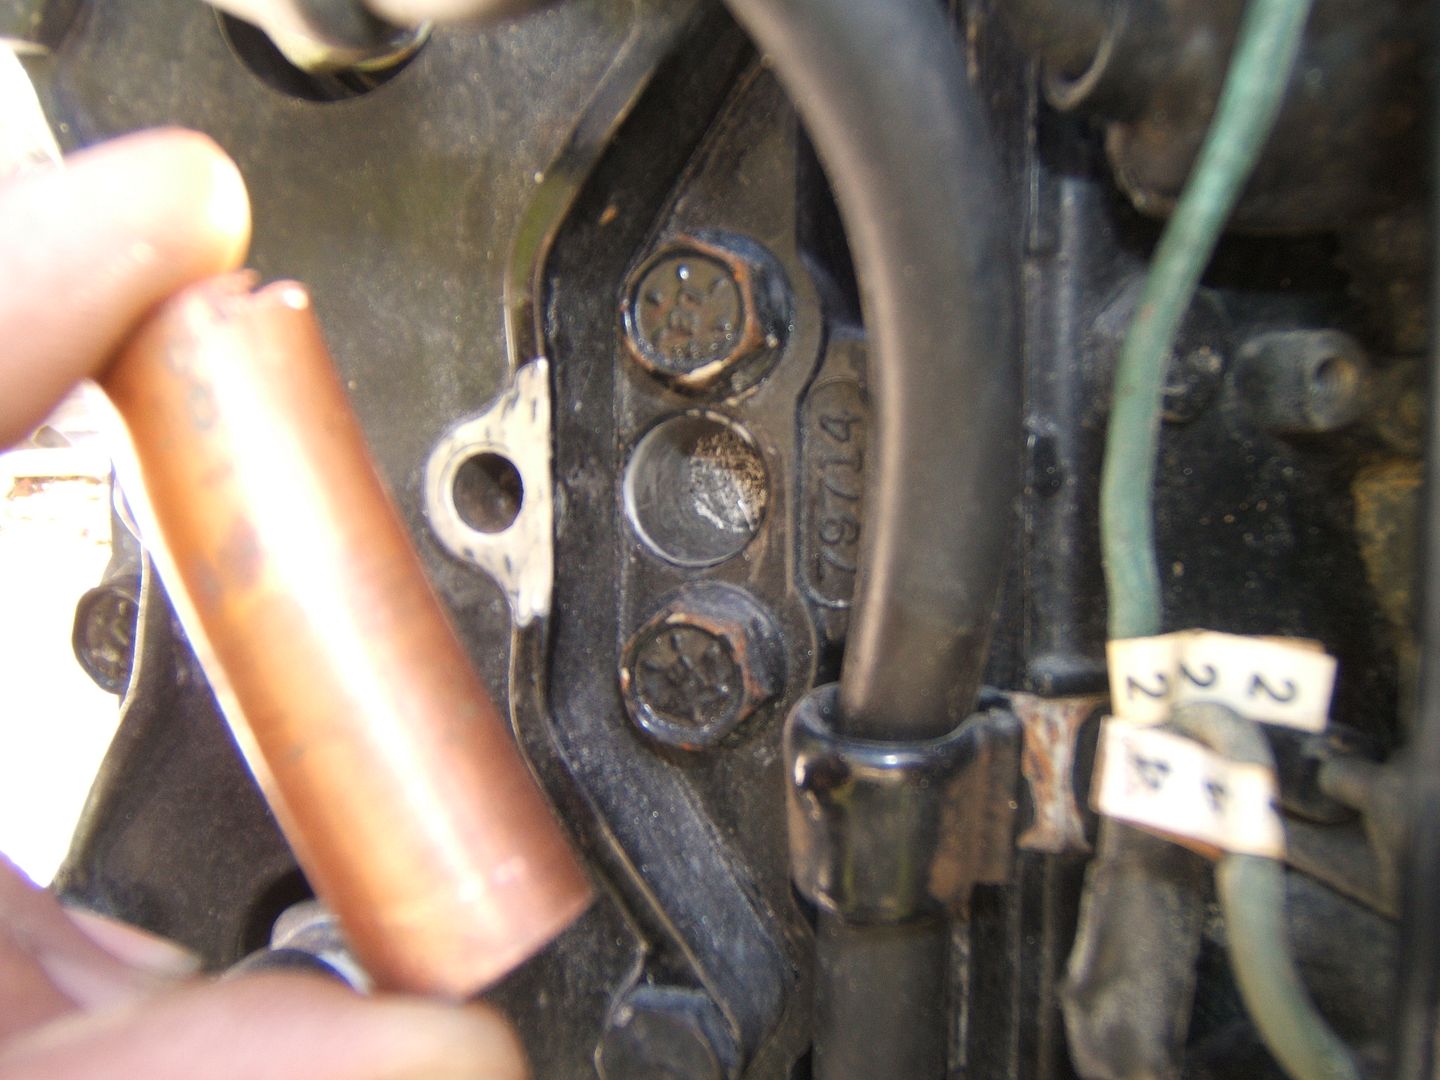
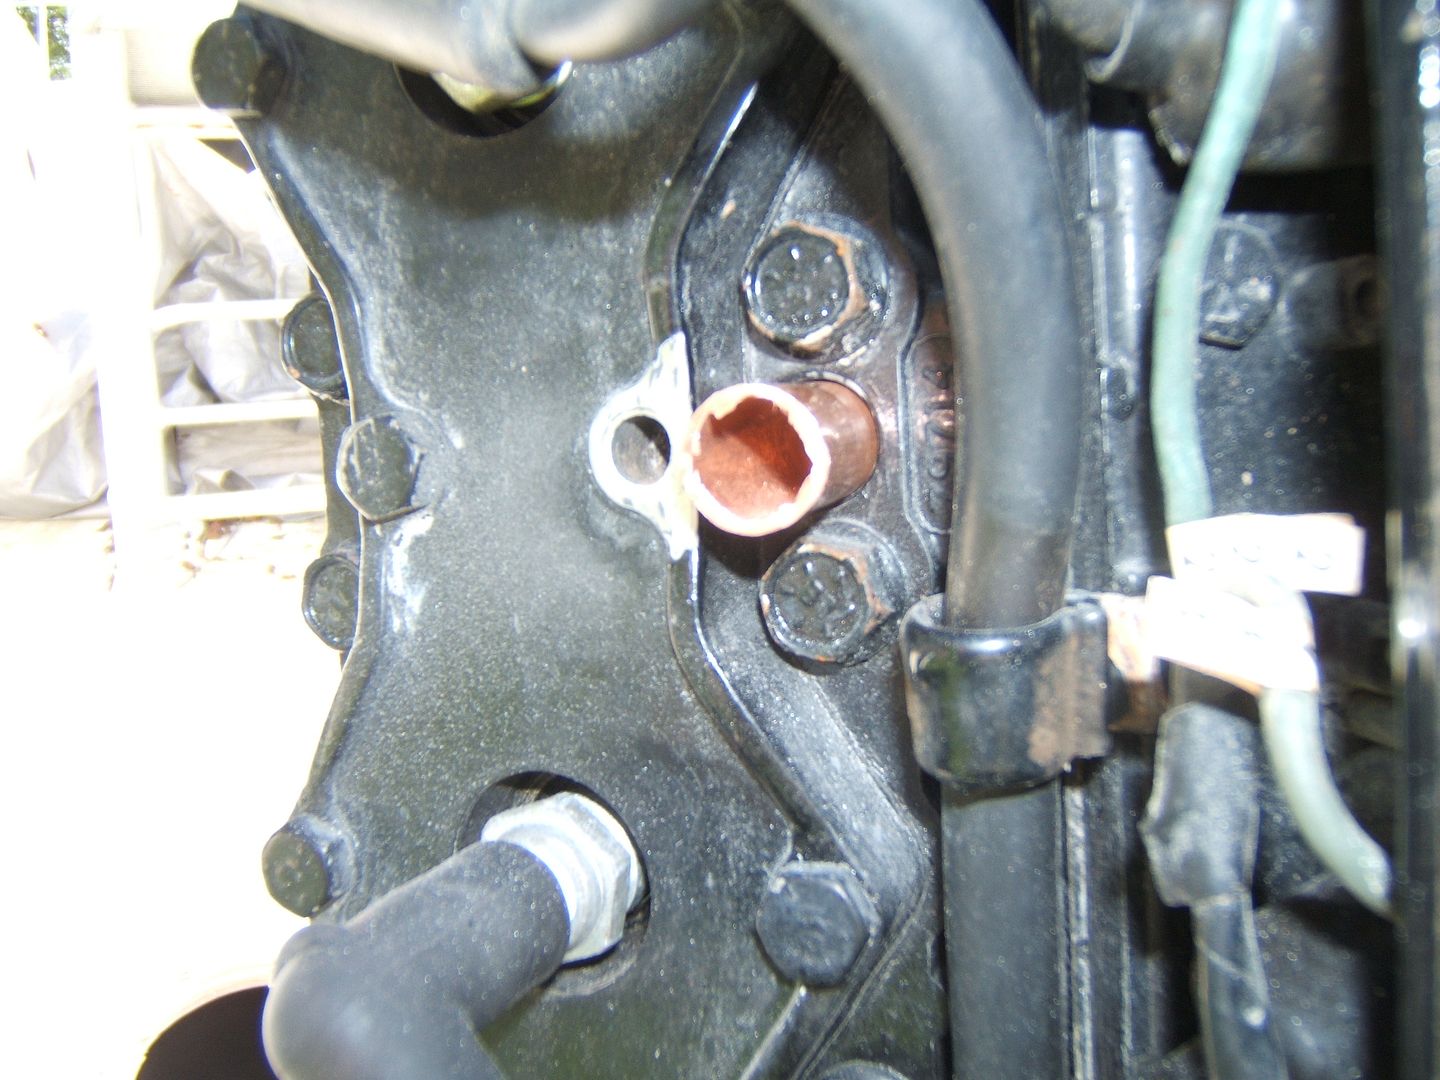
What I came up with instead, sort of by accident...while trying to determine the difference between the outside diameter of the sending unit and the inside dimension of the opening, I found that a piece of 1/2" copper tubing filled the space between the two quite nicely...
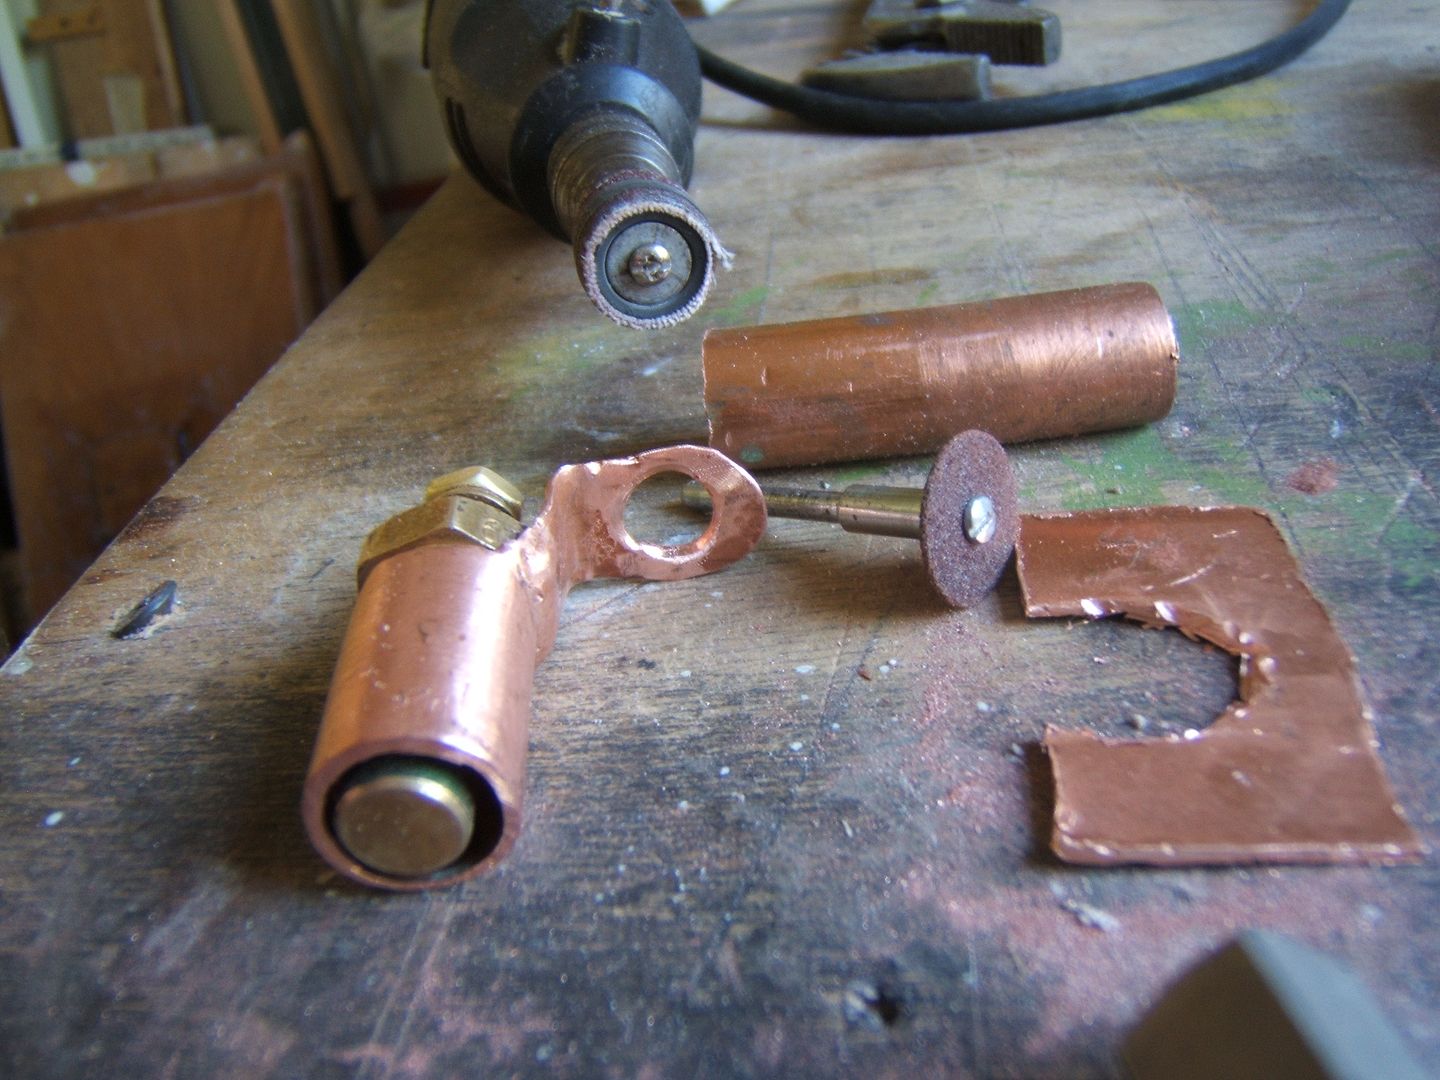
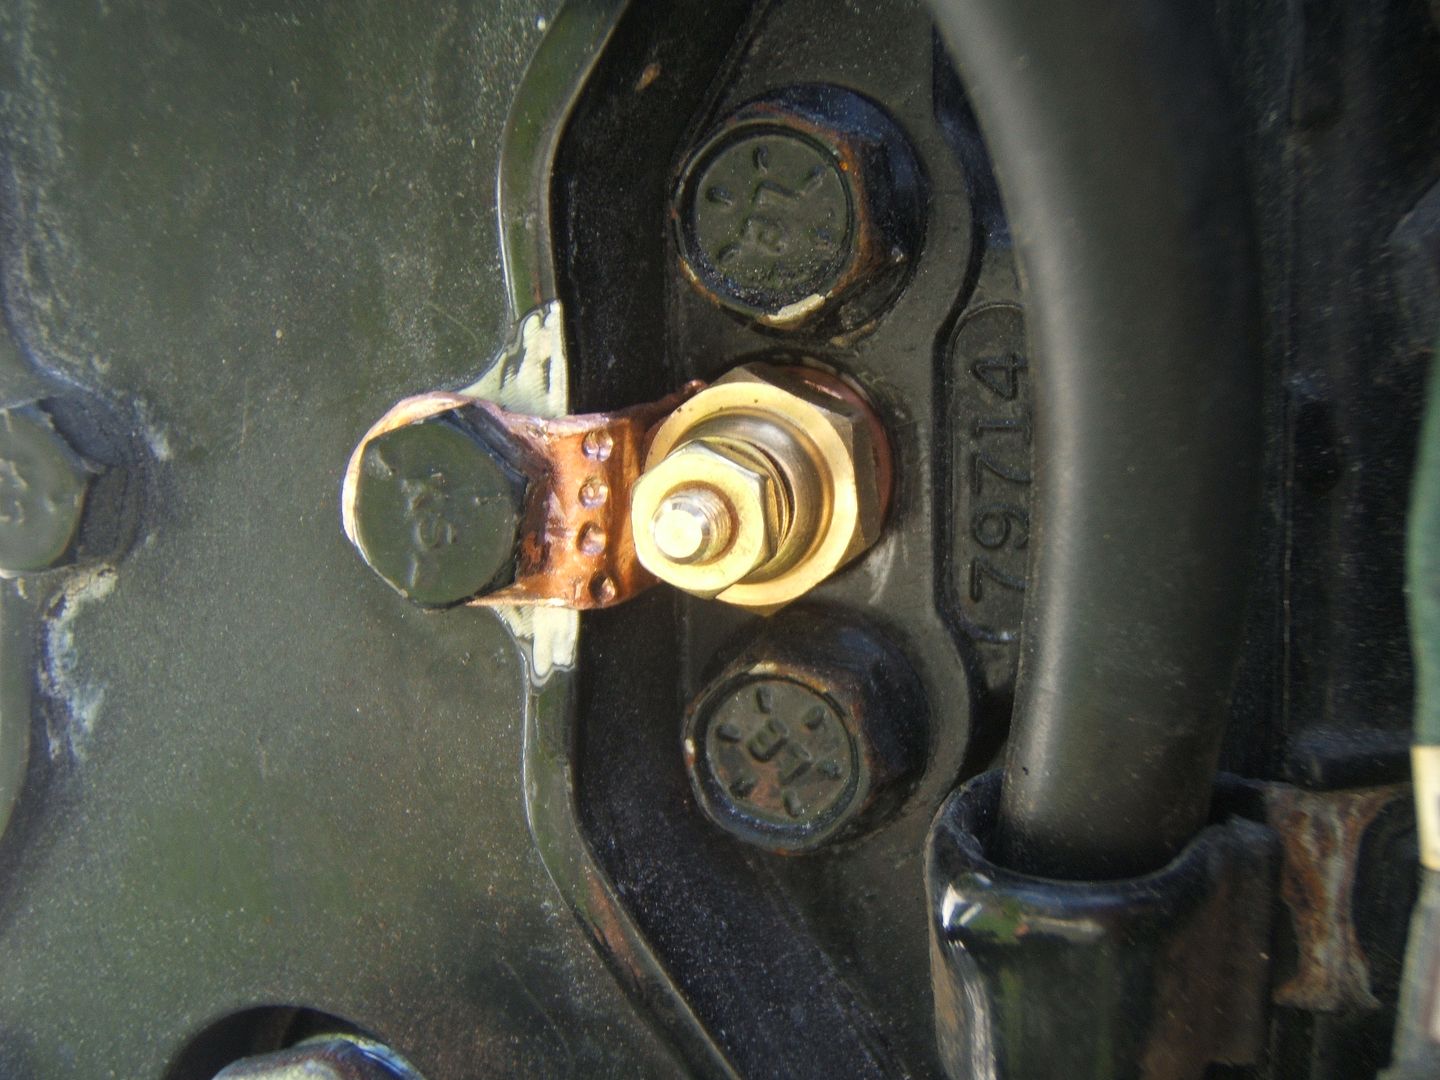
So, the pics below show what I was able to fab up as a mounting bracket...


The unit actually threads into the copper tube and is somewhat crimped in place, makes good contact with the bottom of the hole [which was scraped clean of any paint], the mounting bolt and bracket extension provide the needed ground and the four punch marks you see in the last pic, lock the whole shabang in place...a little touch up paint and basically I'll call this part of the resurrection project, done.
Hopefully all the different metals won't cause the entire engine to galvanically corrode itself into oblivion...LOL!
Final wiring and testing will have to wait till the next time I have some time to work on the boat.
Thanks and Happy Boating...
Finally, after much figuring I think I came up with a mounting solution for the temp sending unit...
Clearances wouldn't allow me to mount the sending unit using a Z bracket and I decided against making any attempt at loosening the head bolts and fabbing up the previously sketched bracket...
What I came up with instead, sort of by accident...while trying to determine the difference between the outside diameter of the sending unit and the inside dimension of the opening, I found that a piece of 1/2" copper tubing filled the space between the two quite nicely...
So, the pics below show what I was able to fab up as a mounting bracket...


The unit actually threads into the copper tube and is somewhat crimped in place, makes good contact with the bottom of the hole [which was scraped clean of any paint], the mounting bolt and bracket extension provide the needed ground and the four punch marks you see in the last pic, lock the whole shabang in place...a little touch up paint and basically I'll call this part of the resurrection project, done.
Hopefully all the different metals won't cause the entire engine to galvanically corrode itself into oblivion...LOL!
Final wiring and testing will have to wait till the next time I have some time to work on the boat.
Thanks and Happy Boating...


