Woodnaut
Chief Petty Officer
- Joined
- Jul 4, 2007
- Messages
- 634
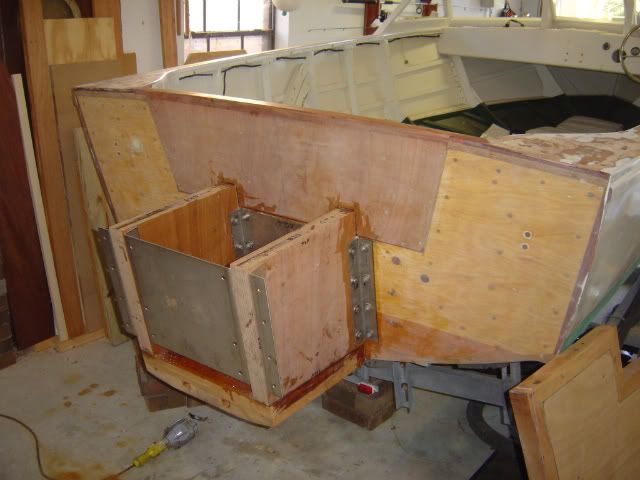
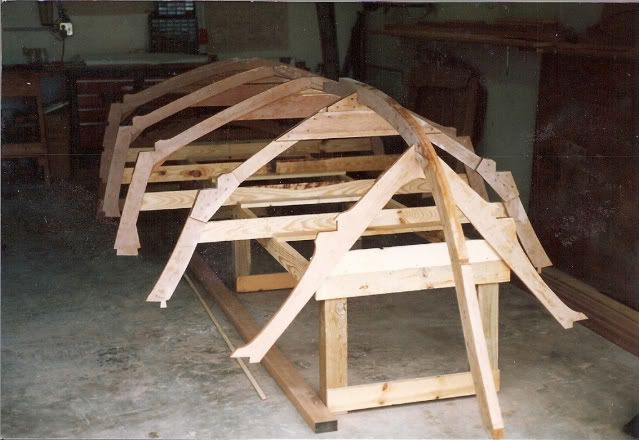
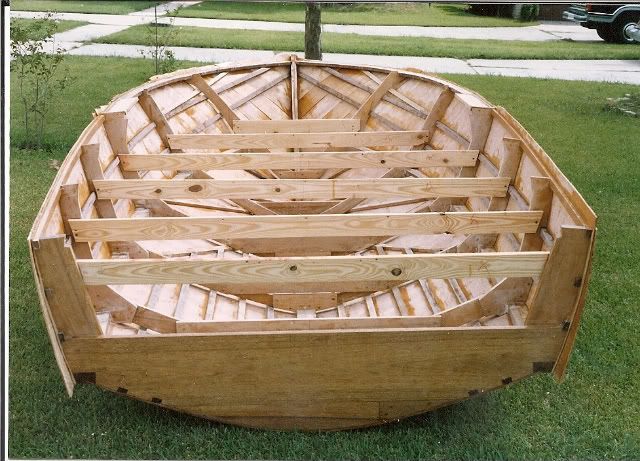
I wanted to build a boat, so I shopped around and found some plans by "Hartley". When they arrived they were dated 1966 and had the country "New Zealand" written in the title block. I had the plans and a few power tools, so now I needed some wood. I purchased some Philippine Mahogany, several sheets of marine plywood, a couple of gallons of Epoxy, a few pounds of ring shank nails, and about a zillion silicon bronze wood screws. I built a stock and cut out the frames. After a gallon or two of epoxy I had her framed up.
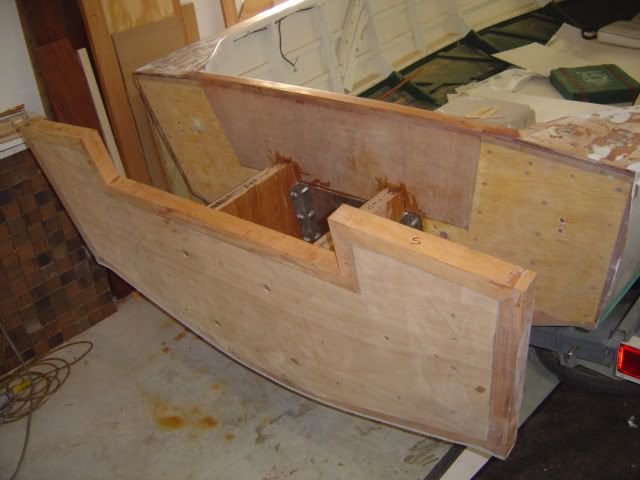
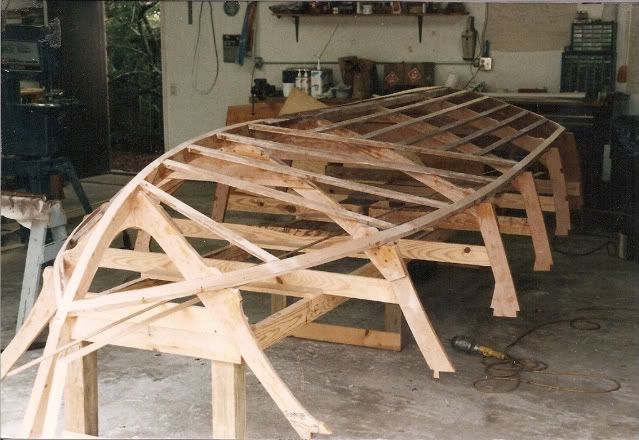
I ripped some boards, spread some more epoxy, did lots more sanding, and then I had the stringers in and the chine in place.
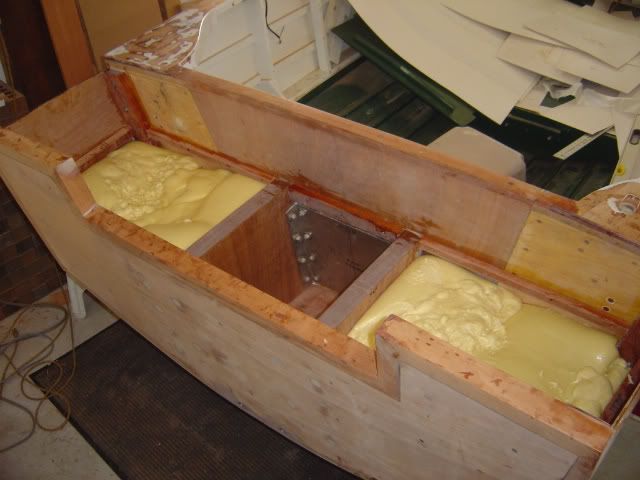
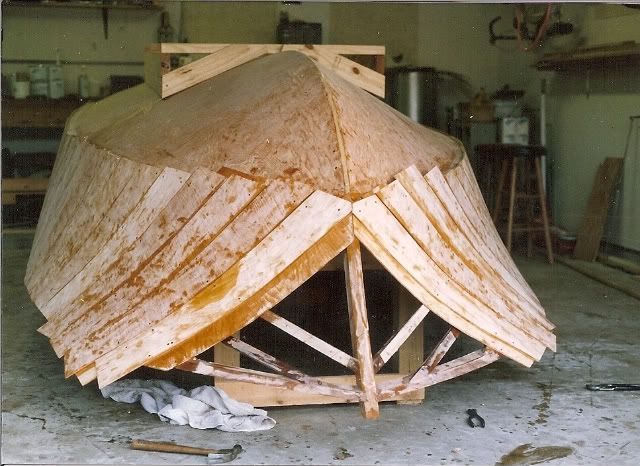
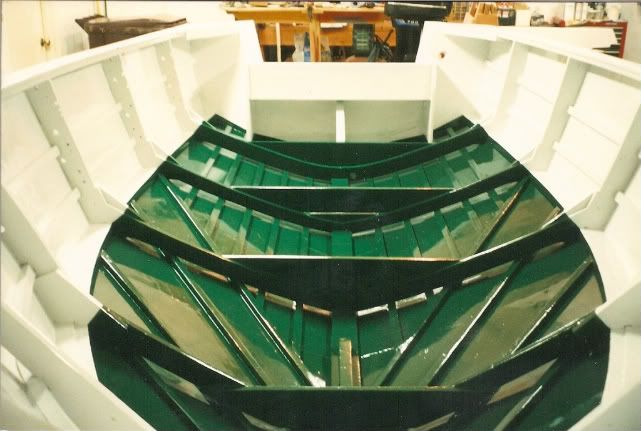
Two layers of 1/4 marine ply followed on the bottom and sides, with copious amounts of epoxy. This little boat has a flared bow, so two overlapping layers of 6" wide plywood strips were worked onto the bow.
Over she goes. A little trim work here and there, then it was flipped upside down again where she was sanded all over. The bow was faired with epoxy and silica filler. Then the entire hull was fiberglassed.
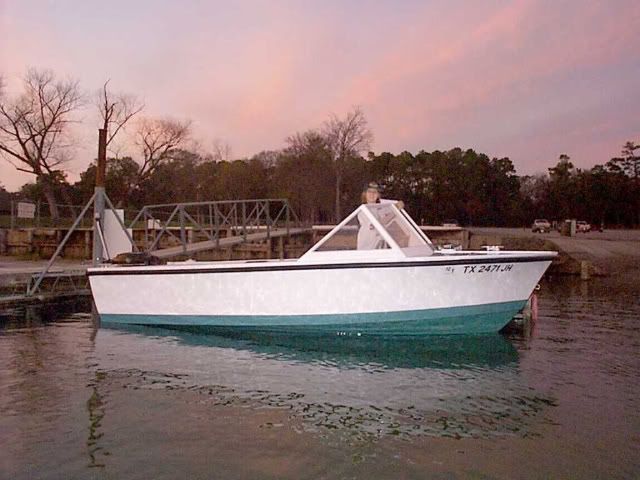
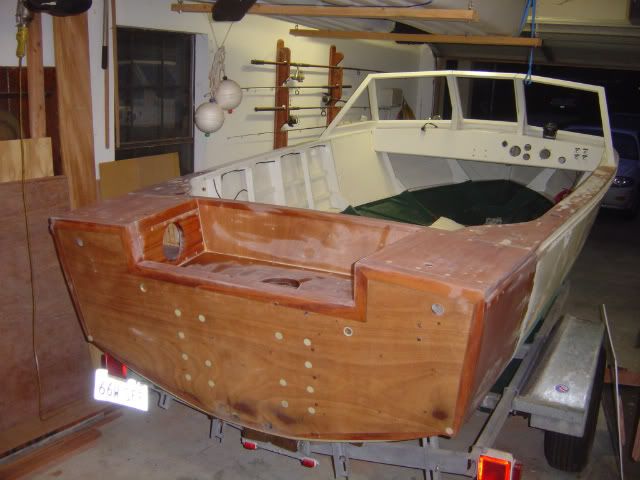
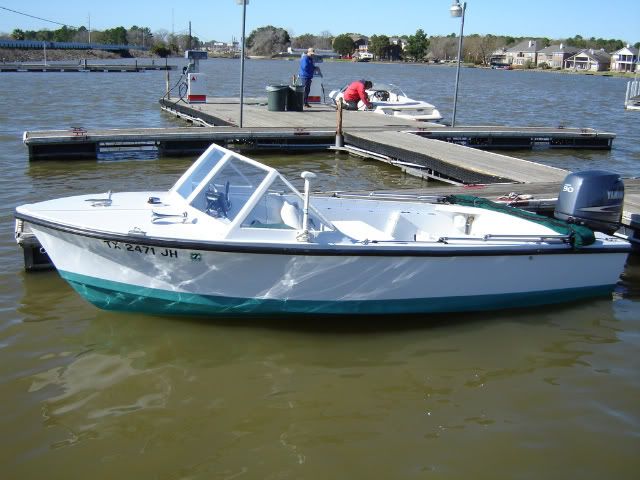
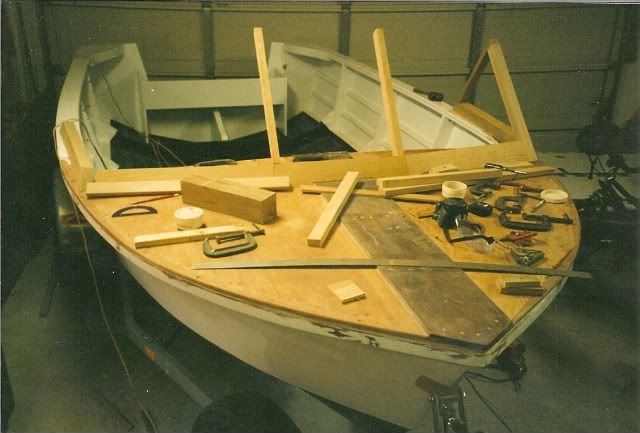
Time to start thinking about the topsides. There are some thick sections of mahogany in the transom, under the gunwales, and especially under (and in) the forward deck. She measured out at 14" 6".
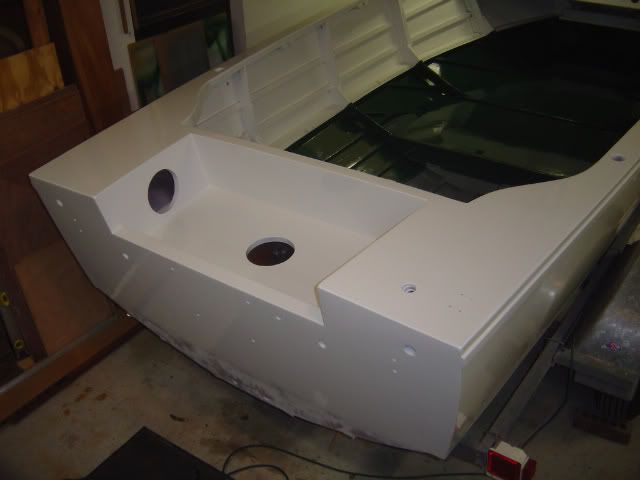
Building was easy. In addition to time and money, what you really need to build a boat is persistence. Preparation for painting seemed to go on forever. Man, that was a long, hot, humid summer. I turned my garage into a paint booth and sprayed the whole shebang. I'm glad I did. I got a really great finish that lasted for years. I used an Interlux single part polyurethane.
I ripped some boards, spread some more epoxy, did lots more sanding, and then I had the stringers in and the chine in place.
Two layers of 1/4 marine ply followed on the bottom and sides, with copious amounts of epoxy. This little boat has a flared bow, so two overlapping layers of 6" wide plywood strips were worked onto the bow.
Over she goes. A little trim work here and there, then it was flipped upside down again where she was sanded all over. The bow was faired with epoxy and silica filler. Then the entire hull was fiberglassed.
Time to start thinking about the topsides. There are some thick sections of mahogany in the transom, under the gunwales, and especially under (and in) the forward deck. She measured out at 14" 6".
Building was easy. In addition to time and money, what you really need to build a boat is persistence. Preparation for painting seemed to go on forever. Man, that was a long, hot, humid summer. I turned my garage into a paint booth and sprayed the whole shebang. I'm glad I did. I got a really great finish that lasted for years. I used an Interlux single part polyurethane.