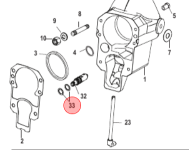
The following are the steps taken from the alpha service manual regarding this area in question.
Thru-bulkhead To Bell Housing Gear Lube Monitor Hose found in OEM Merc service manual number 14, Page 4A-46.
6. Apply oil to O-rings on anti-dribble valve and install into bell housing making sure that the shoulder on valve is completely flush to the bell housing face.
7. When installing new gasket the hole with silicon seal should be positioned around anti-dribble valve. Install sterndrive unit.
Bell Housing To Driveshaft Housing Anti-Dribble Valves Unless damaged during disassembly, or by heat, these anti-dribble valves should last the life of the drive unit. The bell housing anti-dribble valve is replaced as an assembly.
REMOVAL:
1. The bell housing anti-dribble valve can be removed with pliers and discarded, or it can be removed by placing hose clamp snugly over area “f,” and pulling out, with pliers on hose clamp and reinstalled if working properly.
2. The driveshaft housing anti-dribble valve can be removed by retracting the seal cup with a pliers or hook and discarded. Remove the check valve and spring and discard.
REASSEMBLY:
1. Driveshaft Housing - insert spring, check ball and seal cup - press or tap, carefully, on seal cup until outer face is flush with casting surface, as shown. Do not use sealant.
2. Bell Housing - coat O-rings with Gear Lube; insert check valve assembly into passageway, place 3/8 in. deep wall socket over valve end and tap into casting until shoulder surface “e” is flush with casting surface.
3. After units are connected and drive unit and gear lube monitor are filled with Gear Lube, check area “a,” and under bottom seam of mating surfaces, for oil leak. Recheck for oil leak after first use.
The valve itself utilizes the 2 O-rings.
Get the best deals for 18920a1 at eBay.com. We have a great online selection at the lowest prices with Fast & Free shipping on many items!
www.ebay.com
For the drive unit side you'd be looking at item number 4,
DRIVESHAFT HOUSING AND DRIVE GEARS

www.mercruiserparts.com


