Re: 88 force 85hp trim drop help.
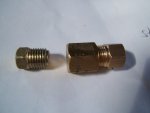
If I were a betting man, I would bet that it was the check valves in the valve body, however, it could be the "O" rings in the Tilt/Trim cylinders too. Here is some info on repairing both....just in case.
It could be the "O" rings in the Tilt/Trim cylinders, which aren't that hard to replace. The link below is a kit that will take care of that problem, if your Tilt/Trim assy. is the type pictured in the details of the kit. It does require a pin wrench to remove the top of the Tilt cylinder. A picture of the pin wrench tool is shown in the literature that comes with the kit. Also, the bolts that hold the Trim cylinder cover are prone to break. If you break one, you'll have to drill it out and replace it.
Rebuild Kit Chrysler Force Power Trim and Tilt Cylinder Seal Kit | eBay
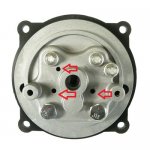
If that doesn't take care of it, most likely it is one of the "O" rings on one of the check valves in the valve body itself. Easiest way to work on it is to remove the Tilt/Trim motor and Valvebody assy. from the boat. 4 bolts hold the valve body to the motor/fluid reservoir. Note, when you remove the hydraulic lines, make sure you note which port in the valve body they go in. Also, when re-attaching the lines, it's very easy to cross thread the fittings. Be very careful when re-attaching the hydraulic fittings. Attached below is a picture of the valve body with the check valves removed and disassembled. On your year motor, the check valves are typically held in with a couple of circlips. Remove one circlip at a time and I use compressed air to get the check valve out. If you remove both circlips at once, there's a chance that the compressed air will blow both valves out, sending them flying across the shop to who knows where. Sometimes you can also remove the circlip and tap the valve body against a piece of wood to get the check valve assy. out.
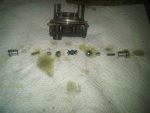
The picture below shows the disassembled check valves removed from the valve body and placed in order of assembly. Part numbers 1 -4 are the check valve assy. #1 is the body itself, #2 is the spring, #3 is the hexagonal check valve, #4 is the cap which is pressed into the check valve body #1. #5 is the shuttle valve with an "O" ring around it. There is a very small "O" ring that sits around the small nipple on part #3. That "O" ring is often the culprit. The part number that I use for the "O" ring is in a Briggs and Stratton lawn mower needle& valve seat repair kit 398188. Cost is $3 - $5 and you'll need two. I've also included a clearer picture of the valve body and check valves without the numbers.
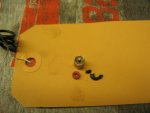
Third picture below is of the hexagonal check valve with a bad black "O" ring which is pretty much disintegrated, and the new red replacement. The new rubber piece fits over the nipple and the nipple pokes through the hole in the rubber seal.

Jiggz who is another forum member here, has come up with a way to remove the pressed in cap #4 using an automotive panel clip tool.
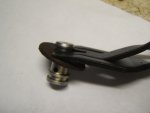
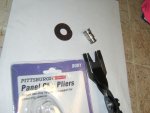
If you have some decent mechanical abilities, you should be able to accomplish the repair, however, there is a certain amount of risk involved in attempting this repair as you could completely disable the Tilt/Trim assy.


