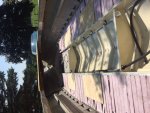
86 18' Starcraft SFM

Status
Not open for further replies.

Watermann

Starmada Splash of the Year 2014
Joined
Jan 12, 2013
Messages
13,787
That's how you get over the finish line, by moving forward and plugging away making progress. :thumb:
 

Candutch

Chief Petty Officer
Joined
May 8, 2015
Messages
637
I like the raised windshield idea. Got me thinking for the off season now.
 

Yooper77

Cadet
Joined
Jul 10, 2012
Messages
6
Thank you for the detailed description of your work. I'm in the process of a restoration on my 80s 18' SFM. I'm ripping up the currently. Carpet and vinyl has already been ordered, I'm staying away from Wise seats, too many bad reviews.
 
Last edited by a moderator:

MD28

Petty Officer 1st Class
Joined
Sep 1, 2016
Messages
222
y4masgQBrHPjnYUdPmFPQpSLj6rK-dfRELrSB4Rvl_E3zReZqOmXeA0sxK1dDwAo8z9hJsL9XjKMMkBeDiHnIe1Ya6b2wfkEvGWR2O4UEf0qeigiM2EDBHHtPEUIyAFYeRXH3SA3pxmkUfB2_TM6IMk7UbWejq6B0Wf3YKUcJX2YyMXZ1GO6RGWQrTZRTd8R28OB1p-tKTWcgO4sTPweXn3oQ


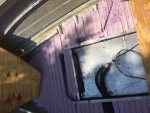
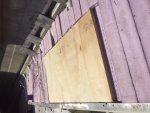
​Time for an update. Progress! Dry fit
 
Last edited:

MD28

Petty Officer 1st Class
Joined
Sep 1, 2016
Messages
222
No Title

.
y4mFKhAV6tAygMh-ebX4eDmGwWVKPRh4VS_2FEkPyzvemnL98mA1pWBUYxo3-C8joczmaI9RK3tvMyFxwMuARB0LQDTylGYyH7NelgJR4bhWaLb6I2akLTJd44a_yVMOxJcQM7GO_V-XtQdXznHCQsVt7FLxAZynurtcWAlZgvzBpbv2qjdYKjVQI6JOJ2TXpu58U7HxXIlA9te0my9NTpdnA

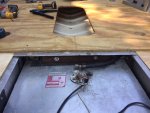
I cut the foam out for the plumbing for the live well
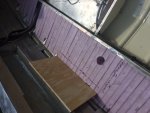
I also cut out backer boards for the joints of the plywood and made them long enough to be backers for the pedestals as well.

y4ml40Sn_ZnRgE7uiJWO-RZtg65qImd2gSWPaL7M9ZVF1_ZiZtoiWxCwmVy_53CJ2ouQAXo6amC-FzYfEW8nuHq4OVKUN1jSrm4dhhtprOiqw6SwvEdtv1bOGBGId3yeee0ak6Fbpe97-l9sR6cXexxcdQpAuftTIzbszst-Bm0lw2iswOlA3_pH_CO8p5qVZIShDRQCl7Al8tw2_G-L_Xibw

I used a drywall saw for the plumbing. The larger backers I used the table saw to cut the foam out one a time. I cut out the outline with a razor then numbered them. It went really easy, but is very dangerous for the fingers cutting off 5/8 inch. But I still have my fingers.

Next I laid the backers in their cut out little nests and put the decking back over top. I zipped some screws in to hold them in place and cut the holes for the pedestals in the backers. One area I couldn't use a plywood backer so I used a strip of aluminum which I secured with counter sunken rivets. I hope this all made sense!

y4m7Uhp3CajetwnuAFkOur4QZmlLSL5Hf5SOitElIb8fpFS4yqdPE2ErG7ZuI7TGki37--CtZV7Km7GR497kX19u6odaF8JG9EnWhZJpAN5gLh308nknbJyYufGOBzTJbjE3qBKXnlvCHSOi4_gPU9J9u1kJfQfJfY-_mn02QGs6HvFu4Ald3mQ8FjDEq2173hsN5Dgxgbg7oFXjl9732STng


y4mBt74NRhBGI_YMMDfD9YppFU_DrAVX5Z4-7todO4hhjG0uOCbXGbw0QnT23kjbc61HLLr28AQrfKsNzW3kzkLSKZWkua3nmiH8zU8AmOeC8ssnGDG0u8KxjevEQjOicj7SnfMOV6IAf1BXn-i0aobuXtZA9xB9rD7-yYrCoTm0oukS2DbxwhTE3y7gk1LyaY3xjbndKVw52_o28knFhQ6Xw


y4mf8TelC5LF64m5irpl3oeSE7Fw4oObOAP3s2P5vy7QVUg9xgysER_-Rk7IjBeUhQLSYC9C_QNos7RaYZhcrg8tVHahv4Z4hEpAV77_nDtIa87Mr7MQCEOogWZU75fy8ITPqC1yqb-DAmHu9bkbWzwTZHmp0r-uJinBlydbzRFG14m6z9mRzmgZ45MvkMQk1o3tLjXBk7WqEgWNBNzHaZojg
 

Attachments

  • photo274941.JPG
    photo274941.JPG
    121 KB · Views: 1
  • photo274942.JPG
    photo274942.JPG
    107.4 KB · Views: 1
  • photo274943.JPG
    photo274943.JPG
    100.3 KB · Views: 1
  • photo274944.JPG
    photo274944.JPG
    113.8 KB · Views: 1
  • photo274945.JPG
    photo274945.JPG
    128.2 KB · Views: 1
Last edited:

Watermann

Starmada Splash of the Year 2014
Joined
Jan 12, 2013
Messages
13,787
Dry fit looks really good, are you using T nuts on the underside for the pedestal bases?
 

MD28

Petty Officer 1st Class
Joined
Sep 1, 2016
Messages
222
Planning on using t nuts. On th last boat I had the screws always worked loose. This boat had the same issue as well. I like the idea of t nuts and some lock tite. I have the holes marked out for it. The next step is to get the bolts and t-nuts. I'm also going to get new hose for the live well fill and drain lines. Then I should be able to fasten the deck down for good. After I spar the backers that is.
 

MD28

Petty Officer 1st Class
Joined
Sep 1, 2016
Messages
222
y4mzLXuBVndXMCdar0goEbWLYq7OJMX9RkcIrGG5VmMehXXF5F5rums15AF-3jtAGLMfKEAVIbusTjmh6zQkzyjwYKlqUIzq9RtsHtC95IjVocwsWOqxHWZSn0b9xzmOZkIOJYx5ZSboKIQejZFDKglZ_iC5qdLaNNBpY5WiTgN6RUZreBfpavn2-EuDBSweulVdKZns4abolY49rLp5DNR4Q

​The deck is in!
y4mwd9LDhlydMSMWwvQq2EHpNt_3zXeN7oCn-gmYZjxQ2FB_qpr4pUfO6cvWJ2kbP6lleIRsODHVBBc-YfLHtOrcw4jHfnNEGfFg2iem07nzkBJ26G3encSyKj-CD5QwP--XPZLeSYa6dc7AtgPfHRo7_kpvcVj-fhYrllWMqElTbyKXF8zoLwJ7xgoGp7H5US6WjCfOYWT5CReD-HkkrpxJg

​Here is a closeup of the rivets and screws for the pedestal backers. Might I recommend anyone who does it this way to use https://www.rivetsonline.com/
​Also known as Jaycee sales. They have outstanding customer service. I ordered the wrong size about 2 months ago and they were very accommodating. Thanks again to waterman for the rivets sticky thread!
y4mgB953DMh7M67AxBhlxpLtxgbt2VnNLDi0EMxLtOZTzu_BnzAQfyHzpZuQkfOjoEVsGyqaNIMOJpcQBoGo0TnmYU_RbWHKX0TGfkxp2kUdNHurBMvcpkjdIFlCeFk457lDYkOeAeDLfwuJB-Ub9UJrmIXnj7127O86wG_Bjf6p4wqjkPjCWgznGU-sXv0wqhKH4LS0FcUzi0ubNTVXG5M4Q

​Here you can see the difference with the large flange rivets. Also the countersink with a 5/8 spade bit. Waterman, I think you did this with your last boat. What did you use to fill in the low spots? I'm thinking of using construction adhesive such as liquid nails and leveling with a puddy knife
 

Watermann

Starmada Splash of the Year 2014
Joined
Jan 12, 2013
Messages
13,787
Yeah now there's a milestone reached getting that deck down. :encouragement: things seem to take right off afterward.

I used some left over marine tex to fill in the counter sunk holes, I think the adhesive might shrink up on you when it sets up but maybe not that much depending on the kind you use, the gorilla stuff in the tube I used on my trailer bunks and it leveled pretty well after hardening.

Nice fit on the decking BTW, that's not an easy feat either. :thumb:
 

knezzer

Petty Officer 1st Class
Joined
Apr 8, 2012
Messages
214
The deck is in! Foam looks nice and tight! Paint is awesome as well.
 

MD28

Petty Officer 1st Class
Joined
Sep 1, 2016
Messages
222
Id like to go with vinyl flooring for the deck but I'm a little overwhelmed when I try looking into it. Is there a quality difference between Marideck and Nautolex? What mil have some of you used? I see 34mill and up. I like the 34 mil price but I'm guessing it is less forgiving when it comes to the subsurface.
 

Watermann

Starmada Splash of the Year 2014
Joined
Jan 12, 2013
Messages
13,787
No matter what the mil you'd be best served smoothing out lumps or filling any holes for longevity. I have nothing but good to say about the Nautolex in both my boats.
 

DirtyHarry83

Petty Officer 1st Class
Joined
Jun 5, 2012
Messages
305
Not to bring up an older portion of your thread but that windshield raiser looks great. I plan on doing something similar.
I look forward to your progress.

I used vinyl flooring from Nautolex. I have to say the rollers are the fun part. I rented a 100lb roller to get the glue and vinyl pressed. for the edges where the roller couldn't reach. I used a hand roller or even my hands. I had a decent amount of glue come out at the bow and the stern. I left the over flow with the mind set of more area that repels water. If you want to remove the over flow and it's not covering the vinyl in a high visibility area then let it sit and cut it out with a knife after the glue sets.
 

crankbait cowboy

Chief Petty Officer
Joined
Mar 25, 2013
Messages
574
looking real fine md28, and I have not installed but also went with the nautolex as many before me have, and for what its worth am planning marine text for my rivet countersinks
 

MD28

Petty Officer 1st Class
Joined
Sep 1, 2016
Messages
222
Thanks guys. It may be some time before I get to the vinyl due to the cost of it. I had a head gasket go out in my van so... I am now postponing that until bonus time at work. So now I'm working on the outboard. It was an ugly mess so I'm re painting it.

I haven't come to a decision on how I finish my windshield bumper uppers yet. I was thinking carpet, but I have no idea how I would wrap that. So I might waterproof it with epoxy and then paint.
 

DirtyHarry83

Petty Officer 1st Class
Joined
Jun 5, 2012
Messages
305
MD28 my two cents. If it's wood on a boat, seal it with something. Carpet glue from what I've seen isn't enough to prevent water penetration. Nothing worse than a few years down the road (depending on usage) the wood gets soft from exposure. Something I try to live by an ounce of prevention beats a pound of cure.

I really do understand epoxy isn't cheap. Sorry about the van! It's always fun to have a project hi jacked by another project!
 

MD28

Petty Officer 1st Class
Joined
Sep 1, 2016
Messages
222
MD28 my two cents. If it's wood on a boat, seal it with something. Carpet glue from what I've seen isn't enough to prevent water penetration. Nothing worse than a few years down the road (depending on usage) the wood gets soft from exposure. Something I try to live by an ounce of prevention beats a pound of cure.

I really do understand epoxy isn't cheap. Sorry about the van! It's always fun to have a project hi jacked by another project!

Oh I plan on sealing it for sure! I was thinking epoxy on the exterior for better protection and smoother finish for paint.
 

MD28

Petty Officer 1st Class
Joined
Sep 1, 2016
Messages
222
Its been a long time since I updated again. I left the boat for a while and started to clean up the motor. I removed the old decals and sanded it down. Fresh paint does wonders. I had to remove the rubber seal on the bottom of the cowl. It was nasty and off colored white from age. I found it is no longer made or in stock so I replaced it with 3/8 fuel line after seeing that idea on iboats. I include pictures of the jig I made with a razor to cut it straight on one side.
y4mzqfR-26rahbqHPj1S6q0qflV8oExOflO3bAC97a6zOeQk0oVyt0aZ_wct9ZLykjJKk7ZBsA6-7GRImTpLFMAvG7F1pK1NoLtQlQfYa98bsjYeCJN_-Vztmcx6tejaZTxH58E8tZDSqaCudEwvXIebgMPLpXWfOC7t3paSln1OrFETpPmuqi_zhtUiXvrrNNh7ZXqkAfmAZya-OaHhPYI3g

a close view of the ugly....
y4mMpfB-Imr1dlR0cf4WWrAW4zSq_yG0GenTCgGPAmthnJSLd71utD6lSJYpIBgdW93uY_7dEwh0R_5txRTOL2CQnzOa0xbYX5H8cz3RF9GC4MPB4UCSxd2TLpBJzDe7yDJahPfb7EKQ_NQWzS7yzDLK8UtsobzHRl-SuHJmBN3NPReROGKsQW5bGPkvN-nSMDmXX0ZaRBDp8jJ1jbDOv7n4A

y4meY6OCZCzd4UaUvGPmsKJQRJcVAG83mAImlZshihpi8zQN23N5cBSFEoqoEkfBSK90-fYq7tW0TeKvNRRpz5iR3SiHvp00Cr2kUhbf9PhuPwxvX4ct5Lqy-8aQxdyttmlQXTUvmb6k4s4gEkjto5p_UeRJ1zsgJ4TYskDUCQzv9RIMfDbQntKiqnzLz2WLwqWBD9ckl8wN0Hy7GuHe5FPzg

​jig on a saw horse with a fixed blade razor that has a hole in the middle to run a screw through. I added a screw on the top near the business end to keep the razor from creeping up as I pulled the hose.
y4mps8T-1hKu42kk4A9lrLK40Gpu_hrQoBOurizT0av2QhTHajNXY_zQXlLeMHNgKShzKOyYfAGMITBZMgW90ZhD024JxLggkGBV80_w9r5fQj_LBNBlZVqDpOLRhzykhPa2WcCstozbB4j1vNq91H4XxyP2ZdLNvRYDGvgKH0ZrRmAI0mjtGCDfVMYrJ7s230M-etJHUq6zCBNuAuSyCYcyw


I glued the hose on the inside with a weather stripping glue. hopefully it holds.
 
Status
Not open for further replies.
Top