'74 Chieftain 21' I/O is home, the rebuild begins !

Status
Not open for further replies.

Watermann

Starmada Splash of the Year 2014
Joined
Jan 12, 2013
Messages
13,786
Oh yeah no way someone did that stiffener job at home, and retro fit would be my guess too as the factory would put all the seam rivets through the stiffeners too rather than over the top of them. I seriously debated my placement of the stiffeners I put in my Chief but I just couldn't bring myself to drill out all those good rivets on the rib ends and I was mostly worried about the possible spray rail chine defect more than bottom rib end cracks in my case. I also added marine ply as a firing strip to the tops of the ribs (to add height for the belly tank) and then the decking so it should limit flex and add some strength. None the less if these boats aren't operated with compromised rotten decking and side panels with loose rivets the chances are they won't have any issues.

The forum here is the next best thing for me when I'm not rebuilding a boat. It's great to be here watching guys return these wonderful old boats to their former glory and then some. Thank you for taking the time to share your rebuild project!
 

oldhaven

Chief Petty Officer
Joined
Aug 30, 2015
Messages
576
If the stiffeners are a retrofit, the technicians seem to have hit the original rib rivet holes, so the deck must have been good and was just put back in using the same rivet holes.

I have never seen anyone comment on the scribed lines on the hull inner bottom that can be seen in the picture at post 40. I have them in my Chief and in some cases they seem to have been used for rivet, outer keel or stringer alignment, but not always. Does anyone know whether they had any other purpose?

In looking more closely at your pocket door, I would have a bit more trouble since my 18' boat does not have the space between the cabin berth supports and the bulkhead that a 21 does. I do not want to move the cabin bulkhead or build a pocket on the outside, so it is back to the original design. I still like what you have there.

Ron
 

jbcurt00

Moderator
Staff member
Joined
Oct 25, 2011
Messages
25,030
There has actually been some debate about the scrib lines, some are found along the inside of the chine, possibly from someone using razor knife to trim the original deck vinyl. And that those razor scribs might contribute to the chine cracking.

Other builds have had scribbed guides for the rivets as seen here.

On a production line, the scrib is a guide, hit some, missed some in a production cycle.
 

FrankenCub

Petty Officer 1st Class
Joined
Dec 29, 2015
Messages
296
Oh yeah no way someone did that stiffener job at home, and retro fit would be my guess too as the factory would put all the seam rivets through the stiffeners too rather than over the top of them. I seriously debated my placement of the stiffeners I put in my Chief but I just couldn't bring myself to drill out all those good rivets on the rib ends and I was mostly worried about the possible spray rail chine defect more than bottom rib end cracks in my case. I also added marine ply as a firing strip to the tops of the ribs (to add height for the belly tank) and then the decking so it should limit flex and add some strength. None the less if these boats aren't operated with compromised rotten decking and side panels with loose rivets the chances are they won't have any issues.

The forum here is the next best thing for me when I'm not rebuilding a boat. It's great to be here watching guys return these wonderful old boats to their former glory and then some. Thank you for taking the time to share your rebuild project!
I think you made the right decision doing your stiffeners the way you did, I don't think the difference would have been that great to tie them in to the rib ends. Maybe in an engineers eyes, but not every day practicality. Not to mention how much time and frustration it would have added.
So far the only loose rivets I've found have been some on the side wall points and a few in the floor where it was rotted, everything else is tight. I've been looking for cracks while cleaning the floor also and haven't found any yet. Maybe I'll get lucky. The rubrail on the other hand, well, it's been mashed at the transom. The caps are good so I'm guessing the rails have been off for something and weren't setting right so they were tuned up with a BFH, or the caps have been replaced at some point in time after significant damage. They are still usable, just not pretty under the caps.

If the stiffeners are a retrofit, the technicians seem to have hit the original rib rivet holes, so the deck must have been good and was just put back in using the same rivet holes.

I have never seen anyone comment on the scribed lines on the hull inner bottom that can be seen in the picture at post 40. I have them in my Chief and in some cases they seem to have been used for rivet, outer keel or stringer alignment, but not always. Does anyone know whether they had any other purpose?

In looking more closely at your pocket door, I would have a bit more trouble since my 18' boat does not have the space between the cabin berth supports and the bulkhead that a 21 does. I do not want to move the cabin bulkhead or build a pocket on the outside, so it is back to the original design. I still like what you have there.

Ron
Yeah I noticed that there weren't any spare holes for the floor. Maybe this was done early on after the sale ? Ah yeah, you're right bout the 18'er not having room for a pocket door. Never thought of it till you mention in and I remember looking at Watermann's cabin in his build. The 21'er has a cabinet and sink that make for plenty of room. Mine is missing the sink though so not sure how I will go about using the room left, yet. The next couple of days aren't supposed to be so great so I'm sure ideas may be running in and out of my head while I try to sleep :D I could use a bit of a break anyway after gutting her, my back and leg have had all they can take for the time being :(

There has actually been some debate about the scrib lines, some are found along the inside of the chine, possibly from someone using razor knife to trim the original deck vinyl. And that those razor scribs might contribute to the chine cracking.

Other builds have had scribbed guides for the rivets as seen here.

On a production line, the scrib is a guide, hit some, missed some in a production cycle.
I can see how any scribe marks may cause an issue. They make for good stress risers. When rebuilding engines we've always tried to deburr or smooth out anything like that for an engine that will be hammered on. Chances are they will get blown up so no sense leaving any reason to hasten it. And I've done a fare share of siding houses when aluminum was popular, I'd scribe the siding with a razor knife and flex it back and forth a few time to cut it to size or make cutouts for windows.
On another note, I guess I should chalk this up as another lucky break ? No scribe marks, they are what appear to be marker. I just went out to get a closer look after reading this, dragged my fingernail across them and it's smooth across the marks. Some parts look faded out like a marker running out or dirty and some spots wider. I looked around each row of rivets and can feel nothing. Unless you're seeing something I'm missing and I'll go back out and look again.
 

FrankenCub

Petty Officer 1st Class
Joined
Dec 29, 2015
Messages
296
Did forget to mention all the foam is bagged for it's last ride and the hull vacuumed out. The transom cap is off and ready to cut that small section of the gunwale that sticks over the transom wood. This should be interesting, the wood is so swelled and waterlogged it's gonna be a fight. Might be a good idea to pull it when it's frozen lol, at least that way if there's any part that would normally want to fall off it will stay put :D
 

FrankenCub

Petty Officer 1st Class
Joined
Dec 29, 2015
Messages
296
We're expecting some decent weather this weekend so I will try to get at the transom if I can get some help getting the outdrive off. With part of the cap going over the transom, is it ok to trim the aluminum back so I don't have to pull the whole cap off ?
 

Watermann

Starmada Splash of the Year 2014
Joined
Jan 12, 2013
Messages
13,786
Isn't that the gunnel and you've already removed the transom cap section? I cut my gunnel with a saws all and right through the screws that are on a bracket just underneath inside the gunnel. The transom cover covers up 1.5" you cut off the end.
 

oldhaven

Chief Petty Officer
Joined
Aug 30, 2015
Messages
576
Cut through the metal on the left side for about 2 inches, then bend the metal back and pull the transom. It can be put back later and will be under the caps so no problem.
 

FrankenCub

Petty Officer 1st Class
Joined
Dec 29, 2015
Messages
296
Isn't that the gunnel and you've already removed the transom cap section? I cut my gunnel with a saws all and right through the screws that are on a bracket just underneath inside the gunnel. The transom cover covers up 1.5" you cut off the end.
Yep it's the gunwale, I was thinking as the whole piece for some reason, like front to back one piece. But now remember it's all split in sections. Sawsall is what I was thinking knowing the wide transom cap would cover it all but wasn't sure if I should remove the rectangular section or cut and bend as oldhaven is referring to.

Cut through the metal on the left side for about 2 inches, then bend the metal back and pull the transom. It can be put back later and will be under the caps so no problem.
That did cross my mind but then I got thinking when I go to straighten it, will I be able to get it to lay flat. Probably would I guess, I have body hammers I could work it back flat with again.
 

Watermann

Starmada Splash of the Year 2014
Joined
Jan 12, 2013
Messages
13,786
I cut the pieces off and tossed them, it serves no purpose to keep them except to snag you while working on the inner transom skin.
 

FrankenCub

Petty Officer 1st Class
Joined
Dec 29, 2015
Messages
296
Thanks Watermann, sounds like a plan to me, I'm sure I would bleed well from a piece if aluminum bent up looking at me. I'm going to try to snag the neighbor kid this weekend for yanking the outdrive, then get the engine slid forward. This is the only piece that is questionable whether I can use it as a template or not. I should have pulled it while it was frozen but I'm just not into the cold right now.
 

Grandad

Lieutenant Commander
Joined
Jun 7, 2011
Messages
1,504
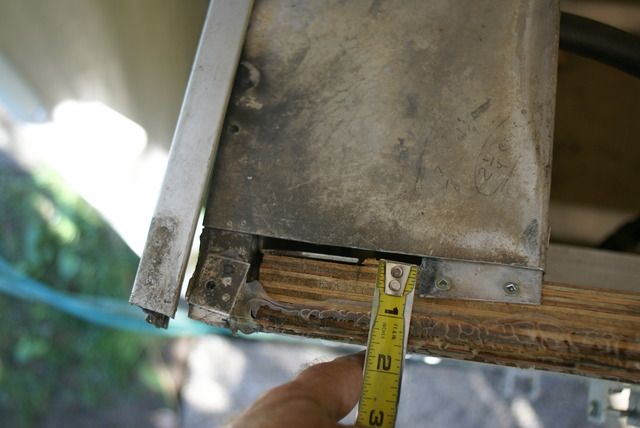
I agree. Just cut it off, like I did. This picture is after my first transom repair; a stopgap replacement of only the top 11" or so and before doing a full replacement. Note your transom thickness before you start ripping and tearing. - Grandad
 

FrankenCub

Petty Officer 1st Class
Joined
Dec 29, 2015
Messages
296
Thanks Grandad, I will get a measurement in the keyhole. I think that's the only spot that isn't swollen and rotted. I talked to the neighbor so he's lined up for tomorrow for a helping hand.
 

FrankenCub

Petty Officer 1st Class
Joined
Dec 29, 2015
Messages
296
Well my neighbor wasn't around today but I got to busy anyhow. It sure wasn't warm like they forecast, I don't it got above 30. The outdrve is off, engine is slid forward, and gimble assembly is off. Through the key hole it's lookin like I'm right at 2" thick. Here's where she sits as of now.


One thing is for sure, the previous owner that used it sure wasn't afraid to grease everything :D Still have plenty of parts that are loose from wear so I'll be making a list of what needs replacing.
 

jbcurt00

Moderator
Staff member
Joined
Oct 25, 2011
Messages
25,030
The 2in thru the keyhole includes the 1/2in ply 'horse collar' on the inside so you're good w 1.5in for transom ply
 

FrankenCub

Petty Officer 1st Class
Joined
Dec 29, 2015
Messages
296
Ok good, I thought I read somewhere that 2" was within range. That includes the skin thickness too. I was going to try to pop the transom out today but running out of light and my back has had it for the day anyway. Tomorrow they are calling for 49 so should be a better day for that. Have a 2x4 and bottle jack to push it up through the key hole with so it should go well.

Was happy to see that the trim pump worked, after I put oil in it. The inside lines don't look so great so I think one of them is leaking and will replace them both. The U-joints feel great, haven't checked the gimble bearing yet but the amount of grease that is everywhere I wouldn't be surprised to find it in good condition too. I may replace it anyway just to be on the safe side.
 

smevil

Petty Officer 2nd Class
Joined
Apr 5, 2011
Messages
123
You are not wasting any time at digging in deep, That is a really good project you found yourself. I see you have a vision for your project, that's the hardest step. I lay in bed and bounce back and forth or this or that, But that the fun part for me. Enjoying your posts, keep it coming please.
 

FrankenCub

Petty Officer 1st Class
Joined
Dec 29, 2015
Messages
296
Thanks smevil :) I've been bouncing a few things around in my head also lol. Still haven't decided exactly how I'm going to do the helm, but I know I don't want the wood piece that goes all the way to the floor. It may end up being aluminum or stainless if I can reinforce the underside to not flex under torque of turning the wheel. And working up a plan in my head to build the engine cover. The one that was there was just a thrown together mess. I should be in bed so I can get up early and get back at it in the morning but been too busy reading other posts to get ideas and looking and I/O parts that I will be needing.
Will post more progress tomorrow ;)
 

FrankenCub

Petty Officer 1st Class
Joined
Dec 29, 2015
Messages
296
More forward progress today. Was hoping for a beautifully warm day like the weather guesser claimed but it didn't happen. Did get the ransom out though. It wouldn't move for the longest time. I knew there were 2 last stainless screws at the bottom holding but I figured the rot wouldn't hold at all. The heads were stripped so I couldn't turn them so I ended up twisting and prying enough to get vise grips on them. The transom was frozen enough that they held really good. Then the International went to work.


Have some decent amount of corrosion, mostly where the skin was bolted or screwed up tight. Before any cleaning.


After some time with a wire brush on my drill.


This spot is pretty deep. May be a couple others like.
 
Status
Not open for further replies.
Top