'73 Crestliner Muskie Transom

dawitner

Cadet
Joined
Jan 20, 2010
Messages
29
Well here goes ! I attempted to replace the drain tubes in this old girl. First one went well, good wood and solid. You know the rest of the story.

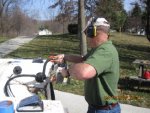
I spent 2 days taking the transom out with a surgically precise chain saw. Got the stringers cut out and the inside with a Harbor Freight vibrating cutter tool. Greatest 39. bucks I ever spent.

I had to cut the inside upper corners off the inside of the transom and plan on replacing with wood all the way to the floor then tie the stringers into that. I will wrap all the wood with glass then glass the stringer to the inside. Once that is done I plan on using Seacast for the transom.

If you can drop me any hints it would be greatly appreciated.
 

Attachments

  • boatinside.jpg
    boatinside.jpg
    25.6 KB · Views: 0
  • boatsaw.jpg
    boatsaw.jpg
    33.4 KB · Views: 0

seamorewaterVIP

Petty Officer 2nd Class
Joined
Jan 6, 2010
Messages
184
Re: '73 Crestliner Muskie Transom

I spent 2 days taking the transom out with a surgically precise chain saw. Got the stringers cut out and the inside with a Harbor Freight vibrating cutter tool. Greatest 39. bucks I ever spent.

:eek:Wow check out the Pic he really did use a chainsaw Way to go dawitner I would have cut my boat in half with that thing! When I read that I thought you meant on of those grinder things with the chain saw wheel on it. koodo to you betch ya got it done way faster than I will.:(

cept from the pic it looks like you cut the outer skin off as well was that you planed or am i looking at the pic wrong? Not sure what I am seeing. let me know cus depending on that answer Ive got more questions
 

dawitner

Cadet
Joined
Jan 20, 2010
Messages
29
Re: '73 Crestliner Muskie Transom

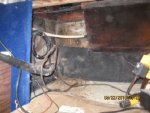
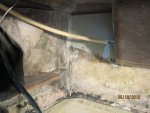
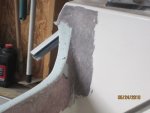
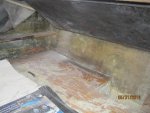
No I did not cut the outer skin off. Both skins are intact with the exception fo the upper "wing" parts on both sides of the transom. If you look at the pictures, the one on the left is a picture of the inside of the boat, on the starbord side looking up. I have removed about a 8" square piece of the inside skin that was way too thin to hold the sea cast. I plan on replacing that piece with a form fit piece of ply covered in fiberglas then tying the stringers to that.
 

dawitner

Cadet
Joined
Jan 20, 2010
Messages
29
Re: '73 Crestliner Muskie Transom

The chain saw really was not that bad, remember, a chain saw will not cut sideways, only down. So, if you keep it fairly steady and stop and look a bunch, its not too difficult. The worse part is getting covered with oil and sawdust.

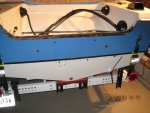
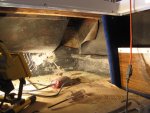
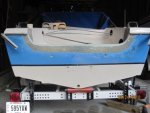
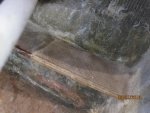
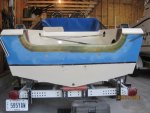
Here are a couple more pictures. The one on the left is obviously the rear of the boat. The other is the port side of the boat from the inside looking towards the rear. All of the black is the inside skin and the vinyl covering the stringer and port inside of the boat. The greenish you see in the upper right of the picture is the inner side of the outside skin. I had to remove the inner skin as it had too many holes in it and was too thin. I plan on replacing this piece with ply covered with glass.
 

Attachments

  • boatrear.jpg
    boatrear.jpg
    92.1 KB · Views: 0
  • boatport.jpg
    boatport.jpg
    144.4 KB · Views: 0

dawitner

Cadet
Joined
Jan 20, 2010
Messages
29
Re: '73 Crestliner Muskie Transom

Well finally got all the prep work done and poured a new Seacast transom on Sunday. It went great !!!!! no leaks and the Seacast performed as advertised. The only little trouble I had was where the resin oozed around the plywood dams on the inside and started to harden. I had to chisel it out to get the dams out.

Yesterday I started grinding and prepping the outside for the final cap. On the inside I am going to tape the corners where the transom meets the floor and sides of the boat then apply a layer of 1708 biax over the entire inside skin of the transom. This will cover the expoxed Seacast where the inside skin was bad and had to be removed. This is probably not necessary but great for my piece of mind.

The last thing to do is to extend the stringers on the side of the boat and tie them back into the transom. They were rotted and not tied in previously.

Again probably over kill but I will be happier.

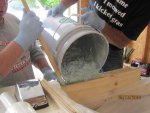
The first picture is the actual pouring. Use the funnel, it made it a lot easier. Plus I did not form the upper sides, for the first pour we filled the transom about 80% full then on the second pour filled it up to the top of the transom and then packed the two sides.

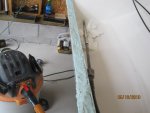
#2 rough exterior of the transom. I will grind this down, taper the existing glass then glass over and blend the edges.

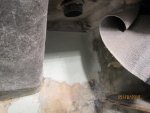
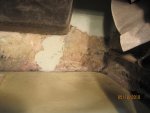
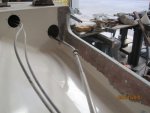
#3 & 4 inside the transom on the port side, note the green Seacast where the inner skin was missing.

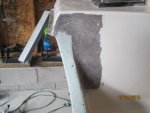
#5 Starb'd side inside the transom. Note the stringer where I had to cut it back. This will have to be extended and then glassed to the inside skin of the transom.


transom 001.jpg

transom 002.jpg

transom 003.jpg

transom 004.jpg

transom 005.jpg
 
Last edited:

ezmobee

Supreme Mariner
Joined
Mar 26, 2007
Messages
23,767
Re: '73 Crestliner Muskie Transom

Really really nice work.
 

dawitner

Cadet
Joined
Jan 20, 2010
Messages
29
Re: '73 Crestliner Muskie Transom

Thanks !!! I'll get some additional pictures up as it goes along.

This fiberglass stuff' just gets in your blood !!!
 

dawitner

Cadet
Joined
Jan 20, 2010
Messages
29
Re: '73 Crestliner Muskie Transom

Got the inside ground down and ready for glass. Now working on the outide. Ground for about two hours today on the outide edge of the transom getting ready to cap the SeaCast.

Here are some pictures.
 

Attachments

  • boat.1.jpg
    boat.1.jpg
    29.1 KB · Views: 0
  • boat.2.JPG
    boat.2.JPG
    31.9 KB · Views: 0
  • boat.3.JPG
    boat.3.JPG
    33.7 KB · Views: 0
  • boat.4.JPG
    boat.4.JPG
    29 KB · Views: 0

dawitner

Cadet
Joined
Jan 20, 2010
Messages
29
Re: '73 Crestliner Muskie Transom

Well she is ready to go to the body shop and get prepped and painted. I spent all week on vacation working on this boat.
I first made up some "peanut butter" with cabosil and resin and filleted all the inside corners. Then two layers of CSM on top of that. Then the entire rear inside skin got laid up with 1708 biax. I then laid up a horseshoe shaped piece inside on the port and stbd sides where the tiedowns/tow hooks attach. This tied the sides, inside skin and splashwell together. Then I extended both of the stringers where I had to cut out the rot. This got tow layers of CSM then tabbed in with 1708.

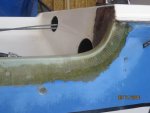
Last I ground down the outside, got a nice straight line and capped it with a layer of CSM. That did not go so well so I ground that off and replaced it with biax. My body guy says one layer of Duraglass, some sanding and he can have it painted in no time.

Check out the pictures.
 

Attachments

  • stbd.1.jpg
    stbd.1.jpg
    139.4 KB · Views: 0
  • stringer.1.jpg
    stringer.1.jpg
    143.2 KB · Views: 0
  • rear.1.jpg
    rear.1.jpg
    136.7 KB · Views: 0
  • cap.1.jpg
    cap.1.jpg
    110 KB · Views: 0
Top