69 Evinrude How to replace coils,condensers,plugs, points and adjust carb

ccvolsdhf

Petty Officer 1st Class
Joined
Jan 4, 2012
Messages
214
Hey everyone.
Recently I took my boat to the water, and couldn't get the motor to start. I have a 69 Evinrude 25902b. 1st boat motor got it last summer. The PO said it had just had a rebuilt carb and started on the 1st or 2nd pull. He offered more than once to take it to the water to show me. We where only about 10 minutes from the lake. So I took his word for it (my mistake I know:eek:). I laid the motor down in the back of my truck drove home and put it on my boat 14ft gamefisher ,and drove too the water. The motor would not start at all 500$ :eek::facepalm:. So dejected I went home, my only hope was that laying it on it's side was what made it not start. After work the next day about 24hrs later. I put the motor in a bucket and pulled quite a few times finally it started :D. I turned it off and restarted it a few times with no problems 1 or 2 pulls so all seemed ok. I took the boat out maybe 7,8 times after that. Everytime out the initial start would take 10 to 15 pulls to start. Also besides the choke the throttle had to be pumped and turned up at least half way to get it to start. After that,the rest of the day 1 to 3 pulls. Last time out was in September so it went four months between running last,and not starting. Except 1 time to disconnect the gas and let it run out. The local boat repair shop suggested to do this. In the down time i did some work on the boat including moving the gas tank to the front of the boat creating an air leak that i fixed first when the motor wouldn't start. After getting good gas flow the motor still wouldn't start. It also started making a strange noise on recoil just a loud rrraaarr noise. Coming from the starter assembly. A few more pulls and the pull cord stopped recoiling. I removed the starting assembly, and found the pawl and friction spring had broke. so I ordered those parts hoping that would fix the noise and the motor not starting. Got the parts and a new pull rope installed. No go, still wouldn't start and it didn't fix the noise either. Next I got a spark tester and sure enough got a spark on one wire nothing on the other. So i figured. since this was my primary motor I would just replace everything. Today I got new coils,points condensers,and spark plugs. Would have ordered wires, but I seen on here where people mentioned getting them for 1.19 a ft or something ,and the only ones I found where 8 and 10 dollars for one 8in wire. I wanted to get some input on that before ordering. So basically I have no idea how to change all this stuff correctly except for the links here on Iboats which may be enough . Still any direct help would be appreciated. I know I take off the starter assembly then the flywheel nut,and use a puller to get the flywheel off. After that I'm not so sure. One last thing is when I got the motor I noticed the kill switch wires where cut. After finally getting it started I figured it was just a matter of preference to have a kill switch, And since the motor ran didn't do anything about this. To stop the motor I just turn the throttle all the way down and it shuts off.

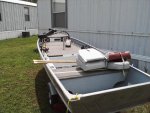
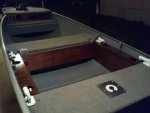
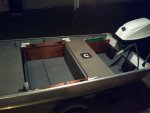
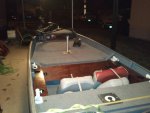
Here's my boat & motor :Dboat2.jpgboat14.jpg2011-12-23 01.29.19.jpg2011-12-23 01.29.38.jpg2011-12-23 23.11.59.jpg
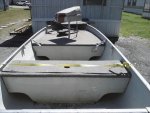
 

69 Alumacraft

Petty Officer 2nd Class
Joined
Nov 15, 2009
Messages
173
Re: 69 Evinrude How to replace coils,condensers,plugs ,and points

Re: 69 Evinrude How to replace coils,condensers,plugs ,and points

I have the same motor 69 25 hp sportster, I would advise buying a manual but once you pull the flywheel you will see two driver coils and two sets of points and condensers. You will need a set of feeler gauges and you may as well order an ignition tune up kit which will supply you w/ two sets of points and condensers and also orer 6ft of 7mm copper core spark plug wire for about 1$ a foot go to marineenginesdotcom. A good tip is to take one set apart at a time and leave the other so you can see how they go together, also make sure to mark which plug wire goes to which cylinder number 1 or top should be in front. You will see the drive shaft under the flwheel and the word "top" rotate the flywheel until the points rest there and set them to .020. This seems difficult until you do it , I would try to get a Johnson/ Evinrude service manual for this motor and start there, stay away from seloc there is a sit e called marinebooks dot com or something like that, search inboats for manuals. I have a 76 25 hp w/ the new style ignition that is driving me up a wall, I rebuilt my 69 like yours and it is a beast, I want to convert my 76 to the same old school ignition system. If your compression and LU are good that motor should kick *** for a while. PM me if you want.
 

ccvolsdhf

Petty Officer 1st Class
Joined
Jan 4, 2012
Messages
214
Re: 69 Evinrude How to replace coils,condensers,plugs ,and points

Re: 69 Evinrude How to replace coils,condensers,plugs ,and points

Ok I got coils,points and condensers from Iboats today. apparently.I only ordered one spark plug:facepalm:. I see on O'Reilly a 7mm copper core spark plug wire. I'm wandering can I pick up another J8c spark plug and the wire from a local auto parts store. I was hoping to try this this weekend. From marinengines its gonna be 23$ plus waiting for it to get here.
 

kfa4303

Banned
Joined
Sep 17, 2010
Messages
6,094
Re: 69 Evinrude How to replace coils,condensers,plugs ,and points

Re: 69 Evinrude How to replace coils,condensers,plugs ,and points

Hi cc. I've had luck getting 7mm copper core spark plug wire for about $3 a foot from both NAPA and Carquest, but you may have to hunt around a bit. Try small engine shops that service lawnmowers and the like too. You should be able to get Champion plugs at just about any auto parts store. Here's a great link that can walk you through and entire ignition rebuild. One tip is to be sure you twist the plug wires onto the coil posts rather than just poking them on there. Good luck. Holler if you get stuck.

http://www.outboard-boat-motor-repa...on 3 HP 1952-1967 Ignition System Tune-up.htm
 

cajuncook1

Chief Petty Officer
Joined
Sep 3, 2009
Messages
559
Re: 69 Evinrude How to replace coils,condensers,plugs ,and points

Re: 69 Evinrude How to replace coils,condensers,plugs ,and points

Ok I got coils,points and condensers from Iboats today. apparently.I only ordered one spark plug: I see on O'Reilly a 7mm copper core spark plug wire. I'm wandering can I pick up another J8c spark plug and the wire from a local auto parts store. I was hoping to try this this weekend. From marinengines its gonna be 23$ plus waiting for it to get here.


Sure J8C plugs can be purchased at a Auto parts store like NAPA or O'Reilly. But Champion J4C or J6C are probably better for your motor. J6C if you are going to do a lot trolling with your motor.

Here is some information I put together for a guy on another forum, but the information should help you out just the same.


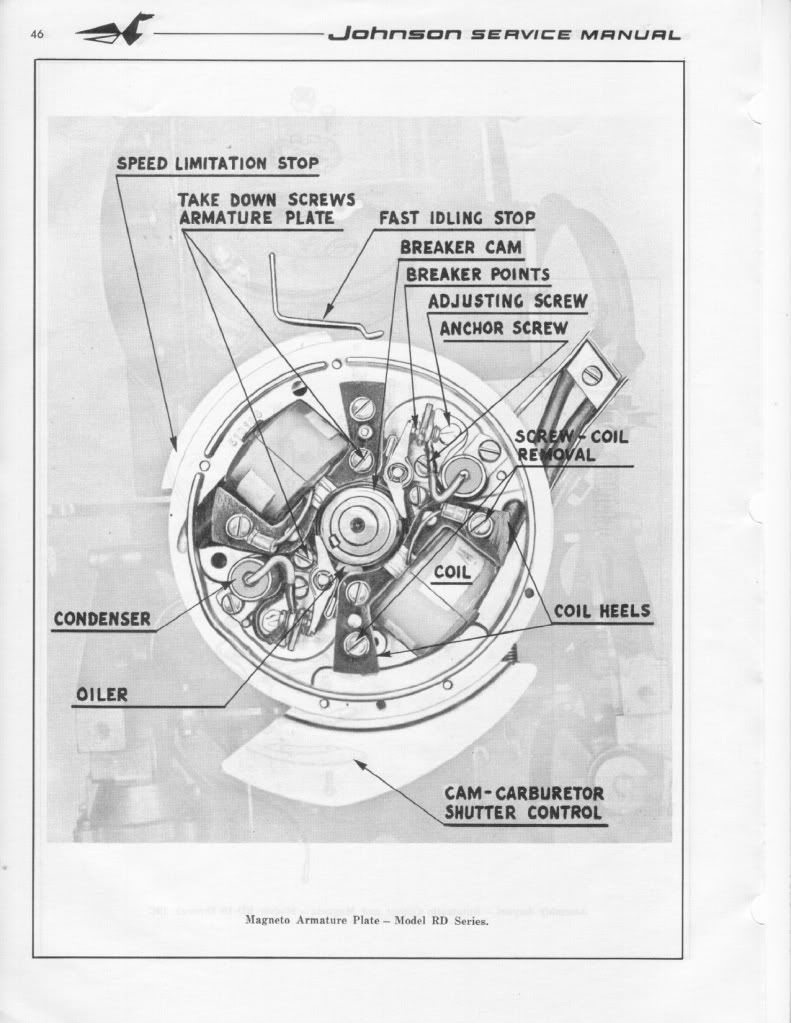
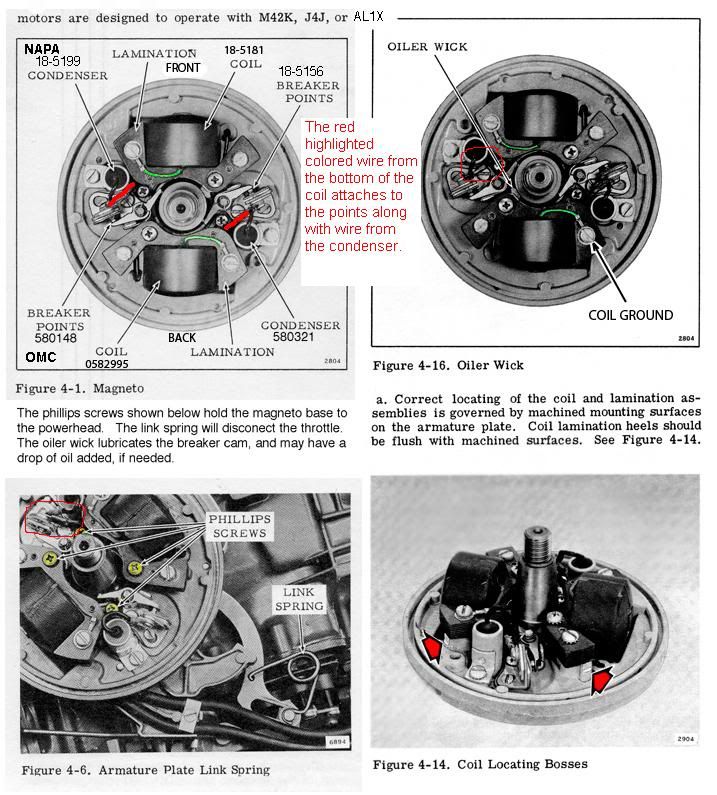
Here is a diagram of a generic OMC (Johnson/Evinrudle/Gale) ignition assembly. You will have to remove the coil designated for the top cylinder and put the oil wicker in. It should be already be coated with a very light oil. (not grease). The purpose of the oil wicker is to lightly lubricate the outside riding surface of the cam so the point shoes do not prematurely wear. If you look at the points they have little shoes that ride along the cam. Please make sure the (breaker)points cam is on the correct side or the ignition will be out of timing. It should have the word [highlight]top[/highlight] machine written on the side facing up.

Ignitionplateandoilwick.jpg


FYI: You can only set(gap) one set of points at a time. Put the flywheel nut back on(turn with a wrench or ratchet clockwise) to allow you turn the crankshaft. (Please remove both spark plugs to make it easier to turn the crankshaft and prevent accidental starting)

You gap the point to 0.020 when the point shoes is at the top(high point of the cam). It should have a mark along with the word top. Then you will turn clockwise to the next set of point 180 degrees and set those points the same way. You will notice that the point of the previous set will be closed and when you come around again they will open up. *** When they are open no current is allow through. This is how you set your timing with the points.***

When you go to set the point's gap. Very gently snug the anchor screw, then adjust the gap with adjusting screw and the feeler gauge until the feeler gauge is sliding through with slight resistance only. Then tighten the anchor screw. Repeat procedure with second set of points. Please make sure your hands are clean and the feeler gauge is clean, because oil on the points can foul them up and create resistance....poor or no no spark. ALways use a spark check to evaluate spark. It should jump minimum 1/4 inch. Blue sharp snappy spark.

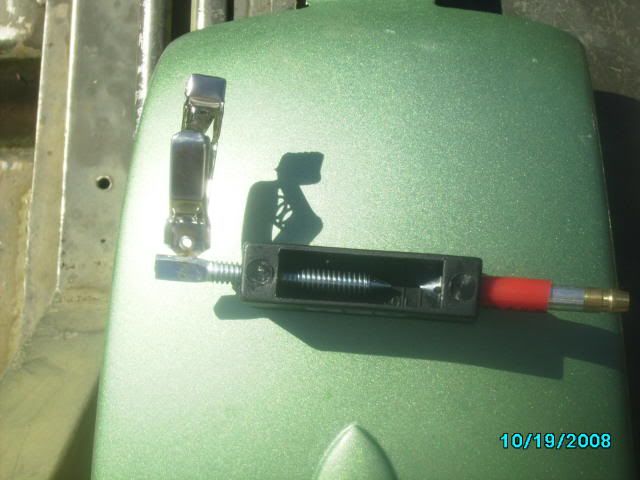
Here is a picture of a spark check...Cheap $6

sparktesterpic.jpg


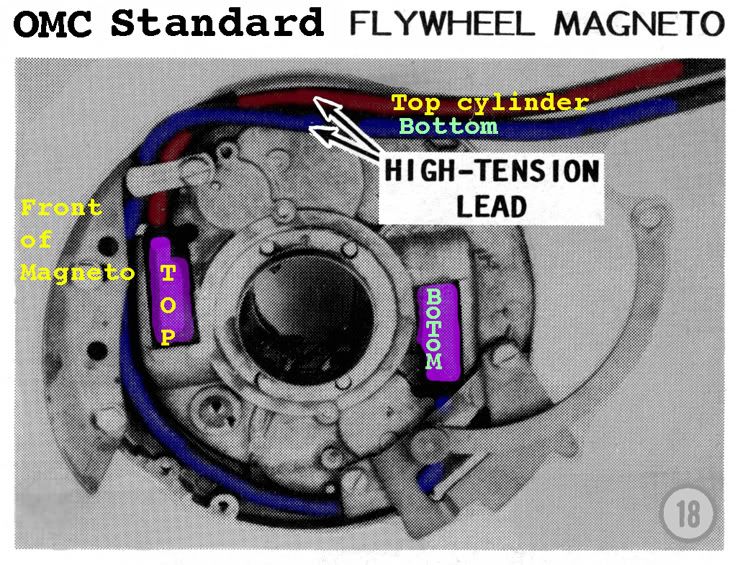
Here is a picture of how to tell which wire is going to the correct cylinder. Thanks to Garry for providing the picture on other post.


TopCyl.jpg


If your using the existing wires then cut about 1/4 inch of end going the coil, so you have clean un-oxidized copper contacting the spiking in the coil. Twist the end of the spark plug wire onto the coil spike. If you have replaced the wires, make sure they are 7mm copper metal core and not the automobile stuff.

***** Please make sure two things*****

1.) Make sure all the wires are tucked away under the flywheel and not rubbing up against the cam or crank, because with will eventually get damage and create a short, then no spark!!

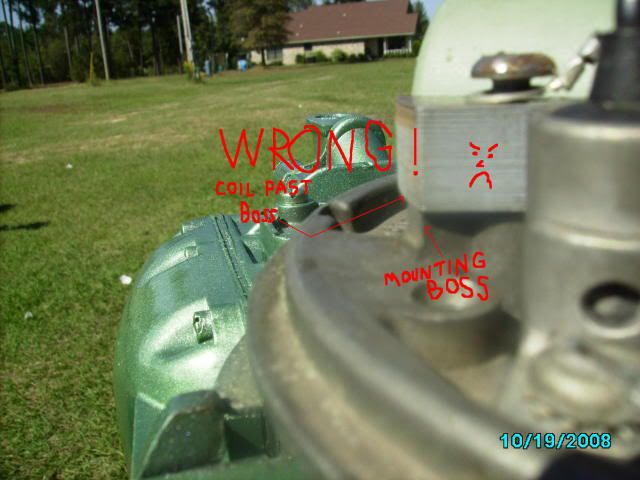
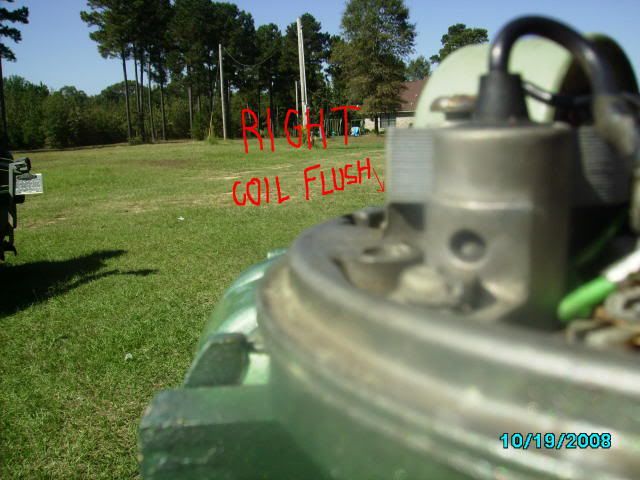
2.) Make sure the coil heels (ends) are evenly lined up with the mounting boss.

Here are some pictures. (Compliments of JBJennings..nice fella)

wrongcoilmount.jpg


rightwaytomountcoil.jpg


Lining up the coil heel with the mounting boss prevent damage of the coils and the flywheel magnet, prevent rubbing as the flywheel turns.

[highlight]*** Make sure the throttle is advanced to that start position***[/highlight]


Here is another picture that Garry (thanks Garry!!) supplied on another post with some modification.

OMC_Stdwithwirecolors.jpg


Both diagrams, should answer your questions.
 

ccvolsdhf

Petty Officer 1st Class
Joined
Jan 4, 2012
Messages
214
Re: 69 Evinrude How to replace coils,condensers,plugs ,and points

Re: 69 Evinrude How to replace coils,condensers,plugs ,and points

Thanks for the info guys. Ive got the service manual for this motor , But having no real exp with disassembling outboard motors a lot of the terminology is hard to grasp completely. I'm sure alot will become clearer when I actually do the work. There's a few tools and what not in the manual for testing everything. That I know nothing about. So it's a little daunting. The timing is my main concern at this point. Just trying to gather as much Info as possible before I begin.Thanks for the link, and info it's all slowly starting to gel in my mind:D....Any other suggestions on the proper spark plugs. Not doubting you at all cajun, but the only reason I got a j8c is that's what Iboats said went to my motor so IDK.
 

kbait

Commander
Joined
Nov 13, 2007
Messages
2,461
Re: 69 Evinrude How to replace coils,condensers,plugs ,and points

Re: 69 Evinrude How to replace coils,condensers,plugs ,and points

I believe they originally called for j4j's, they superceded to j4c's. j6c's are a stage hotter, and work much better for trolling around w/o fouling, and I've never had an issue at cruising speed w/em. j8c's are hotter yet, but I know of no advantage to using 'em. I see 'em all the time in older J/E's I've serviced, and I always switch 'em out to j6c's. Anybody need a pile of used j8c's?? :)
 

lindy46

Captain
Joined
Nov 27, 2008
Messages
3,886
Re: 69 Evinrude How to replace coils,condensers,plugs ,and points

Re: 69 Evinrude How to replace coils,condensers,plugs ,and points

Use J6C Champions, and Hypalon 7mm copper core plug wire. Timing is not adjustable - it is set by the flywheel key and there is only one way the flywheel goes on with the key in place. Synchronization is another story - link & Sync. That's a whole other topic.
 

AlTn

Commander
Joined
Mar 9, 2010
Messages
2,813
Re: 69 Evinrude How to replace coils,condensers,plugs ,and points

Re: 69 Evinrude How to replace coils,condensers,plugs ,and points

this is my little bit of insight..with the f/w off..mark the coil closest to the carb when the the motor is in the start position..I use a dab of liquid electrical sealant.. this is the coil for the No.1, Top, cylinder. Now, use a scribe mark to mark the armature plate and some point right below it so that you'll know you've put it back on in the same position it was in.
Shorting switch wires disconnected, plug wire retainer on rear of head disconnected, plugwires off plugs, you should be ready to remove the armature plate. The 4 screws closest to the crank end hold it on. Here is what I've experienced : replacing the armature plate screws into the retainer can be more of a challange than you would think. I spent almost 1 hr. just trying to align and start those 4 screws. I ended up with a 2 small punches and a pick in 3 of the screw holes just to align both plate and retainer to get one screw started. I know there's got to be a better way. I'm considering taking one screw out and finding some longer screws of the same thread count and size, grinding off the heads and as much of the threads as needed, then as each screw is removed from the armature plate, use one of these aligning "studs" in its place so that the plate can slip back over them and the alignment with the retainer will be held. I dunno, maybe it was just me but it sure was "irritating".
Cajuncook and all the other posters provide all the other details and tips that I would. Great pics as well! Those plugwires have to be tight on the underside of the plate or invariably they'll jam against something making the plate hard to turn and it'll try to "spring back".
Plug boots and terminal ends : it seems Joe Reeves has a pic of stripping off some of the insulation on the plugwire, fanning out the inner wires so that they'll be in contact with the spiral end of the terminal when you push the spiked end of the terminal into the plug wire. It will provide a greater area of contact between the plugwire and terminal. A little WD makes shoving the terminal into the plugboot easier..it'll be tight, but I guess it's suppose to be that way.
Try to get the plug wire approximately the same length as the original because if it's just a few inches longer the cowl latch tries to entangle itself when you take the cowl off or put it on.
Hold the point arms away from the cam when you place the armature plate back on....seems commonsenscical but may be something you'd overlook.
This will be far less "daunting" than your lower unit work.
 

ccvolsdhf

Petty Officer 1st Class
Joined
Jan 4, 2012
Messages
214
Re: 69 Evinrude How to replace coils,condensers,plugs ,and points

Re: 69 Evinrude How to replace coils,condensers,plugs ,and points

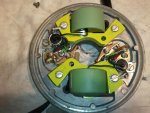
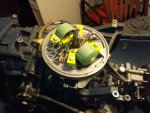
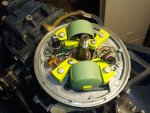
OK guys trying to get spark I just changed the points,coils and condensers. I put the flywheel on,and Tightened it a little, hooked up the spark plug tester. And got absolutely no spark on either wire:mad:. I followed this link and the manual

http://www.outboard-boat-motor-repai... Tune-up.htm

I'm pretty sure everything is attached and hooked up right on the armature plate. The points are spot on. I used the method in the link to set the points as it relates to an ohm meter,and timing marks.

Possible reasons
Armature plate= Does the plate have a little play in it or should it be tight and not move at all. I know it rotates but I couldn't remember if it had any play up and down. The 4 Phillips screws are tight, but the plate still moves a little up and down.

Wires and dialectic grease= In the link It say to use a silicone to keep water out and make a tight seal when you twist the wires into the coil. I thought the dialectic grease was the same so i put a little dab in the coil hole right before twisting in the wire. Also the wire never felt really tight in the coil. I keep twisting but it just never felt real tight so I thought it must be in there as far as it goes. After thinking about that just now one link said to cut off about a 1/4 inch of wire if you planned on reusing the old wire. So I did that,but when I turned the plate over to attach some screws. I noticed that the wire had still not gone in the coil as far as it did the old coil by about a 1/4IN, this after cutting a 1/4in of the end. You guys think this could be the problem.

Flywheel= I just spun the wheel by hand would i have to use the pull rope to test for spark. I had the tester set a about 1/4in first then closed it up a little still no spark

The original coils actually looked good I thought I would just go ahead and change it all anyway

2012-01-21 19.56.21.jpg2012-01-21 22.33.03.jpg2012-01-22 01.20.48.jpg2012-01-22 02.15.11.jpg2012-01-22 02.15.25.jpg
 

HighTrim

Supreme Mariner
Joined
Jun 21, 2007
Messages
10,486
Re: 69 Evinrude How to replace coils,condensers,plugs ,and points

Re: 69 Evinrude How to replace coils,condensers,plugs ,and points

You will likely need the pull rope to get spark, some small motors I am able to spin between my hands with the plugs out to generate spark but on your Big Twin you will likely need help. Dont torque the flywheel nut just in case there is still trouble, just hand tighten it. Be sure the points are clean. Even your fingerprint will cause issues. A quick cleaning with Acetone before you install the flywheel is always a good idea. The coils you removed are actually very good coils. Do not throw them out, they were likely not needed to change, but now you have spares. If you have an analog meter (needle not digital) I can show you how to test them.

Have you tried ensuring that there is continuity across the points when closed, and none when they open? Also put one of the meters leads on the coil ground, where you have the black lead under the mounting screw, and one lead in the plug boot when the point is closed. What is your reading? THis will ensure you have continuity throughout the plug lead/coil. If not, there is an issue along the path, maybe at the plug in like you mentioned.

Let us know how you do
 

lindy46

Captain
Joined
Nov 27, 2008
Messages
3,886
Re: 69 Evinrude How to replace coils,condensers,plugs ,and points

Re: 69 Evinrude How to replace coils,condensers,plugs ,and points

I'd go ahead and replace the plug wires - then you know you have all good parts. When you insert them into the coils, put a little dielectric grease on the wire ends. Makes them go in a little easier and assures they are all the way in and making contact.
 

tx1961whaler

Vice Admiral
Joined
May 31, 2008
Messages
5,197
Re: 69 Evinrude How to replace coils,condensers,plugs ,and points

Re: 69 Evinrude How to replace coils,condensers,plugs ,and points

You have to spin it pretty fast to get it to spark. A drill motor will turn it over if the plugs are out.
 

AlTn

Commander
Joined
Mar 9, 2010
Messages
2,813
Re: 69 Evinrude How to replace coils,condensers,plugs ,and points

Re: 69 Evinrude How to replace coils,condensers,plugs ,and points

Post # 10..pic 2...may just be me, but is there a bare spot on that lower points ground wire?
 

HighTrim

Supreme Mariner
Joined
Jun 21, 2007
Messages
10,486
Re: 69 Evinrude How to replace coils,condensers,plugs ,and points

Re: 69 Evinrude How to replace coils,condensers,plugs ,and points

Post # 10..pic 2...may just be me, but is there a bare spot on that lower points ground wire?

You really studied that! lol

Im not sure if it is a bare spot or just flaking paint on the plate? Hard to tell by the angle.
 

kfa4303

Banned
Joined
Sep 17, 2010
Messages
6,094
Re: 69 Evinrude How to replace coils,condensers,plugs ,and points

Re: 69 Evinrude How to replace coils,condensers,plugs ,and points

HI cc. It looks like you've done a great job rebuilding the magneto, but it sounds like the spark plug wires aren't connected to the coils properly. You should definitely feel the post on the coils bite into the copper core of the wire as you twist it on. I agree that you may need to use the pull start to see a spark on a larger motor. I can spin the flywheel on my 10 hp/20 hp and generate a spark, but it would be hard on a motor much bigger than than that. As for the magneto plate itself, there will probably always be a bit of vertical slop/travel in the plate. It shouldn't be excessive, but 1/4" up and down is common. Try just fixing one side of the magneto at a time. When you get spark on one wire, you can then do the same procedure on the other one. These link may help too.

http://www.youtube.com/watch?v=4GHWXwC_lbE
 

AlTn

Commander
Joined
Mar 9, 2010
Messages
2,813
Re: 69 Evinrude How to replace coils,condensers,plugs ,and points

Re: 69 Evinrude How to replace coils,condensers,plugs ,and points

yeah, High...after a few rounds with these "character builders" one tends to study a whole buncha things..lol
 

ccvolsdhf

Petty Officer 1st Class
Joined
Jan 4, 2012
Messages
214
Re: 69 Evinrude How to replace coils,condensers,plugs ,and points

Re: 69 Evinrude How to replace coils,condensers,plugs ,and points

Thanks guys. again you've all came to the rescue. Altn I see what your talking about ,and will check it out. The pictures are taken right under a light so lots of times a glare shows up in the pics. I will try with the pull rope now may have been the problem. I did test the points continuity like in the link rotating the crankshaft ,and making sure the points open and close on the timing marks on the flywheel and armature plate. I will test from coil to spark plug boot as well now. If none of this works Ill take it apart and check the coil,wire connection. Thanks again guys for your help.
 

ccvolsdhf

Petty Officer 1st Class
Joined
Jan 4, 2012
Messages
214
Re: 69 Evinrude How to replace coils,condensers,plugs ,and points

Re: 69 Evinrude How to replace coils,condensers,plugs ,and points

It's was the pull rope:facepalm: LOL. Put it on and got solid spark of at least 1/4in on the tester on both cyliders:D. The good news Trim is I needed some combination of points coils or condenser on my 18hp rebuild. So now it's time to take it apart and see what's up. Should have it with good spark in no time now. with no money spent:D. I'll clean any parts I attempt to reuse with some acetone.
 

ccvolsdhf

Petty Officer 1st Class
Joined
Jan 4, 2012
Messages
214
Re: 69 Evinrude How to replace coils,condensers,plugs ,and points

Re: 69 Evinrude How to replace coils,condensers,plugs ,and points

I was expecting at least one coil to be bad ,but when i got to them I was surprised they looked good the ohm meter showed continuity just like the new ones. The only thing I could think was the points. I got a .025 thru one side,and .024 gauge thru the other so they may have just needed to be adjusted. While I got it here and open. I'll get you guys opinion both the kill switch wires are cut, and there's no button on the front just a spot where one should be . Should I fix this,could it cause any problems till I get it fixed
 
Top