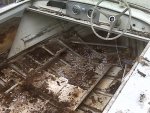
66 Jupiter; Tore up...from the floor up!

wickedwood

Cadet
Joined
Apr 25, 2012
Messages
24
031.jpg
starcraft 16.jpg

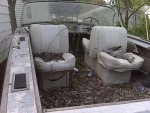
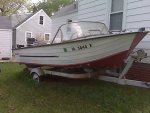
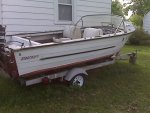
My wife and family LOVES boating and being on the lake. I drug this beauty home for Mothers Day 09'...went over like a lead balloon...or better...went over like an aluminum hull.

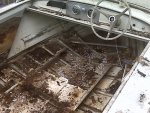
I am a wood guy, and from the street (was unfamiliar with boats at that time) thought maybe it was a woody. Nope, but the guy was hot to sell. Being a wood guy, as mentioned earlier, I could hear something calling my name...it wasn't the boat...but more so the trees growing out of the floor.

He said he hadn't had it running in like 12 years (expiration on the tag was 93) and couldn't guarantee that it ran.

I then ran home...got on i-boats and checked out what these babies are valued (my first of many visits to the site). I figured I could recoup the $300 and I bought it. Including original motor and original tilt trailer, all from 66.

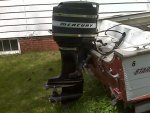
Without spending any money, I wanted to see if it ran. Didn't have a fuel line, didn't have a fuel tank, didn't have a battery, but I did have a pair of tin snips, a funnel, lawnmower gas and jumper cables. How many of you know what I did with these tools?? Cringing?? You should...I do now. Yup...I cut (tin snips) probably the most expensive section of fuel line...stuck the funnel in the end of the fuel line, filled it with lawnmower gas, connected the jumper cables to the truck...and wouldn't you know...the 66 Mercury 650 fired right up after setting for at least 12 years (most likely 16+).

I have since repaired the fuel line, purchased a new battery, and a fuel tank.

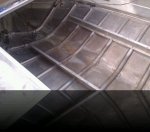
Gutted everything, took it to the river and proceeded to find that it had no leaks...transom was about to fall off...but no leaks.

I then yanked out the rotted transom started stripping the paint...and that was the end of that.

Fast forward 2 years. I now have a goal to get her done by Mothers Day 12' well...at least be close.

So here goes. I'm gonna make a silk purse out of a sows ear, or so I've been accused many times before.
starcraft 15.jpg
starcraft 2.jpg
starcraft 6.jpg

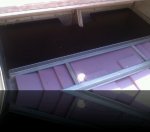
If you look hard enough, you may be able to see the timber roach farm.
 

wickedwood

Cadet
Joined
Apr 25, 2012
Messages
24
Re: 66 Jupiter; Tore up...from the floor up!

227.jpg

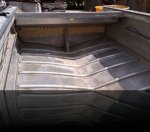
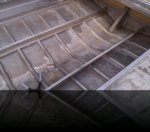
Got the boat stripped down and cleaned up after a two year break.

Got the new transom in.

226.jpg

Started putting the floor back together.

225.jpg

Decided that there was a need for a beverage well. Ended up being 3.7 cubic feet, which will hold quite a bit of beverage.

300.jpg

Added a utility floor for the tanks and battery.

219.jpg
 

oops!

Supreme Mariner
Joined
Oct 18, 2007
Messages
12,932
Re: 66 Jupiter; Tore up...from the floor up!

hi .....welcome to iboats !

you are certainly in the right area !

the starcraft guys will eat this up......look what our members have been doing !

http://forums.iboats.com/showthread.php?t=336651

im sure the starmada will be along shortly to answer any questions you might have. but it looks like you have it under control !

cheers
oops
 

jigngrub

Fleet Admiral
Joined
Mar 19, 2011
Messages
8,155
Re: 66 Jupiter; Tore up...from the floor up!

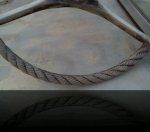
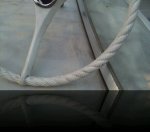
Sa-weeet boat!!! I really dig the rope look steering wheel.

You're doing some really good looking work on her.

A couple of observations:

Keeping an open 4-6" wide drainway down the center of the keel will improve drainage and prevent blockage.

Put as much foam as can fit in your bilge, you can never have too much floatation foam.
 

dozerII

Admiral
Joined
Oct 25, 2009
Messages
6,527
Re: 66 Jupiter; Tore up...from the floor up!

Welcome WW to the Starmada, great job your doing on the rebuild.
Glen
 

Bob_VT

Moderator & Unofficial iBoats Historian
Staff member
Joined
May 19, 2001
Messages
26,030
Re: 66 Jupiter; Tore up...from the floor up!

Keep going!! Boating season is here!!

Welcome aboard......... we have a few Starcraft restorations we have watched!! :rolleyes:
 

wickedwood

Cadet
Joined
Apr 25, 2012
Messages
24
Re: 66 Jupiter; Tore up...from the floor up!

Thanks!

As far as the 4-6" pathway, I have close to 4"...wasn't sure what was standard, but I did cut it to end up around 2" on each side of center. Where you see the foam touching in the beverage cooler, is actually a layer on top of the purlins, trusses, or what ever the boat term is for holding the aluminum to shape.

Ya the wife wasn't happy about the steering wheel, but I couldn't unfreeze the pin in the shaft to release it...so I cleaned it up. I'm glad things sometimes don't want to come apart. Now everything stays original, which is what I am shooting for. This boat came with all the chrome, and I have the original bammimi (sp) top...it's a little worse for wear (I'll need to have it re-made) but have all the hardware.

I checked recently if the speedometer was original, and found that is was worth almost what I paid for the boat.

222.jpg224.jpg
 

kfa4303

Banned
Joined
Sep 17, 2010
Messages
6,094
Re: 66 Jupiter; Tore up...from the floor up!

Bimini top;) Pronounced (bim-in-ee). I love the original rope twist steering wheel too. Super cool.
 

wickedwood

Cadet
Joined
Apr 25, 2012
Messages
24
Re: 66 Jupiter; Tore up...from the floor up!

009.jpg
Got her flipped and stripped...after a couple cans of KS-3. Wouldn't have been so much, but there were four layers of paint on the sides.

I have decided to brush on the paint. I am working outdoors (where my garage is supposed to be) and my Graco is at a friends, that has never seen anything by latex (the sprayer, not my friend) meaning I may need a different tip, more material for cleanup, and way more time for setup for protection in his garage...next boat I'll spray. Also, for me to load the boat up take it over to his garage accross town, unload, flip, tape, spray...and to barge in for every coat, decided that a few brush strokes would add character.

011.jpg

It's a pretty cool yellow, to bad it's just primer.

010.jpg

View attachment 143812

026.jpg


I decided not to paint the bottom. I was curious to know if there are any drawbacks to that? My reasoning was that we hit the beach often...ok, everytime we go boating to lounge and let the kids play in the sand and water, so I don't see the need to scratch off paint.
 

jigngrub

Fleet Admiral
Joined
Mar 19, 2011
Messages
8,155
Re: 66 Jupiter; Tore up...from the floor up!

Looking real good WW!

I would only paint the bottom if the boat was going to be exposed to salt or brackish water.
 

jasoutside

Supreme Mariner
Joined
Dec 20, 2009
Messages
13,269
Re: 66 Jupiter; Tore up...from the floor up!

Howdy and welcome to the club! Looking good man. Just be aware that bare alum will oxidize so maintenance will need to happen now and then. Shark Hide or something similar will help combat that.

Cheers:)
 

Georgesalmon

Lieutenant Commander
Joined
Apr 14, 2012
Messages
1,793
Re: 66 Jupiter; Tore up...from the floor up!

My dad had a 14' Lund with an 18 Evenrude on it. When he passed we sold the boat. Point? After over 30 years that hull looked like it just came from the factory. Every year before he put it away he waxed the whole thing with Turtle wax. I think that simple step kept the aluminum looking good as new. no oxidation
 

wickedwood

Cadet
Joined
Apr 25, 2012
Messages
24
Re: 66 Jupiter; Tore up...from the floor up!

I actually ran across some Sharkhide at a friends shop...thanks for the headsup.

After a couple of rain days I got some painting done.

037.jpg

038.jpg

While it was upside down, I raised it up and was able to continue on the interior...

I wanted to replace dash, but found that the wood was still good, no rot, and also realized as I was undoing screws...it is a structural member and without taking the top off...it was staying. So I took a piece of 5/4 Cypress, and resawed it with a table saw, sawzall and orbital sander (in that order). It ended up around a little under a 1/4 of an so as not to stick out past the trim of the boat. Started with a cardboard template to get close and then scribed it in from there.

008.jpg

Here it is installed. Next to what it used to look like. Mind you this was all done upside down...wife did check to make sure that speedometer was right side up...I would be offended, but unfortunately that is how I roll sometimes. :)

040 (2).jpgstarcraft 6.jpg

Ok...here is a question: What is the best way to take haze or oxidation off of the plexi windshield? Does the headlight restorer work? I was going to try that, but thought to ask first.
 

wickedwood

Cadet
Joined
Apr 25, 2012
Messages
24
Re: 66 Jupiter; Tore up...from the floor up!

Couple of nice days in a row and I got the last of the paint on.

039 (2).jpg

front.jpg

dash (4).jpg


Here is a pic for comparison where I was 4 weeks ago.


starcraft 14.jpg
 

wickedwood

Cadet
Joined
Apr 25, 2012
Messages
24
Re: 66 Jupiter; Tore up...from the floor up!

My windshield....

windshield (1).jpgwindshield (2).jpg

How do I get rid of the 46 years of haze...aside from getting new plexi?
 

wickedwood

Cadet
Joined
Apr 25, 2012
Messages
24
Re: 66 Jupiter; Tore up...from the floor up!

Awesome, thank you for that. Looks like another rainy day project. :)
 

wickedwood

Cadet
Joined
Apr 25, 2012
Messages
24
Re: 66 Jupiter; Tore up...from the floor up!

Ok, time to show the floor.

When deciding what material to use, was planning on using plywood. Then carpet. Then the woodworker in me starting thinking that if I was going to have to waterproof the plywood and then cover it up, I would just do something cool with the plywood and no carpet.

Went to go pick up the AC ply (exterior glued, just may have voids in some of the plys vs. marine with no voids) and it was ugly with flich's that were only 8 feet long on a 10 ft slab...meaning it was going to look like poo with a stain and clear coat. Not to mention was going to weigh in at around 150 lbs for the whole floor.

What to use....

Oh, Cypress....grows underwater. It can be expensive...but right now prices are cheaper per board ft than red oak (at least here in IA). If you have a table saw and a router, no need to purchase S4S. I picked up 10" wide planks that I ripped down to 4 1/2" planks with an 1/8" roundover on the edges.

I then positioned the planks in the order I wanted, and flipped them upside down (in order). I used Cypress to buck out the back and fasten the planks. I used Ply under where the front seats will go just for extra strength.

To got them tight by using a block and wedge method, clamps can be damaging with the soft wood. Screwed everthing together with SS screws. Flipped over and took my cardboard template and cut the floor to shape.

I stopped by my local boat boneyard and was able to pick up the beverage well trim ring for $10, polished it up, traced it on the floor and cut out the lid. I then took a proto-type table I had made that had an inlay of a matrini glass and integrated it into the beverage cooler lid.

The Inlay - The base is Bubinga (African Rosewood) the Martini glass is Quilted Maple, the Olive is Paduk and the swizal stick is Purple Heart.

I fastened the floor to the cross struts I had installed and "viola!" I have a floor that won't rot, and weighs in at about 70lbs total.

297.jpg

floor (1).jpg

dash (6).jpg


floor (2).jpg
 

TruckDrivingFool

Lieutenant Commander
Joined
Jul 30, 2007
Messages
1,818
Re: 66 Jupiter; Tore up...from the floor up!

WOW! Awsome woodwork there.

And of course now you admitted it where in IA? Curious about a boat boneyard and a wood source.
 
Top