65 650 flywheel/timing question

Poopdeck

Cadet
Joined
May 9, 2010
Messages
21
Ok, I admit it. I scewed up. The 650 4cyl engine I have was really slow turning over with the starter and a known good battery. I read somewhere, possibly on this site that the timing being off could cause such a symptom so I decided to check it. I needed to put a new belt on anyhow. Well because I am one of those guys that usually has zero trouble putting things together without instructions and typically have no trouble figuring out how things go back together, I just jumped right in there and started taking the flywheel off. Curiosity got the better of me and I took the whole thing apart (I knew better but...) and now I have a problem.

I took the flywheel off of the hub without even thinking about the timing mark on the flywheel in relation to the hub and now I'm not sure where to put it back to.

If the #1 piston is TDC, can I reinstall the flywheel on the hub with the timing mark pointing at the center of the Magneto pulley shaft, line up the Mag pulley arrow with the flywheel mark and the timing be right? I hope this makes sence and it's not too confusing what I'm actually asking.
 

Poopdeck

Cadet
Joined
May 9, 2010
Messages
21
Yeah, I thought of that. It wasn't any help though for putting the flywheel assembly back on the hub. It worked great putting the flywheel and plate back together.
 

Poopdeck

Cadet
Joined
May 9, 2010
Messages
21
I still have to get the flywheel assembly back on the hub though. I need to know where to point the timing mark on the flywheel based on the piston position. If #1 is at TDC, where does the timing mark on the flywheel go when I bolt it back to the hub?
 

The Force power

Commander
Joined
Feb 3, 2019
Messages
2,349
At zero (hopefully marked on Flywheel) otherwise if you have the distributor set to #1 spark set the flywheel to 23 degrees before TDC mark
 

merc850

Commander
Joined
Jul 7, 2010
Messages
2,046
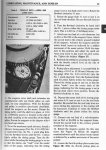
This is for a '67 but the method is the same. When you put the flywheel back together tork the bolts to 15 ft/lbs and use blue Loctite on the threads.
Click image for larger version  Name:	19676501.jpg Views:	2 Size:	185.6 KB ID:	10720661
 

GA_Boater

Honorary Moderator Emeritus
Joined
May 24, 2011
Messages
49,038
Take out the plugs.

Set #1 to TDC. Put a pencil or something in the plug hole to get it close. It doesn't need to be perfect, just close.

Take off the timing pulley flange.

Rotate the flywheel/hub CW until the arrow on the timing pulley points exactly to the hub.

Install the timing belt. You may need to lead or lag the belt by a tooth.

Install the flywheel on the hub with the flywheel timing mark is lined up with the timing pulley arrow. Torque down the 8 small bolts.

Rotate the flywheel CW a few turns and make sure the timing pulley points to the timing mark. Again, close is what you're looking for.

RANT;

DON"T play with the timing stop screws - It doesn't get out of time when replacing the timing belt if you follow the steps above and you can't see 23[SUP]o[/SUP] anyway!

And the timing didn't cause the motor to turn over slowly - Merc timing on these motors is totally mechanical and doesn't magically fall out of time. Fix the starter and clean all the electrical connections.

Don't believe everything you read on the Internet, not even this forum. We try to set people straight, but there are more of them than us. Ask questions if you aren't sure before doing something and get a manual.

END RANT

EDIT - Merc850's procedure is perfect if you can find the timing stop tool and if you mess with the timing stop screws. If you don't screw with the screws, a pencil works to get the motor close to TDC. I think the timing stop tool has been NLA for decades. If the timing screws are not messed with, you can find a pencil in almost any desk drawer or maybe even behind your ear. 850 is the shop way if you work in a shop and have the tool, my way is the shade tree way. Both methods work - If you don't mess with the stop screws.

I'm not knocking 850's advice if it seems that way. Just showing another way to skin a cat.
 
Last edited:

Poopdeck

Cadet
Joined
May 9, 2010
Messages
21
Thanks guys. I thought that was what needed to be done but wanted to confirm it with you guys before I messed up anything else.

I have tried two different starters now and both have turned the engine over slowly. The timing affecting the spin rate sounded wrong to me too but I thought since I had to replace the belt I'd check just the same. The problem came from me just being curious how things work and not paying attention to the mark when I took it apart.

Since the engine is on a stand, I have been trying to spin the engine by hooking jumper cables to the ground post on the engine and the hot post on the solenoid and then jumping the solenoid to spin the starter.Is there a better way that would change the results I'm getting? There is really no wiring to replace in this scenario and both starters have turned the engine slowly. Anything I'm missing?
 

racerone

Supreme Mariner
Joined
Dec 28, 2013
Messages
38,112
New starters or something else.------Take the starters apart and inspect them to be sure they are good !!------Checked for bad bearings in powerhead.----Jammed lower unit perhaps.----What is the history of this motor ?----Did the slow cranking develop suddenly ?
 

Poopdeck

Cadet
Joined
May 9, 2010
Messages
21
Hmmm, I don't know the history. The engine spins great with the plugs out, but with the plugs in it spins slow. Neither of the starters tried were new but both looked fine inside and worked as they should. Lower unit is in neutral. It acts like the battery is almost dead even though it's fully charged.
 

GA_Boater

Honorary Moderator Emeritus
Joined
May 24, 2011
Messages
49,038
Sounds like a new motor to you. If you haven't, drop the lower and inspect the water pump and change the impeller. Change the lube and check for water in the lube.

While it's off see how she cranks.
 

The Force power

Commander
Joined
Feb 3, 2019
Messages
2,349
If I made add; make sure the battery-cables are good, including the lug-ends! no corrosion in with the copper-strands.

The ground cable is equally as important as your power supply make sure they're all tied
 
Top