1990-ish Johnson 48 SPL Trim Tilt Motor, Pin Removal please help!

gnarbrah

Petty Officer 2nd Class
Joined
Sep 20, 2007
Messages
140
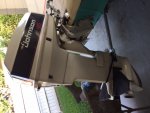
Hello all - not exactly sure of the year of this engine (ID plate is missing) but I think it's a late 80's early 90's. Engine runs great has130psi both cylinders BUT the wonderful trim tilt motor died. I've read and watched videos to the ends of the internet and I've learned I need heat, big hammer, penetrating oil and patience to remove the upper pin to get the motor assembly to tilt so I can access the back screws. That being said I believe my engine is "special".
It would appear that I do not have a manual release that would allow me lift the engine and block it to relieve pressure on the pin (step1 correct?).
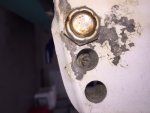
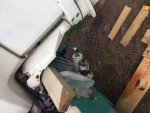
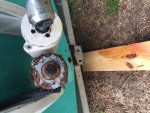
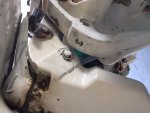
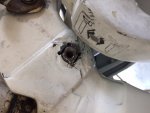
Also it appears that my upper pin has a bolt threaded into the starboard side and just a "cotter pin" to secure the pin on the port.
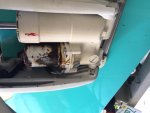
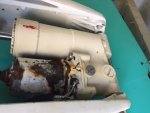
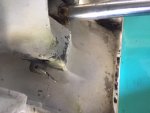
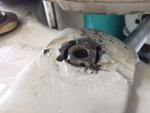
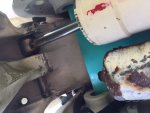
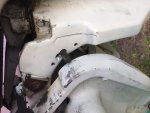
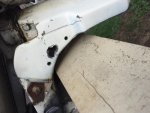
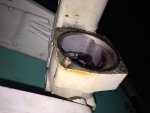
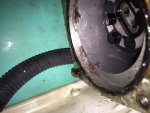
It appears my only hope in removing it will be hitting it on the starboard side and forcing it to port. My plan is to remove the starboard side bolt, get a drift and start wailing away at it. Any suggestions are GREATLY appreciated!! Here are some photos:
IMG_3263.JPG
IMG_3264.JPG
IMG_3265.JPG
IMG_3266.JPG
IMG_3267.JPG
 
Last edited:
gnarbrah

Petty Officer 2nd Class
Joined
Sep 20, 2007
Messages
140
UPDATE -

I googled a bit more and found another thread where a similar motor had the release screw located on the port side (head of the screw faces to port) and you can access it through one of the adjustment holes in the mounting bracket. I looked and sure enough there's a screw in there. Haven't tried too hard but it's TIGHT. Should I keep trying to loosen it?
FullSizeRender.jpg
 

Stumpalump

Chief Petty Officer
Joined
Dec 5, 2013
Messages
413
They were special in the earlier years because the did not come with trim, VRO and warning system. Best motors ever. I've paid my dues on those old trim units and now seek motors without them. The set back and the way an aftermarket trim unit raises the height and the angle makes them my first choice so if that unit becomes one problem after another then don't be afraid to swap. Spray that screew. I pay about 16 bucks a can for aresol Triflow. I'd buy it for $50. It lasts forever because a drop will do what a big squirt of the others won't. Grainger and gun shops sell it. It will unseize that screew. Very common to see them broken off. Break free is another spray that works but it's a little greasy and contains smelly fish oil. Fish oil on rust is supposed to be the best but after using it for years the smell made me switch to Triflow. Remember the screws break like they are made of plastic so go easy and be ready for the motor to drop once loose.
 

gnarbrah

Petty Officer 2nd Class
Joined
Sep 20, 2007
Messages
140
Thanks Stump - I've started soaking it (and the pin) with an old can of rust eater I found in the shed. Still no luck getting the screw to turn. I have successfully bent 2 screwdrivers nearly 180 degrees...
What happens if I end up stripping the screw head or breaking it off? Is there another way to relieve pressure?


I went ahead and pulled the bolt from the starboard side of the pin. It would appear that the previous owner tried drilling out around it to try and get the pin freed up (I'm guessing to no avail). The pin is basically flush with the motor housing so I might not have any mushrooming trouble once I start beating on it. Question now is, do i screw the bolt back in and beat on it or use a drift of sorts inside where the threads are?

IMG_3269.JPG
IMG_3270.JPG IMG_3271.JPG
 

gnarbrah

Petty Officer 2nd Class
Joined
Sep 20, 2007
Messages
140
UPDATE -

So I bent 2 screwdrivers like a pretzel trying to get the manual release screw loosened up. The screw is off center enough so I can't get a bigger screwdriver in through the mounting bracket hole. So plan B kicks in. I was able to get the top fill hole screw out but the bottom was stuck like no tomorrow so I ended up drilling a hole in it to drain the fluid. Not ideal I know but I'm hitting a brick wall.
So I was able to drain the fluid and the motor goes all the way down now but I can't lift it (manually obviously) past about 3/4 of the way up. I'm trying to get it up enough so I can engage the lock out to take the pressure off the hydraulic piston. Then it's off to the races beating the tar out of the pin.

What am I missing to get the motor to lift all the way up??

Thanks!
 

gnarbrah

Petty Officer 2nd Class
Joined
Sep 20, 2007
Messages
140
So I've been thinking about this issue and it would make sense to me that there is fluid on top of the piston inside the ram cylinder (correct?). Basically I have drained all the fluid below the cylinder but the fluid remaining on top is still compressing when I try to manually lift the motor. Any truth to that logic? If so, can I unscrew the top of the ram cylinder to relieve this pressure?

Also, I'm starting to hate this PTT - if when I get this thing apart / removed is it possible to convert to manual?
 

gnarbrah

Petty Officer 2nd Class
Joined
Sep 20, 2007
Messages
140
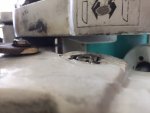
So the good news is I got the pin out. I started pounding on it with a punch that fit inside the threads on the starboard side. Sadly I learned this model is intended to be "pulled" to the starboard side via slide hammer (hence the threaded pin) and won't travel far enough to port in order to release from the tilt rod. I tried miserably to cut the pin but that wasn't happening so I ended up having to drill through the bracket on the port side to beat the pin out to starboard. Good news is it worked, bad news now my punch is stuck...
I'm hoping I maneuver things enough to punch it back out to the port side then with any luck I'm off to the races. I actually think I can reuse the pin too so that's a bonus I suppose.
So now I'm at a point that if I get the punch out I can hopefully pivot the tilt assembly outward and get to the screws on the trim motor. Then it's a matter of putting back together, replacing the drain screw and seeing if it works.

IMG_3285.JPG

IMG_3289.JPG
 
Last edited:
gnarbrah

Petty Officer 2nd Class
Joined
Sep 20, 2007
Messages
140
So I'll just keep updating as I go along should anyone else have this problem.

I was able to get the punch out but had to drill out some more of the mounting bracket. Definitely not ideal but I'm oping it won't cause any structural issues. I guess I could weld some flat stock across the hole to beef it up?

The really good news is the tilt assembly did rotate down as I had hoped and sure enough I can now get to all 4 screws holding the trim motor on. Of course they're seized up too so I'll hit them with the rust off spray for a day or two and see if I can get them to turn. The good news is the heads are in good shape so with any luck they'll come free. I guess I still need to figure out how to get the push rod lined back up to get the pin back in once it's all said and done but I'll cross that bridge when I get there...

Any comments are still welcomed and very much appreciated!

image1.JPG

image2.JPG

image3.JPG
 

gnarbrah

Petty Officer 2nd Class
Joined
Sep 20, 2007
Messages
140
Well I got the drain plug (retainer cap I think it's called in reality) to come out. It looked like the o-ring was wrapped around the threads. Everything else in there looks good. Should I worry about replacing anything other then the o-ring and plug? It figures that plug is a $50 part...

Now it appears that I am down to the 4 screws that actually hold the trim motor in place. They are bright and shiny and look like new. I even bought a new #3 phillips screwdriver to minimize my chances of stripping the heads. I've tried them all a few times but they do not want to turn. I keep spraying them every so often with rust eater and figure I'll just keep at it for a few days and hope they give in. Anyone have any thoughts as to what else I could try to loosen them up? They appear to have some sort of washer or rigid gasket between the housing and the screw head. Will the penetrating oil still be able to work its way in?

Lastly, I was looking at new motors as I hope to need one soon. I came across DB Electrical and most of the reviews I read said they work ok. They're only $60 shipped vs. $200-$300 for the other brands. Any thoughts on these? I plan on light sanding whatever motor I get and hitting it with Osfo and fresh paint before installing it to try and maximize it.

Thanks
 

interalian

Commander
Joined
Jul 23, 2009
Messages
2,105
Well I got the drain plug (retainer cap I think it's called in reality) to come out. It looked like the o-ring was wrapped around the threads. Everything else in there looks good. Should I worry about replacing anything other then the o-ring and plug? It figures that plug is a $50 part...

Now it appears that I am down to the 4 screws that actually hold the trim motor in place. They are bright and shiny and look like new. I even bought a new #3 phillips screwdriver to minimize my chances of stripping the heads. I've tried them all a few times but they do not want to turn. I keep spraying them every so often with rust eater and figure I'll just keep at it for a few days and hope they give in. Anyone have any thoughts as to what else I could try to loosen them up? They appear to have some sort of washer or rigid gasket between the housing and the screw head. Will the penetrating oil still be able to work its way in?

Lastly, I was looking at new motors as I hope to need one soon. I came across DB Electrical and most of the reviews I read said they work ok. They're only $60 shipped vs. $200-$300 for the other brands. Any thoughts on these? I plan on light sanding whatever motor I get and hitting it with Osfo and fresh paint before installing it to try and maximize it.

Thanks

Hand impact screwdriver is your friend. Like this: https://cdn1.bigcommerce.com/server...impact_driver__01780.1359648045.1280.1280.jpg
 

gnarbrah

Petty Officer 2nd Class
Joined
Sep 20, 2007
Messages
140
Thank you! Hand impact was awesome! Picked one up at HF for $9 and it worked like a dream on 3 of the 4. The bad news is #4 broke the head off...

Now what do I do? I am so torqued I can't stand it. I was SO close!!!!
 

gnarbrah

Petty Officer 2nd Class
Joined
Sep 20, 2007
Messages
140
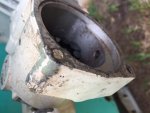
Ok so all might not be lost but I think I'm on my 9th life. I went ahead and pulled the tilt motor off and the broken screw has about 1/4" still sticking up. I've gone ahead and hit 2 or 3 times with penetrating oil and will do the same thing tomorrow. What's the best plan of action? Lots of penetrating oil and vice grips? I can't believe I'm this depressed with tilt motor in my hand...

IMG_3313.JPG

IMG_3315.JPG
 

interalian

Commander
Joined
Jul 23, 2009
Messages
2,105
I've never had much luck getting a broken bolt like that out. Vice grips can't put enough torque on the stub to ever work. Some say if you take it to a welder and have a hex nut welded to the stub, then turn out while still hot you'll get it. At this point, what do you have to lose?
 

juno pierrat

Petty Officer 1st Class
Joined
Dec 14, 2013
Messages
355
mixture 50/50 acetone/ATF its worked amazingly for me several times, and some heat
 

gnarbrah

Petty Officer 2nd Class
Joined
Sep 20, 2007
Messages
140
I found a guy who lives 10 houses away that has a TIG welder and will help me out. I'll mix up some 50/50 ATF Acetone and soak it all day tomorrow them Monday the welder will do his thing. Wish me luck!
 

gnarbrah

Petty Officer 2nd Class
Joined
Sep 20, 2007
Messages
140
Well my worst fears were realized. We went through 3 nuts being welded on the broken stud until finally the stub broke down far enough to where we couldn't get another one on. That thing is really stuck!

What options do I have left? I suppose all I've got left is drilling. Any words of advice?
 

interalian

Commander
Joined
Jul 23, 2009
Messages
2,105
Yikes, that's really stuck. Now, as you say, drilling. Hope the break is flat enough that the bit won't wander, but at least you have a guide now.
 

gnarbrah

Petty Officer 2nd Class
Joined
Sep 20, 2007
Messages
140
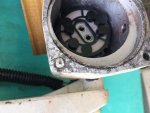
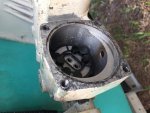
Well I'm happy to report I may have success! I had about 3/4 of a thread still exposed and took the dremel cut off wheel to it and made it as flush as I could:
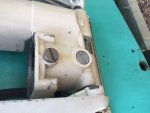
IMG_3351.JPG

Then I took one of my trusty HF punches and made (as close to) center punch to start the drilling:
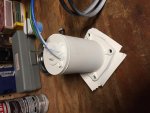
IMG_3352.JPG

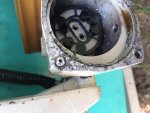
Started small and went bigger once it broke through the bottom of the bolt:

IMG_3353.JPG

IMG_3354.JPG

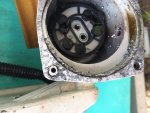
The drilling went surprisingly well and easy. I used left hand bits that my mechanic friend let me borrow. I guess quality bits do make a difference - who knew... I sprayed them regularly with wd-40 and went slow and steady on the drilling. Honestly it wasn't that bad at all. I was hoping the left handed bits would just spin it out eventually bit no luck there. Ended up working a 1/4-20 tap in and out and got all the junk cleaned out of the threads. Sadly the threads were a bit washed out so I had to go the helicoil route. Sadly the first helicoil went too deep so I stacked another one and I think it's a touch too tall:

IMG_3357.JPG

Are they easily removed? I think I'd like to just have one in there and place it at the right depth. The good news is that particular screw snugs up ok with an extra washer. Thoughts?

As luck would have it my new DB Electric trim motor showed up today too and it fits nicely. Now I'm just waiting on my retainer plug that I had to drill out to show up and then its time to start putting it all back together. Any thoughts on anti-seize goop to put on the threads when it goes together again? Also, any special grease I should use on the upper pin to keep it from locking up again as well?

I call this progress!

IMG_3356.JPG

I plan on painting the new motor - any special paint I should use to protect it better?
 

interalian

Commander
Joined
Jul 23, 2009
Messages
2,105
If your HeliCoil is too long, Dremel the excess off - easy.

You're doing very well. Keep it up!
 

gnarbrah

Petty Officer 2nd Class
Joined
Sep 20, 2007
Messages
140
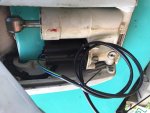
So I'm gonna finish this thing one of these days (I hope). I had to wait for my new retainer plug (drain plug) that I drilled out to deliver and got it put back in:

IMG_3434.JPG

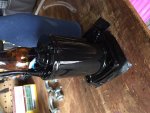
That part was easy enough. Got the new trim motor coated with primer and then about 4 coats of enamel spray paint to try and make it last as long as possible:

IMG_3430.JPG

IMG_3433.JPG

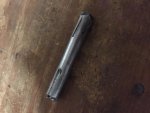
I also filed, wire wheeled and polished up my battle scarred tilt pin. You'll notice all the drilled out grooves from the previous owner. Not sure if he ever got it out but it's still a solid piece of steel and it should work fine:

IMG_3429.JPG

I want to make sure it goes back in as easy as possible. I also got a can of Tef-Gel. From what I read it's a must for stainless / aluminum connections to prevent seizing =. I would guess even more so in salt water which I plan on being in plenty.


As for the 4 bolts that actually hold the trim motor on, I went with hex head bolts and will also coat them generously with Tef-Gel. If I ever have to do this againI don't want to have to fight it!

I would probably have it back together by now but I dropped the drive coupling that goes from the trim motor to the pump setup. It's somewhere in my yard but I sure can't find it. Luckily it was available to buy and I'm just waiting on the UPS man to bring it to me.

Once it gets here I guess it's go time!

Any words of wisdom? I know to fill it with automatic transmission fluid, run it all the way up (I'll have to help it of course) then fill it again, run it down and repeat till it works like it should. Honestly I'm slightly more concerned about running the wires for some reason.
 
Top