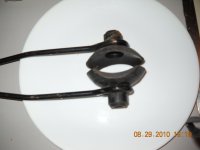
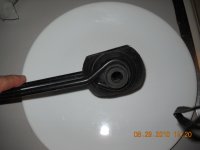
1990 Force 50 HP Bearing Cage Kit Replacement

Nordin

Commander
Joined
Jun 12, 2010
Messages
2,555
That washer in the upper part of the housing is a part of the old shift rod seal.
Pull it away and clean the wall of the seal seat with fine sandpaper.
Lube the new seal with gear oil and push it in with a suitable socket from upper part of the gear housing.
Be careful when start pushing the new seal in, check so it would go in straight.
When reassemble lube the shift rod with gear oil cause the new seal will fit and seal more than snug so the shifting can be hard in the begining.
 

JohnWaynne

Cadet
Joined
Jul 4, 2022
Messages
23
That washer in the upper part of the housing is a part of the old shift rod seal.
Pull it away and clean the wall of the seal seat with fine sandpaper.
Lube the new seal with gear oil and push it in with a suitable socket from upper part of the gear housing.
Be careful when start pushing the new seal in, check so it would go in straight.
When reassemble lube the shift rod with gear oil cause the new seal will fit and seal more than snug so the shifting can be hard in the begining.

Thanks for the follow-up. This info was accurate. I got the seals in and the lower unit put back together. Gonna bolt it back on the boat in the next few days.

I also got the new propeller shaft bearing cage installed. New bearing and new seals all around. I used a little lock-tite on those 2 allen head bolts holding it in place. One bolt vibrated loose originally causing all this work.
 
Last edited:

JohnWaynne

Cadet
Joined
Jul 4, 2022
Messages
23
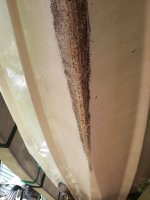
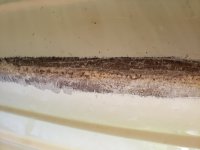
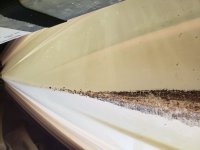
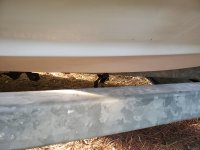
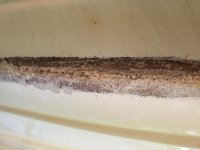
On another note I got some bodywork going on on the bottom of this boat.
I ordered some Marine-Tex and when I added the catalyst it started smoking. Ha! It's some commercial level repair putty. I'm repairing scratches and nicks in the fiberglass. I'm puttying about a 3 ft long section of the V.
I also have some gel-coat and will paint on a section of the V about 8 ft long. Fortunately, there's a lot of good videos on youtube about how to do the fiberglass and gel coat. It's my first go of it, but it's going well.

The directions of the Marin Tex said Get coats don't stick that well to resins. Everything is white color and its the underside so if it doesn't finish out perfect I'm OK with it. Just want it solid and smooth and looking decent.
 

Attachments

  • 20220718_190428.jpg
    20220718_190428.jpg
    1.4 MB · Views: 2
  • 20220718_190423.jpg
    20220718_190423.jpg
    976.4 KB · Views: 2
  • 20220718_190420.jpg
    20220718_190420.jpg
    1.2 MB · Views: 2

JohnWaynne

Cadet
Joined
Jul 4, 2022
Messages
23
I got the lower unit bolted back on and added new gear oil. It starts and goes into forward, idle, and reverse just fine. Technically it's back together properly. But I noticed a bolt that holds the lower unit on seems to have a small jet of water flowing from it. You can see it in the video.

While I was working on the lower unit, I got a small ding on the flat surface that mates up to the upper unit. I used a couple drops of JB Weld, sanded it flat, and finished it smooth as the surface with 1600 grip sandpaper. I'm not sure if that could cause the two halves from mating-up together and cause a leak?


I drained the new gear oil again to check for water and in preparation to take it apart again. I did think there was water in the oil.

Should disassemble the lower unit it again and check the flat surfaces?
I'm really surprised there's no gasket to link the lower and upper unit. It's Just aluminum to aluminum.
 

Attachments

  • 20220726_192608.jpg
    20220726_192608.jpg
    1.2 MB · Views: 2
  • 20220726_192632.jpg
    20220726_192632.jpg
    1.4 MB · Views: 2
  • 20220726_192527.jpg
    20220726_192527.jpg
    2.1 MB · Views: 2
Last edited:

JohnWaynne

Cadet
Joined
Jul 4, 2022
Messages
23
Here's a shortened video of the leak. I suppose I'll have to take drop the lower unit again to hopefully find it.
 

Attachments

  • 1233456789987.mp4
    9 MB · Views: 0
Last edited:

racerone

Supreme Mariner
Joined
Dec 28, 2013
Messages
37,818
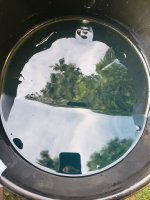
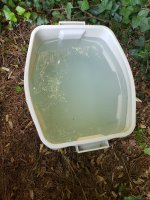
There is an o-ring seal between the upper and lower parts of the gearcase.------You should have a bigger bucket / more water for testing.----There is no gasket between lower unit and exhaust housing.-----Is there a drain hole there that is supposed to leak ?
 
Last edited:

jerryjerry05

Supreme Mariner
Joined
May 7, 2008
Messages
18,037
Pressure test before adding oil.
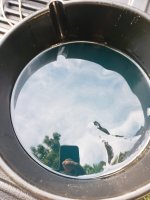
The bucket needs to be deeper or use the right muffs.
 

Attachments

  • Tach and stuff 001.jpg
    Tach and stuff 001.jpg
    800.7 KB · Views: 1
  • Tach and stuff 002.jpg
    Tach and stuff 002.jpg
    838 KB · Views: 1

JohnWaynne

Cadet
Joined
Jul 4, 2022
Messages
23
There is an o-ring seal between the upper and lower parts of the gearcase.------You should have a bigger bucket / more water for testing.----There is no gasket between lower unit and exhaust housing.-----Is there a drain hole there that is supposed to leak ?
I believe you are correct about that. The O-ring was installed on the lower.
I may have my terminology offer a little bit.

I was referencing the section about the lower unit where the 4 bolts go to bolt it back to the upper motor. There seems to be a large empty space above the lower unit. The only thing in there is the drive shaft runs thru there, and the tube taking water to the motor. I was thinking the was some type of leak in that area. But I'll know more after I test it on the garden hose with the right muffs.
 

racerone

Supreme Mariner
Joined
Dec 28, 2013
Messages
37,818
?????----An empty space that has exhaust and water coming down through it when the motor is running.
 

JohnWaynne

Cadet
Joined
Jul 4, 2022
Messages
23
I did a pressure test on the lower unit.
It held right at 12 psi for at least 10 minutes. That seems good. I filled it with gear oil.

I put the right muffs on it and ran it on the hose. It leaked from around one bolt. The video shows the leak. They were all very tight.

I loosened all 4 bolts about half way and dropped it to make a gap. I used a flash light and checked for any debris around the seal. It looked clean. The little JB Weld repair spot looks the same. Its on the other side of the leak. It seemed smooth and flat.

Can those two sections be put together with some blue RTV silicon?
 

Attachments

  • 20220727_192601.mp4
    37.4 MB · Views: 2

JohnWaynne

Cadet
Joined
Jul 4, 2022
Messages
23
Overall good news. I used some sealant and put the lower back on. It reduced the leak but it was still a little around the bolt. However, from reading other posts, it appears once the lower unit is separated and put back together it's a somewhat common issue.

I got to test it on the lake yesterday and it ran fine. Hopefully, no more issues for the rest of the boating season. Thank you guys for the accurate info.
 

JohnWaynne

Cadet
Joined
Jul 4, 2022
Messages
23
The bodywork also came out nice enough for my purposes. Its only noticeable if you're really looking, which is fine. Its below the water line as well.
 

Attachments

  • 20220728_192952.jpg
    20220728_192952.jpg
    7.3 MB · Views: 1
  • 20220718_190423.jpg
    20220718_190423.jpg
    976.4 KB · Views: 1
Top