1990 Force 50 HP Bearing Cage Kit Replacement

JohnWaynne

Cadet
Joined
Jul 4, 2022
Messages
23
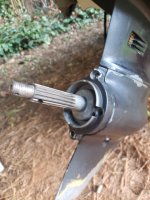
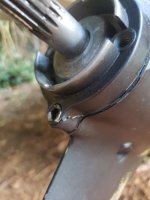
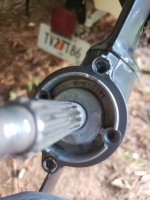
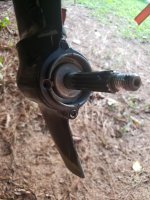
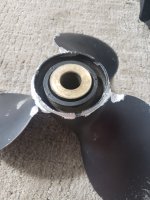
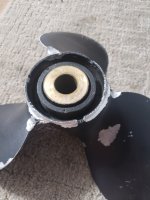
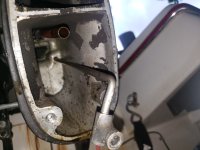
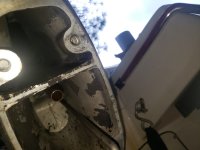
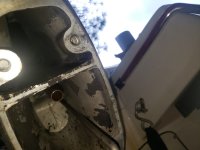
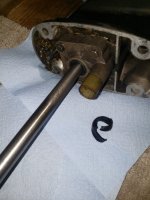
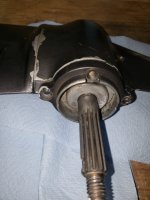
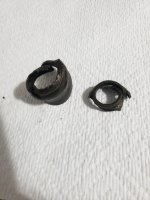
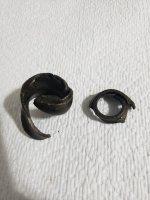
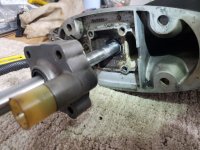
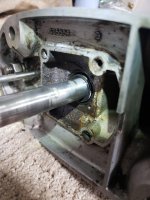
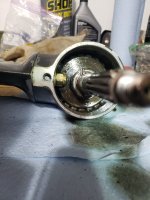
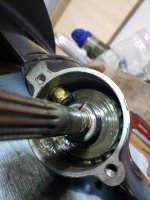
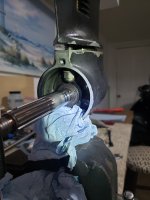
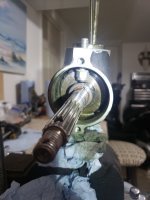
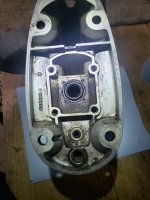
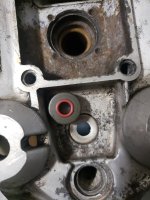
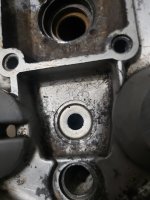
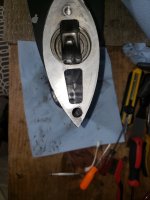
Hi, I'm new here and been boating 2-3 years. After taking my boat out I discovered the prop showed signs of wear. It looks like something wrapped around it and damaged the prop and bearing cage, or maybe the bolt vibrated out and damaged the back of the prop Not sure, but the bearing cage is cracked and missing a bolt.

My question is is there a special tool needed to pull the bearing cage off and install a new one? It's cracked and there maybe water in the lower unit oil. I haven't looked yet, but I know the oil needs changing anyway.

I'm planning to replace the bearing cage kit, add new oil, and install a new prop. Any thoughts or advice for this repair? Are there other parts that should be replaced in the lower unit? Thanks for any feedback.
 

Attachments

  • thumbnail_20220704_201433_resized.jpg
    thumbnail_20220704_201433_resized.jpg
    213.2 KB · Views: 8
  • thumbnail_20220704_201440_resized.jpg
    thumbnail_20220704_201440_resized.jpg
    141.6 KB · Views: 8
  • thumbnail_20220704_201509_resized.jpg
    thumbnail_20220704_201509_resized.jpg
    174.3 KB · Views: 7
  • thumbnail_20220704_201520_resized.jpg
    thumbnail_20220704_201520_resized.jpg
    240.4 KB · Views: 7
  • thumbnail_20220705_020211_resized.jpg
    thumbnail_20220705_020211_resized.jpg
    204.6 KB · Views: 7
  • thumbnail_20220705_020226_resized.jpg
    thumbnail_20220705_020226_resized.jpg
    189.2 KB · Views: 8
racerone

Supreme Mariner
Joined
Dec 28, 2013
Messages
37,818
Stop looking for a quick fix.-----Take this unit apart for inspection.----Likely stripped gears in there.
 

JohnWaynne

Cadet
Joined
Jul 4, 2022
Messages
23
Stop looking for a quick fix.-----Take this unit apart for inspection.----Likely stripped gears in there.
Right on. If that's the group consensus that I should do that. I've never taken a lower unit apart. Is there anything special that should be pointed out? Special tools, etc. I appreciate the feedback.
 

jerryjerry05

Supreme Mariner
Joined
May 7, 2008
Messages
18,037
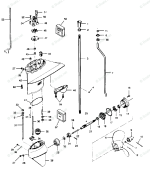
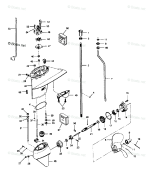
Looks like the shear pin or locating pin is missing.
That pin holds the prop away from the housing.
On the shaft is a 1/4" hole, turn the prop over there's a corresponding hole.
Fit the prop and insert the pin in the hole and then tighten the nut and insert the cotter key.
#s 9 /10/11/12 all work to keep the prop from rubbing.
1657042506832.png1657042506832.png
 

JohnWaynne

Cadet
Joined
Jul 4, 2022
Messages
23
Looks like the shear pin or locating pin is missing.
That pin holds the prop away from the housing.
On the shaft is a 1/4" hole, turn the prop over there's a corresponding hole.
Fit the prop and insert the pin in the hole and then tighten the nut and insert the cotter key.
#s 9 /10/11/12 all work to keep the prop from rubbing.
View attachment 364810asdfasdView attachment 364810


Thanks for the charts. It looks like the bolt #13 vibrated loose out of #14 (bearing cage) and the prop kept hitting it until the bolt broke in half causing the damage to the cage and prop.

All the parts were in place correctly for the cotter pin, cone, and little pin going thru the shaft to hold the prop in place. I've had the boat out 7 times this year before this happened...
 

JohnWaynne

Cadet
Joined
Jul 4, 2022
Messages
23
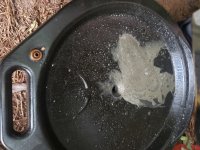
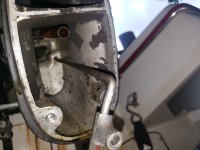
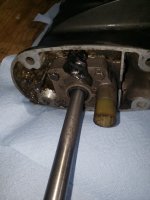
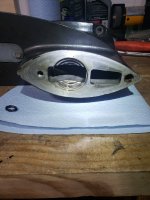
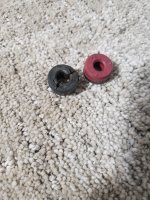
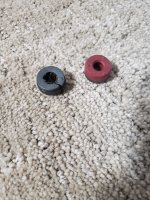
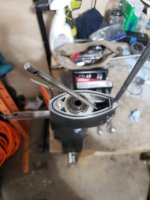
Update: I've taken the foot off. Took that bottom oil screw out and a lot of water came out. Then some milkshake oil. There's a rubber gasket that's broken and visible in one of the pictures. Looks like it connects the water pump outlet into the pickup tube that runs up to the motor. I haven't been able to find that rubber gasket anywhere so far. Worried putting it back together without it will cause a water leak and the motor may overheat?

I have the rubber water pump that I'm going to install. And I also got the bearing cage kit ready to install.

The long shaft won't pull out from the lower unit where the gears are. It looks like I'll have to take them apart to get the shaft to pull out to put the new rubber water pump and then reassemble it all.

I'm mostly worried about that rubber connector. I guess I need to keep searching to see if I can find one available to buy?
 

Attachments

  • thumbnail_20220711_200132_resized.jpg
    thumbnail_20220711_200132_resized.jpg
    308.2 KB · Views: 5
  • thumbnail_20220711_200844_resized - Copy.jpg
    thumbnail_20220711_200844_resized - Copy.jpg
    199.8 KB · Views: 5
  • thumbnail_20220711_200844_resized.jpg
    thumbnail_20220711_200844_resized.jpg
    199.8 KB · Views: 5
  • thumbnail_20220711_200850_resized - Copy.jpg
    thumbnail_20220711_200850_resized - Copy.jpg
    157.5 KB · Views: 4
  • thumbnail_20220711_200850_resized.jpg
    thumbnail_20220711_200850_resized.jpg
    157.5 KB · Views: 4
  • thumbnail_20220711_202356_resized - Copy.jpg
    thumbnail_20220711_202356_resized - Copy.jpg
    209 KB · Views: 5
  • thumbnail_20220711_202409_resized.jpg
    thumbnail_20220711_202409_resized.jpg
    248.4 KB · Views: 6
  • thumbnail_20220711_202732_resized.jpg
    thumbnail_20220711_202732_resized.jpg
    202.4 KB · Views: 6

JohnWaynne

Cadet
Joined
Jul 4, 2022
Messages
23
Better pic of the rubber washer thingy??
Where does it fit?

That's my question too. I can't tell exactly where it came from?
I'll take a better picture of it and post it soon.

When I curl it up into the original shape, it looks like it fits in the plastic outlet for the water pump. Like it connects the up-tube for water that cools the motor.

I cannot find an actual rubber gasket in any replacement kits for that part tho.
 

JohnWaynne

Cadet
Joined
Jul 4, 2022
Messages
23
I took a few pictures. It looks like that rubber seal came from the drive shaft under the water pump. There's a spring showing where some rubber is missing.

Perhaps it's a dumb question, but I can't figure out how to pull the gears out of the housing. There's a bolt in the way blocking me pulling the shaft and gears out. I can't find a good video on the steps.

The videos I find on youtube the guy pulls the gears straight out.
 

Attachments

  • thumbnail_20220712_185853_resized.jpg
    thumbnail_20220712_185853_resized.jpg
    187 KB · Views: 4
  • thumbnail_20220712_185908_resized.jpg
    thumbnail_20220712_185908_resized.jpg
    204.6 KB · Views: 4
  • thumbnail_20220712_190600_resized.jpg
    thumbnail_20220712_190600_resized.jpg
    263.5 KB · Views: 3
  • thumbnail_20220712_190609_resized.jpg
    thumbnail_20220712_190609_resized.jpg
    242.5 KB · Views: 3
  • thumbnail_20220712_190821_resized.jpg
    thumbnail_20220712_190821_resized.jpg
    220.9 KB · Views: 4
  • thumbnail_20220712_190836_resized.jpg
    thumbnail_20220712_190836_resized.jpg
    203.4 KB · Views: 4

JohnWaynne

Cadet
Joined
Jul 4, 2022
Messages
23
It turns out that bolt has to be slowly backed out while slowly separating the foot. As I lift the foot up it creates a little more space to continue backing the bolt out.

Then finally ill be able to remove the gears. Once I have it apart I'll order a full gasket kit and replace the gasket. And check the gears and the dog for rounded edges. If all looks good itll be the reverse.

That bolt blocking the gears in is a bad design.
 

Attachments

  • 20220713_011137.jpg
    20220713_011137.jpg
    1.3 MB · Views: 5

JohnWaynne

Cadet
Joined
Jul 4, 2022
Messages
23
I've noticed this motor has vibrated 3-4 bolts loose. Is that normal? I would run full throttle for 15-20 minutes at a time on the lake. Max vibrations is what I was thinking.
 

Nordin

Commander
Joined
Jun 12, 2010
Messages
2,555
I think that black rubber seal is the rubber boot seal which suppose to seal the drive shaft spline up against the crank.
Part number 819293.
There are no more seals for the water tube to the impeller housing then the white plastic one with part number FA 485914.
The black rubber boot seal is not necessary, just coat the spline with a small amount of marine grease to protect the spline from rust when you put the LU back to the engine.
 

jerryjerry05

Supreme Mariner
Joined
May 7, 2008
Messages
18,037
Nordins right, the shredded rubber is the driveshaft cover that fits on the end of the shaft. Grease the splines but no grease on the end of the shaft.
You said" I took a few pictures. It looks like that rubber seal came from the drive shaft under the water pump. There's a spring showing where some rubber is missing."
The spring is the back side of the shaft seal. NORMAL!! It's designed to keep the oil in the drive.
I took a few pictures. It looks like that rubber seal came from the drive shaft under the water pump. There's a spring showing where some rubber is missing.
#33,59,39 is that pesky bolt/nut.
The bolt is supposed to be locked in place and the nut can be removed then the gears can be removed.
1657709040750.png
 

JohnWaynne

Cadet
Joined
Jul 4, 2022
Messages
23
I think that black rubber seal is the rubber boot seal which suppose to seal the drive shaft spline up against the crank.
Part number 819293.
There are no more seals for the water tube to the impeller housing then the white plastic one with part number FA 485914.
The black rubber boot seal is not necessary, just coat the spline with a small amount of marine grease to protect the spline from rust when you put the LU back to the engine.
Thanks for the observations and info. Super helpful to learn that rubber is not something I have to replace. I can just grease the drive shaft splines.
 

JohnWaynne

Cadet
Joined
Jul 4, 2022
Messages
23
Nordins right, the shredded rubber is the driveshaft cover that fits on the end of the shaft. Grease the splines but no grease on the end of the shaft.
You said" I took a few pictures. It looks like that rubber seal came from the drive shaft under the water pump. There's a spring showing where some rubber is missing."
The spring is the back side of the shaft seal. NORMAL!! It's designed to keep the oil in the drive.
I took a few pictures. It looks like that rubber seal came from the drive shaft under the water pump. There's a spring showing where some rubber is missing.
#33,59,39 is that pesky bolt/nut.
The bolt is supposed to be locked in place and the nut can be removed then the gears can be removed.
View attachment 365484
Same to you. Thanks for the information. I have enough info I can complete the tear down, inspection, gasket replacements, and build-up!
 

JohnWaynne

Cadet
Joined
Jul 4, 2022
Messages
23
Well I finally got the two pieces of the foot separated. The nut did not back off the bolt holding the gears in.

Id have to cut that bolt in half and pull it up thru the top. Im not having any issues with the gears. Im going to replace the gaskets I can reach as it is, and put it back together. Its not ideal at all. But I'll do more damage to the aluminum housing then its worth at this point.

Its a poor design in the manufacturing IMO.
 

Attachments

  • 20220713_203953.jpg
    20220713_203953.jpg
    1.2 MB · Views: 4
  • 20220713_204001.jpg
    20220713_204001.jpg
    1.3 MB · Views: 4
  • 20220713_204014.jpg
    20220713_204014.jpg
    1.8 MB · Views: 4
  • 20220713_204035.jpg
    20220713_204035.jpg
    1.9 MB · Views: 4

JohnWaynne

Cadet
Joined
Jul 4, 2022
Messages
23
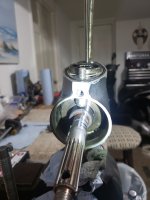
I got my seal kit and removed the shift shaft seal. I'm wondering if there's special tools to install the new shift shaft seal? I used a pick and other flat blade to pull the old one out.

Both sides where the seal go are smaller then the seal. So The seal needs to be squished down to fit inside, except it has like a ceramic part to the seal.
I cannot figure out how the original was installed unless there's some special tool to do this job.

Any advise how to install the new seal? If it could just be pushed in with a small deep socket and extension I would pop it in. But the whole is too small for it to even push into on both sides. Not sure how it gets in there.
 

Attachments

  • 20220720_010034.jpg
    20220720_010034.jpg
    2.3 MB · Views: 1
  • 20220720_010021.jpg
    20220720_010021.jpg
    2.2 MB · Views: 1
  • 20220720_010109.jpg
    20220720_010109.jpg
    1.2 MB · Views: 2
  • 20220720_010148.jpg
    20220720_010148.jpg
    2.1 MB · Views: 2
  • 20220720_010130.jpg
    20220720_010130.jpg
    1.4 MB · Views: 2
  • 20220720_010214.jpg
    20220720_010214.jpg
    1.4 MB · Views: 1

JohnWaynne

Cadet
Joined
Jul 4, 2022
Messages
23
Well after looking at this a little further, I may be able to break the ceramic portion off the back of the seal. The shift shaft seal hole is a little bigger on the side that's down deep inside the lower unit. I'll need an extension that's about 10-12 inches, and an appropriately sized socket, and I think if I use some light grease, I can "maybe" press in the seal.


If that's a bad idea I'd be open to buying a special tool for this job or maybe taking it somewhere to be done.
 

JohnWaynne

Cadet
Joined
Jul 4, 2022
Messages
23
Well after looking at this a little further, I see there's a piece of metal that belongs to the old seal that's wedged in there so tight, it looks like it's part of the structure. I should be able to carefully pry it out, and pop in the new seal quite easily.
 
Top