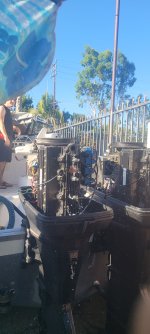
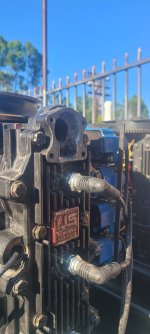
1990 Force 120HP #2 Cyl zero compression and upon opening piston shows damage

gica

Chief Petty Officer
Joined
Feb 24, 2016
Messages
495
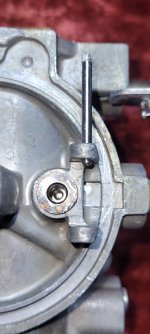
The issue you'reexperiencing with that; Mabe here in step# 4. The black roller is held with an offset screw and nut. Loosen the nut and turn the screw until the black roller JUST touches the cam. Tighten the nut and re-attach the ball link maintaining the scribed line at the roller.

I had this issue and fixed it by not "JUST" touch BUT slightly ever so slightly advance it
I did that at some point. This engine had the beggining of a melted cylinder in number 2. So the carbs may have been running rich. The float was high not parallel on the top carb I have not opened the bottom yet. It doesn't showthe same things. The squeezeball looses its firmness so the high float can do that since it doesn't close properly and overfills. But the idle? It was staying at 2500 before the rebuild with zero compressionon 2 and same setup. Now it dies at anything below 2k.
 

jerryjerry05

Supreme Mariner
Joined
May 7, 2008
Messages
18,037
Squeezie: it's only job is to draw fuel from the tank, you squeeze it till it gets firm, job done. Then when the motor starts it should loose the firmness. Then it just sets there. Oh yea it's supposed to stop the fuel from going back into the tank. The one way valve stops the fuel from returning to the tank.
 

gica

Chief Petty Officer
Joined
Feb 24, 2016
Messages
495
Thanks Jerry any comments on my carburator rebuilding? Any info would be appreciated
 

jerryjerry05

Supreme Mariner
Joined
May 7, 2008
Messages
18,037
g
Carb: upside down, the float should be level, hook up a hose and try to blow through the needle/seat, should be no air going through.
Turn up: the drop should almost touch the post.
Needle/seat: inspect the needle, rubber tip, pointy no grooves. Solid needle: look into the seat, should be a rubber seat with hole, make sure it is clear and no rough edges.
Some cleaners or carb soaks fuel treatments and other additives can swell the rubber/plastic/cork in the carb and cut off the fuel or expand it so it leaks out the side.
Get a welders tip cleaner(usually under 10$) and use it on the jets and internals of the carb.
Set the air screw at 1 1/2 turns out for initial starting.
Starting fluid test: start motor, spray SF around the intake side of the motor, this includes under the coils/packs and under the base of the carbs, not in them.
IF??? the spray makes ANY difference in the way the motor runs?? then it's sucking air someplace.
The port covers can be 2-5 depending on the motor. The gasket is a real weak point, one tiny cough or backfire can blow the gasket.
Hope something helped??

1692787294281.png
 

gica

Chief Petty Officer
Joined
Feb 24, 2016
Messages
495
g
Carb: upside down, the float should be level, hook up a hose and try to blow through the needle/seat, should be no air going through.
Turn up: the drop should almost touch the post.
Needle/seat: inspect the needle, rubber tip, pointy no grooves. Solid needle: look into the seat, should be a rubber seat with hole, make sure it is clear and no rough edges.
Some cleaners or carb soaks fuel treatments and other additives can swell the rubber/plastic/cork in the carb and cut off the fuel or expand it so it leaks out the side.
Get a welders tip cleaner(usually under 10$) and use it on the jets and internals of the carb.
Set the air screw at 1 1/2 turns out for initial starting.
Starting fluid test: start motor, spray SF around the intake side of the motor, this includes under the coils/packs and under the base of the carbs, not in them.
IF??? the spray makes ANY difference in the way the motor runs?? then it's sucking air someplace.
The port covers can be 2-5 depending on the motor. The gasket is a real weak point, one tiny cough or backfire can blow the gasket.
Hope something helped??

View attachment 387989
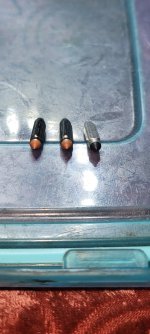
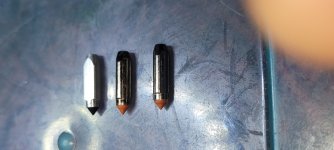
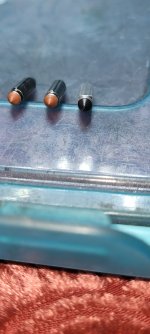
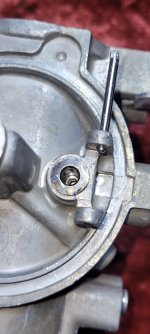
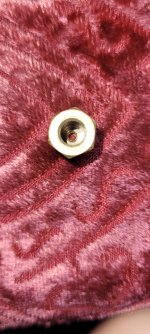
The seat has no rubber on it. I took pics of the needless. One seems to be more grooved than the other and the silver one is off the market. Any thoughts on the off the market ones? I have a seat for it.
I did adjust the floats as you mentioned.
Waiting for the inner tube and caps that I removed.
 

Attachments

  • 20230823_133417.jpg
    20230823_133417.jpg
    918 KB · Views: 5
  • 20230823_133311.jpg
    20230823_133311.jpg
    1.4 MB · Views: 6
  • 20230823_133427.jpg
    20230823_133427.jpg
    743.3 KB · Views: 6
  • 20230823_134727.jpg
    20230823_134727.jpg
    797.1 KB · Views: 5
  • 20230823_134730.jpg
    20230823_134730.jpg
    824.3 KB · Views: 3
  • 20230823_134910.jpg
    20230823_134910.jpg
    1,016.5 KB · Views: 3

jerryjerry05

Supreme Mariner
Joined
May 7, 2008
Messages
18,037
No rubber on the seats, the rubber on the needle takes the place of the seat. The pics show 3 needles. One has a groove around it. I would change that.
The black tip looks like it needs replacing too?
Try to replace the whole thing if you can remove them without destroying it.
 

gica

Chief Petty Officer
Joined
Feb 24, 2016
Messages
495
The black tip one is new.
And it is an off the market cheap kit with seat and needle. The seat on the carb is in there good. Maybe heat and a reverse screw or something to take it off.
 

gica

Chief Petty Officer
Joined
Feb 24, 2016
Messages
495
Hello again so I cleaned and adjusted the floats on the carbs. The gas does not get sprayed out when I squeeze the prime bulb.
The engines start I got idle, still have to adjust it all, the gear selector and the gas selector because they kind of interlock.
I saw somewhere that the lower unit shift bar has to be turned in all the way and turned out four turns. Mine is one turn.
So if I disconnect the gear cable I cannot turn the gas up to rev the engine.
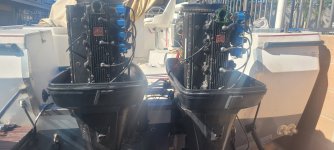
The main problem is the water circulation on both engines is not there. BOTH get hot and the alarm goes off.
What the heck could it be?. I have a tank under one engine and muffs on the other. Same thing happens . I poured water from the top and it comes out the two exhaust nozzles from the middle of the engine. And at some point it comes out the middle area of the propeller. I don't understand if it was only one engine I would say something is wrong but both??? Is tyere a trick to this?
So I need some help here fellas. Thanks again.
 

Attachments

  • 20230831_155622.jpg
    20230831_155622.jpg
    1.4 MB · Views: 8
  • 20230831_155633.jpg
    20230831_155633.jpg
    1 MB · Views: 8

gica

Chief Petty Officer
Joined
Feb 24, 2016
Messages
495
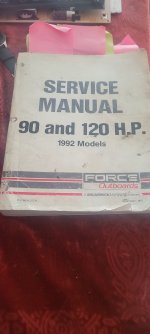
Read the 1992 manual inside and out. Mine is 1990 but it looks the same Nothing on the water pump issue.
 

Attachments

  • 20230831_163923.jpg
    20230831_163923.jpg
    824.5 KB · Views: 0

gica

Chief Petty Officer
Joined
Feb 24, 2016
Messages
495
Ok I put it in gear revved the engine and water came up the tube. I have to put the
thermostat back in and see if it still heats up.
 

topgun3690

Lieutenant Junior Grade
Joined
May 7, 2019
Messages
1,034
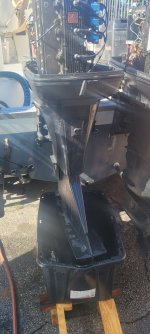
Looking at your pic with the motor in the bucket.....water needs to be well above the cavitation plate (4-6 inches) for the pump to work right. That could be the problem with that one. The other one, maybe the muffs not sealing good?
 

gica

Chief Petty Officer
Joined
Feb 24, 2016
Messages
495
Yeah it started to spit water at 2k RPM in gear. At idle just a trickle so I put back the thermostat.
 

Attachments

  • 20230831_172751.jpg
    20230831_172751.jpg
    984.6 KB · Views: 3
  • 20230831_172851.jpg
    20230831_172851.jpg
    865.7 KB · Views: 3

Nordin

Commander
Joined
Jun 12, 2010
Messages
2,555
As topgun3690 says, the water level need to be above the water impeller housing.
The impeller is not self priming, it need to bee submerge.
Water level need to be at least 1 in above the top of the impeller housing, 4-5 in above the split line of the gear case.
Regarding running with muffs.
Are the muffs sealing right, can the garden hose supply with enough amount of water?
The impeller can pump really much amount of water.
 

gica

Chief Petty Officer
Joined
Feb 24, 2016
Messages
495
As topgun3690 says, the water level need to be above the water impeller housing.
The impeller is not self priming, it need to bee submerge.
Water level need to be at least 1 in above the top of the impeller housing, 4-5 in above the split line of the gear case.
Regarding running with muffs.
Are the muffs sealing right, can the garden hose supply with enough amount of water?
The impeller can pump really much amount of water.
Ok so then how do you flush it since at marinas the muffs are the only way to rinse. I think you have to be in gear and RPM above 1500.
 

racerone

Supreme Mariner
Joined
Dec 28, 2013
Messages
37,829
Facts need to be understood.----Water must be 6 or 8" above the impeller in a test bucket.-----Testing in a small bucket is a common mistake that folks make every day !
 

gica

Chief Petty Officer
Joined
Feb 24, 2016
Messages
495
Yeah my beef was the alarm. And when measuring temp it went up to 200 so I have to be careful. But when both engines did the same thing it had to be a functional issue not a repair mistake.
 

gica

Chief Petty Officer
Joined
Feb 24, 2016
Messages
495
I want to add a tail tell to these engines. I read that you can add a fitting to the thermostat housing. That would probably be mandatory at this point.
 

topgun3690

Lieutenant Junior Grade
Joined
May 7, 2019
Messages
1,034
There's a stickie at the top about adding a tell tail to a Force engine......
 

gica

Chief Petty Officer
Joined
Feb 24, 2016
Messages
495
Cannit believe it it's an M10x1 thread. Everything on this engine is standard
 
Top