1987 Cheetah 196 Fish and Ski Rebuild Project and Pictures

swire

Petty Officer 2nd Class
Joined
May 11, 2004
Messages
131
Here is a little background on my boat and the story on what prompted me to rebuild it.
I bought the boat about 6 years ago. It had supposedly had work done a couple years earlier but the owner was moving and had to sell it. Even though the boat was a 1987 it came with a 1998 90HP Force by Mercury motor. I got the boat, motor, and trailer for $4,200. It has been a great boat that I?ve travelled all over with. It does everything I need and is excellent for fishing for striped bass.
Fast forward to July 4th weekend last year. I had been on a lake for 2 days straight. There was a little more water than usual that was getting into the bilge but nothing that had me too concerned. The third day we decided to go to a different lake where my friends were. This lake was all chop and had some pretty big waves. I hit a few really hard and noticed the passenger side of the floor was flexing a lot. Fifteen minutes later I look down and to see the storage area in the bilge was almost completely full of water! I turned on the bilge pump and headed back towards the dock. Even with the pump running, 5 minutes later the water level had increased and started gushing out of the storage area.

I knew I wouldn?t make it back to the ramp so I found a cove with some other boats and what looked like a fairly flat bank and ran the boat up the bank as far as I could go. That rushed all the water to the back of the boat and if the motor wouldn't have hit the bottom of the lake the back end would have gone under water. I was lucky that it came to rest with about 2 inches of the transom above water. The vent for the gas tank was about 3 inches above water so I got lucky there. The waves from other boats would crash over the transom and continued to flood the boat. The battery compartment was full of water to the tops of the batteries. I pulled them out so they wouldn't short out.

I hooked the bilge pump back up but with the waves crashing over the transom I wasn't gaining anything. After 30 minutes I gave up and took a 1/2 mile hike to the nearest house boat. The guy gave me a ride to a marina where I bought 2 more bilge pumps and some hose. With all 3 pumps going I was able to make some headway in getting the water out. It still took over 45 minutes to get the boat relatively dry. Then comes the weird part, I pushed back off and sat in the cove watching to see how much water was getting in the boat. The answer, NONE! I putted around the cove for a good 30 minutes and not a drop of water came in. So we loaded everything back up in the boat and headed towards the ramp. As soon as I gunned the motor and got up on plain water started coming back into the boat. Within minutes I had several inches of water in the bilge. I was able to turn all 3 pumps on and made it back to the ramp. It was by far the worst day of boating I have ever had, even worse than when the motor on a different boat caught fire!

I figured there must be a stress crack in the hull that only opened up when under power or as the hull was flexing going over some big waves. When I got the boat home I filled the entire bilge with water to see if I could find the leak. Not a drop leaked out. I knew the floor was soft and would need to be replaced, so I cut a section out and that is when I saw the stringers had rotted away. After I had the stringers out I put the hull of the boat in a creek and put pressure on every inch of the floor, I could not get it to leak. That prompted me to put another layer of fiberglass across the entire hull just to make sure any stress cracks were covered.

I knew it was going to be a big project at that point. I started working on it slowly in October and November. Then it got too cold. Now I?m back at it trying to finish things up. I plan on customizing a few features of the boat since I have it taken apart. The square live well is going to be replaced with a larger bait tank. Having the larger tank and it being under my deck will be great for striper fishing.

Here are some pictures I took during the process. I have a ton of pictures so if anyone wants to see something in particular just ask. I welcome all questions and comments.


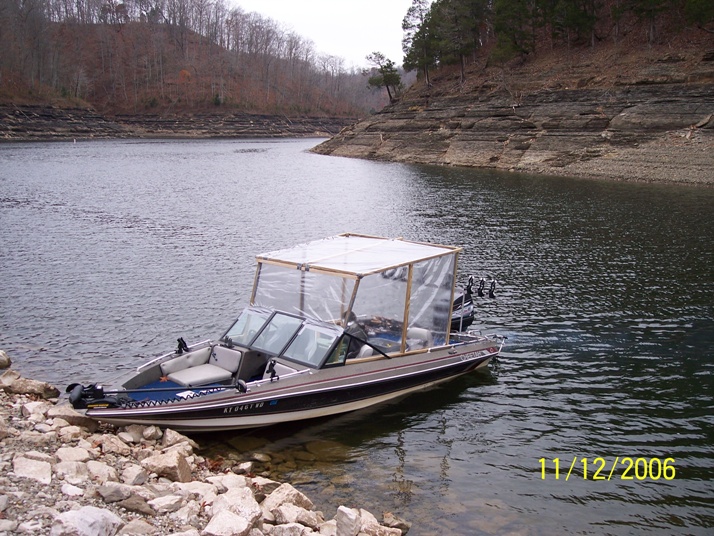
Here is a picture of my boat the day before it nearly sank.
boat.jpg


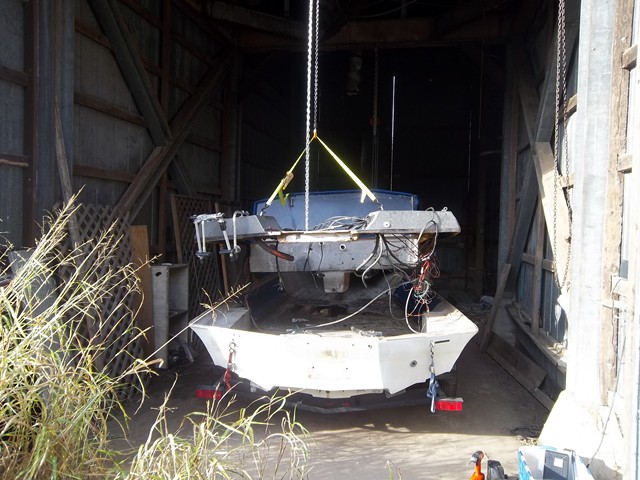
Removing the cap from the boat.
removing_cap.jpg


removing_cap1.jpg


It held it's shap really well so I was able to leave it hanging during the entire process
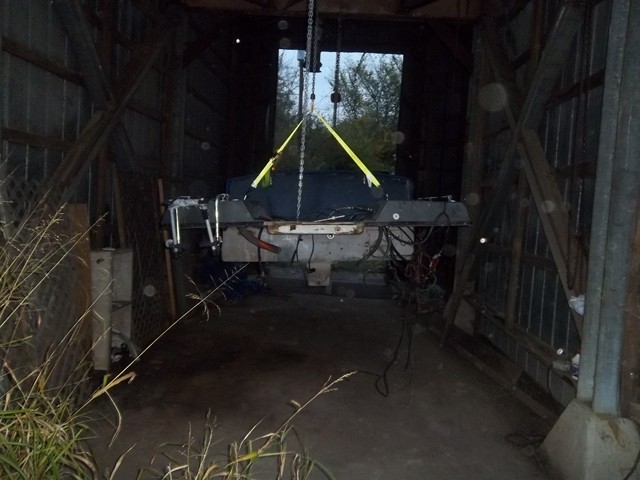
cap_hanging.jpg


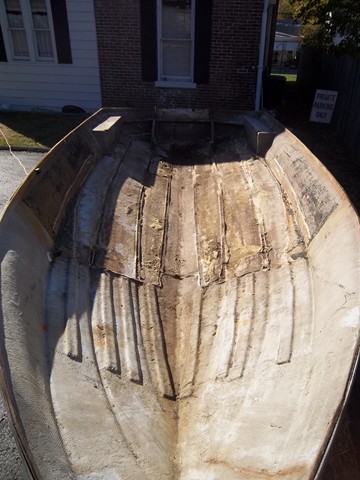
Here is what I was looking at once I had removed the cap and the carpet
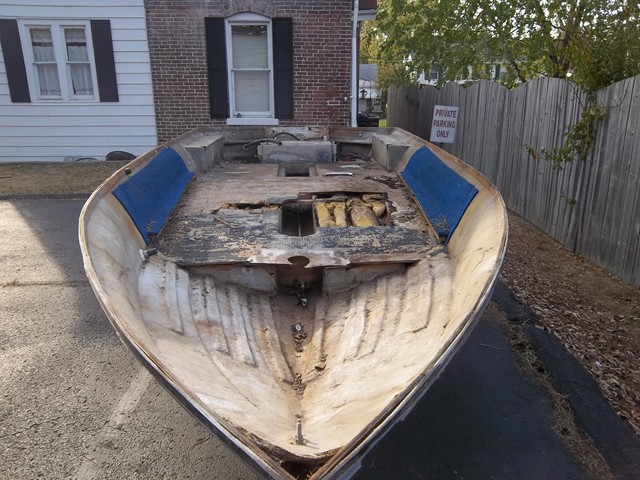
cap_off.jpg


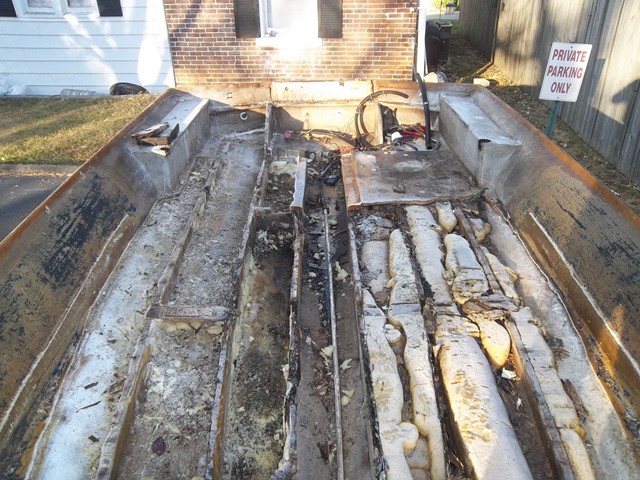
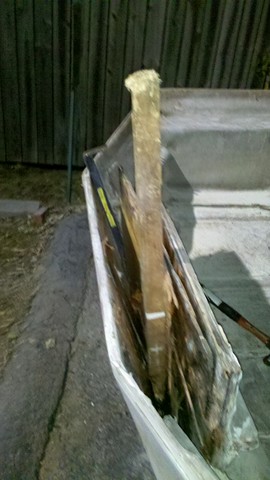
The process of removing the old floor and foam.
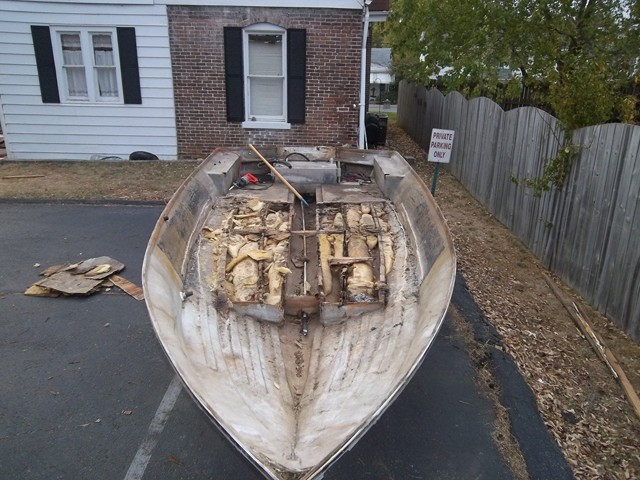
removing_floor.jpg
 

swire

Petty Officer 2nd Class
Joined
May 11, 2004
Messages
131
1987 Cheetah 196 Fish and Ski Rebuild Project and Pictures

removing_floor1.jpg


foam_out.jpg


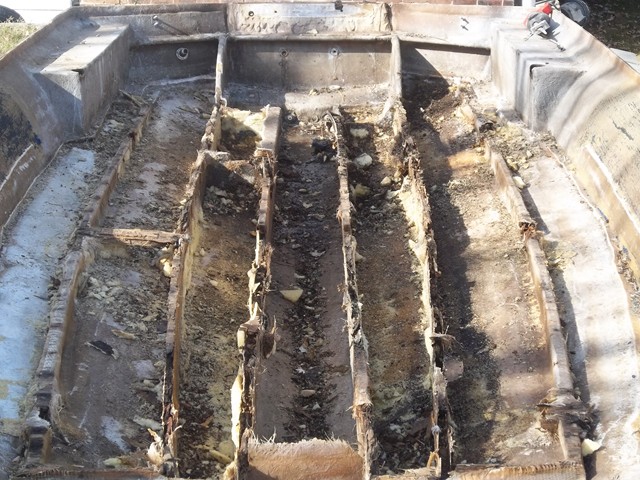
Next I removed the stringers.
stringers_out.jpg


stringers_out1.jpg


Since I had the boat stripped down so far already I decided I might as well replace the transom.
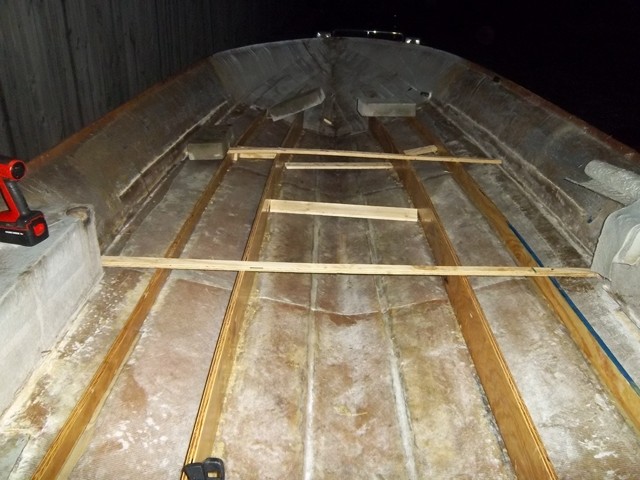
removing_transom.jpg


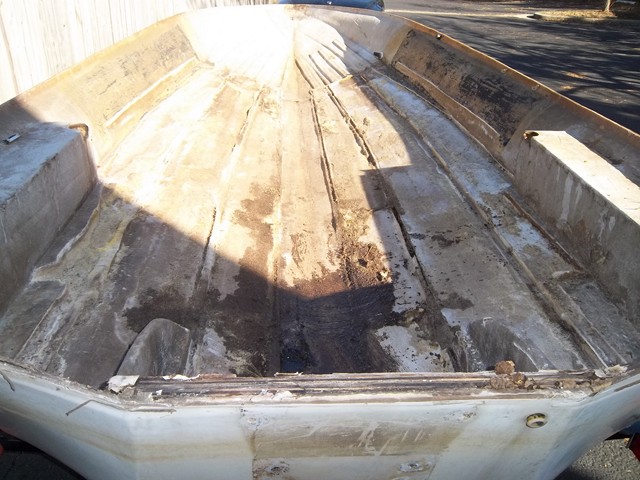
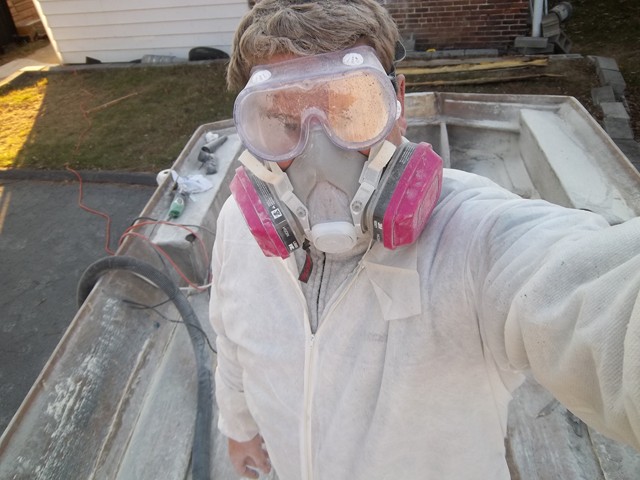
Ready to grind down the hull. Using a hand held grinder I touched every inch of the hull several times. I was looking for any weak spots, cracks, and wanted to make sure I had all the old wood and fiberglass for the stringers removed.
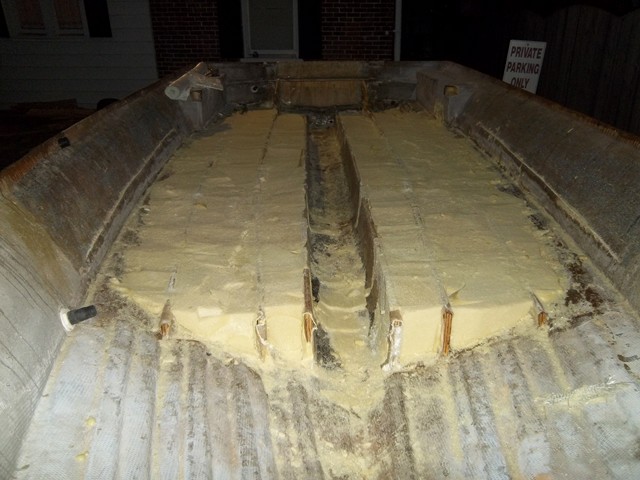
ready_to_grind.jpg
 

swire

Petty Officer 2nd Class
Joined
May 11, 2004
Messages
131
Re: Rebuilding a 1987 Cheetah 196 Fish and Ski

Re: Rebuilding a 1987 Cheetah 196 Fish and Ski

The shopvac got a huge workout trying to handle all the fine fiberglass dust
vacuum.jpg


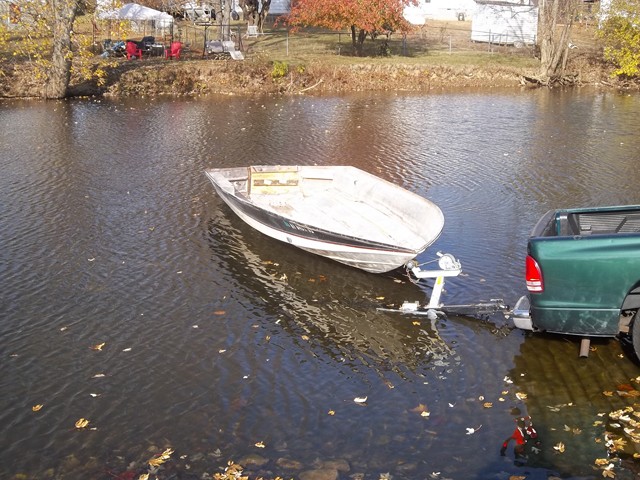
Since I still couldn't find where the water was getting in I decided to put the unsupported hull in a creek and proceeded to jump up and down on every inch. I was trying to put stress on it and find the crack. No luck.
checking_for_crack.jpg


That meant to be sure that the crack was taken care of I would have to add an layer of fiberglass to the entire hull. Even though it was just one layer of 1708 biaxle it did wonders at strengthing the hull.
adding_layer_to_hull.jpg


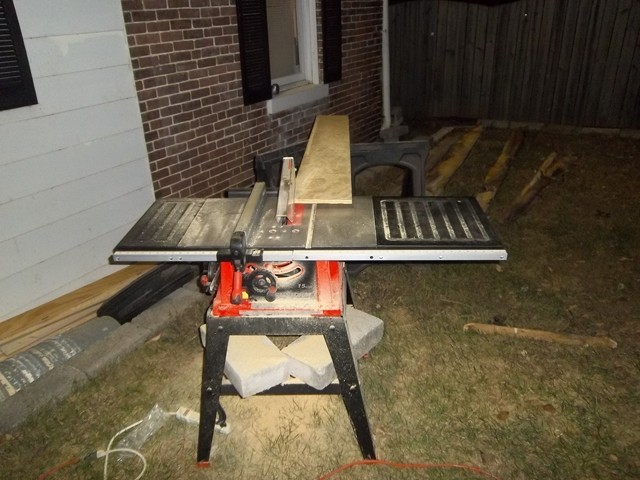
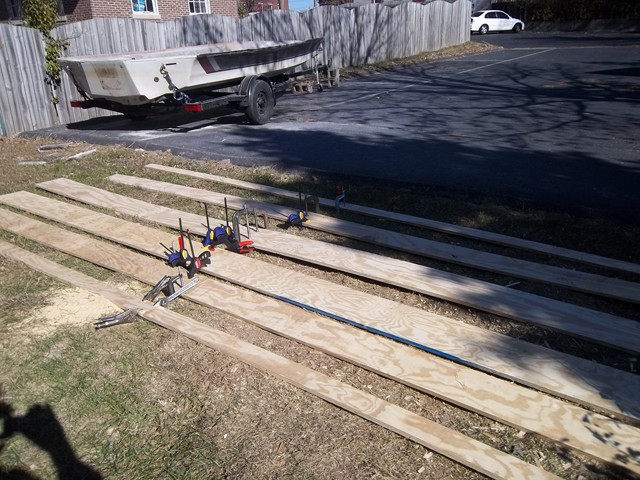
Cutting the 4x8 sheets of plywood into the size I needed to create stringers 14 feet long.
cutting_stringers.jpg


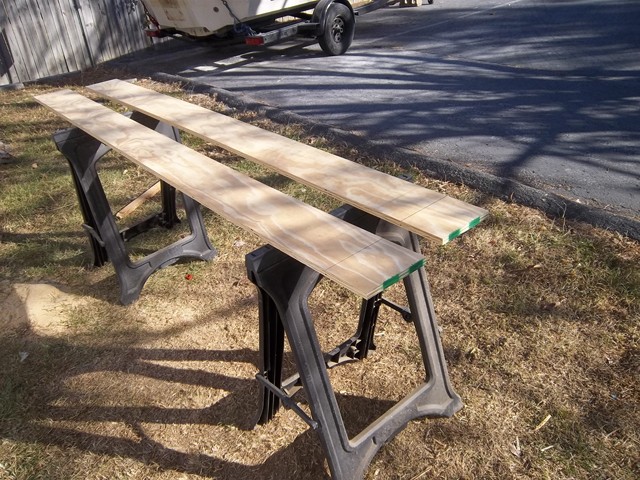
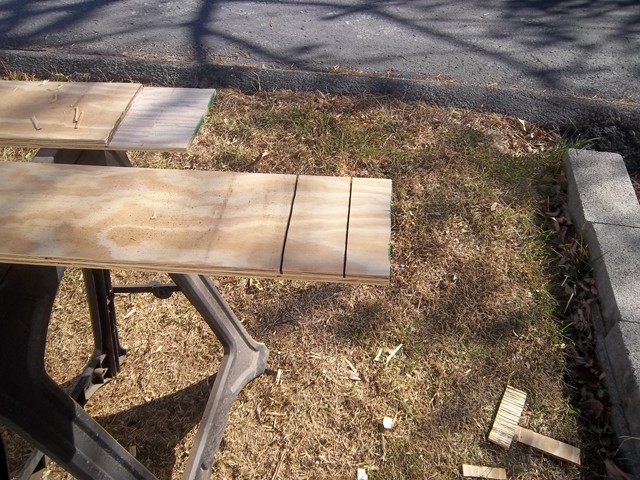
I cut half way through 6 inches of the end of the stringer, used a wood chisel to remove the wood, put a heavy coating of PL Premimum on the joints and then clamped them together.
create_stingers1.jpg


create_stringers2.jpg
 

swire

Petty Officer 2nd Class
Joined
May 11, 2004
Messages
131
Re: Rebuilding a 1987 Cheetah 196 Fish and Ski

Re: Rebuilding a 1987 Cheetah 196 Fish and Ski

create_stringers3.jpg


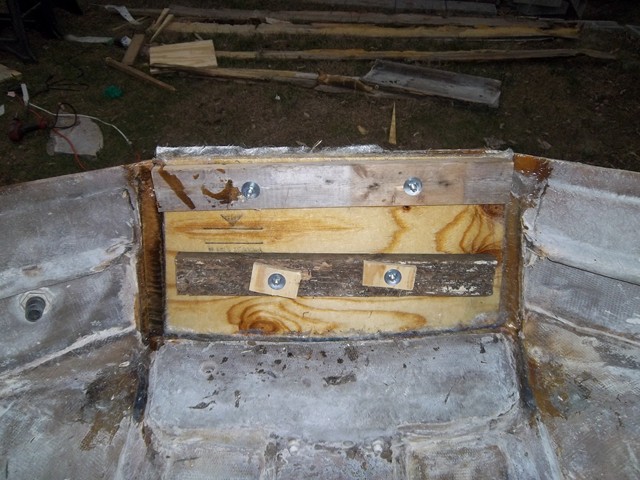
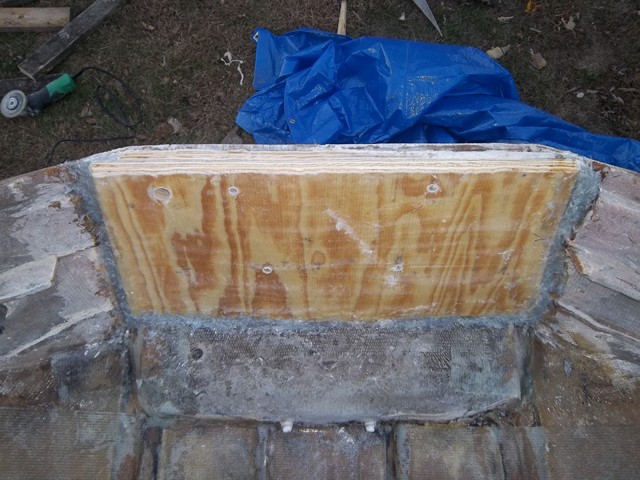
For the transom I used 2 pieces of plywood. I coat the first piece and glued it to the hull. Then coated the second piece, added some CSM, and pulled everything tight by creating my own clamping system using bolts through the motor mounts and 2x4s.
transom_firstpiece.jpg


transom_done.jpg


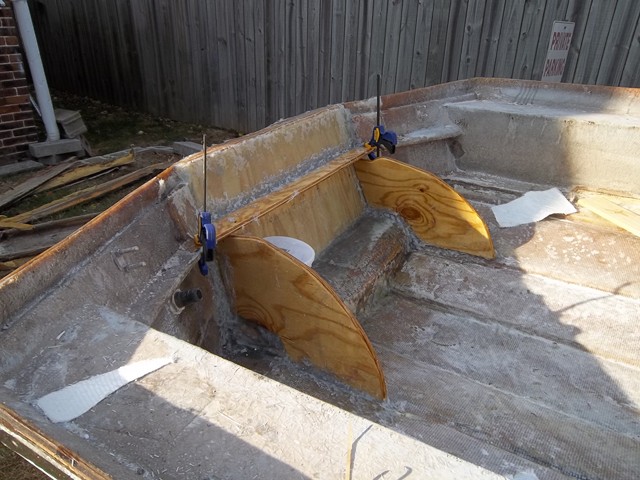
Building out the transome supports
transom_supports.jpg


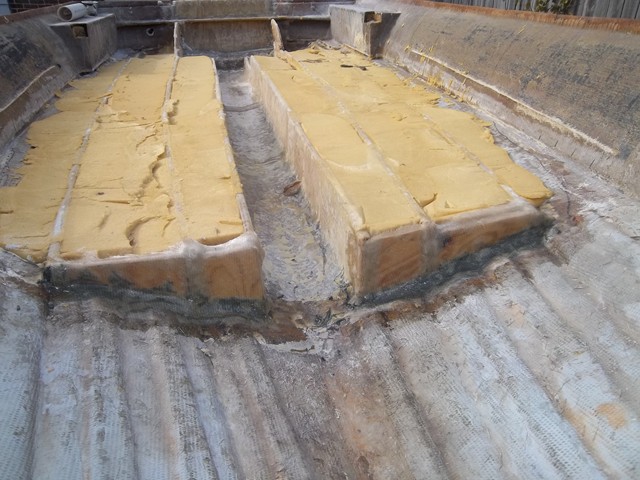
Putting the stringers in place and bedding them using PL Premium. The PL didn't work as well as I thought so I ended up mixing up peanut butter and filling in around the stringers.
bedding_stringers.jpg


The stringers took a lot longer than I thought they would and the weather was turning cold fast. I wanted to make sure I got the foam poured in before it was too cold to do so. On the last warm day we had in November I was able to pour the foam and then trim it to shape.
trimmed_foam.jpg
 

swire

Petty Officer 2nd Class
Joined
May 11, 2004
Messages
131
Re: Rebuilding a 1987 Cheetah 196 Fish and Ski

Re: Rebuilding a 1987 Cheetah 196 Fish and Ski

I fit in the supports for the front of the stringers and glassed that all together.
glassing_front_of_stringers.jpg


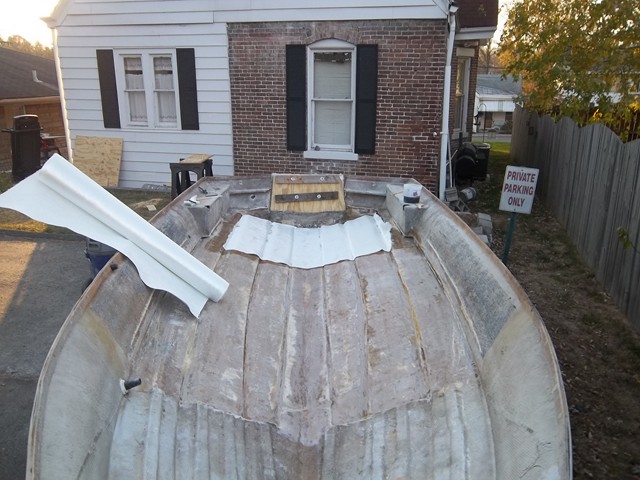
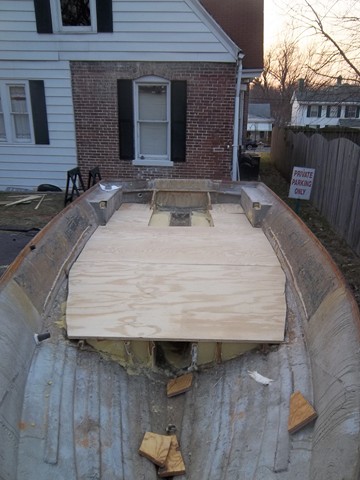
Getting the rough cut of the new floor.
cutting_new_floor.jpg


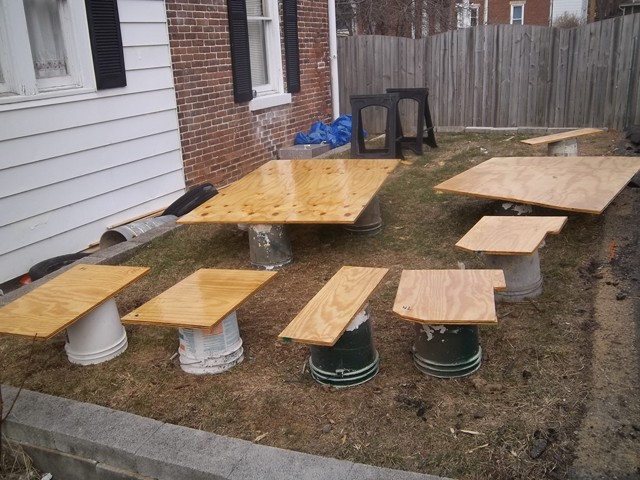
Coating the plywood in resin.
coating_floor.jpg


Test fit of the cap with the floor in place. I needed to take some additional measurements for my custom bait tank.
test_fitting_cap.jpg


I've made a little bit more progress but I haven't had time to upload the pictures yet. The old livewell has been cut out. To have enough room for the bait tank I had to remove several inches of the middle two stringers. I hope this doesn't affect things too much.

This afternoon I might get part of the floor bedded down and the joints taped. Then it is going to get cool and rain again so I won't be able to work on it for awhile.
 
Joined
Aug 17, 2009
Messages
941
Re: Rebuilding a 1987 Cheetah 196 Fish and Ski

Re: Rebuilding a 1987 Cheetah 196 Fish and Ski

Nice work swire. That thing will be like a new boat. What are you final finishing plans?
 

swire

Petty Officer 2nd Class
Joined
May 11, 2004
Messages
131
Re: Rebuilding a 1987 Cheetah 196 Fish and Ski

Re: Rebuilding a 1987 Cheetah 196 Fish and Ski

Nice work swire. That thing will be like a new boat. What are you final finishing plans?

I'm hoping the boat will be like new. This is my first rebuild so I'll have to see how it performs when I'm done. As for fishing, you can see my trolling setup in my first picture as well as a container of catfish jugs. I have a MinnKota Powerdrive trolling motor with a remote control and the option that keeps it heading straight. This allows me to control the motor from the back of the boat while I'm putting the lines out, trolling, and pulling in a fish. I have a bimini top for the boat and plan on getting a custom zip in enclosure built for it. Here in Kentucky I can typically fish from March through December. It gets a little bit cold so the enclosure is definately a nice to have feature. Up until now I was keeping the shinners in the live well. The only problem is it was square and they would bash themselves into the corners. So by replacing that with a bait tank I should have healthy and lively bait.

The boat is rated for up to a 200HP motor and right now it only has a 90HP motor on it. Since I didn't know the condition of the transom and stringers I was hesitant to put a bigger motor on it. Now that I know the boat will solid I plan on putting a 200HP motor on it in a year or two.


Here is the winter redneck enclosure that I was using. It kept the wind and rain off but doesn't look the nicest.
cheetah_winter.jpg


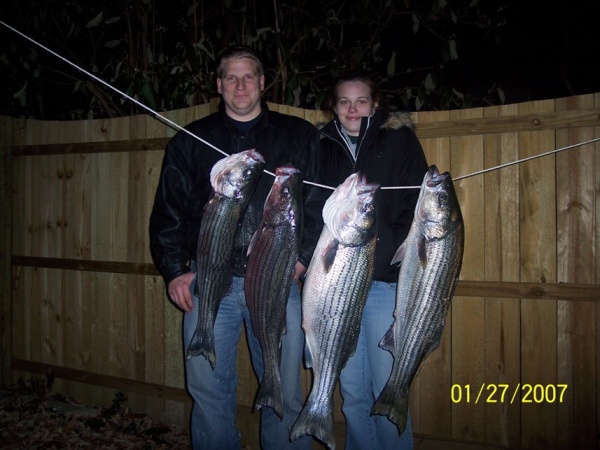
Here is a shot from my best fishing trip.
stephen_jessica_fish.jpg
 
Joined
Aug 17, 2009
Messages
941
Re: Rebuilding a 1987 Cheetah 196 Fish and Ski

Re: Rebuilding a 1987 Cheetah 196 Fish and Ski

Sweet! Hey whatever works. Oh yeah that boat will run much better than before. Are you going to re-paint or fix-up the gel coat?
 

swire

Petty Officer 2nd Class
Joined
May 11, 2004
Messages
131
Re: Rebuilding a 1987 Cheetah 196 Fish and Ski

Re: Rebuilding a 1987 Cheetah 196 Fish and Ski

Sweet! Hey whatever works. Oh yeah that boat will run much better than before. Are you going to re-paint or fix-up the gel coat?

The paint has faded so much that the only way to make it look nice is to repaint it. That has thrown a little wrench into things because I need to remove every piece of hardware to repaint and I don't want to have brand new carpet in the boat when I'm doing all the sanding. So I really need to hold off on putting the boat completely back together until I get done repainting it.

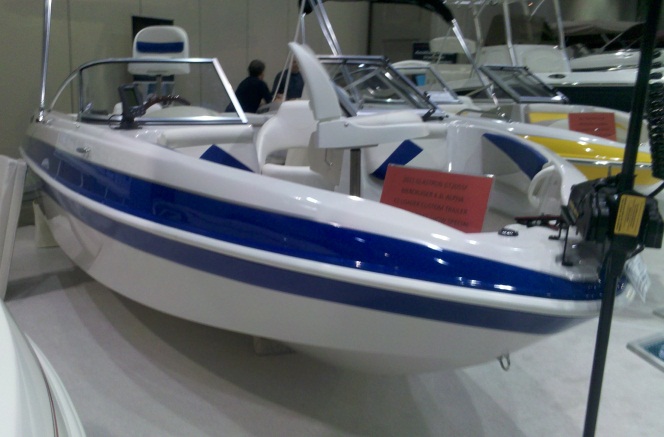
I plan on a completely different look but one that should be simple to do. Here is an example of what I'm considering.

new_paint_scheme.jpg
 
Joined
Aug 17, 2009
Messages
941
Re: Rebuilding a 1987 Cheetah 196 Fish and Ski

Re: Rebuilding a 1987 Cheetah 196 Fish and Ski

That will look great! I can't wait to see the end results. Keep up the good work.
 

swire

Petty Officer 2nd Class
Joined
May 11, 2004
Messages
131
Re: Rebuilding a 1987 Cheetah 196 Fish and Ski

Re: Rebuilding a 1987 Cheetah 196 Fish and Ski

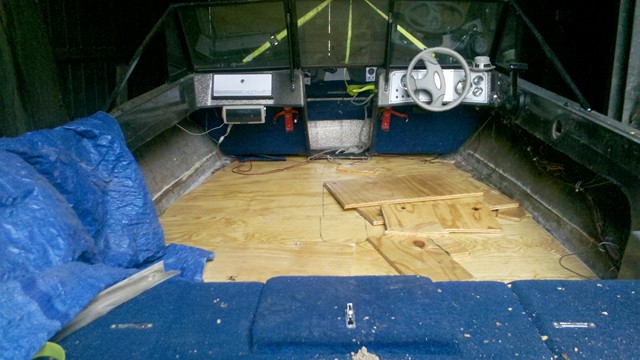
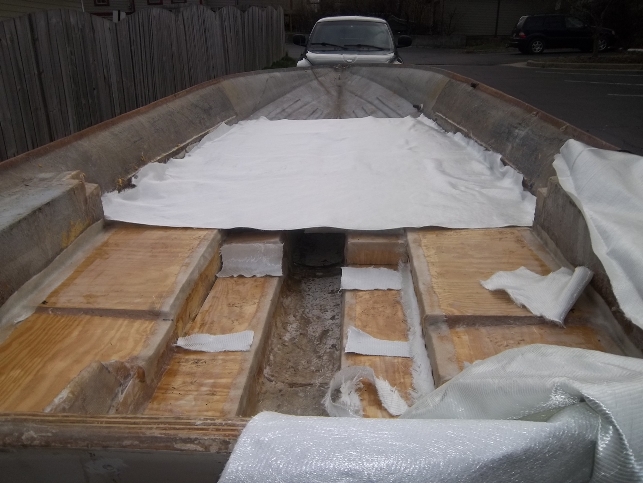
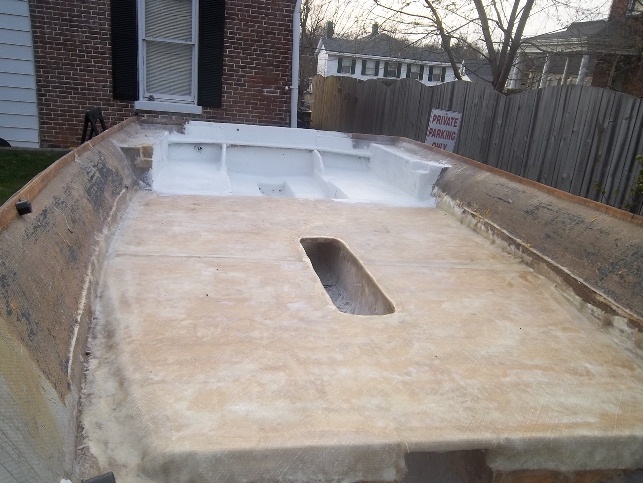
The wasther has been nice lately so I've finally been able to finish the new floor. It is made with 3/4" exterior grade plywood and both sides coated in resin before it went into the boat. I used a combination of PB mix and PL to glue the floor down. I ran out of materials to make the PB. I taped the all the seams first to give them extra strength and then came back and glassed in the entire surface. I used one layer 1708 for this step.

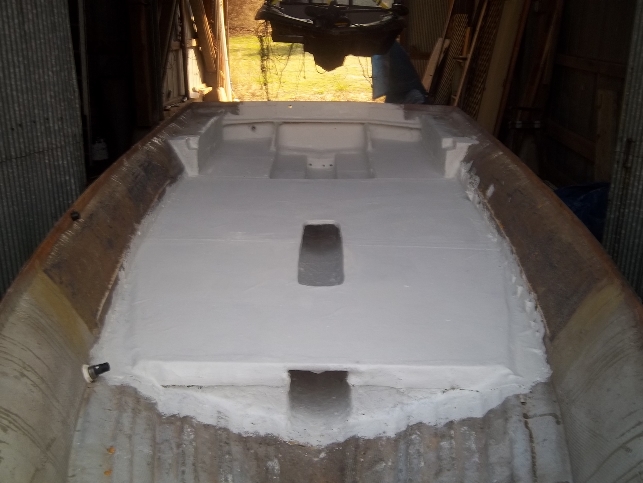
After the fiberglass dried I came back and painted the boat. I'm not sure how the product will hold up but I used the masonry water proofer for basement walls. It is supposed to expand into any open pore and form a water tight seal. I'm not sure if it is necessary but I've done all this work and I figured it would be a little extra protection. The water proofer must have forced its way into the fiberglass as it pushed a lot of water to surface as it was drying. I had wiped the water out of the boat in the morning and used a towel to make sure it was dry but clearly the fiberglass was still holding some of it.

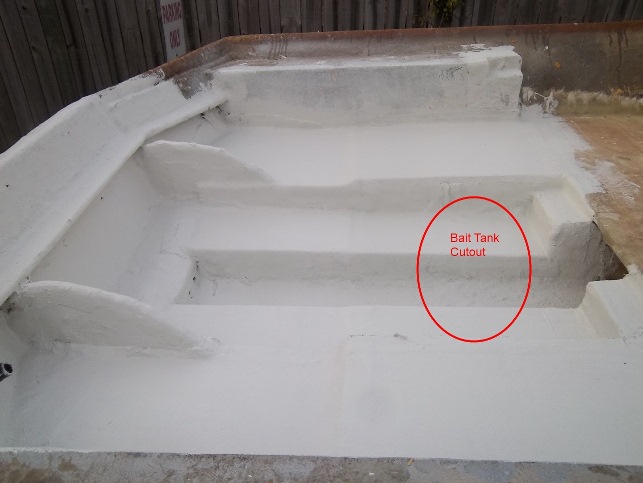
I decided to put a bait tank under my rear deck but in order to do that I had to go back and cut down the middle stringers. I hated having to cut up the new foam and then cutting down my glassed in stringer but it was necessary. It shouldn't weaken the structure too much. The stringer between the bait tank and transom was already cut that low for the gas tank to fit in, so it should be ok.

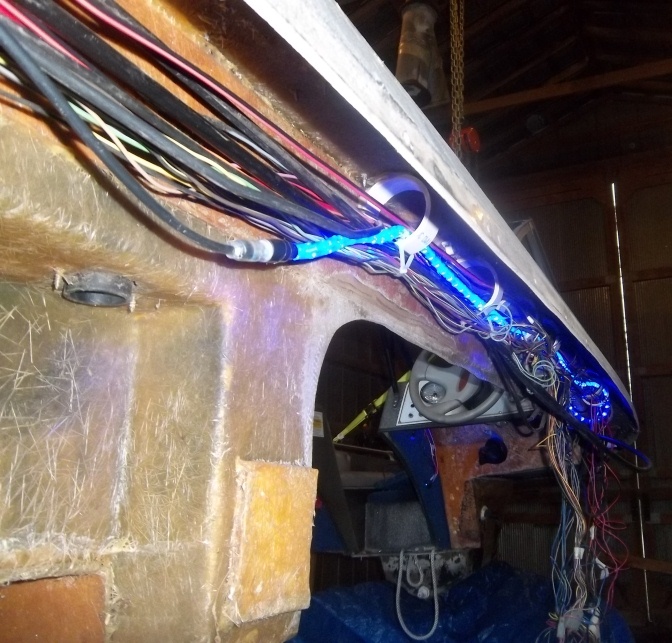
The next step is going rewiring everything on the boat. The picture of the wires is after I removed half of the old wiring that wasn't really connected to anything. It is easier to work on the wiring with the cap hanging so I haven't put the cap back on yet but the boat is ready to be put back together.

The fiberglass install didn't come out as clean as I had hoped but not much that I can do about that now. It isn't terrible but after I painted the floor there were noticable air pockets in a few spots which I couldn't see before.

Laying out the fiberglass for the floor.
laying_out_fiberglass.jpg


After the floor was glassed in and I started paining.
floor_fiber_glassed_in.jpg


Entire floor painted.
painted_floor.jpg


The stringer cutout for the bait tank.
bait_tank_cutout.jpg


The wiring mess that I need to sort out.
wiring.jpg
 

swire

Petty Officer 2nd Class
Joined
May 11, 2004
Messages
131
Re: Rebuilding a 1987 Cheetah 196 Fish and Ski

Re: Rebuilding a 1987 Cheetah 196 Fish and Ski

Greg, I went through your built rebuild thread and it looks like my plans mirror what you did. Do you remember how much primer and paint your boat took? I greatly underestimated the amount of resin it would take for my boat, it took 12 gallons, and I don't want to end up short on paint. You said painting took you about 7 weeks. How many hours a day or week were you working on it. I was thinking painting my boat would take 2 to 3 weeks, now I'm worried that I underestimated it. Also where did you get the u-flex trim? I need to replace all my trim but I haven't been able to find it anywhere.
 
Joined
Aug 17, 2009
Messages
941
Re: Rebuilding a 1987 Cheetah 196 Fish and Ski

Re: Rebuilding a 1987 Cheetah 196 Fish and Ski

Greg, I went through your built rebuild thread and it looks like my plans mirror what you did. Do you remember how much primer and paint your boat took? I greatly underestimated the amount of resin it would take for my boat, it took 12 gallons, and I don't want to end up short on paint. You said painting took you about 7 weeks. How many hours a day or week were you working on it. I was thinking painting my boat would take 2 to 3 weeks, now I'm worried that I underestimated it. Also where did you get the u-flex trim? I need to replace all my trim but I haven't been able to find it anywhere.

Swire,

Yeah I used about 12-13 gals of resin as well.

For the painting, I used 2 qts of primer (or enough for two coats) and 2 qts of the blue and 3 qts of the white (enough for three thin coats). I used the roll and roll method of application. You may use slightly more or less depending on your application method. I included all filling, fairing, sanding, priming and painting in my 6-7 week total. Just to do the painting it took me about 2 weeks. I averaged about 20-30 hours a week during that phase of my project. And it was HOT as crap!!!

I bought my Taco flexible trim through Port Supply (wholesale arm of West Marine) but other places should carry it though. IBoats sells it as does other marine suppliers. Do a search on TACO Flexible Trim.

Let me know if you need anything else.
 

swire

Petty Officer 2nd Class
Joined
May 11, 2004
Messages
131
Re: Rebuilding a 1987 Cheetah 196 Fish and Ski

Re: Rebuilding a 1987 Cheetah 196 Fish and Ski

Thanks for the info. I was able to find the trim using those search terms. What size opening did you get on the trim? I imagine the smallest would be the best since it is going on thin pieces of fiberglass.

I really didn't want to hear 20-30 hours a week during the painting phase. Crap. I'm going to have to bust my *** to get the boat painted then. What took up most of the time, sanding? What type of equipment did you use for sanding? I have an orbital sander that I plan on using after I use my grinder with a sanding disc on it to remove the gelcoat and get down to the paint.

Your boat looks like it has more blue than white but you said you used more white paint than blue. Did the inside and bow require that much extra?
 
Joined
Aug 17, 2009
Messages
941
Re: Rebuilding a 1987 Cheetah 196 Fish and Ski

Re: Rebuilding a 1987 Cheetah 196 Fish and Ski

For the trim, check the thickness of what you are putting it on. I think I used the 1/4" stuff but I really should have used the 5/16" in retrospect. I had areas along the edge that had some excess glass that the wider trim would have covered better/easier.

I did a major push during the painting phase and definitely averaged 3-4 hours a day and most of the weekends. Most of the time was taken up in the prep work. I had a lot of holes to covered and surface blemishes to fill and fair. Plus I had to repair the splashwell cut since I removed it to put the new transom in. So yes definitely this type of work takes the longest. 80% of the sanding I did was by hand. It was very time consuming and labor intensive. The various surface angles and lap strake design on the hull made using power sanders limitied. Remember you only have to sand the gel coat surface not remove it. The primer and paint is designed to go over the gel coat.

Okay now for the paint. Interlux Perfection is tricky stuff to work with. I put one more coat of white paint on the white parts than the blue. The main reason being I was trying to figure out the best way to apply the paint while painting. Perfection only has about 40-50 seconds of work time after applying before it starts to set. This means you have to get it on, even it out and leave it alone. If you try to further roll it out it will leave roller marks. These marks will remain in the final finish. PITA!! This means you have to get everything ready, and go and not stop until the entire boat or section is completely done. Like I said very tricky. Since my top cap had all kinds of crazy angles this was difficult to do and required more painting and touch ups. One thing about Perfection paint...don't over thin it. Stick to the recommended max of 10%. Over thinning will lead to blushing in the final finish because the thinner rises to the surface during curing which can make a hazy layer appear.

It will goe easier if you have a smooth hull and top cap.

Let me know if there is anything else I can help you with.
 

swire

Petty Officer 2nd Class
Joined
May 11, 2004
Messages
131
Re: Rebuilding a 1987 Cheetah 196 Fish and Ski

Re: Rebuilding a 1987 Cheetah 196 Fish and Ski

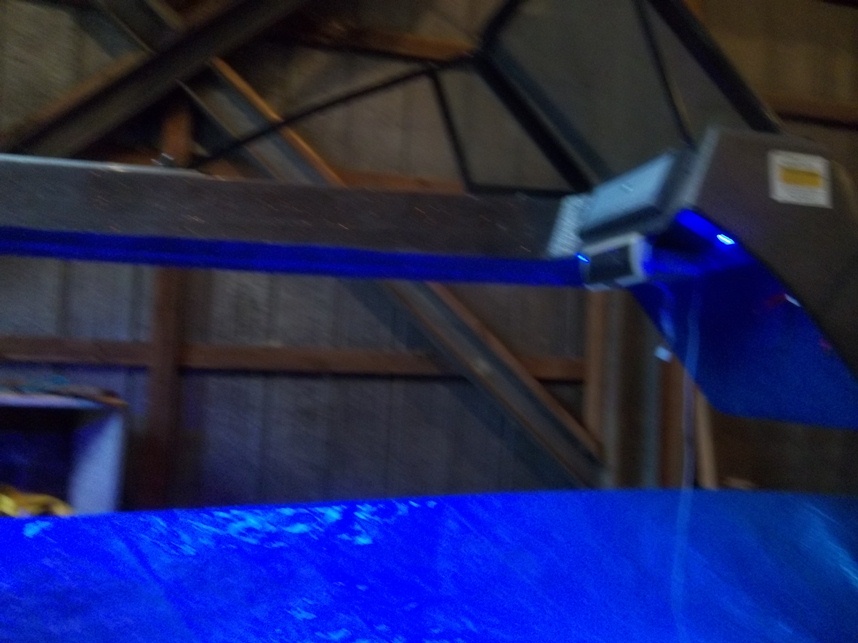
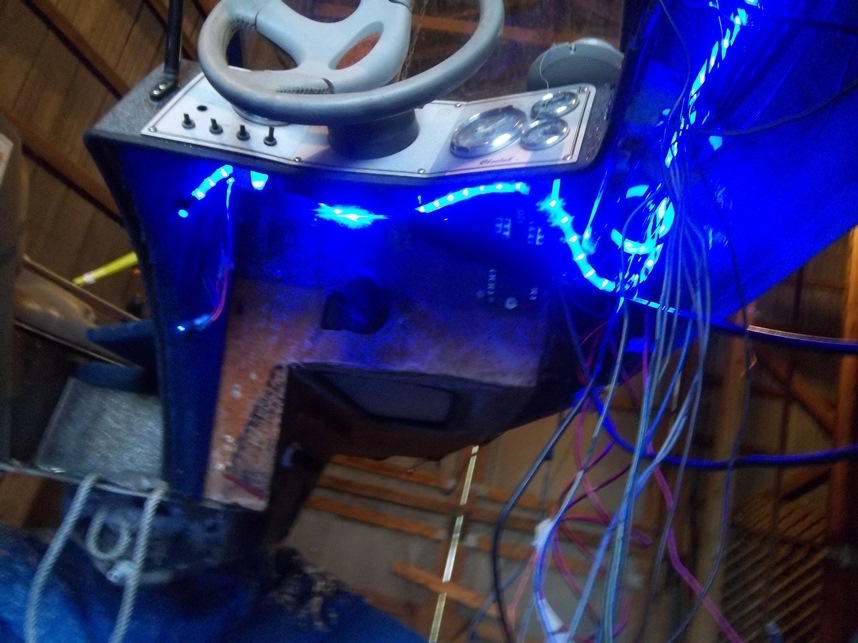
I've had plenty of time to work on my boat but I found myself lacking in motivation recently. I have made some progress on the wiring. Almost all the new wiring has been completed. I've also installed the blue LED rope lights under the gunwale. I have pictures, they didn't come out the best but it gives the general idea of the glow the boat will have. I can't wait to get the cap on to see how it really looks.


Most wires except for the motor wiring harness have been removed. New circuits have been run inside the 3" pvc rings that I installed.
new_wiring.jpg


LED glow
led_glow.jpg


led_dash.jpg
 

swire

Petty Officer 2nd Class
Joined
May 11, 2004
Messages
131
Re: Rebuilding a 1987 Cheetah 196 Fish and Ski

Re: Rebuilding a 1987 Cheetah 196 Fish and Ski

Greg,
I saw the lap strake design on the side of your boat. That must have been a pain to work with. I'm lucking in that my sides are smooth, just the underside has sharp angles and layers. I should be able to use a power sander on 90% of it, so that should cut down the amount of time required. How did you paint the sharp inside corners? It doesn't seem like a roller would make 100% contact. Did you use the standard size rollers or the small diameter rollers?
 

ron2tush

Recruit
Joined
Mar 30, 2011
Messages
2
Re: Rebuilding a 1987 Cheetah 196 Fish and Ski

Re: Rebuilding a 1987 Cheetah 196 Fish and Ski

Hi, I have been watching the build...Looks nice !!! I just purchased the same boat..It is in verry nice shape. I am just getting it all legal for the water (hope verry soon !!!) But i noticed that the capacity plate for people,gear, and max H.P. is missing..I have been hunting for this info online for a week now and no luck. Do you know this info or where i could get it or a new plate ?
Thanks
 

Blake0912

Petty Officer 1st Class
Joined
Oct 31, 2010
Messages
310
Re: Rebuilding a 1987 Cheetah 196 Fish and Ski

Re: Rebuilding a 1987 Cheetah 196 Fish and Ski

Very nice work Swire. That boat looks almost identical to my 88 18ft Dynatrak. I noticed it looks like you have a stereo installed in yours, i was wanting to put one in mine but i cant figure out where would be a good place to mount the speakers. If you don't mind could you show me some pics of where your speakers are mounted or give me some insight. any info would be great, thanks.
 
Joined
Aug 17, 2009
Messages
941
Re: Rebuilding a 1987 Cheetah 196 Fish and Ski

Re: Rebuilding a 1987 Cheetah 196 Fish and Ski

Greg,
I saw the lap strake design on the side of your boat. That must have been a pain to work with. I'm lucking in that my sides are smooth, just the underside has sharp angles and layers. I should be able to use a power sander on 90% of it, so that should cut down the amount of time required. How did you paint the sharp inside corners? It doesn't seem like a roller would make 100% contact. Did you use the standard size rollers or the small diameter rollers?

Swire,

I used foam rollers that were about 1" dia x 6" length. The outside end was rounded and I could smash that into the edge to get paint in there. I then very carefully rolled it out to smooth it. Yes runs and sags are common. Like I said it was somewhat a PITA. You just have to take your time and leave an even and smooth final coat. The final result is a really good finish and this paint is definitely tough stuff. Unlike anything I have ever used.
 
Top