1981 Chaparral 187 restore

robbankston

Petty Officer 2nd Class
Joined
Jun 12, 2009
Messages
129
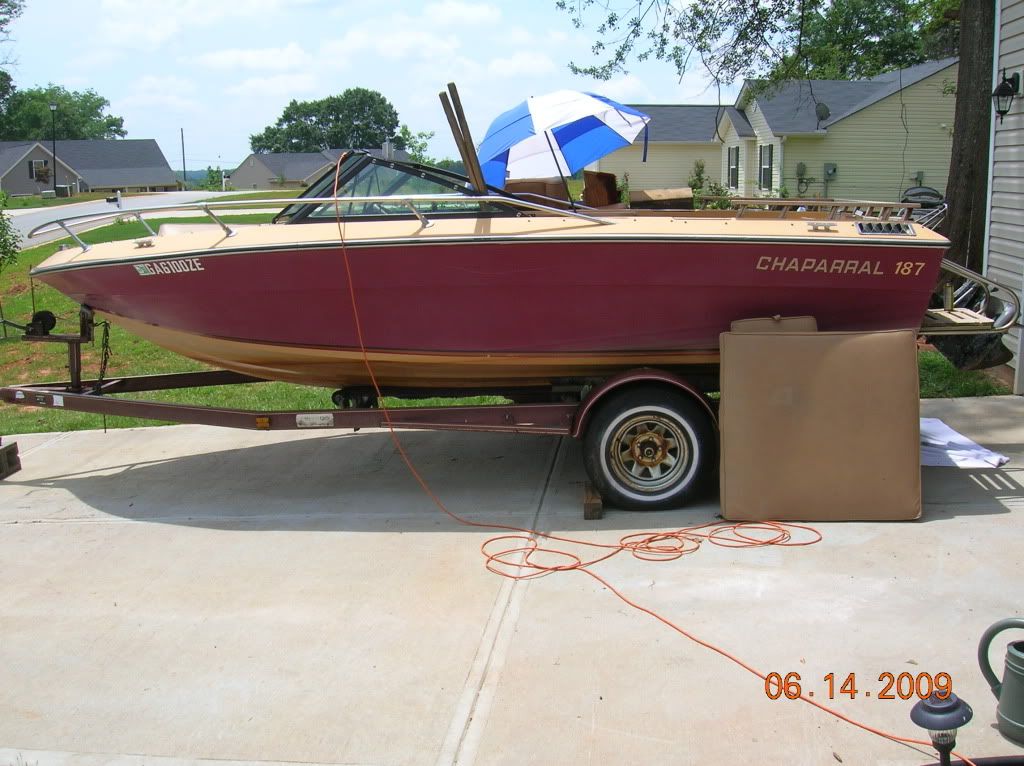
Well I'm jumping on the bandwagon and documenting my insanity. Picked this 1981 Chap from a friend of my father-in-law's. It was a victim of Lake Lanier drying up so it sat in the muck for quite a while before the lake came back up and they were able to pull it out. Meanwhile it apparently whatever rain there was last summer was captured in the boat instead of the lake. So now the lakes up and he has a new ride and wanted it off his hands. Price was right so me and the in-law (out-law) thought we'd give it a shot.

DSCN0906.jpg


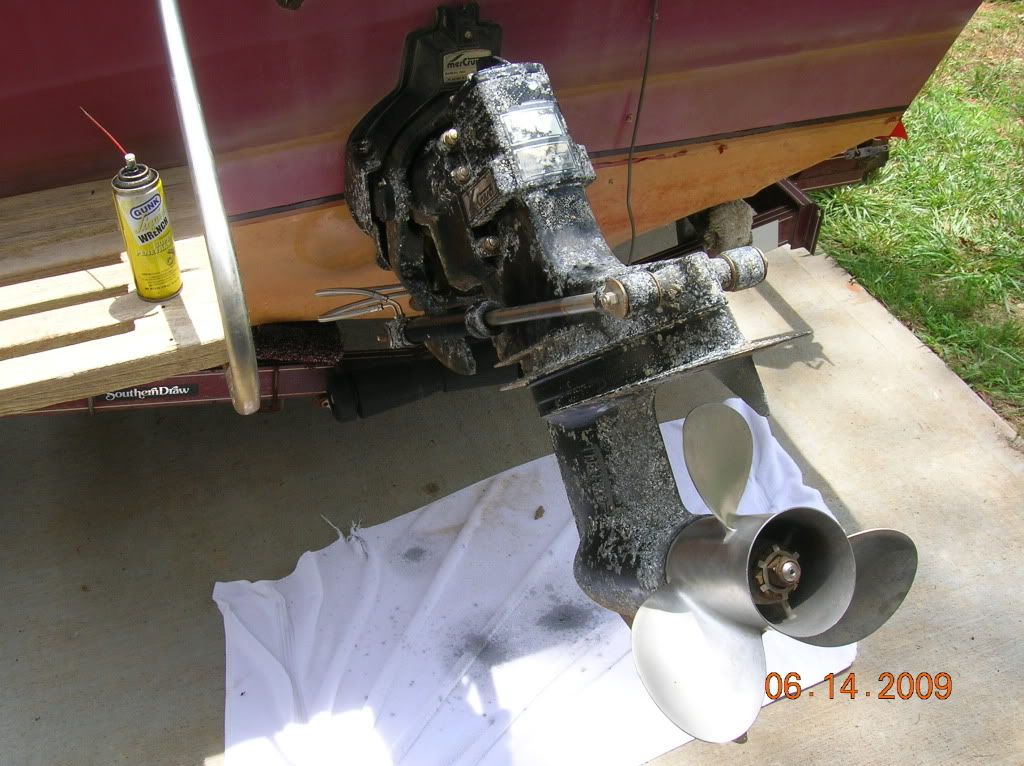
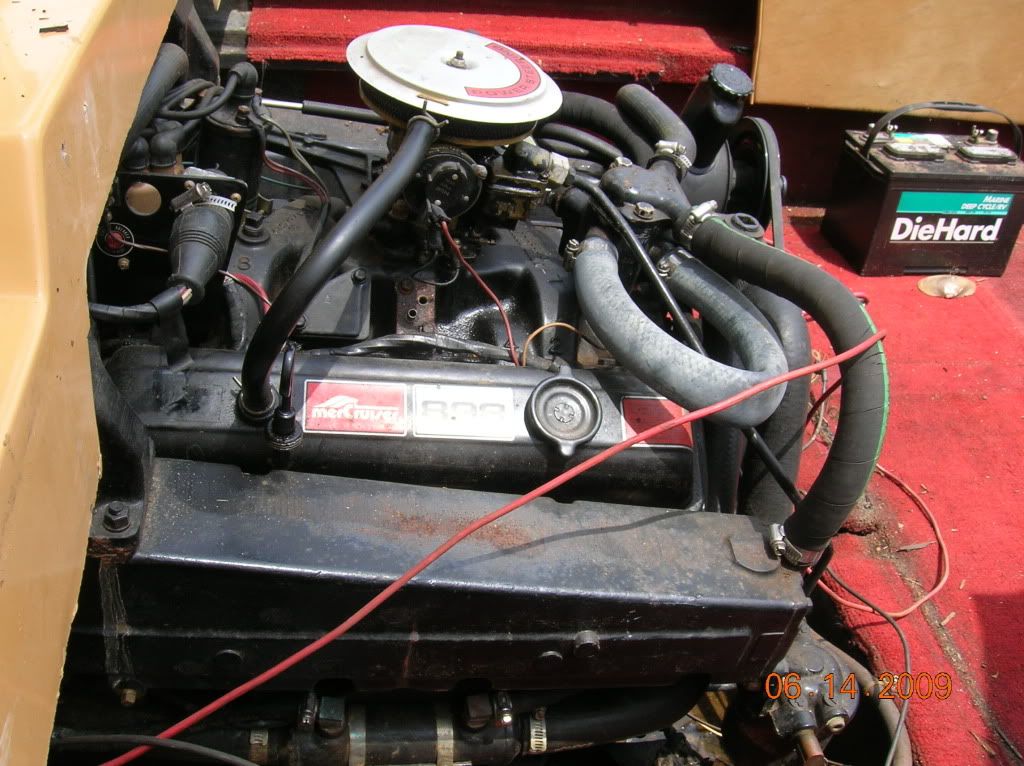
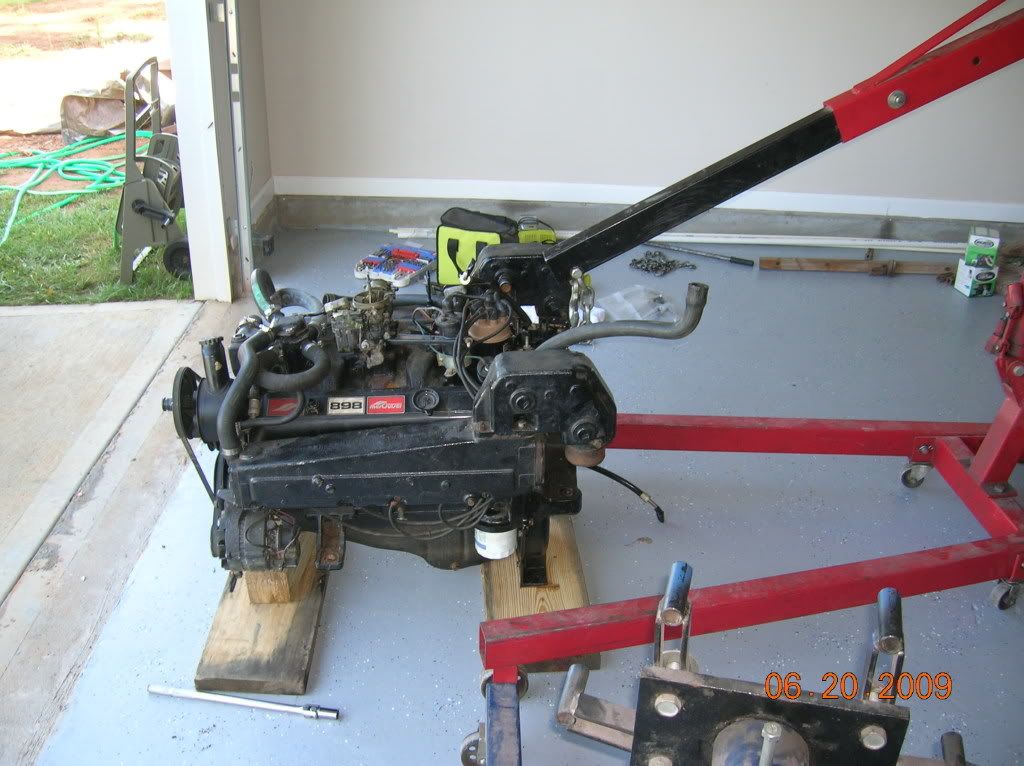
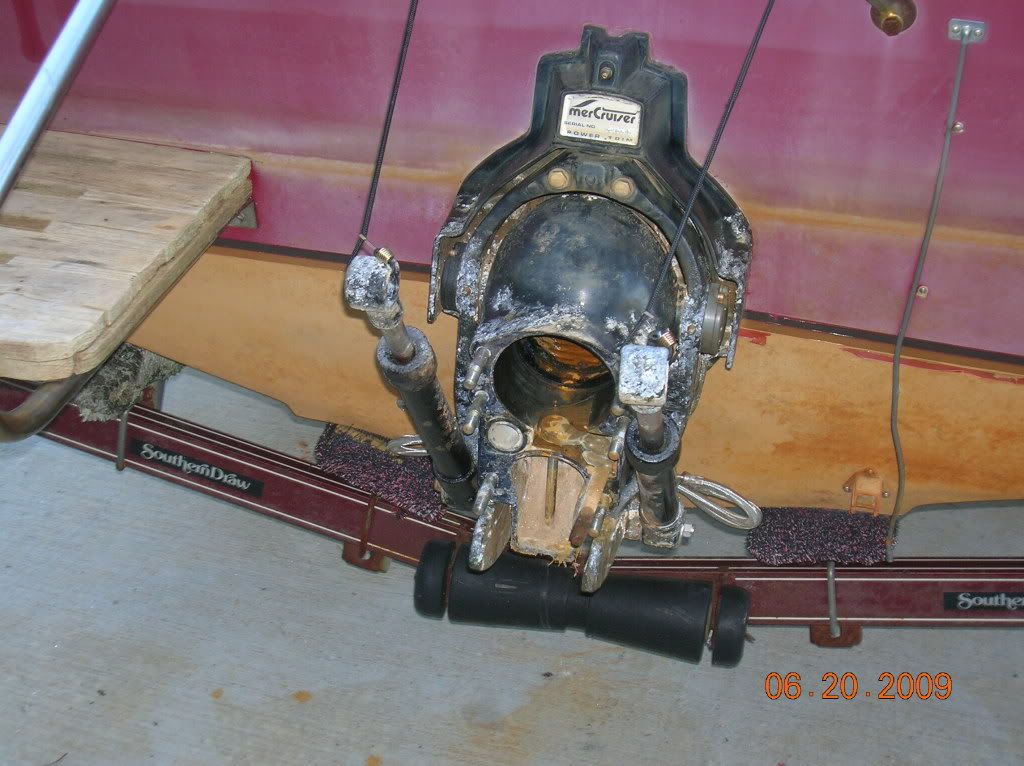
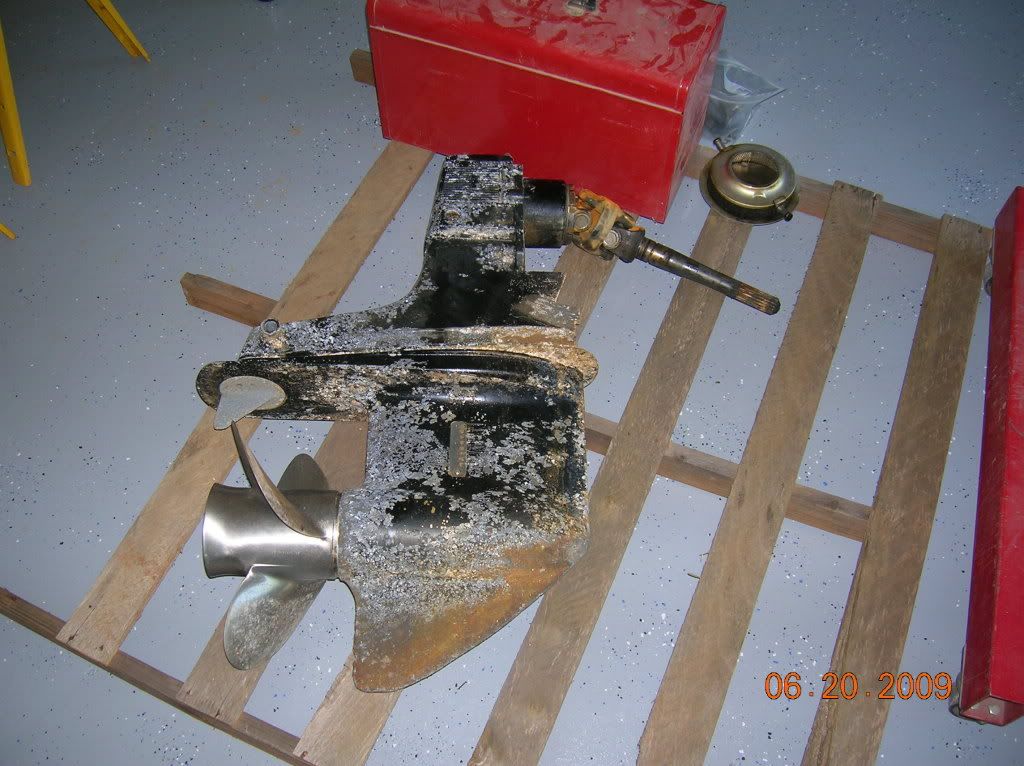
The first thing I did was start checking out mechanical stuff. Found that the starter was froze solid and have not resurrected it yet. Did hand turn the engine and it has compression so thats a good sign. The trim cylinders were frozen, but days of Liquid Wrench treatments cured that. Also got the blower and bilge pump working, both important.

DSCN0907.jpg


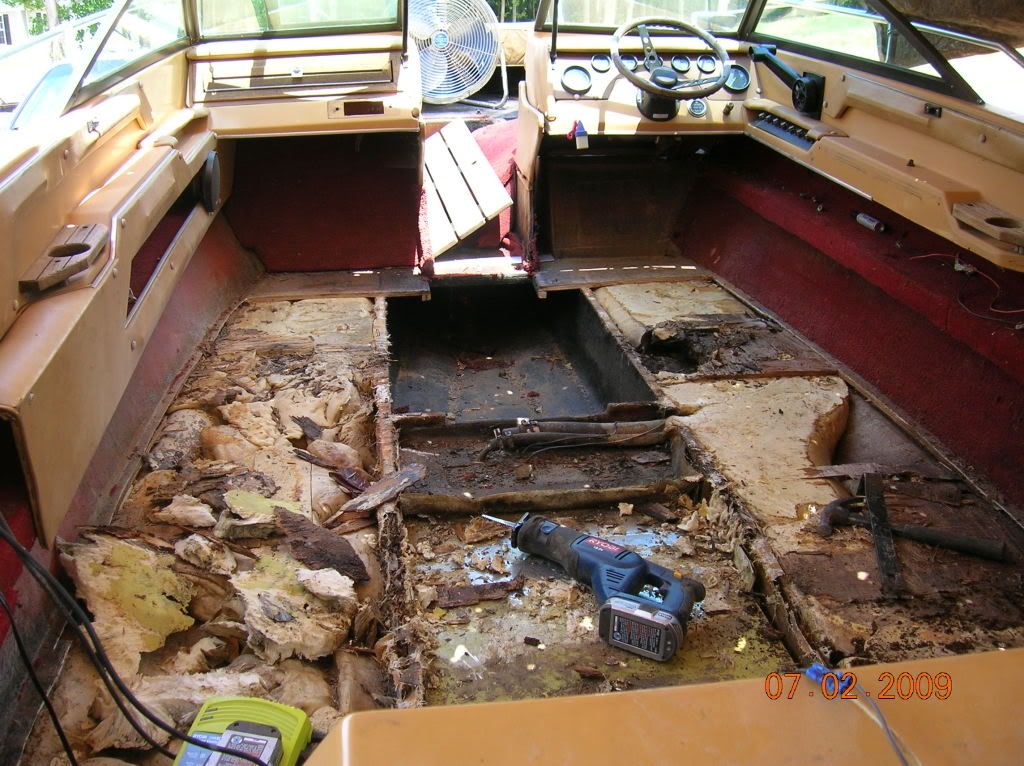
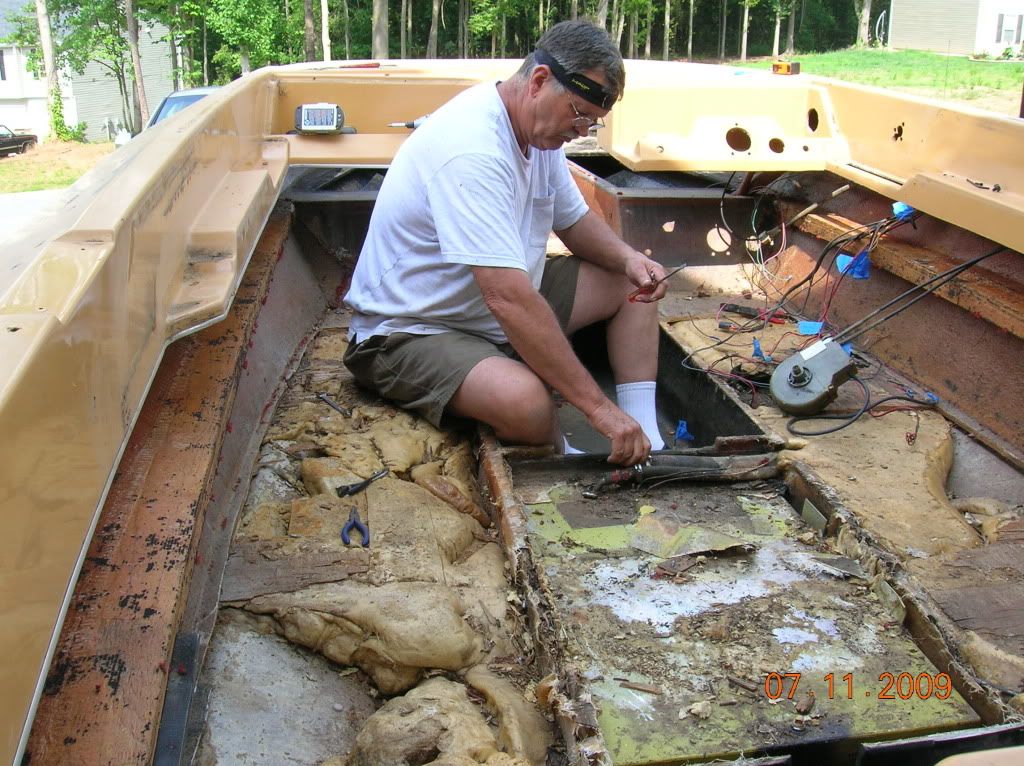
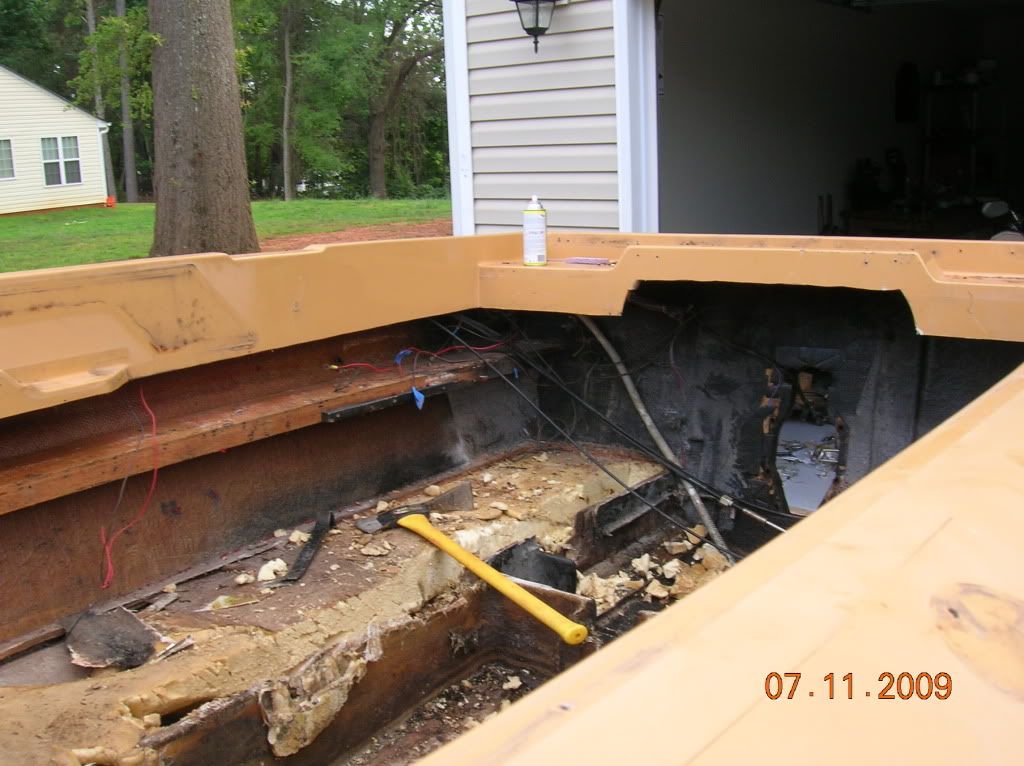
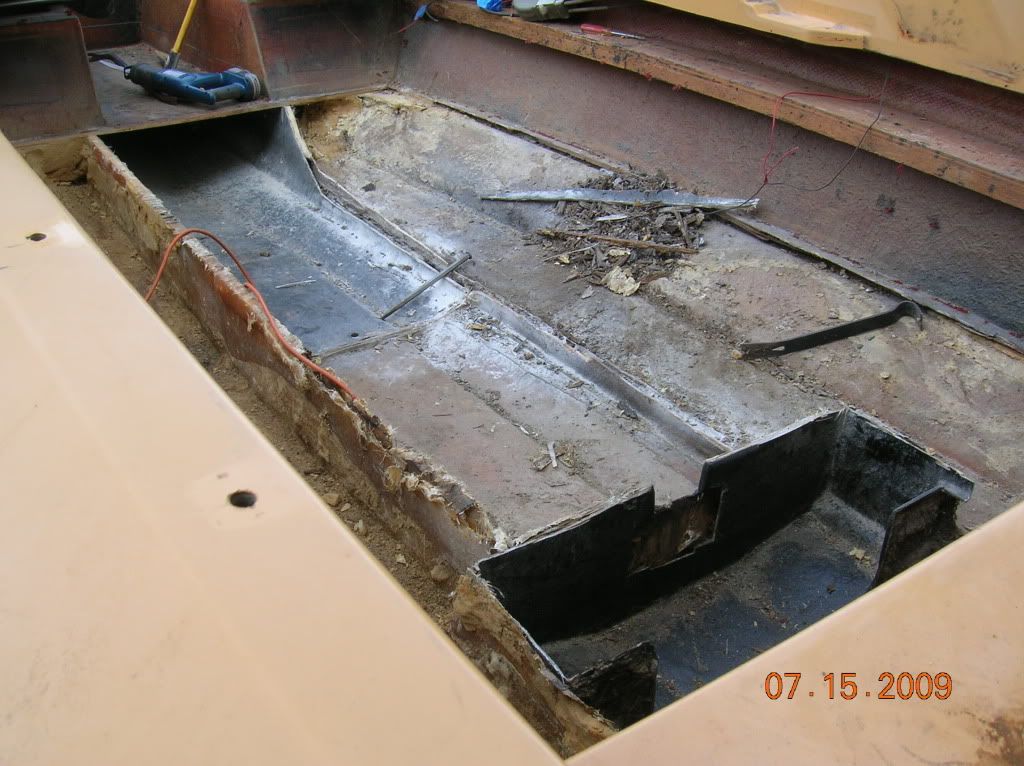
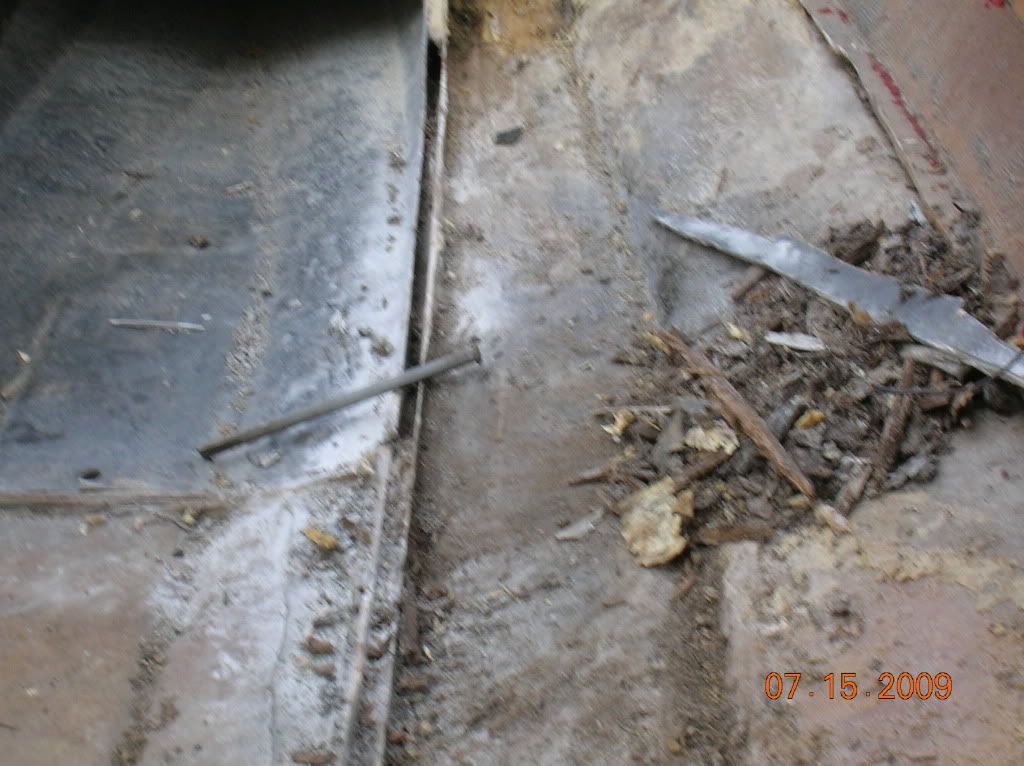
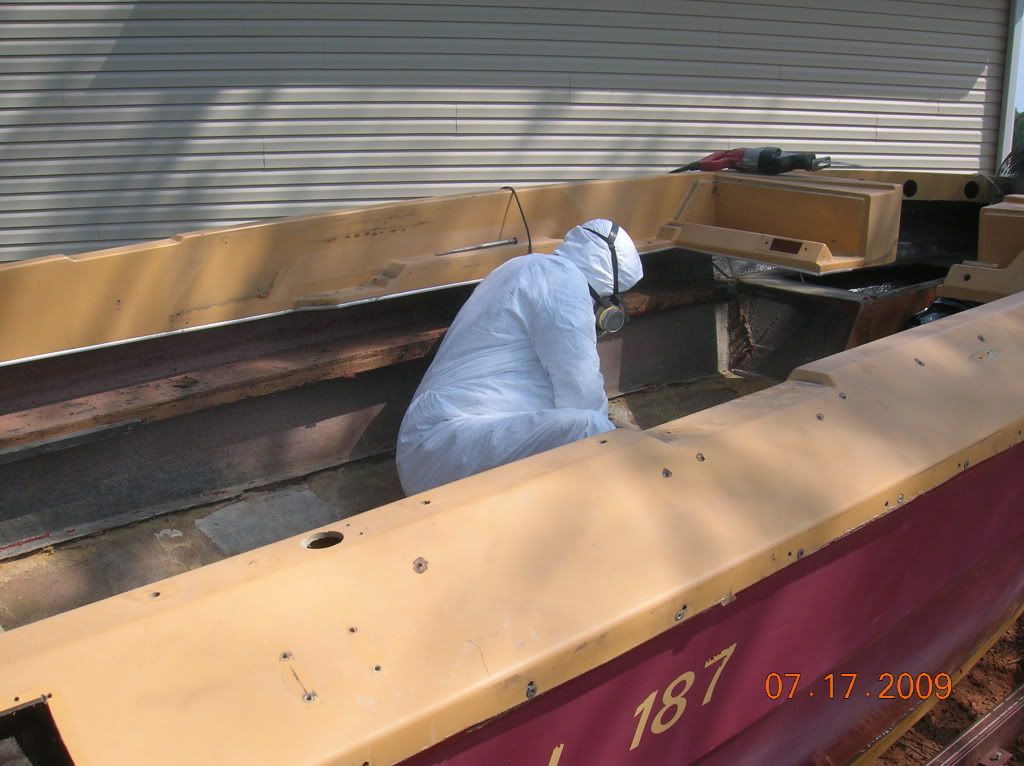
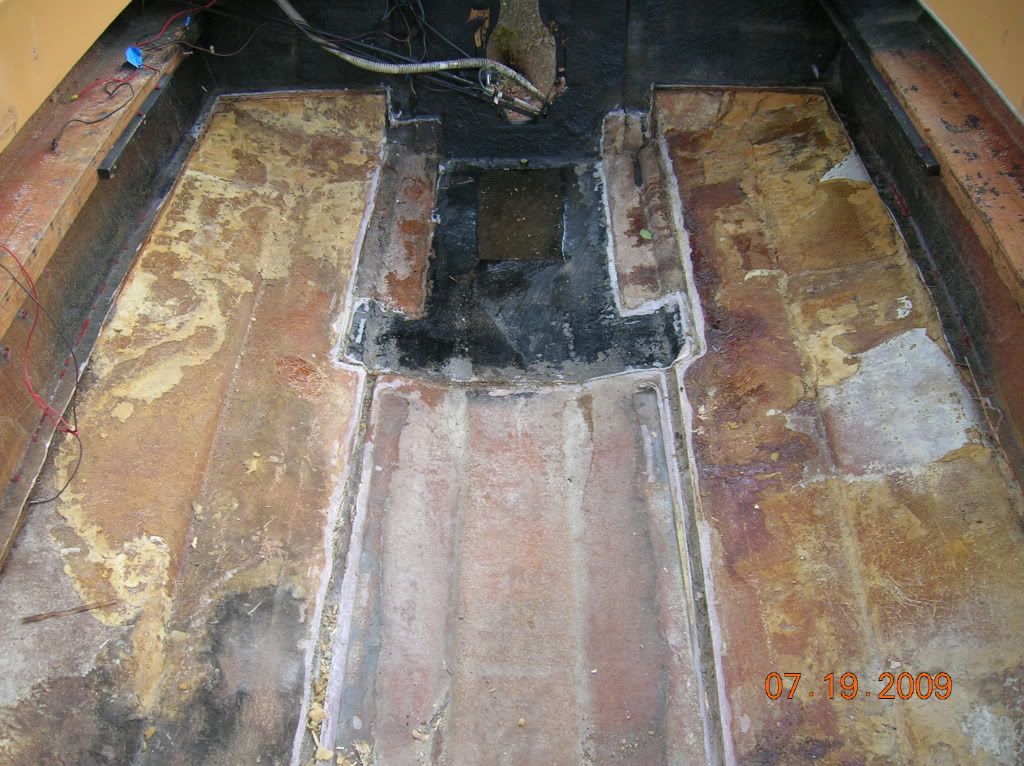
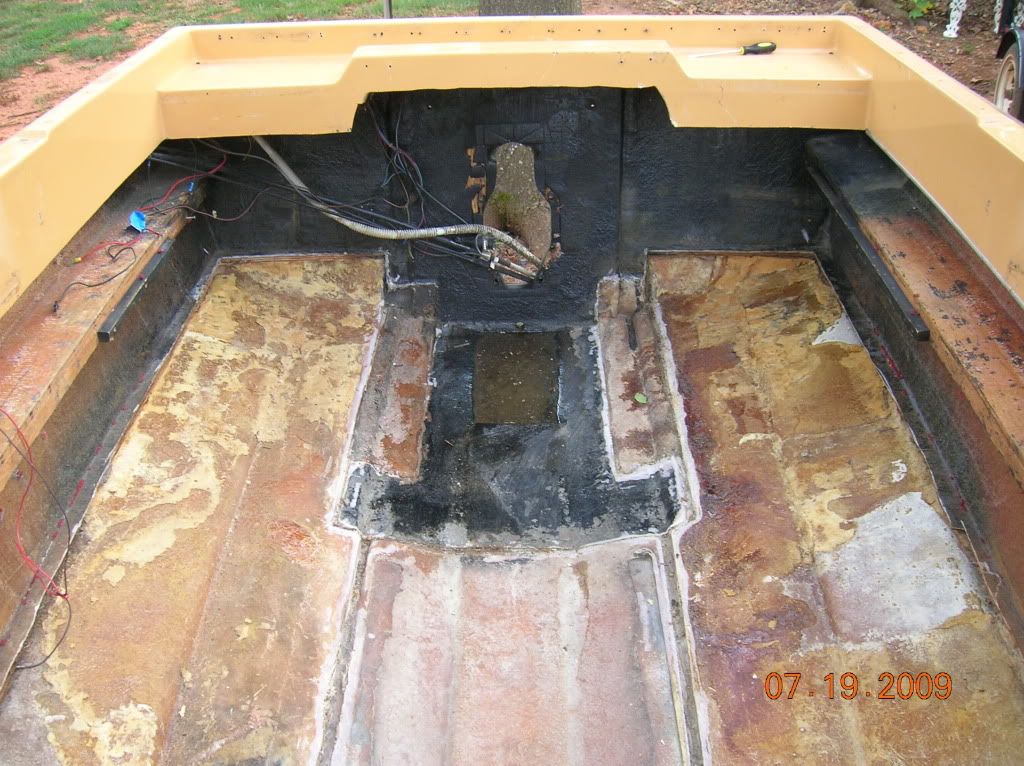
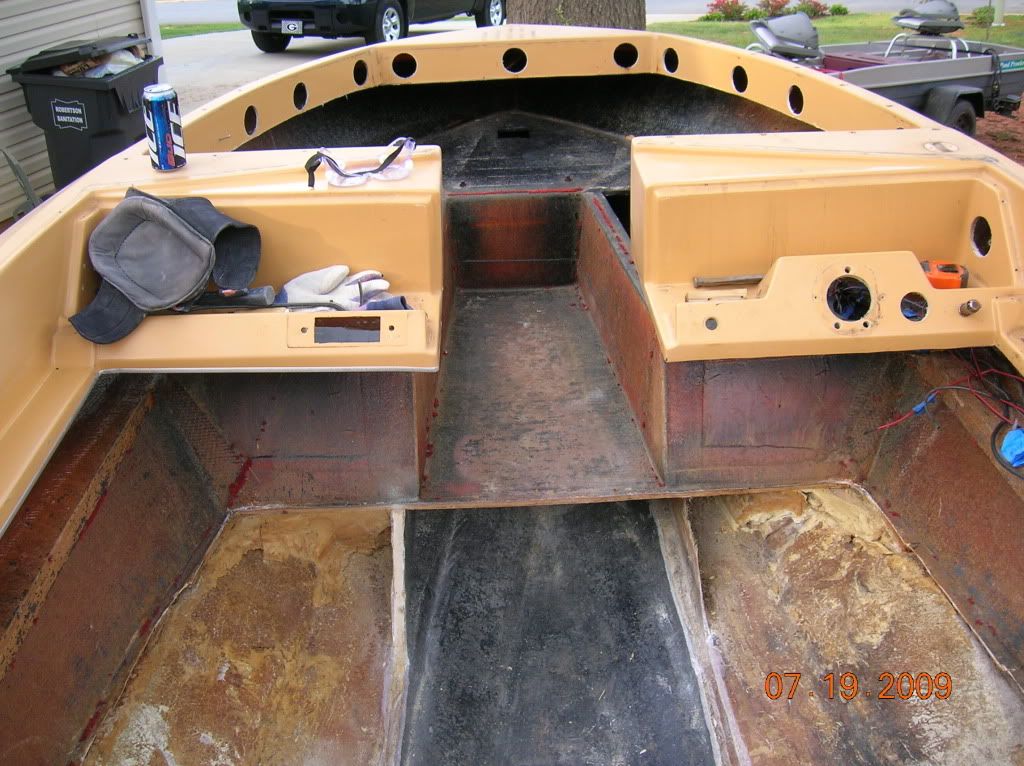
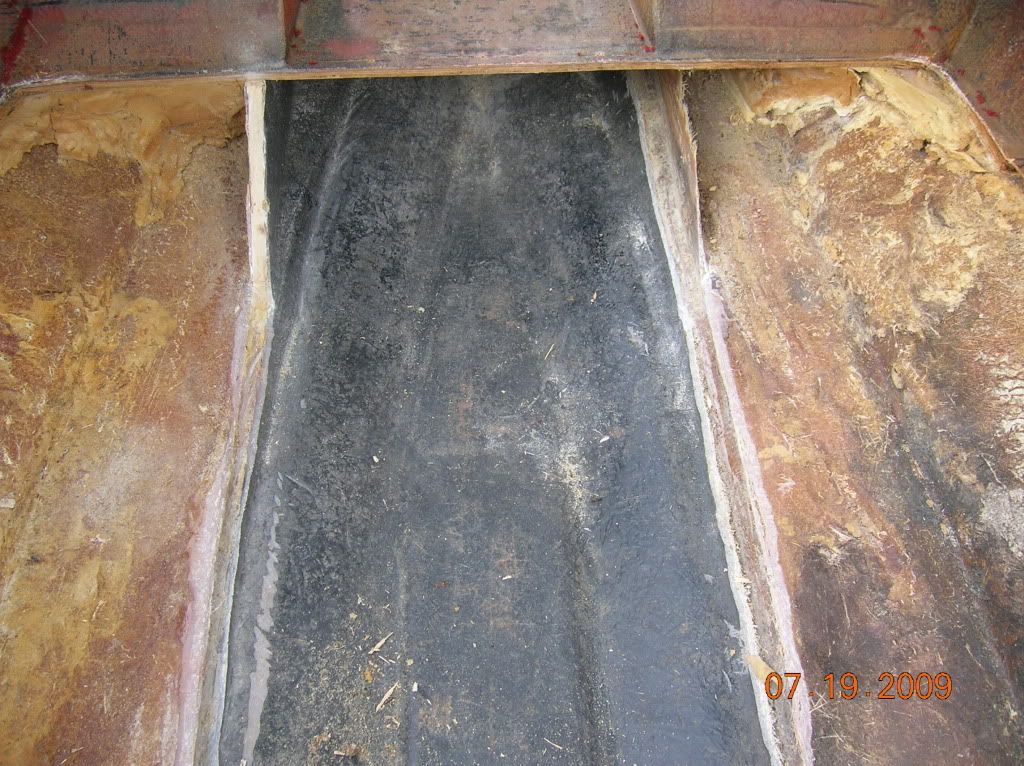
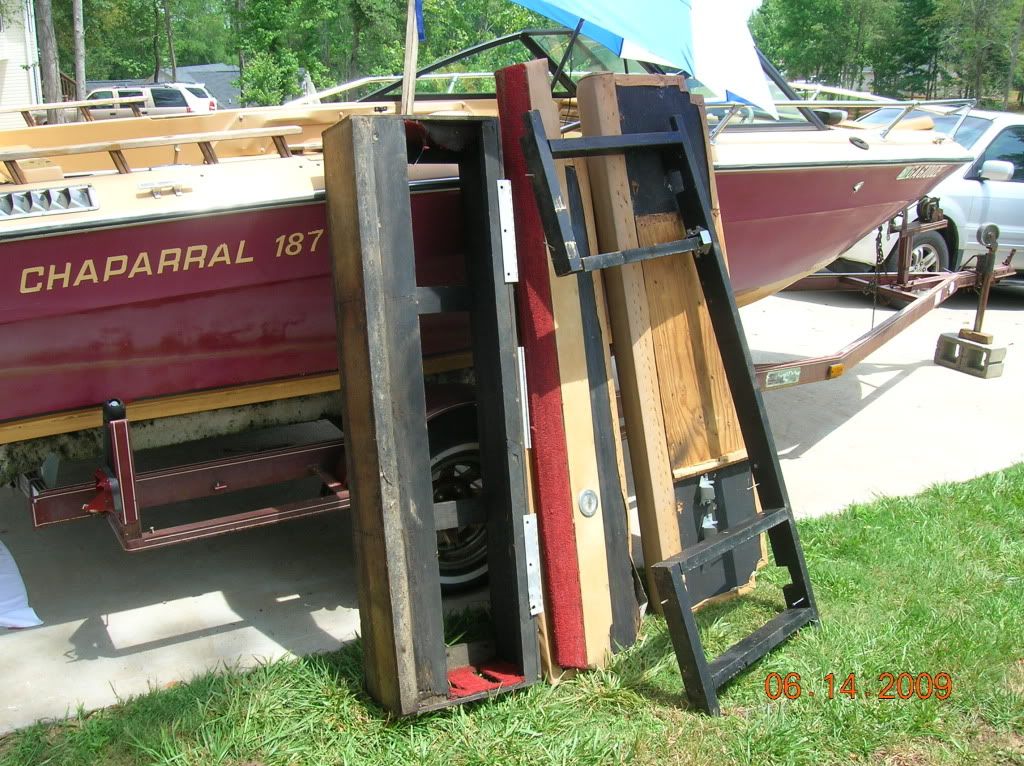
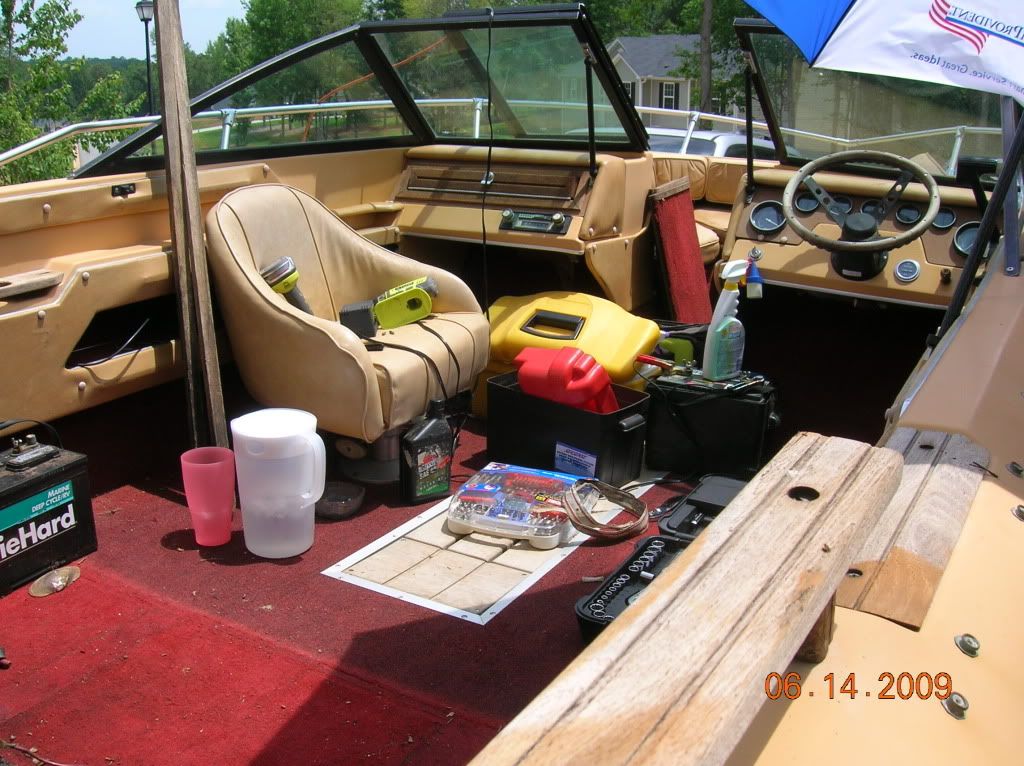
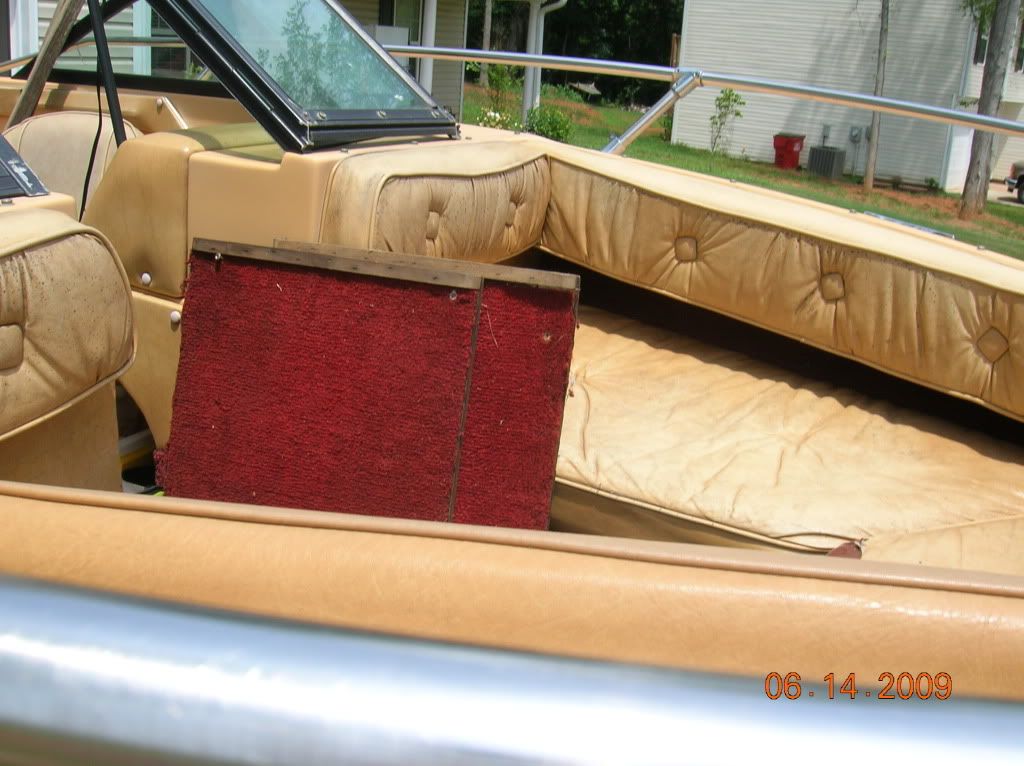
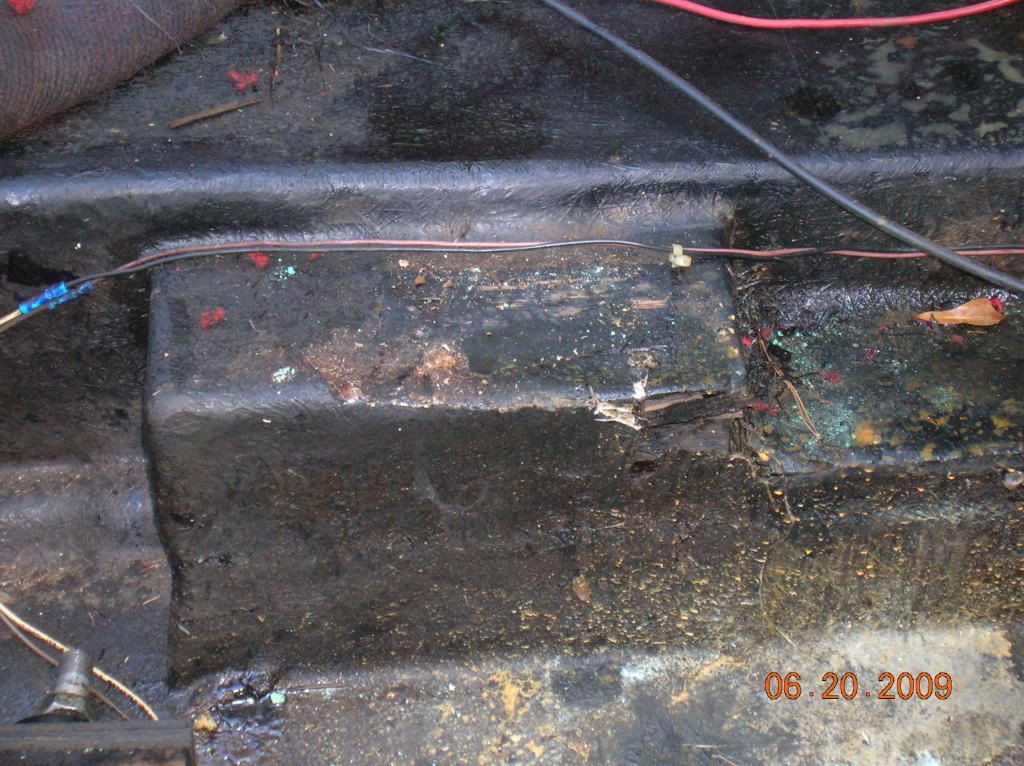
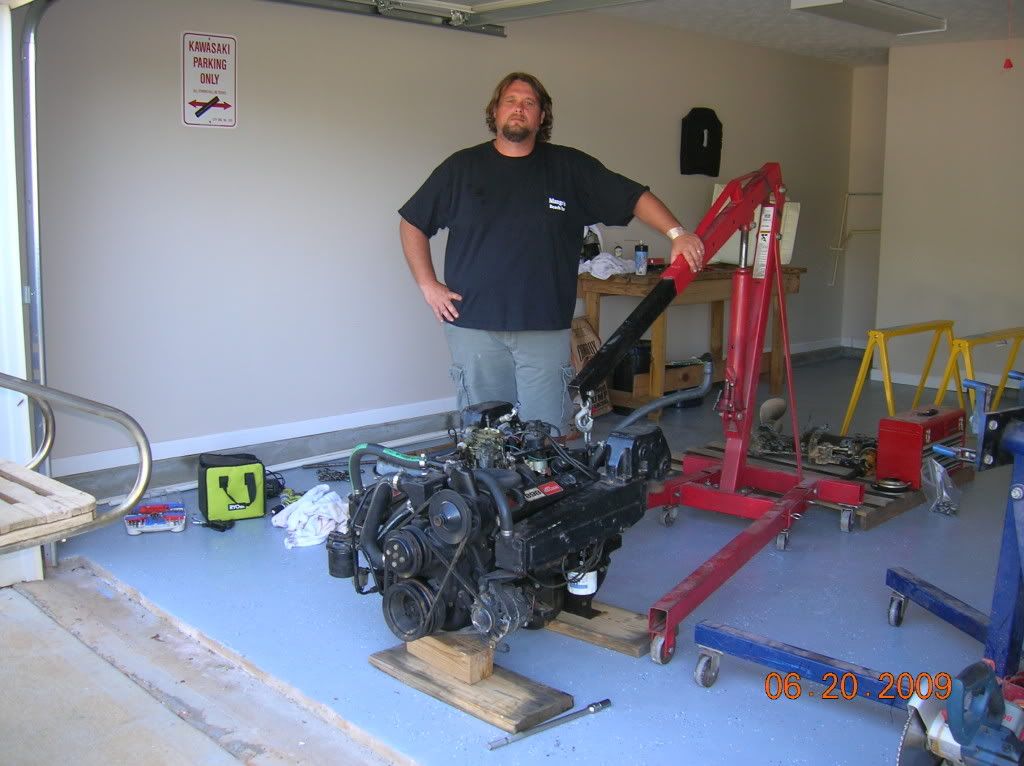
Now its time to start removing the interior so we can get the engine out. There goes the sundeck.

DSCN0908.jpg
 

robbankston

Petty Officer 2nd Class
Joined
Jun 12, 2009
Messages
129
Re: 1981 Chaparral 187 restore

So finally got a good look at the engine. It looks pretty good for almost 30 years old.

DSCN0909.jpg


Here's a shot of the interior before removal.

DSCN0910.jpg


And another

DSCN0911.jpg
 

robbankston

Petty Officer 2nd Class
Joined
Jun 12, 2009
Messages
129
Re: 1981 Chaparral 187 restore

Got the engine out. That was a bit of an adventure. We had to jack it up a bit higher than I think the stand was intended to go, but its out and nobody got hurt. Which is an accomplishment for me since its the first time I've ever done anything like it.

DSCN0914.jpg


Getting a good look at the engine well.

DSCN0915.jpg


Motor mounts are shot, but we knew that going in.

DSCN0916.jpg


DSCN0917.jpg
 

robbankston

Petty Officer 2nd Class
Joined
Jun 12, 2009
Messages
129
Re: 1981 Chaparral 187 restore

Drive was removed before the engine, only the pictures are out of order.

DSCN0918.jpg


DSCN0919.jpg


The proud captain.

DSCN0920.jpg
 

robbankston

Petty Officer 2nd Class
Joined
Jun 12, 2009
Messages
129
Re: 1981 Chaparral 187 restore

So we started cutting on the mounts and as we were poking around we discovered the floor had to go to along with the foam. Surprise surprise. So that of course meant the stringers are bad, so we finally decided to tear it all out. I'm sure we are the only ones who ever tried to deny there was an issue right. :)

DSCN0927.jpg


Here's the outlaw removing the gas tank.

DSCN0937.jpg


Surprisingly the transom is in really good shape! Finally caught a break.

DSCN0939.jpg
 

robbankston

Petty Officer 2nd Class
Joined
Jun 12, 2009
Messages
129
Re: 1981 Chaparral 187 restore

So that brings us to today.

Used a maddock to remove the foam.

DSCN0941.jpg


Foams out so the grinding can begin.

DSCN0952.jpg


So I got one stringer removed, but it was really hot and the kids were driving the wife nuts, so I quit early and took them to the lake for some swimming. Planning to hit it hard in the morning. Hopefully I'll have more to post tomorrow.

DSCN0954.jpg
 

ezmobee

Supreme Mariner
Joined
Mar 26, 2007
Messages
23,767
Re: 1981 Chaparral 187 restore

Wow! You got a lot done. Looking good. What are your plans for the interior?
 

robbankston

Petty Officer 2nd Class
Joined
Jun 12, 2009
Messages
129
Re: 1981 Chaparral 187 restore

Wow! You got a lot done. Looking good. What are your plans for the interior?

Hey thanks. Good thing I have my father-in-law as my partner on this. It wouldn't be this far along otherwise.

Can't decide if I want to go with carpet or paint once we get the new deck back in. I know will be reupholstering everything also. Really it's kind of hard to think about that stuff when we still have to rebuild the floors, stringers, motor mounts, and flip it over for sand and gel coat. Lots to do...
 

chrishayes

Senior Chief Petty Officer
Joined
Apr 9, 2009
Messages
691
Re: 1981 Chaparral 187 restore

WOW, everytime I see one of you poor b**tards having to deal with the foam removal, i thank the boating gods and Wellcraft for not putting that crap in mine!:D What a nightmare that stuff must be...well, looks like you got a handle on it so far. I hope you kept the stringers after cutting them out. They looked like they could be used as templates? If not, man is it tough to make new ones. Well I will be looking forward to seeing more from your adventure! Keep it up!
 

robbankston

Petty Officer 2nd Class
Joined
Jun 12, 2009
Messages
129
Re: 1981 Chaparral 187 restore

WOW, everytime I see one of you poor b**tards having to deal with the foam removal, i thank the boating gods and Wellcraft for not putting that crap in mine!:D What a nightmare that stuff must be...well, looks like you got a handle on it so far. I hope you kept the stringers after cutting them out. They looked like they could be used as templates? If not, man is it tough to make new ones. Well I will be looking forward to seeing more from your adventure! Keep it up!

Foam removal wasn't too bad (am I lying?). Used a sawzall and a maddock to remove. Isn't the foam required for any boat under 20 feet? We were going to put it back since it seemed like it helped with the structure of the floor also.

Didn't keep the stringers, but my father-in-law who is a carpenter by trade (and a darn good one) took a lot of measurements. So I have faith that we will be ok.

Got another stringer cut out today. Not sure its worth posting more pictures yet. Once I get them all cleaned up I'll post more.
 

chrishayes

Senior Chief Petty Officer
Joined
Apr 9, 2009
Messages
691
Re: 1981 Chaparral 187 restore

Foam removal wasn't too bad (am I lying?). Used a sawzall and a maddock to remove. Isn't the foam required for any boat under 20 feet? We were going to put it back since it seemed like it helped with the structure of the floor also.

Didn't keep the stringers, but my father-in-law who is a carpenter by trade (and a darn good one) took a lot of measurements. So I have faith that we will be ok.

Got another stringer cut out today. Not sure its worth posting more pictures yet. Once I get them all cleaned up I'll post more.

mine had foam, but it is all in drick shaped pieces with a little tabbing of glass here and there to hold it down. Actually most of the foam in my boat was under the gunwhale down the sides and in the stern up high. I like the way my boat was made, they put foam only where they had to to keep the boat from sinking. They didnt use it structurally. therefore, my boat lasted much longer than a boat built like yours. Foam is not required during a redo of a boat, just in manufacturing a boat. I intend to use pink foam sheets that are meant to go around the exterior of a house foundation. It will allow drainage under and around it plus is doesnt soak up water.
 

robbankston

Petty Officer 2nd Class
Joined
Jun 12, 2009
Messages
129
Re: 1981 Chaparral 187 restore

mine had foam, but it is all in drick shaped pieces with a little tabbing of glass here and there to hold it down. Actually most of the foam in my boat was under the gunwhale down the sides and in the stern up high. I like the way my boat was made, they put foam only where they had to to keep the boat from sinking. They didnt use it structurally. therefore, my boat lasted much longer than a boat built like yours. Foam is not required during a redo of a boat, just in manufacturing a boat. I intend to use pink foam sheets that are meant to go around the exterior of a house foundation. It will allow drainage under and around it plus is doesnt soak up water.

I think we'll end up adding it back. When I said it added structure I'm not sure it was intended for it. I think it just helped stabilize the floor after the rot set in. In any event, we will add it back, but I am thinking about putting in something on the hull that will allow for a channeling system for water once the foam is poured. Still something I'm thinking about.
 

robbankston

Petty Officer 2nd Class
Joined
Jun 12, 2009
Messages
129
Re: 1981 Chaparral 187 restore

Working on the same thing. If you want to see how it will look with everything out, take a look at the photo gallery here. http://forums.iboats.com/showthread.php?t=332712

For the stringers I am using 15/32 ply laminated.

Got a good look at it today with everything out. It's getting an acetone bath tomorrow. Father-in-law is starting the stringers tomorrow. He has quite the workshop (did I mention he's carpenter). The front stringer we took out were solid dimensional lumber, so we are going with to put the same back in. We are going to use some white oak, which is what we already had on hand and its supposed to be rot resistant.
 

robbankston

Petty Officer 2nd Class
Joined
Jun 12, 2009
Messages
129
Re: 1981 Chaparral 187 restore

Stringers are out and grinding is done. Now I'm giving it a couple of degreaser and acetone baths and with a bit of sanding we'll be ready to bed stringers. Good progress.

DSCN0956.jpg


DSCN0957.jpg


DSCN0958.jpg


DSCN0959.jpg


DSCN0960.jpg


DSCN0961.jpg
 

blousteau

Seaman Apprentice
Joined
Apr 20, 2009
Messages
44
Re: 1981 Chaparral 187 restore

Mine were dimentional too, but since everyone here seems to be using ACX exterior ply with good results I figured I would go with that. Plus the ply should be stronger. Were your stringers suspended off the hull a little or were they bonded to the hull? If I remember right mine were up off the hull a little, maybe 1/4 of an inch. It looks like the part that is still in there, in the front, is up off the hull a little.

You might want to scarf joint or put some braces on each side of where the new stringers will join the old, In my 187 the hull seems to take most of the wake and wave hits directly under the driver and passenger area. That is why I took the entire stringer out to replace it in one piece instead of scabbing onto the old one.

I was thinking of either bedding them to the hull in some PL Premium, or epoxying a strip of 1/2 inch by 3/4 wide blue foam to the hull then epoxying the stringers to that.

I think there was some talk on here in some other posts that white oak didn't bond well with the poly, but I don't remember about epoxy. It seems that the softer woods are able to soak up the resin better, or at least that would make sense.

You should also grind or sand about three to four inches on each side of the stringers and the top of the floor, that way the glass will have some tooth for the resin to stick to. If you use poly it is a must, if you use epoxy it will just make it better. When you add glass to at already cured hull the bond is mechanical not chemical, so there needs to be a tooth for the new glass to bond.

I'll add the latest pics to my gallery so you can see what I am talking about.
 

88BLiner

Petty Officer 2nd Class
Joined
Mar 22, 2009
Messages
172
Re: 1981 Chaparral 187 restore

Looking good man, keep at her like you have been and you will be on the water in no time.
 

robbankston

Petty Officer 2nd Class
Joined
Jun 12, 2009
Messages
129
Re: 1981 Chaparral 187 restore

Mine were dimentional too, but since everyone here seems to be using ACX exterior ply with good results I figured I would go with that. Plus the ply should be stronger. Were your stringers suspended off the hull a little or were they bonded to the hull? If I remember right mine were up off the hull a little, maybe 1/4 of an inch. It looks like the part that is still in there, in the front, is up off the hull a little.

You might want to scarf joint or put some braces on each side of where the new stringers will join the old, In my 187 the hull seems to take most of the wake and wave hits directly under the driver and passenger area. That is why I took the entire stringer out to replace it in one piece instead of scabbing onto the old one.

I was thinking of either bedding them to the hull in some PL Premium, or epoxying a strip of 1/2 inch by 3/4 wide blue foam to the hull then epoxying the stringers to that.

I think there was some talk on here in some other posts that white oak didn't bond well with the poly, but I don't remember about epoxy. It seems that the softer woods are able to soak up the resin better, or at least that would make sense.

You should also grind or sand about three to four inches on each side of the stringers and the top of the floor, that way the glass will have some tooth for the resin to stick to. If you use poly it is a must, if you use epoxy it will just make it better. When you add glass to at already cured hull the bond is mechanical not chemical, so there needs to be a tooth for the new glass to bond.

I'll add the latest pics to my gallery so you can see what I am talking about.

Yep we plan to sand about 4 inches on each side. The one part of the stringer that is left we plan to scarf joint it. It's and the rest of the stringers were definitely bedded and bonded on the hull. We'll be using marine plywood on the other stringers that were past the ski locker. We are going with dimension on the first set of stringers because we are trying to stick to the original manufactures design. The one change we are going to make is instead of a ski locker we are going to build a builkhead and install some insulation so we can have a built-in beer cooler, i mean drink cooler. :cool:
 

chrishayes

Senior Chief Petty Officer
Joined
Apr 9, 2009
Messages
691
Re: 1981 Chaparral 187 restore

Yep we plan to sand about 4 inches on each side. The one part of the stringer that is left we plan to scarf joint it. It's and the rest of the stringers were definitely bedded and bonded on the hull. We'll be using marine plywood on the other stringers that were past the ski locker. We are going with dimension on the first set of stringers because we are trying to stick to the original manufactures design. The one change we are going to make is instead of a ski locker we are going to build a builkhead and install some insulation so we can have a built-in beer cooler, i mean drink cooler. :cool:

Looking forward to seeing your...uh...drink...cooler! I am going to build one as well but I plan to put mine under the port side bow seat with the seat being the lid! I dont know if it will work or not but im gonna give it a go. Keep up the good work, once the grinding is done, the rest of it is just way more fun. Except all the bending over. I have a herniated disk at L5 so for me, the stringers have been the worst part. It is all done by standing and bent at the waist. I am dead and hurting soooo bad from just putting a continuous 2 layers of 1708 on one stringer this weekend:( I cant wait to stand on a deck to do work!
 
Top