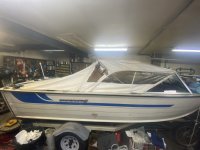
1980 Holiday 181

Troubled1

Petty Officer 2nd Class
Joined
Oct 2, 2019
Messages
116
The chieftain is safely parked in my driveway. I can’t believe how tall it is compared to the house. It’s definitely going to be a fun project worthy of it’s own rebuilt thread.
I’m hoping that Sunday I can get the Holiday out on Lake Superior for a shakedown run then get it winterized and put away until spring.
 

Watermann

Starmada Splash of the Year 2014
Joined
Jan 12, 2013
Messages
13,794
Awesome! Another SC boat saved from the dust bin of history. (y)

From the pics of the Chief it looks to have an OMC from the color of the motor. Those drives are obsolete with no parts support making a repower to either Mercruiser or an outboard if so inclined if nothing else for reliability.
 

Troubled1

Petty Officer 2nd Class
Joined
Oct 2, 2019
Messages
116
Awesome! Another SC boat saved from the dust bin of history. (y)

From the pics of the Chief it looks to have an OMC from the color of the motor. Those drives are obsolete with no parts support making a repower to either Mercruiser or an outboard if so inclined if nothing else for reliability.
The fellow I got the boat from gave me the contact info of a guy that has a good supply of OMC engines and outdrives. He’s in his 80’s and wants to get rid of the stuff so his kids won’t have to do it when he’s gone. I’ll be giving him a call to see what he has. I’m also keeping my eyes open for a donor boat with a Mercruiser setup. They come up often and quite cheap too.
 

Troubled1

Petty Officer 2nd Class
Joined
Oct 2, 2019
Messages
116
Since my last post too many things have happened. My mother passed away in October so we had to deal with that and then sell our house and move into my mother’s place. Since moving I can finally get back to working on the Holiday. I have straightened the side window frames as good as I can and am in the process of fitting the Lexan. Once in place I’ll get the top with the side and back curtains in place, take pictures and bring everything to an upholstery shop to see if they can make the original top usable. If not I’ll pull the trigger on a complete new one.
With the boat in the heated garage I have ample time to work but with having to move so quickly it became a repository for junk that has to be dealt with. That said, I am making progress.
 

jbcurt00

Moderator
Staff member
Joined
Oct 25, 2011
Messages
25,046
Welcome back, some find boat work helps when life throws stuff at you.
Condolences for your family's loss
 

Troubled1

Petty Officer 2nd Class
Joined
Oct 2, 2019
Messages
116
Welcome back, some find boat work helps when life throws stuff at you.
Condolences for your family's loss
Thank you. I have a lot of winter projects to keep me busy. Besides the boat I’m also working on a 1980 Yamaha IT 125 dirt bike. It’s nice having 2 different Motorsports equipment from the same year.
 

Troubled1

Petty Officer 2nd Class
Joined
Oct 2, 2019
Messages
116
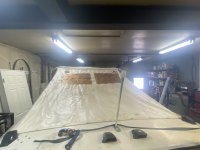
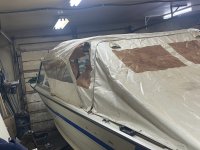
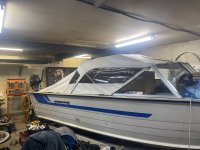
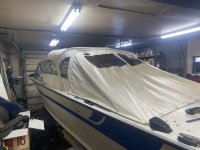
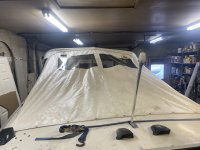
The Lexan is in place and the full enclosure is installed. There is only one tear in the top on the rear starboard corner. All window plastic will need replacing and there’s only 4 missing snaps on the entire thing.
83FB02FC-BD29-4208-AFE9-09B34D213495.jpeg

2D366E5C-8699-4B96-B5C8-CF1F9B71B0EA.jpeg

89042757-D648-4B6C-BD85-AFFA39E8E928.jpeg

For a 42 year old top, this thing is in really good condition. I just hope a local upholstery shop will be able to fix it up for me.
 

Troubled1

Petty Officer 2nd Class
Joined
Oct 2, 2019
Messages
116
I picked a really good time to bring my top in for repairs. Dropped it off yesterday morning and they called me at 10am saying it was ready. One thing I had them do was to add a piece of material in the top rear corners to make sure the tube doesn’t rub on the clear plastic windows. Hopefully it’ll fade enough to blend in a little better. I will however try cleaning the top some more and see how it looks.
I spent last evening straightening out the main frame member. It’s not perfect but until I can get a new piece of tubing to make one it’ll do just fine.
1306F7C6-735D-4EC7-BEB7-D8A839541283.jpeg6E6C092D-333B-44A5-9F1B-2819B2170418.jpeg6554F6BC-8B4D-4587-BC5C-4E2EF3769807.jpeg
 

ShoestringMariner

Lieutenant Commander
Joined
Apr 18, 2015
Messages
1,600
I picked a really good time to bring my top in for repairs. Dropped it off yesterday morning and they called me at 10am saying it was ready. One thing I had them do was to add a piece of material in the top rear corners to make sure the tube doesn’t rub on the clear plastic windows. Hopefully it’ll fade enough to blend in a little better. I will however try cleaning the top some more and see how it looks.
I spent last evening straightening out the main frame member. It’s not perfect but until I can get a new piece of tubing to make one it’ll do just fine.
View attachment 355411View attachment 355412View attachment 355413
Looks good!
Can you sit fully upright with this top or do you have to be scrunched down?
I don’t have a top but I feel like I have to look above or below the top windshield bar to drive and I just have sleeper seats. (My seats are new, maybe they sit taller than the originals)
 

Troubled1

Petty Officer 2nd Class
Joined
Oct 2, 2019
Messages
116
Looks good!
Can you sit fully upright with this top or do you have to be scrunched down?
I don’t have a top but I feel like I have to look above or below the top windshield bar to drive and I just have sleeper seats. (My seats are new, maybe they sit taller than the originals)
We can sit upright quite comfortably. The white keeps the interior at a comfortable temperature during the day.
 

Troubled1

Petty Officer 2nd Class
Joined
Oct 2, 2019
Messages
116
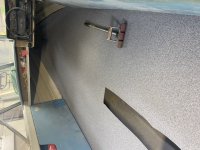
Back at it again. Flooring is now glued in. I will more than likely have to trim the hatch door a bit so it won’t interfere when it is covered and installed. Next up is covering the seat bases and back panel with flooring as well.

C9F8D1F6-4EBC-4A77-86F2-9920E3407848.jpeg

The blue seats and side panels will have to do for this coming season. Next winter they’ll be off the the upholstery shop and redone in a two tone gray.
I picked up an 8” subwoofer today and will be making a combination bow step/sub enclosure, installing the amps and 2 sets of speakers along with the Vexilar T box smartphone graph components.

The instrument cluster has seen better days and has a couple cracks in it. I’m thinking of removing it, putting a layer of fiberglass over it then doing a vinyl wrap before re-installing the gauges and adding new switches. I also have 8 stainless steel led lights I want to wire in for the warm evenings on the lake.
 

Troubled1

Petty Officer 2nd Class
Joined
Oct 2, 2019
Messages
116
Work on the Holiday has stalled out. I’ve been ordering things and as I get them plans start to change a bit. I have decided to go to a dual battery setup as I don’t want a no start issue after running the stereo for prolonged periods (2 amplifiers). I will be mounting the amps up front so I had to order some power distribution blocks so I can power the amplifiers.
I have decided that since I’m running power up front, I may as well remove the original circuit breakers and replace them with an automotive type fuse panel. I then decided if I’m upgrading the power, I may as well update the switches as well. With a switch panel on ordering figured it’s time to put a horn in while I’m at it. So back online and now it have it.
It didn’t stop there!! If I’m doing all this work to update things, i should replace the old gauges. So last week the new set of gauges showed up. The plan now is to draw up a wiring diagram and figure out how I’ll do all this before I order more stuff.
 

Troubled1

Petty Officer 2nd Class
Joined
Oct 2, 2019
Messages
116
Here’s a question for the stringer guys. If everything is original on my 1980 holiday, what type of shift setup would it have? Would it be electric, mechanical or something else. Also, when in neutral, my control lever is roughly in the 10 O’clock position. Is there a way to adjust it to get it to the 12 o’clock position?
 

Watermann

Starmada Splash of the Year 2014
Joined
Jan 12, 2013
Messages
13,794
I think you're our stringer guy :LOL:

You'll most likely get the best results in the OMC IO forum.
 

Troubled1

Petty Officer 2nd Class
Joined
Oct 2, 2019
Messages
116
1A9696D4-6EBC-49FB-B4D4-93A879221BC0.jpeg
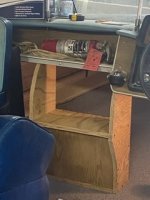
Test fitting the step/subwoofer enclosure. Fits good so I’ll sand all the edges smooth and cover it with the matching flooring. I may enclose the top section to mount the stereo head unit. I plan to mount a piece of plywood to the wood on the underside of the bow to mount the amplifiers.

I can’t believe the amount of wiring under the dash for everything. Changing out all the switches, gauges and circuit breakers to a fuse panel might take a bit of effort.
 

SHSU

Lieutenant Junior+Starmada Splash Of The Year 2019
Joined
Mar 8, 2017
Messages
1,741
I can’t believe the amount of wiring under the dash for everything. Changing out all the switches, gauges and circuit breakers to a fuse panel might take a bit of effort.
I agree with that. That is one thing I wish I would have planned for better. More space for all the wiring and such.

SHSU
 

Watermann

Starmada Splash of the Year 2014
Joined
Jan 12, 2013
Messages
13,794
Yeah the rats nest of wiring is a tough one to tame, I used lots of loom and zip ties to keep it as managed as possible.
 

Troubled1

Petty Officer 2nd Class
Joined
Oct 2, 2019
Messages
116
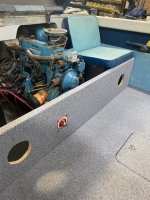
I’ve had a few free evenings to get some work done. I started in the rear and mounted the batteries and battery switch. Finding an accessible spot for the switch close enough to the batteries was my top priority. I ended up mounting it in the rear panel directly inline with the starter. I also made the rear speaker cutouts and reinstalled the panel. With the switch in place I started wiring.
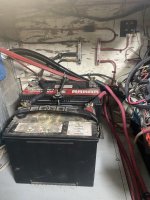
B773E2D2-2D8E-404E-ACA3-46769B3D1459.jpeg
The small fuse panel on the upper right will need to has the power in moved to direct battery power as it powers the bilge pump float switch. From the bus bar I has a 50A midi fuse protecting the #6 wire going to a fuse panel up front.
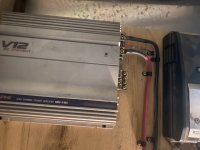
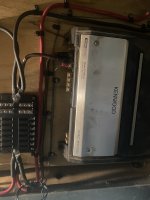


6F2FC0DE-26AC-4828-8178-2A58EC2D16C6.jpeg
90C52FBE-BED5-406B-997F-721C915FB16E.jpeg

The amps and front fuse panel are mounted to a piece of 3/4” plywood that is attached to the underside of the bow on the wood supports directly behind where the step/subwoofer will be. This will keep all the wiring up and out of the way and allow me to easily add the interior lighting, USB charge ports and wiring for the stereo and graph. The step has been fitted, sanded and now just needs to be covered with the flooring material, cut out and mount the subwoofer and CD player and install it.

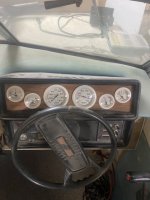
While I was looking at the wiring under the dash I decided I should change the gauges out. It was a simple enough job and the only thing left to do is run the water tube for the speedometer and wire the gauge backlighting to operate only when the navigation lights are on. The original setup had the lights on continuously.
05FA27EB-B491-447C-BA87-8F12B47D050B.jpeg
The next job will be replacing the switches. They are still functional but I prefer something a little more modern. If all goes well, I’ll have it on the lake before July.
 
Top