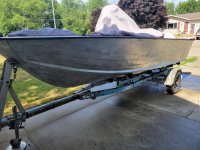
1978 Holiday 18

strov68

Seaman Apprentice
Joined
May 19, 2011
Messages
45
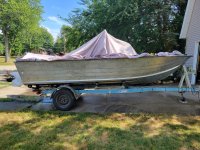
So I put my 22ft V5 on hold for now. There was a ton of corrosion and hundreds of steel shank blind rivets and also a ton of bad solid rivets that are going to have to be dealt with. That hull will be a more long term project, so in order to get on the water with my kids quicker I picked up this 18ft Holiday with a roller trailer, but no motor for super cheap.
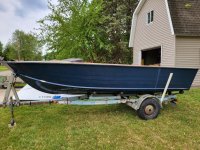
20210527_163720.jpg

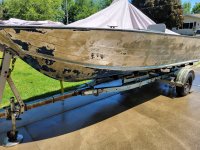
This was a project that somebody had already started. The hull was painted a really nice blue color, but the chine had some paint flaking off on one spot. This kind of makes me worry that whoever painted it didn't correctly prime it.
The floor was already taken out, but it was sitting out in the woods with side panel parts, windshield, and transom prices, sitting in the hull so it needed a good cleaning. I had also taken the glove box off already before this picture.
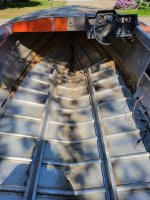
20210603_162018.jpg

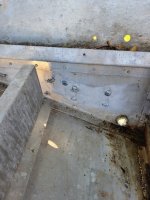
The hull looks good and very minor corrosion and best of all no blind rivets!
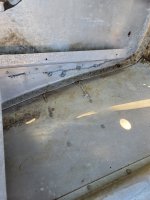
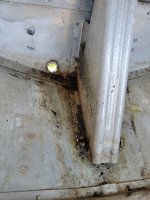
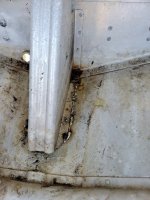
Well except for these 2 and three was some very odd welding done by a previous owner.
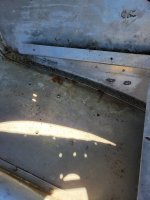
20210603_162003.jpg

20210603_162007.jpg
20210603_162000.jpg
20210603_161958.jpg
20210603_162005.jpg
 

Moserkr

Chief Officer + Starmada Splash Of The Year 2021
Joined
Nov 23, 2020
Messages
869
Starting an armada! The holiday will be good practice until you get to the even bigger v5.
 

strov68

Seaman Apprentice
Joined
May 19, 2011
Messages
45
Very poor job of welding and could weaken the hull. It looks more like the solder sticks, whatever the name is.
Any suggestions on how to remedy that? Grind down and put some new aluminum over those spots on the inside? I did a leak test already and only 1 rivet leaked in the bow and one small seep at the back where the transom skin meets the hull. It looks like they did some "welding" there on the outside too.
 

Moserkr

Chief Officer + Starmada Splash Of The Year 2021
Joined
Nov 23, 2020
Messages
869
Just a thought - take it to a professional welder and have them inspect the welds. If poor, then remove. Add plate AL to reinforce everything that needs it, new rivets where necessary, and gluvit everything. Seems like the standard fix procedure from what ive read.

Paint looks good from afar so hopefully it holds. If you can find the exact match then touch it up.
 

Watermann

Starmada Splash of the Year 2014
Joined
Jan 12, 2013
Messages
13,787
Well now I see where the welding term 'chicken scratch' came from and there was zero reasons to be welding where they did. Not sure that it would cause a serious issue down the road, just really a dumb move. At least your Holly is of the chine brace era so that's a huge plus.
 

jbcurt00

Moderator
Staff member
Joined
Oct 25, 2011
Messages
25,035
As the welds seems to be around a knee brace, my guess is there was a motor strike that overflexed the hull at the knee brace. Stump/rock, towing w the motor down... something.
 

strov68

Seaman Apprentice
Joined
May 19, 2011
Messages
45
Well now I see where the welding term 'chicken scratch' came from and there was zero reasons to be welding where they did. Not sure that it would cause a serious issue down the road, just really a dumb move. At least your Holly is of the chine brace era so that's a huge plus.
Yeah some spots are super weird. Like they replaced rivets that are there on the other side by those clobs of weld. At least I have those chine braces going for me!
 

strov68

Seaman Apprentice
Joined
May 19, 2011
Messages
45
As the welds seems to be around a knee brace, my guess is there was a motor strike that overflexed the hull at the knee brace. Stump/rock, towing w the motor down... something.
That could very well be... upon closer inspection there is some gouging right under where the knee brace is on the outside of the hull. I am going to strip the paint off there and where those globs are to see what is going on. I may make a price of aluminum that essentially extends the keel strip all the way back if it looks really bad to cover that area.
 

strov68

Seaman Apprentice
Joined
May 19, 2011
Messages
45
Just a thought - take it to a professional welder and have them inspect the welds. If poor, then remove. Add plate AL to reinforce everything that needs it, new rivets where necessary, and gluvit everything. Seems like the standard fix procedure from what ive read.

Paint looks good from afar so hopefully it holds. If you can find the exact match then touch it up.
I'm not super worried about the paint. I found a rustoleum rattle can in "navy blue" that is a pretty close match. If it does end up flaking off more I will just strip the whole thing and just paint the sides or leave it all bare. I like the natural aluminum hull look anyway.
 

strov68

Seaman Apprentice
Joined
May 19, 2011
Messages
45
Wow... it has been a busy summer! Been picking away at the boat when I have had time. Sorry I don't have many pictures, I will take some before the winter cover (tarp) goes on. Got the aluminum plate on the keel area riveted though using the holes for the knee brace. A previous owner welded the knee brace and filled those holes with weld. Used coat it on the new rivets, entire transom/hull seam, and bow area with all that factory stuff that was up there. It is now leak free!

Then set on the foam and flooring. Of course I waited to buy the 3/4 in ply and the prices skyrocketed over the summer. Flooring was sealed with the old timers formula and oil based floor paint with non skid. I also managed to get the gunnels, splashwell, and motor painted before it got too cold this fall.
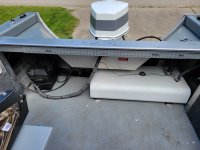
I took the 85 hp johnson v4 that came with my 22 footer and put it on this boat since it is s better fit. I was quite pleased that it took very little fuss to get running on the stand considering it may have been sitting for 6 years or more judging by the 2015 registration sticker on that boat.

Next steps will be to get the gas tank in and mounted, side panels back in, and then start building a console. Yup... decided I'm going center console with it after getting the floor in and standing where the helm would be. It just felt too far forward. That means I will also be cutting the bow skin out this winter.
 

Watermann

Starmada Splash of the Year 2014
Joined
Jan 12, 2013
Messages
13,787
Indoor winter boat work is the best way to make the long winter months go by quicker. Wishing I had a large enough space to get my 22'r inside.
 

strov68

Seaman Apprentice
Joined
May 19, 2011
Messages
45
Indoor winter boat work is the best way to make the long winter months go by quicker. Wishing I had a large enough space to get my 22'r inside.
Unfortunately it will be mostly outdoor winter boat work for me too. Last year was a mild winter so it worked out. At least building the center console will be inside.
 

strov68

Seaman Apprentice
Joined
May 19, 2011
Messages
45
Here are a few pics of my progress...
20211110_143609.jpg
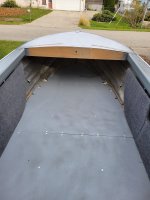
Foam and deck is in. In hindsight I should have painted the part of the bow skin that I will end up keeping. I also need to figure out the side panels since the aluminum peices that raises them off the deck didn't come with the already torn down boat.
20211110_143704.jpg
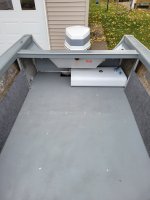
Gas tank isn't mounted yet, just put in there to get out of the way.

20211110_143713.jpg
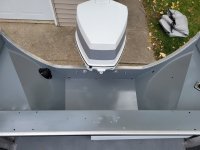
Motor and splashwell painted.

20211110_143945.jpg
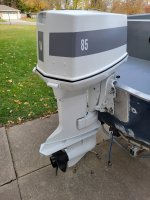
I just kind of made up my own paint scheme since I didn't want it all white. The stickers are just mailbox lettering stickers I put on there to see how I like them.
 

strov68

Seaman Apprentice
Joined
May 19, 2011
Messages
45
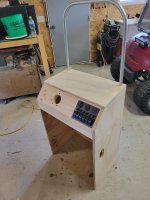
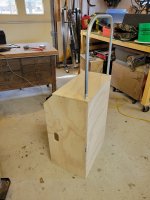
Didn't get near as much done this winter as I had hoped with Covid and flu and whatever else was going around. I did manage to make some headway on the center console though.
20220311_141031.jpg
20220311_141059.jpg

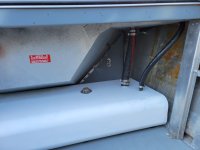
Also got the bilge pump in and fuel fill and vent lines run.
20220315_150409.jpg

Now I have to figure out where to mount the fuel/water separator. I am thinking on the transom with through bolts right next to where the stern eye bolts are. It will be tight, but should fit with the primer bulb between the tank and separator. I am open to better suggestions though.
 

Watermann

Starmada Splash of the Year 2014
Joined
Jan 12, 2013
Messages
13,787
Nice work, should serve you well for many years to come.
 

strov68

Seaman Apprentice
Joined
May 19, 2011
Messages
45
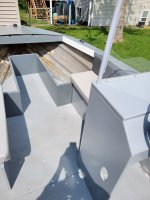
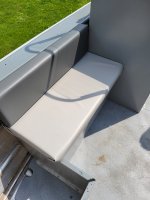
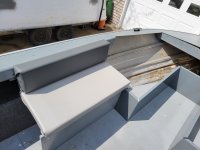
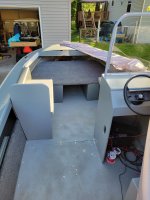
Changed my mind on the layout again. After having the console in and trying to figure out seats for the family I decided to move the console I made to the side and put 2 small bench seats on each side of the boat with a casting deck up front.
20220514_111042.jpg
20220514_111031.jpg
20220514_111019.jpg
I still have to finish up the rear seat support for the port side seat and get another sheet of 3/4 plywood to make the casting deck.

Also got the fuel lines fished up and am starting on the wiring.
 

strov68

Seaman Apprentice
Joined
May 19, 2011
Messages
45
Finally seeing the light at the end of the tunnel.

Casting deck and seats are done. Still need to do some trim work around where I cut the bow.
20220601_193857.jpg
The wiring is also done, but I don't have a picture of the wiring completed under the console.
20220610_160829.jpg
Stripping paint with a almost completed boat on the trailer is no fun at all. I was hoping it was going to come off easy like it did in a couple spots, but a lot of it was actually primered correctly so it stuck pretty good.
20220612_122821.jpg
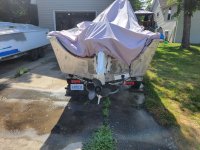
Finally got it to the point where I am going to put the registration numbers and sticker on a run it for the year and worry about stripping the rest of the bottom around the rollers later. I am also going to take a scuff pad and hand scrub the rest of the residual gunk and primer off as I have time.
20220707_164800.jpg
20220707_164811.jpg
20220707_164842.jpg

Now just to repack the bearings and throw on the new tires and wheels that came today!
 
Top