1978 Chieftain

spegtoast

Petty Officer 2nd Class
Joined
Nov 4, 2012
Messages
138
Re: 1978 Chieftain

Since we are all picture lovers I thought I would add a few images of my last visit to the Cheif.
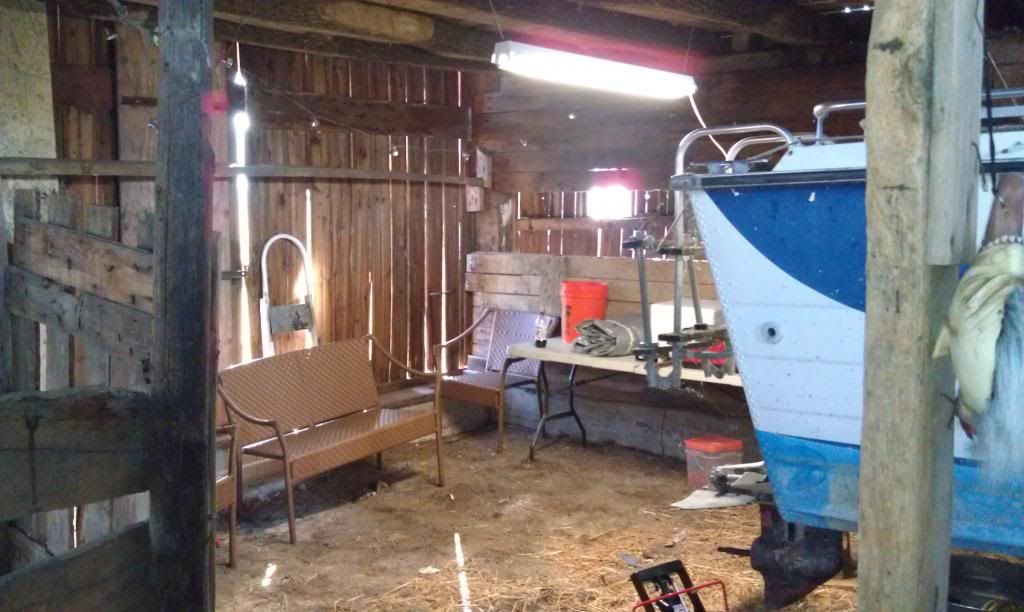
My work area... clean and dry but you can see the barn siding isnt keeping much wind and cold out.
Workarea.jpg

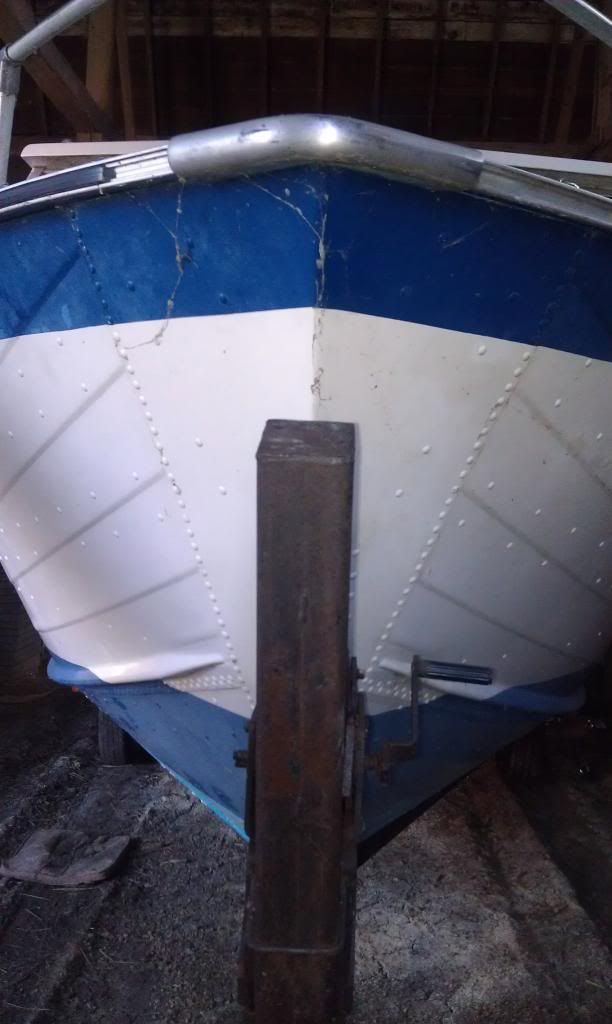
Front hull design...
fronthull-1-1.jpg

Not sure what the PO was doing painting the over the rivets?? Notice alll the little blue paint patches..
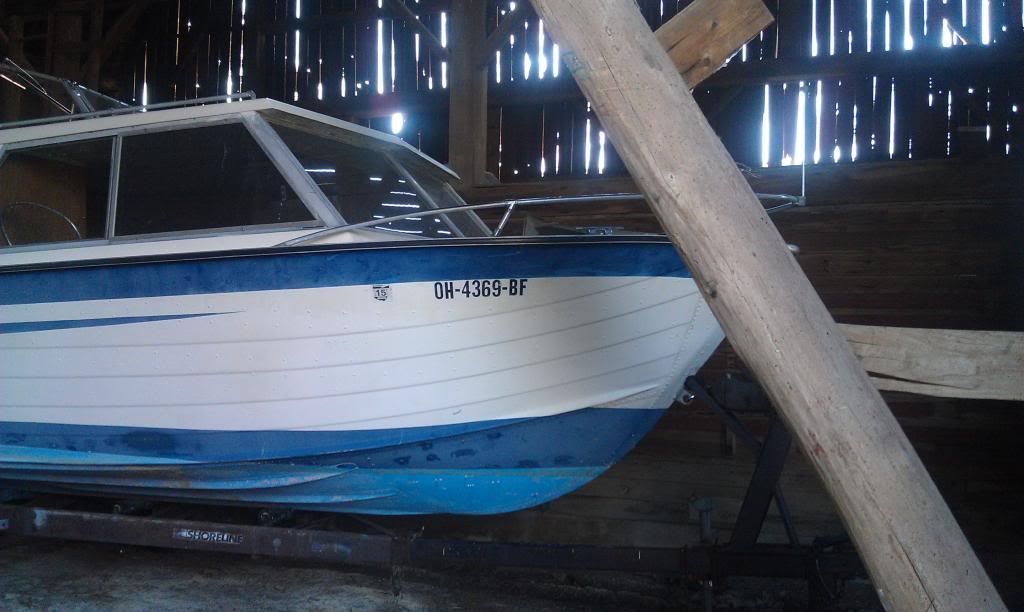
hull.jpg

Patch over rivets close-up... any concernse?
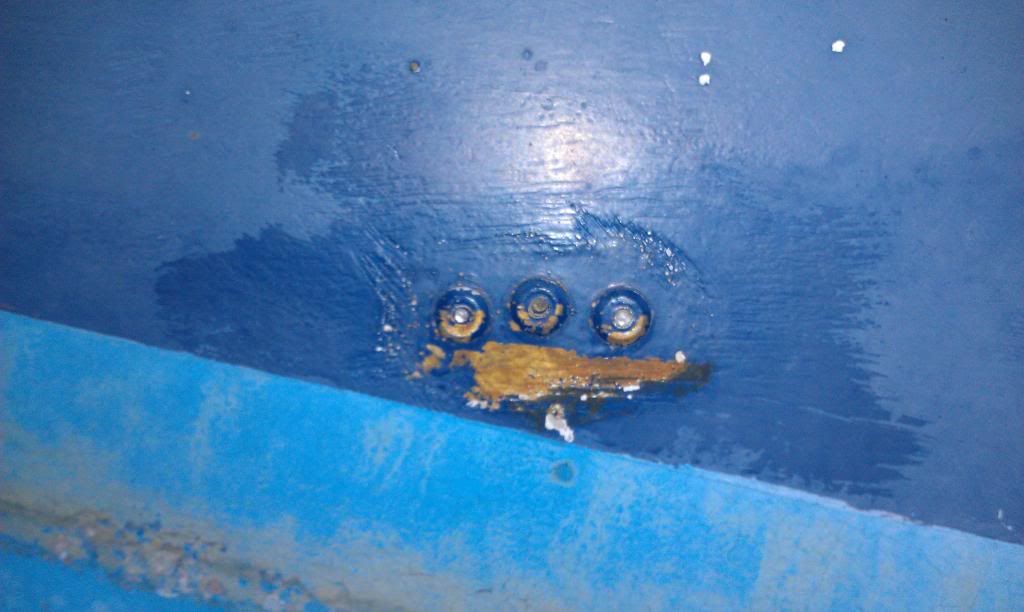
rivets.jpg

Transom decay... From what I hear from here this is a definate concern
023.jpg

Engine:
025.jpg
 

jasoutside

Supreme Mariner
Joined
Dec 20, 2009
Messages
13,269
Re: 1978 Chieftain

Hey toast! Yah, I'd bet you have a leaker there and your previous owner was trying to seal it up from the outside. A good clean hull, rivet re-buck/fix, and Gluvit or CoatIt on the inside should do the trick for ya.

And yup, yur due for a transom rebuild too:snowman:
 

spegtoast

Petty Officer 2nd Class
Joined
Nov 4, 2012
Messages
138
Re: 1978 Chieftain

Correct me if I'm wrong.. re-buck is to remove and replace the rivets? If so are the rivets and rivet tool available to the general public? I've never seen this big of rivet at the hardware store.

I was afraid you would say something about the transom. lol I really dont want to have to go down this road but the rewards will be plenty.
 

spegtoast

Petty Officer 2nd Class
Joined
Nov 4, 2012
Messages
138
Re: 1978 Chieftain

Any good ideas on what material would be a good pruchase to fab up a new accesory panel
dash.jpg


Tell me what I've got myself into:)
033.jpg
 

Attachments

  • dash.jpg
    dash.jpg
    75.7 KB · Views: 1

Weep'n Willy

Master Chief Petty Officer
Joined
Jun 12, 2012
Messages
831
Re: 1978 Chieftain

Doesn't looks all that bad, the wiring that is. The previous owner of my Chief had attempted to do some creative wiring and there is spaghetti running all over the place. He had also attempted to install a second battery with no isolation switch......used too small wire from where the second battery was to be located, and had stuff spliced in everywhere. So I have a good project in wiring alone to get it back to somewhat normalcy. As my dash was fairly rotted too I am still tossing around ideas for a new console/instrument panel. I do know that when I start on the wiring project I will put in a blade style fuse box instead of the old glass fuse style. I found this wiring diagram somewhere so this may be of some use for you.

Dsinstrument_zpsdfae2976.jpg


Have a very happy holiday!
 

jbcurt00

Moderator
Staff member
Joined
Oct 25, 2011
Messages
25,072
Re: 1978 Chieftain

Any good ideas on what material would be a good pruchase to fab up a new accessory panel

Exterior plywood, Aurauco, MDO encased in epoxy, and covered by Spar, Wood grain formica laminate, paint...Or covered by real wood veneer, encased in epoxy & protected w/ spar...

Fabbed & left exposed 1/4" aluminum
 

Bwana Don

Lieutenant Commander
Joined
Oct 20, 2009
Messages
1,951
Re: 1978 Chieftain

Re Dash/accessory panel:

Mahogany! 2 coats of epoxy and 3 coats of spar, and it will look awesome.
 

Bwana Don

Lieutenant Commander
Joined
Oct 20, 2009
Messages
1,951
Re: 1978 Chieftain

Another option for rivets is closed end pop rivets. Use the ones with the steel core, they are pretty strong. Seal the rivet after use so the steel rod isn't exposed. The advantage of the closed end pop rivet is that you don't have to remove the floor to replace a rivet, same side access, no helper needed.
 

spegtoast

Petty Officer 2nd Class
Joined
Nov 4, 2012
Messages
138
Re: 1978 Chieftain

Why epoxy and spar? Wouldnt you trust the epoxy alone or just the spar?
 

jbcurt00

Moderator
Staff member
Joined
Oct 25, 2011
Messages
25,072
Re: 1978 Chieftain

Epoxy for the strength & longevity, but it isn't UV stable, so covered w/ the spar.

Spar alone won't have the strength, longevity or as thorough a waterproof barrier, so epoxy 1st.
 

spegtoast

Petty Officer 2nd Class
Joined
Nov 4, 2012
Messages
138
Re: 1978 Chieftain

dash.jpg Any ideas on a material to restore the black ball on the throttle assembly?
 

64osby

Admiral
Joined
Jul 28, 2009
Messages
6,826
Re: 1978 Chieftain

A little hard to see it in the pic. What is it made of?

First guess would be JB Weld. Fill sand paint.
 

spegtoast

Petty Officer 2nd Class
Joined
Nov 4, 2012
Messages
138
Re: 1978 Chieftain

A little hard to see it in the pic. What is it made of?

First guess would be JB Weld. Fill sand paint.

Thats what I was looking for! How do you say it? "You put the rivet on the head"? Its made of two products I think. One being a white hard material for the core and then a hard black plastic on the outside.

More Ideas are always welcome but I think the JB weld would work as long as it sticks to plastic..

Thanks,
Ken
 

tgp***

Senior Chief Petty Officer
Joined
Oct 18, 2009
Messages
768
Re: 1978 Chieftain

I agree JB weld and paint. I restored my steering wheel w/ JB weld for the cracks and Rustoleum plastic primer and plastic paint. Still looking new..........
 

spegtoast

Petty Officer 2nd Class
Joined
Nov 4, 2012
Messages
138
Re: 1978 Chieftain

I like your idea Dozer. I would even go with a black 8 ball just to stick with the times hehe. Those things were cool back in the day! I will check to see if it screws on next time I'm out at the boat.

Next question on the agenda is favorite boat gauges, best place to buy, and what if any thing I should look out for before purchase. I dont want to wire the whole boat to the gauge instead of the other way around.
 

spegtoast

Petty Officer 2nd Class
Joined
Nov 4, 2012
Messages
138
Re: 1978 Chieftain

Transom plate1.jpgTransom plate2.jpg

What am I missing from these two pictures? It looks like the top gunnel was cut on an angle?

No dissrespect for Stevens, he is doing all the work. Maybe I should just bite the bullet and finally get my hands into it! Instead of over thinking and researching. Dunno
 
Top