1977 Mariner 1600 rebuild

Draper11

Cadet
Joined
Nov 1, 2015
Messages
14
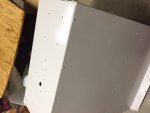
Just purchased this week and have finished the tear down... Have a few rivets to replace and hope to work on new floor this week. Boat was dry in initial water test outside of one missing rivet. Thinking of skipping gluvit... More to follow.
 

Attachments

  • image.jpg
    image.jpg
    64.9 KB · Views: 3

classiccat

"Captain" + Starmada Splash Of The Year 2020
Joined
Dec 20, 2010
Messages
3,412
Just purchased this week and have finished the tear down... Have a few rivets to replace and hope to work on new floor this week. Boat was dry in initial water test outside of one missing rivet. Thinking of skipping gluvit... More to follow.


Welcome to the Starmada Draper11! :welcome:

Good deal on the leak test! :thumb:

definitely keep us posted...with many more :photo: :)

fetch
 

Draper11

Cadet
Joined
Nov 1, 2015
Messages
14
Thanks! This was a Craigslist find here in Central Alabama. Little short for words, after working all weekend the hands are having a hard time typing on this little phone. Motor is a '78 Mercury 500 50 which runs fine. Only problem is the tilt trim motor is not working in the down position (maybe a bad connection). Trailer needs to be set up as boat is resting on keel roller.

Took old open cell foam sheets out. Was surprised to see that complete sheets were pushed across the hull through the drain channel in the middle (so they were soaked down the drain line). Cleared the channels with the hose and a wet dry vac for half the day.

Everything else seems to be fine. Sanded out a couple of rusty spots that were associated with items that had fallen in- metal is in great shape. Do not think I need to pull transom, but this can be done easily at a later time based on how it is set up.
 

Watermann

Starmada Splash of the Year 2014
Joined
Jan 12, 2013
Messages
13,786
:welcome: to iboats and the Starmada Draper!

Some more pics of your boat would be great. :D

I wouldn't skip resealing the seams of a boat that's getting on 40 years old as Starcraft sealed them when leaving the factory means that it's necessary. The keel area is very vulnerable to leaks since it takes the brunt of all the landings and such over the years.
 

64osby

Admiral
Joined
Jul 28, 2009
Messages
6,816
^^^ I agree. Take a little time now to seal the hull and you shouldn't have to worry about it for many many years.

It would kind of suck to have to pull out a new floor in a year or two to seal it at that point.
 

Draper11

Cadet
Joined
Nov 1, 2015
Messages
14
I am contemplating that- just wish I could access some quicker (guess I could dry fit everything else). The keel has had very little Impact over the years (I do not think the boat was used much). There was a substance poured inside the keel area that was rock hard. I tried to chisel just enough out to keep water from pooling up there but finally just drilled some small drain holes in the first support.
 

Draper11

Cadet
Joined
Nov 1, 2015
Messages
14
No Title

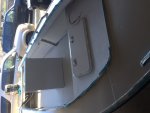
I'm liking the mahogany trim. Think I might try to put something close back in. Going with Rustoleum gloss white and sanded painted floor.
 

Attachments

  • photo233454.jpg
    photo233454.jpg
    16.5 KB · Views: 2
  • photo233455.jpg
    photo233455.jpg
    36.7 KB · Views: 1
  • photo233456.jpg
    photo233456.jpg
    34.7 KB · Views: 1
  • photo233457.jpg
    photo233457.jpg
    180.2 KB · Views: 2
  • photo233458.jpg
    photo233458.jpg
    170.7 KB · Views: 2

Draper11

Cadet
Joined
Nov 1, 2015
Messages
14
Gluvit ordered plus now we have 3 sheets of 5/8 BC exterior ply and 5 sheets of 3/4 foam waiting to join the party.
 

Draper11

Cadet
Joined
Nov 1, 2015
Messages
14
Lots of different opinions around, but can I deck tight to the walls (including sealant and or trim), leave gaps but cover with flat aluminum trim, or leave an exposed gap? I would like to have floor water tight and water funneled to where it will properly drain through bilge. I don't want it to pool up behind tightly packed foam coming through the sides...
 

Draper11

Cadet
Joined
Nov 1, 2015
Messages
14
Pulled the tilt trim pump, studied it, filled it, and jumpers worked as per manual. Bled it, refilled, and tried switches. Initially I was disappointed as only two of the three switches worked. Then I figured out that the middle controlled up with no limit and the top controlled in. Evidently some short cuts were wired in. Not going to complain!

Boatfix.com has the manual for the trim motor originally built by presto lite.
 

jbcurt00

Moderator
Staff member
Joined
Oct 25, 2011
Messages
25,030
Most dont go tight to the hull w the deck, fill in the gap or cover it, but some do.

If you cover it, seal it well, and allow for the water on the deck to be directed into the bilge to be pumped overboard, then it should be fine.

Leaving the small gap at the edge of a well sealed deck w rigid foam below decks that allows the water to flow below the deck back to the bilge works well too.

As BWR has done, filling the gap does guard against lost hooks and etc getting below decks
Well, we got the cup holders all installed today. And rerouted the depth finder wiring and hooked that up; works okay so far! Sliced off the expanding foam level with the deck in the area that I did last night. Am hoping my wife will have time to spray the rest of the boat tonight or tomorrow.

Making progress, a little at a time. :joyous:


Forward cup holders installed.


Aft cup holder installed. Can be used by passenger or tiller operator.


We have da powah! Or at least 12v to the depth finder. :D


Expanding foam really expands! Needs that delicate touch...


Excess sliced off. Forward part of boat is now complete as far as foam installation is concerned.
 
Last edited:

Georgesalmon

Lieutenant Commander
Joined
Apr 14, 2012
Messages
1,793
Many of those old mercs had the trim limit micro switch bypassed because its obsolete. You can and I did replace mine by buying a generic micro switch. Just used a caliper to find the right size normally open switch and soldered it in. The original operation was that the bottom switch controlled down (in) and the middle switch was trim. Then you had to hold both the middle and top switch at the same time to tilt all the way up. Though it all worked fine with the trim limit switch bypassed I felt that I needed to fix it because I have some young people operating this boat and I was concerned with safety. Didn't want them tilting to far up at WOT.
 

Draper11

Cadet
Joined
Nov 1, 2015
Messages
14
Got gluvit in, Jb welded some pit corrosion- after replacing more rivets than I started out thinking I'd tackle. I started off with missing or leaking ones, then I went after any and all that were compromised... Anyway, got deck cut out and epoxied. Foam is cut. Center console has a fresh coat of paint. Looking to slap together tonight.
 

Draper11

Cadet
Joined
Nov 1, 2015
Messages
14
No Title
 

Attachments

  • photo234309.jpg
    photo234309.jpg
    15.7 KB · Views: 1
  • photo234310.jpg
    photo234310.jpg
    31 KB · Views: 1
  • photo234311.jpg
    photo234311.jpg
    24.5 KB · Views: 1
  • photo234312.jpg
    photo234312.jpg
    43.9 KB · Views: 1

Draper11

Cadet
Joined
Nov 1, 2015
Messages
14
No Title

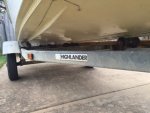
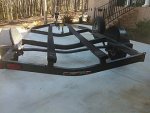
Also, anybody have any pointers on setting up this trailer for the boat? Seems to be resting on keel rollers. Think I will get longer bunks and bring them towards the center line, with front raised higher than back.
 

Attachments

  • photo234313.jpg
    photo234313.jpg
    26.8 KB · Views: 2
  • photo234314.jpg
    photo234314.jpg
    32.5 KB · Views: 2

Draper11

Cadet
Joined
Nov 1, 2015
Messages
14
No Title

Still rocking along.
 

Attachments

  • photo235157.jpg
    photo235157.jpg
    66.9 KB · Views: 2
  • photo235158.jpg
    photo235158.jpg
    72.9 KB · Views: 2

Watermann

Starmada Splash of the Year 2014
Joined
Jan 12, 2013
Messages
13,786
Also, anybody have any pointers on setting up this trailer for the boat? Seems to be resting on keel rollers. Think I will get longer bunks and bring them towards the center line, with front raised higher than back.


Your Mariner is a 16 but I still would consider using 4 bunks over just 2. Here is what my Chief's bunk trailer set up in like. I also added another cross member up front with an adjustable keel roller and side rail guide ons after this pic was taken.

IMAG1395.jpg
 

g0nef1sshn

Lieutenant
Joined
Feb 24, 2015
Messages
1,291
The trailer I bought for mine only has two bunks. I think it will work fine

image_216635.jpg

If it had the supports already welded there I would have prefered 4 bunks like the trailer posted above
 

BWR1953

Admiral
Joined
Jan 23, 2009
Messages
6,176
Your Mariner is a 16 but I still would consider using 4 bunks over just 2. Here is what my Chief's bunk trailer set up in like. I also added another cross member up front with an adjustable keel roller and side rail guide ons after this pic was taken.

IMAG1395.jpg

Looks perfect for a Chieftain. šŸ˜Š
 

Draper11

Cadet
Joined
Nov 1, 2015
Messages
14
No Title

Got one more good day in. Starting to fit everything inside, cleaned up outside, primed and added first coat to hull. Did not get a pic of the painted hull yet. Starting to get even more excited about this little boat.
 

Attachments

  • photo235313.jpg
    photo235313.jpg
    62.2 KB · Views: 1
  • photo235314.jpg
    photo235314.jpg
    66.1 KB · Views: 1
  • photo235315.jpg
    photo235315.jpg
    83 KB · Views: 1
  • photo235316.jpg
    photo235316.jpg
    90.2 KB · Views: 1
Top