1974 Evinrude 25hp wont run.

Crosbyman

Vice Admiral
Joined
Nov 5, 2006
Messages
5,446
why not start with a good points cleanup with just a strip of 150-200 grit paper and a carb cleaner shot to wash away dust

the condensers main role is to absorb the back kick of reverse voltage from the coil which tries to maintain a collapsing magnetic field while allowing a strong current flow to induce volage on the HV lead to the plug .
Bad condensers allow strong sparks to cross over the points gap causing burns and pitting of mating surfaces


see excellent articles magneto ignition components , testing and cures

if coil wires are to short you likely ordered the wrong ones :-(
 

Dalejam

Petty Officer 2nd Class
Joined
Jul 3, 2009
Messages
109
why not start with a good points cleanup with just a strip of 150-200 grit paper and a carb cleaner shot to wash away dust

the condensers main role is to absorb the back kick of reverse voltage from the coil which tries to maintain a collapsing magnetic field while allowing a strong current flow to induce volage on the HV lead to the plug .
Bad condensers allow strong sparks to cross over the points gap causing burns and pitting of mating surfaces


see excellent articles magneto ignition components , testing and cures

if coil wires are to short you likely ordered the wrong ones :-(
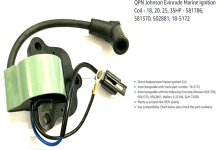
so i looked up the coils that i had orderd they are the correct replacements, here is a picture of them. so i amasking how do i tell if the coil lamination under the flywheel is putting out enough charge, or does it just create the field ???
thanks again
Dale
 

Attachments

  • coil sniped .png
    coil sniped .png
    270.1 KB · Views: 2

Crosbyman

Vice Admiral
Joined
Nov 5, 2006
Messages
5,446
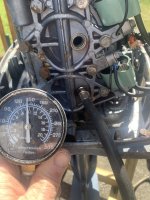
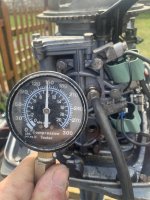
dont make this to scientific.... clean the points , clean the carb, check compression, remove any kill wires

choke it and open up the idle screw a bit more. btw did you inspect clean the idle chamber
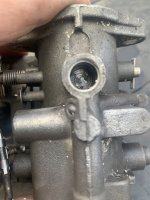
under the dime size plug on top ?? (see #5)

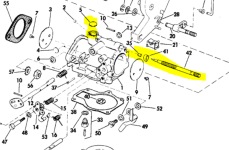
check for broken tip on the LS needle in yellow this would block off any fuel entering the LS drip chamber ...normall screwed all the way in you should see the tip poking into the drip chamber . This model having Ls plastic inserts may not poke all the way

DO blow carb cleaner in the LS threads it must come out the other side in the drip chamber check the side channel from the lower bowl leading to the matching top side... flush with carb cleaner .. .side channel in the carb top half feeding the idle chamber is very narrow .
carb cleaner must flow all the way to the top needle & chamber

make certain gasket holes line up !!!


1649351122008.png
 

Attachments

  • basic carb.PNG
    basic carb.PNG
    307.3 KB · Views: 8
Last edited:

Dalejam

Petty Officer 2nd Class
Joined
Jul 3, 2009
Messages
109
dont make this to scientific.... clean the points , clean the carb, check compression, remove any kill wires

choke it and open up the idle screw a bit more. btw did you inspect clean the idle chamber
under the dime size plug on top ?? (see #5)

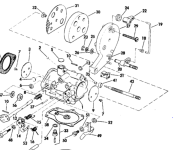
check for broken tip on the LS needle in yellow this would block off any fuel entering the LS drip chamber ...normall screwed all the way in you should see the tip poking into the drip chamber . This model having Ls plastic inserts may not poke all the way

DO blow carb cleaner in the LS threads it must come out the other side in the drip chamber check the side channel from the lower bowl leading to the matching top side... flush with carb cleaner .. .side channel in the carb top half feeding the idle chamber is very narrow .
carb cleaner must flow all the way to the top needle & chamber

make certain gasket holes line up !!!


View attachment 358462
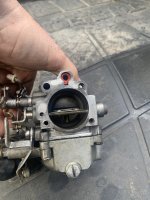
Ok so here we go, I took the points off cleaned the top under flywheel. Put the points back on, put original ones back in, I did take sand paper to them like suggested. So back to all original. Feeling like that might be the right move. Then I took the carb off checked the gas in the carb , put in a glass cup looked good. So I removed the cap on the top of the carb, as it was suggested to do so and make sure it was clean. It was. I sprayed it down with carb cleaner as suggested. Then I drained all the gas out of carb. Checked float it was working.
Then I disconnected the fuel line going to carb, squeezed bulb and gas comes out . Figure it’s getting gas . So put all back together push the button, squeezed the gas bulb to fill carb first. And it sounded like it wanted to start. Big improvement. So I figure what the hell switch coils. And drum rooooooooooollllll please
It RAN YES IT RUNS.
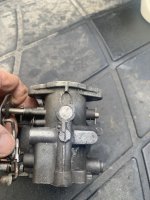
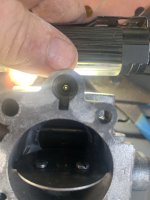
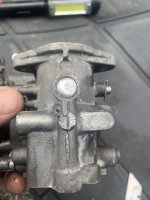
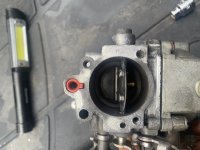
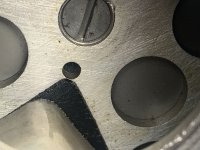
You guys are great. Gave me hope when I thought it was dead . Here are pictures
 

Attachments

  • 0896A7C2-3FE7-4306-ADDC-F21B7CB402DE.jpeg
    0896A7C2-3FE7-4306-ADDC-F21B7CB402DE.jpeg
    1.5 MB · Views: 10
  • 4136BBF1-E770-484F-82CC-0021A4D759C8.jpeg
    4136BBF1-E770-484F-82CC-0021A4D759C8.jpeg
    1.5 MB · Views: 10
  • B6ED8933-60AE-4CB9-8B01-15FB2511F8C2.jpeg
    B6ED8933-60AE-4CB9-8B01-15FB2511F8C2.jpeg
    1.4 MB · Views: 11
  • E2DBB0C4-2B67-424C-A6A7-7787C576869A.jpeg
    E2DBB0C4-2B67-424C-A6A7-7787C576869A.jpeg
    1.4 MB · Views: 10
  • 8F881FBE-3222-4CBD-9BDD-F972A53A9117.jpeg
    8F881FBE-3222-4CBD-9BDD-F972A53A9117.jpeg
    1.7 MB · Views: 10
  • 12F0E4A6-165A-4A9D-B87F-DE3377118B98.jpeg
    12F0E4A6-165A-4A9D-B87F-DE3377118B98.jpeg
    1.2 MB · Views: 10
  • CB479734-50D1-400A-BE38-72336D377DC9.jpeg
    CB479734-50D1-400A-BE38-72336D377DC9.jpeg
    1.5 MB · Views: 8
  • C0D172C1-B3C4-467B-B21E-BC503CD55C89.jpeg
    C0D172C1-B3C4-467B-B21E-BC503CD55C89.jpeg
    3.1 MB · Views: 8
  • 692353E7-AABD-475D-AC0E-77874D1D4EC9.jpeg
    692353E7-AABD-475D-AC0E-77874D1D4EC9.jpeg
    1.8 MB · Views: 8
  • 14863A1A-4EB4-4396-9DE7-9C131EA8B61B.jpeg
    14863A1A-4EB4-4396-9DE7-9C131EA8B61B.jpeg
    1.6 MB · Views: 9
  • IMG_8874.MOV
    2.5 MB · Views: 0

Dalejam

Petty Officer 2nd Class
Joined
Jul 3, 2009
Messages
109
dont make this to scientific.... clean the points , clean the carb, check compression, remove any kill wires

choke it and open up the idle screw a bit more. btw did you inspect clean the idle chamber
under the dime size plug on top ?? (see #5)

check for broken tip on the LS needle in yellow this would block off any fuel entering the LS drip chamber ...normall screwed all the way in you should see the tip poking into the drip chamber . This model having Ls plastic inserts may not poke all the way

DO blow carb cleaner in the LS threads it must come out the other side in the drip chamber check the side channel from the lower bowl leading to the matching top side... flush with carb cleaner .. .side channel in the carb top half feeding the idle chamber is very narrow .
carb cleaner must flow all the way to the top needle & chamber

make certain gasket holes line up !!!


View attachment 358462
I have a question know that the motor runs. Has a bad hiccup/ skip . I see in the picture part #
dont make this to scientific.... clean the points , clean the carb, check compression, remove any kill wires

choke it and open up the idle screw a bit more. btw did you inspect clean the idle chamber
under the dime size plug on top ?? (see #5)

check for broken tip on the LS needle in yellow this would block off any fuel entering the LS drip chamber ...normall screwed all the way in you should see the tip poking into the drip chamber . This model having Ls plastic inserts may not poke all the way

DO blow carb cleaner in the LS threads it must come out the other side in the drip chamber check the side channel from the lower bowl leading to the matching top side... flush with carb cleaner .. .side channel in the carb top half feeding the idle chamber is very narrow .
carb cleaner must flow all the way to the top needle & chamber

make certain gasket holes line up !!!


View attachment 358462
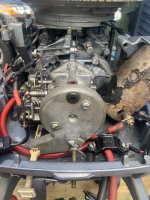
i see in the picture part # 35. I re did carb as you suggested but I don’t know how to tell if that part is in there. From my pictures the one with the plate on the carb in front. When I put the slow idle speed needle in I would have thought it would not bottom out to the plate. So if it is? Is that because I am missing that part. How can I find out if it is in there. No I can’t see down that far in that tiny hole. I like the motor just wished the carb was doing the right thing.
Part two of my 1974 evinrude 25hp
Also if some one can tell me how to set it up from the beginning I’ll try it. Did what videos I could watch .
Thank you always
Dale
 

Crosbyman

Vice Admiral
Joined
Nov 5, 2006
Messages
5,446
well part 35 should be in .... just close the needle shut than back it out 1.5 turns or so

glad you got it purring...

try to adjust it to idle and run ok without the carb cover #27 and needle linkages

install cover# 27 after it runs ok

1649456396371.png
adjustment
 

Dalejam

Petty Officer 2nd Class
Joined
Jul 3, 2009
Messages
109
well part 35 should be in .... just close the needle shut than back it out 1.5 turns or so

glad you got it purring...

try to adjust it to idle and run ok without the carb cover #27 and needle linkages

install cover# 27 after it runs ok

View attachment 358521
adjustment
So mine is missing part #19. It had a bad sputter. So I read the forums and someone said they redid there points and that fixed it. So I just took them all apart. Put the new ones back on gaped them to .20 , put the fly wheel on not completely to spec. Sonic I have to take it off again.
So it runs a lot better one oth the 2nd dry wires the plastic around the Iliad was cracked so I think it was shorting to ground. So I put some heat shrink on it and prey for the best. Can someone tell me what kind of wire can I use to replace the ones from under the flywheel to the coils on the back. There old and dried. May help if I replace them. Can I use wire from a big box store. It was getting dark so I stopped.
Can some one point me in the right direction on a video on how to set the carb up to the cam follower thingy . I am a little lost.
Thanks again all
Dale
 

Crosbyman

Vice Admiral
Joined
Nov 5, 2006
Messages
5,446
you can run without 19... the linkage just brings the adjustment capabilities to the front so just set it manually for now by turning the needle only

for now you can try just a coat of "liquide tape" to get you going ... main thing is to get it to run properly ...cometics can come later

....if you are referring to High voltage wires that is different... they must be replaced. Some silocones used to stop corona effects on old style flyback transformers in tube TVs can be tried as a temprary measure if arcking is suspected .

Usually the cam follower must begin to open the carb throttle plate when at START and reach max openning at max speed . the cam itself or the follower probably has a few bolt to adjust it to "touch" the follower at START .

all this depends on your engine .

AT START the throttle plate must be shut to put max. crankcase vacum on the carb low speed drip chamber... you cleaned up under plug #5 .
 

racerone

Supreme Mariner
Joined
Dec 28, 2013
Messages
37,835
At start up the throttle plate can be slightly open.----The choke plate must be fully shut.
 

oldboat1

Fleet Admiral
Joined
Apr 3, 2002
Messages
9,612
That clip on your spark tester is a ground clip (attach to head bolt or similar -- rig a jumper if you need to). Snap the spark plug boot over the male end of the tester. Spark is seen and measured at the contact points (gap enlarged by screwing out the end holding the plug boot.) I can't tell how you have the tester rigged in your photo, but looks backwards (?)

Plugs are removed from the engine for the test -- testing the ignition output.
 
Last edited:

Dalejam

Petty Officer 2nd Class
Joined
Jul 3, 2009
Messages
109
you can run without 19... the linkage just brings the adjustment capabilities to the front so just set it manually for now by turning the needle only

for now you can try just a coat of "liquide tape" to get you going ... main thing is to get it to run properly ...cometics can come later

....if you are referring to High voltage wires that is different... they must be replaced. Some silocones used to stop corona effects on old style flyback transformers in tube TVs can be tried as a temprary measure if arcking is suspected .

Usually the cam follower must begin to open the carb throttle plate when at START and reach max openning at max speed . the cam itself or the follower probably has a few bolt to adjust it to "touch" the follower at START .

all this depends on your engine .

AT START the throttle plate must be shut to put max. crankcase vacum on the carb low speed drip chamber... you cleaned up under plug #5 .
Yes I did . Removed it spayed carb cleaner and put back a new welsh cap. It runs better after I just put the new points in. It is a learning curve for me. But with help I am getting through this. I am watching some YouTube channels on how to set that up. Not understanding it completely but I’m getting there. I will make that motor my primary and use my 1974 Johnson 8.5 as a kicker on a 14 foot aluminum boat.
Look forward to seeing more reply’s on what is next for the carb.
Thank you all
Dale
 

Dalejam

Petty Officer 2nd Class
Joined
Jul 3, 2009
Messages
109
At start up the throttle plate can be slightly open.----The choke plate must be fully shut.
I can push the button to start with the throttle open, in neutral and it fires right up no hesitation. It’s when I turn it down some it gets funny. But I have to set the carb up to the motor first. Waiting on my next instructions
Thank you all
Dale
 

oldboat1

Fleet Admiral
Joined
Apr 3, 2002
Messages
9,612
I can push the button to start with the throttle open, in neutral and it fires right up no hesitation. It’s when I turn it down some it gets funny. But I have to set the carb up to the motor first. Waiting on my next instructions
Thank you all
Dale
#42 is the idle mixture screw for your motor. Turn clockwise until lightly seated, then turn c.clockwise about 1 to 1 1/2 turns. Start the motor. When warmed up, adjust until the motor runs smoothly without any popping or backfiring.
 

Crosbyman

Vice Admiral
Joined
Nov 5, 2006
Messages
5,446
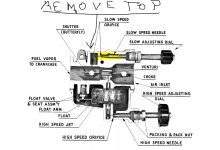
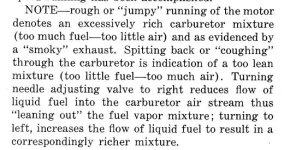
here is a exerpt from an older style carb. you only have one needle to adjust for LS.... and tuning a good clean working carb is basically a question of making small progessive touch ups after you have done the initial 11/8 or 11/2 turns ut of bottoming out.....and then letting the carb settle down for a moment before progressing to happiness :)

let the engine run while to reach it's operating temperature
 

Attachments

  • carb adjust.JPG
    carb adjust.JPG
    57.9 KB · Views: 3

Crosbyman

Vice Admiral
Joined
Nov 5, 2006
Messages
5,446
Yes I did . Removed it spayed carb cleaner and put back a new welsh cap. It runs better after I just put the new points in. It is a learning curve for me. But with help I am getting through this. I am watching some YouTube channels on how to set that up. Not understanding it completely but I’m getting there. I will make that motor my primary and use my 1974 Johnson 8.5 as a kicker on a 14 foot aluminum boat.
Look forward to seeing more reply’s on what is next for the carb.
Thank you all
Dale


hummm a 25 and a 8.5 on a 14 footer may be a heavy load hopefully you have a long shaft transom...one good backwash from a wave and priorities change real fast ....
 

Dalejam

Petty Officer 2nd Class
Joined
Jul 3, 2009
Messages
109
hummm a 25 and a 8.5 on a 14 footer may be a heavy load hopefully you have a long shaft transom...one good backwash from a wave and priorities change real fast ....
I did think of that and made me wonder Hmmmmmmmm. The good thing is I never mounted the kicker bracket. After looking at weight and how high the transom was , I have made the choice, ONE MOTOR AT A TIME.
I bought a boat not a sub.
Thank you for catching that too.
Dale
Thank you……
 

clemsonfor

Lieutenant Junior Grade
Joined
Sep 19, 2005
Messages
1,011
I did think of that and made me wonder Hmmmmmmmm. The good thing is I never mounted the kicker bracket. After looking at weight and how high the transom was , I have made the choice, ONE MOTOR AT A TIME.
I bought a boat not a sub.
Thank you for catching that too.
Dale
Thank you……
Also a 25 is pretty fuel efficient at idle, so I don't see the point really to having another engine, sure it will save fuel but worth it, probably not. If you really want to quiet it down and save gas get a cheap transom trolling motor. I had one on my 15 foot fiberglass Jon boat type boat I had. It was the cheapest Minkota they make...think it's 35lb thrust. Wide open it would move that boat pretty fast for just a trolling motor...faster than you would ever probably troll electrically.
 

racerone

Supreme Mariner
Joined
Dec 28, 2013
Messages
37,835
A back up motor is needed more with newer motors.------The old Johnson / Evinrude had a twin ignition system magneto.------2 separate systems under the flywheel.-----Would warn you if it needed attention ( harder to start ) never fail all of a sudden.-----No need for a replacement part that is $500 beer tokens.-----The older motors would still run on 1 cylinder to get you to the dock.
 

Crosbyman

Vice Admiral
Joined
Nov 5, 2006
Messages
5,446
and ten miles out in wild country a kicker is always a good friend to have.
it is not always a fuel saving issue. my 75 ETC burns .6l/h trolling yet my 9.5 turtle drink equal or more !
 

racerone

Supreme Mariner
Joined
Dec 28, 2013
Messages
37,835
Yes I know that a conventional 2 stroke idling is inefficient.-----The E-Tec operates like a 4 stroke for part of the crankshaft rotation.-----Therefore very efficient.----For the last 30 years I have gone out in big water with twin engines.----And in some parts of the world it is the law.----You go offshore with one engine and need rescue you pay , pay for it.
 
Last edited:
Top