1973 starcraft ss restore in progress

Woodonglass

Supreme Mariner
Joined
Dec 29, 2009
Messages
25,927
Re: 1973 starcraft ss restore in progress

At the very least you need to wash it with a degreaser i.e. TriSodiumPhosphate (Get it @ Lowe's) and then Final wipe down with Acetone.
 

crankbait cowboy

Chief Petty Officer
Joined
Mar 25, 2013
Messages
574
Re: 1973 starcraft ss restore in progress

any ideas as to how to remove the drain tubes and plug hole in transom, as i want to tear out old and replace. also wondering do i put new transom in, dry fit, and drill all holes needed, then remove and drill holes out bigger,fill with 5200 and then put together drilling new holes. hard for me to follow exactly what procedure you other guys are doing. thanks in advance. will have some pics of the transom coming out
 

crankbait cowboy

Chief Petty Officer
Joined
Mar 25, 2013
Messages
574
Re: 1973 starcraft ss restore in progress

you guys and gals got any advice to previous post? thanks
 

biglurr54

Petty Officer 1st Class
Joined
Feb 14, 2011
Messages
234
Re: 1973 starcraft ss restore in progress

I just did my transom this weekend in a similar boat. I used marine grade plywood. Not cheap at 80 a sheet. Then west system ed. I cut the board allowing 2/32nds on each side for epoxy. I think I was over kill on the measuring. The factory cut two 1 inch pieces of plywood and stuffed it in. I dont think its as exact of a science. I would try to match everything as close as you can though. It is load bearing after all. Measure the gap between your splash well and the rear sheet of aluminum. (See Pics) Mine had a decent gap. After the boards were epoxied and sanded to fit the channel, I installed everything in the boat and drilled the holes and ran everything in 5200 or life caulk depending on if i plan to replace or take off the fastener at some time. The correct way to do it is to dry fit everything. Plan on 1/32nd for each coat of epoxy. Drill your holes with it in place. Take it out and redrill the holes bigger. then paint with epoxy. Then install and drill the epoxy out of the holes to the right size. I figured the factory transom lasted 24 years with no epoxy and terrible silicone leaking water in so the open fastener holes with 5200 should outlast that which will most likely outlast my time with the boat. It was good enough for me. The correct way should last forever. No water means lasting forever. I have an original 1830 house that can prove it.

Here's my transom rebuild thread with pics.

http://forums.iboats.com/boat-resto...om-aluminum-fish-ski-over-weekend-612472.html
 

Attachments

  • IMG_20130623_192506.jpg
    IMG_20130623_192506.jpg
    142.6 KB · Views: 11
  • IMG_20130623_192515.jpg
    IMG_20130623_192515.jpg
    144.1 KB · Views: 11

biglurr54

Petty Officer 1st Class
Joined
Feb 14, 2011
Messages
234
Re: 1973 starcraft ss restore in progress

Use a cold chisel and fold the drain tube in itself on one end then punch it out with a bigger chisel.
 

biglurr54

Petty Officer 1st Class
Joined
Feb 14, 2011
Messages
234
Re: 1973 starcraft ss restore in progress

The propper proceedure for the transom would be
1. cut and dry fit no holes
2. epoxy whole board sand and fit
3. drill holes with it in place
4. remove and drill holes a bit bigger
5. epoxy holes with a few coats to make holes smaller than fasteners
6. Final install
7. Drill epoxy holes out to fit fastener.
8. Run fastener in 5200 or lifecaulk or other sealant.

I could be wrong on order that but that should work. Its a lot more steps and work but its a better tighter finished product. some might say over kill.
 

crankbait cowboy

Chief Petty Officer
Joined
Mar 25, 2013
Messages
574
Re: 1973 starcraft ss restore in progress

thanks biglur, sound like what i will do, and the cold chisel should do what i need also
 

crankbait cowboy

Chief Petty Officer
Joined
Mar 25, 2013
Messages
574
Re: 1973 starcraft ss restore in progress

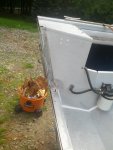
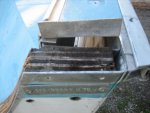
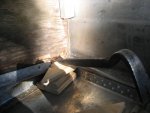
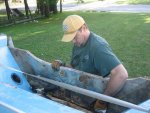
well i got the transom out last night, and all went well. took all hardware off, and bent my top caps back (pic 1) then used ezombee method of prying up bottom of transom from inside. took awhile as transom was poor wood down there, but with patience and working back and forth i got it started. ( pic 2 ) then i went to the outside and pryed on each end , back and forth for about 10 minutes and it finally let loose and lifted right out. ( pic 3 ) last pic is picture of it on floor. wondering what you all think of new 1 piece or with the ears like old had. any suggestions
thanks
 

classiccat

"Captain" + Starmada Splash Of The Year 2020
Joined
Dec 20, 2010
Messages
3,412
Re: 1973 starcraft ss restore in progress

Nice progress CC!

Definitely 1 piece!

I'm guessin' the 3-piece was a band-aid to compensate for a poor manufacturing flow (installing transom wood after the gunwale caps were installed)
 

jvanhees

Petty Officer 1st Class
Joined
Mar 20, 2013
Messages
284
Re: 1973 starcraft ss restore in progress

nice work so far crank! I would do a 1 piece as well. Look forward to watching this project!
 

crankbait cowboy

Chief Petty Officer
Joined
Mar 25, 2013
Messages
574
Re: 1973 starcraft ss restore in progress

thanks guys, bought 2 sheets 3/4 marine grade for transom and gotta cut ,fit and epoxy next. figured go all out for transom, and probably save a few bucks when i do floor and just use axc exterior 3/4 inch. tossing around idea of gluing up 2 sheets of 3/4 for transom before cutting it to size. i have a good template from old. what do you guys think. cut the 2 pieces seperate or glue them and cut 1 time?
thanks
 

crankbait cowboy

Chief Petty Officer
Joined
Mar 25, 2013
Messages
574
Re: 1973 starcraft ss restore in progress

like that idea also unless somebody has a reason not to, also looking for a transom cap to replace old as it is broken, any ideas?
 

crankbait cowboy

Chief Petty Officer
Joined
Mar 25, 2013
Messages
574
Re: 1973 starcraft ss restore in progress

any other pros or cons regarding gluing 2 pieces together for transom ,then making one cut. or am i better off cutting them seperate and then gluing them up. looking for any advise you all may be able to give me. am a little worried about cutting 11/2 inch piece, but can do if you all think that is way to go instead of cutting 2 transom pieces then gluing.
thanks
 

jvanhees

Petty Officer 1st Class
Joined
Mar 20, 2013
Messages
284
Re: 1973 starcraft ss restore in progress

I would glue then cut, better chance at the transom being uniform.
 

Woodonglass

Supreme Mariner
Joined
Dec 29, 2009
Messages
25,927
Re: 1973 starcraft ss restore in progress

What is your worry about cuttin 1 1/2" material. A standard jig saw with a new blade will handle that with No issues. Just remember, it does not have to be perfect. You need a bit of a fudge factor to get it in place.:D
 

crankbait cowboy

Chief Petty Officer
Joined
Mar 25, 2013
Messages
574
Re: 1973 starcraft ss restore in progress

thanks, that is the way i will go then. glue 2 sheets, then cut , dry fit and sand as needed then epoxy
 

crankbait cowboy

Chief Petty Officer
Joined
Mar 25, 2013
Messages
574
Re: 1973 starcraft ss restore in progress

last night i got the transom put together. pic 1 ,i clamped 2 marine grade 3/4 inch together and used old transom for template cutting on outside edge of line with skill saw and saber saw. took woodenglass advice about cutting once, and worked real well. then i dry fit one sheet in boat and looks good ( i am going to have to sand a bit to fit the skin, and will do so before i epoxy) pic 2 is boards laid out ready to glue. pic 3 is using titebond 3 with 16 inch troll to apply glue and pic 4 is clamped and screwed together for a couple of days. overall went real well. next step is to dry fit, sand with belt sander where needed, take out and 2 coats of epoxy resin using clarkcraft 1 to 1. got 85 to 90 degrees here in northern mn. so expecting the epoxy process to go pretty well.
 
Top