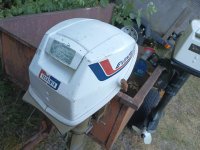
1973 4hp Evinrude

film495

Petty Officer 1st Class
Joined
Apr 8, 2009
Messages
285
I picked this up and went over it a bit. The hood latch seems really hard to close. You can see it pucker the hood when it grabs the latch, and then when it snaps closed you can see the hood pop back out a bit. I pullet the little latch arm off another one, parts motor a 71 4hp Johnson, and it is the exact same. I switched the parts and figured the arm was just bent a little, but it works the exact same. I guess I could put on of the arms in a vice and bend it, but the trial and error of it seems like a hassle. I guess I can pull the other arm off, and when I held them together they seems more or less the exact same. So, if I bend it, am I bending the arm where it turns on the bushing, or the upper part that actually hooks over the piece in the hood and holds it? Weird problem, just bugs me. I tried to file it a bit and smooth out the parts, but it woks the same. It is just the fitment is a bit off.

Put new gear oil in the lower, checked compression and spark, all seems good. Steering seems fine, all the controls seem correct. It did seem to run pretty strong in a tank. Plugs were not fouled, they looked good.

I think it is an 18" shaft, so not sure what I'd ever do with this motor. I guess I could run it as a kicker. A little jack plate for the thing couldn't be too difficult to work out.

One of the plug wires looked a little cracked, maybe almost melted, for about a 6" section. I just wrapped it with electrcal tape for now. It made a good spark, so - IMHO good enough for testing. The tape will be a good tell tale if it seems melted after I run it for a while.
 

Attachments

  • Yachtwin1.jpg
    Yachtwin1.jpg
    185 KB · Views: 5

racerone

Supreme Mariner
Joined
Dec 28, 2013
Messages
37,722
Motors are for a 15" transom or a 20" transom.----Does this 73 4 hp have a 5" spacer between lower unit and exhaust housing ?
 

film495

Petty Officer 1st Class
Joined
Apr 8, 2009
Messages
285
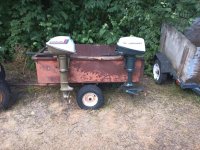
I'm not sure on the extension. I'd certainly prefer if it were for a 15" transom, but the cavitation plate is 2 or 3" lower than what I'd expect to see in a common sort shaft like the one on the right.

oh, no wait, maybe I'm just looking at it wrong. I'll have to get a chance to measure it again, think I did it wrong.
 

Attachments

  • 4hp70sJohnsons.jpg
    4hp70sJohnsons.jpg
    109.7 KB · Views: 18

cyclops222

Lieutenant Junior Grade
Joined
Mar 21, 2024
Messages
1,232
The speed those small h p motors can do ??? Is not a safety concern.
Use them.
 

film495

Petty Officer 1st Class
Joined
Apr 8, 2009
Messages
285
excellent. I was bummed when I thought it was a weird shaft length, but it is a short. Weird paint job on the thing, looks like the color on some of the Johnson's I've seen. The compression on this one is 95/100, so far as I can tell that is a healthy little motor. Bright blue spark.

Few things to tinker with, but when I get a chance this is ready to get tried out on a boat. I'll probably run it on the same 12" rowboat I run a 3hp Evinrude on. I wonder what I'll think of the 25% more power.
 

film495

Petty Officer 1st Class
Joined
Apr 8, 2009
Messages
285
I did bend that bracket in a vice a bit. The hood latch is still stiff, but if you press down on the back of the hood, it snaps in fine now. Pulled the recoil from a parts motor and put it on this Evinrude, and a not cracked starter handle to go with it. I might switch the throttle arm over too if it fits, but - the one there is good enough for now, but the bushing isn't as good, and the knob is ugly. Another motor just got the choke knob off that parts motor. Huh, for the value of a spare parts motor vs. trolling ebay .. win.
 

film495

Petty Officer 1st Class
Joined
Apr 8, 2009
Messages
285
I ran this in a bucket. It is hard to start even after running for a bit, just not right. Would not idle down very well, would stall. I found the fuel pump dripping a little gas, and I think whomever put the fuel pump in stripped the threads, or at least one of them, that attaches the fuel pump. No ideas on solutions for that yet. I think this one will be my practice motor, and I'll just pull the flywheel and lower end, and just see what happens if I full service the whole motor from ignition to water pump, carb, etc. I do have a parts motor that runs, a 71 4hp Johnson, but I'm not sure there is any part I can switch for the stripped threads, but there is a full motor, so feel free to throw out ideas.

Oh, why are the plugs facing to the left. I'm used to the 3hp, and is that how the 4hp verions go? In both 3hp I have they point to the right, but they are from 68, and the plugs face to the right looking from the back of the motor. My first thought was someone put it on backwards, but in pictures a lot of them are like that. I ordered a service manual off e-bay, so - that should give me some insight.
 

Crosbyman

Vice Admiral
Joined
Nov 5, 2006
Messages
5,410
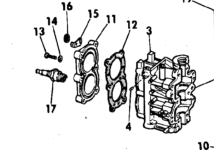
Oh, why are the plugs facing to the left

design intent or cyl head swapped.

4R73 PH diagram shows them 90 deg. straight
1721397918465.png


film495

Petty Officer 1st Class
Joined
Apr 8, 2009
Messages
285
I got a chance to mess with the fuel pump screws. I took out the really wide gasket and just cut a paper one to match, much thinner. I did this on a 3hp 68 Evinrude, the aftermarket fuel pump screws were wrong and the original ones were not long enough becuase the fuel pump was fatter. Seemed to work good, well - attaching it anyways. I had intended to go back and add a gasket to the other one, but I just ran it like that the last 2 years, no issues. Changed the small fuel line, and put in new clamps.

I pulled the flywheel and checked the points gaps. .018 and .02, not sure what the spec is, or how to check or adjust timing, but nothing seemed wrong too obviously to me. No cracked coils, no mice, nothing melted.

I gotta see if I can find one of my points files and clean them up a touch. Put a dot of oil on the felt pad. Not sure what else to do while I'm in there. I'd like to be able to check that the points open in time, but I'm not sure where the timing marks are or how to adjust the plate if it is off anyway, but eventually I'll have a service manual in my hands and have the specs and such.
 

racerone

Supreme Mariner
Joined
Dec 28, 2013
Messages
37,722
Timing can be set using a feeler gauge to set points to 0.020"-----Or using a meter / timing marks on the flywheel you can set the points " deadnuts " to get strongest spark.-----Lots of videos on u-tube to tutor you on these simple magnetos.
 

film495

Petty Officer 1st Class
Joined
Apr 8, 2009
Messages
285
I set them to .02 for now. and cleaned the points. didn't see anything in there too weird so I'll try running again and see how it goes.
 

film495

Petty Officer 1st Class
Joined
Apr 8, 2009
Messages
285
Well, I'd like to think it ran better, but who knows. Still started hard, but it started, and seems like it would happily run wide open, but won't really idle down. Seemed to get real hot, and was not spitting water as well as it should be a bit, but definitely on the path to overheating. I never did a water pump before, so - I just started pulling it apart. doesn't seem like there's to much too it. famous last words

I got it mostly apart, lower unit detached, water pump out. prop off, pulled the housing to the gearcase, and really almost all apart. How the heck does the drive pin come out. or does that not come out. Just a sheer pin no? Tried to drive it out with a punch and a hammer, and maybe it moves back and forth 1/32", kind of feel it move a touch, and then just that's it. Made me wonder if it would be more expecient to just crack off the plastic piece it goes through, but that seems rash. and then I'd need more parts.

So, I probably need to figure out what water pump kit, and what seals and everything I need. The impeller seemed fine to me, so I'm not sure why it wasn't pumping water really, maybe it was just tired.

So, what seals do I need? gaskets?

Maybe it will run better if it doesn't just immediately start to overheat. If not I guess I'll be looking at the carb. Fuel pump seems to have stopped dripping gas after some tinkering, so - seems to be doing what it's supposed to. Motor does seem to run really strong when it does start.
 

saltchuckmatt

Commander
Joined
Jul 19, 2019
Messages
2,590
Really it's kind of wall art.....if you want to continue to play around with it purchase a factory manual and tear it down and restore it. Newer more modern motors work better for actual use but I have fun cleaning them up.

Just remember at the end of the day what you really have.
 

film495

Petty Officer 1st Class
Joined
Apr 8, 2009
Messages
285
Really it's kind of wall art.....if you want to continue to play around with it purchase a factory manual and tear it down and restore it. Newer more modern motors work better for actual use but I have fun cleaning them up.

Just remember at the end of the day what you really have.
Service manual came today. It did not help me figure out how to get that drive pin out.
 

saltchuckmatt

Commander
Joined
Jul 19, 2019
Messages
2,590
Service manual came today. It did not help me figure out how to get that drive pin out.
Who's the maker of the service manual and in general I wasn't talking about just the pin.

No problem with you working on it or even enjoying posting.... it's just at the end of the day don't expect it to be a real good outboard for you.
 

film495

Petty Officer 1st Class
Joined
Apr 8, 2009
Messages
285
the lower unit was fully milk, so I think I'm looking at seals and such. my shopping list looks like this

impeller kit - metal housing
water tube gromet
gearcase head o-ring
gearcase head seal
drive shaft o-ring

and just some things I want to get, but not for lower unit
carb kit
head gasket

what seals or parts am I missing here? Is there a sealant for connecting the gearcase head and big parts?

The service manual I got is an OMC manual. Seems pretty good.
 
Top