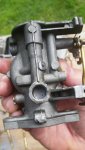
1967 20hp carburetor problems?

Bigscott

Cadet
Thread starter
Joined
Aug 26, 2017
Messages
12
Hi I recently picked up a 1967 Johnson 20hp FD-21r. It ran when I got it but not very good. It has great compression (110 on both cylinders). To weed out any ignition issues I replaced all the coils, condensers, and points. And made sure the timing and points gap was correct. Next I went through and replaced the impeller,all new gaskets and O-rings in the lower unit. I decided to clean the carburetor. When I took it apart it was in need of a serious rebuild. So I ordered the rebuild kit and installed it cleaning the carb very well before reassembling. Installed it on the engine and set the low speed needle at 1 1/2 turns out for a starting point. started it up and it was doing a lean cough/sneeze very bad. I turned out the slow speed needle a total of 4 turns before the cough/sneeze would go away. Which doesn't seem right to me. It does run better and no sneeze anymore but wowzers this thing is running terribley rich. Smoking like crazy and fouling out the plugs. Does anybody have any insight on what may be the problem? Any help would be much appreciated thank you, Scott
 

tomhath

Master Chief Petty Officer
Joined
Dec 5, 2007
Messages
814
Are you sure the float height is correct? Carb bolted on tight (no air leak)?

How does the fuel pump look? It might not be supplying enough gas, try closing the idle adjustment again and pumping the priming bulb when it sneezes.
 

Joe Reeves

Supreme Mariner
Joined
Feb 24, 2002
Messages
13,262
Did you manually & carefully clean the high speed jet with a piece of single strand steel wire? If not do so to make sure it's absolutely clean.

Double check your carburetor work.
********************
(Carburetor Adjustment - Single S/S Adjustable Needle Valve)
(J. Reeves)

Initial setting is: Slow speed = seat gently, then open 1-1/2 turns.

Start engine and set the rpms to where it just stays running. In segments of 1/8 turns, start to turn the S/S needle valve in. Wait a few seconds for the engine to respond. As you turn the valve in, the rpms will increase. Lower the rpms again to where the engine will just stay running.

Eventually you'll hit the point where the engine wants to die out or it will spit back (sounds like a mild backfire). At that point, back out the valve 1/4 turn. Within that 1/4 turn, you'll find the smoothest slow speed setting.

When you have finished the above adjustment, you will have no reason to move them again unless the carburetor fouls/gums up from sitting, in which case you would be required to remove, clean, and rebuild the carburetor anyway.
********************
Did you set the points as follows?

(Point Setting Of Magneto Models)
(J. Reeves)

Note that there are other ways to set points such as using a ohm meter or timing light... however, the following will result in a setting so close to being exact that one could not tell the difference.

Make sure that your feeler gauge is absolutely clean so as NOT to transfer oil/grease to the points.

Set the points as follows. Have the flywheel key aligned with the fiber rubbing portion of the ignition points. Adjust the gap so that a .020 gauge will pass thru but a .022 will not. Should there be any question of the points being dirty (touching the contact with your finger would cause them to be dirty), clean them with a small brush and acetone or lacquer thinner.

NOTE 1: Should the operating cam have a small portion on it with the word "SET" imprinted, align this portion with the fiber rubbing portion instead of the flywheel key.

NOTE 2: Should the cam have the word TOP embossed on the top of it, that is a cam that could be installed upside down and this is simply telling you which side is up. It is not a position where one would set the points.
 

Bigscott

Cadet
Thread starter
Joined
Aug 26, 2017
Messages
12
Thanks for your quick response!
​-Tom I actually went back through and checked the float height and checked to make sure all the bolts were tight. Ive had this carb off at least ten times since I did a full rebuild kit on it trying to figure out why it keeps sneezing. I have not checked the pump out yet because it was working before I did the carb rebuild. Maybe I have an air leak there. I will try what you suggested with the primer ball.
​-Joe thank you for the info...I have cleaned the carb 4 different times thinking maybe I missed something but still no better than before. The new points were sanded and cleaned after I installed them. Yes the cam says top facing up with an arrow next to it. The key is where I set my points from at .020. Could bad timing cause the carb to sneeze? I never had the sneeze problem until I rebuilt the carb so I'm still leaning towards something I didn't do right with the carb. I rebuilt the carb because the packing was shot where the slow speed needle goes and the float was breaking into pieces. How many pieces of packing should be in the slow speed needle port? I put 3 in with the plastic washer on the outside of them.
Thank you for your help,
Scott
 

oldboat1

Fleet Admiral
Joined
Apr 3, 2002
Messages
9,612
Sorry, but think you need to go back into the carb. Disassemble and soak, then check and clean every opening. You need to pull off the domed plug on top, and clean the idle passages up there. Two cork needle washers -- but make sure the passage for the needle is clear. Do a test insertion while the plug on top is removed, and make sure the point seats properly -- and that there is not a broken point jammed in the orifice. The idle needle should normally end up somewhat shy of the 1 1/2 turns open (i.e., typically leaner than the initial setting).
 

lindy46

Captain
Joined
Nov 27, 2008
Messages
3,886
Sorry, but think you need to go back into the carb. Disassemble and soak, then check and clean every opening. You need to pull off the domed plug on top, and clean the idle passages up there. Two cork needle washers -- but make sure the passage for the needle is clear. Do a test insertion while the plug on top is removed, and make sure the point seats properly -- and that there is not a broken point jammed in the orifice. The idle needle should normally end up somewhat shy of the 1 1/2 turns open (i.e., typically leaner than the initial setting).

Agree - remove the plug and clean the slow speed circuit if you haven't already done so. Make sure the needle orifice is not chipped or broken. I've seen that cause no end to idle problems.
 

Bigscott

Cadet
Thread starter
Joined
Aug 26, 2017
Messages
12
Thank you for taking the time to help me with this problem! I'm on it today and will let you know my findings.
Much appreciation,
Scott
 

RCO

Petty Officer 1st Class
Joined
Jun 15, 2016
Messages
350
Make sure to check your link and sync also. There is a line on the throttle cam, that is where the carb roller should begin to contact the cam.
 

Joe Reeves

Supreme Mariner
Joined
Feb 24, 2002
Messages
13,262
Along with the advice above of the snapped off broken point of the adjustable S/S needle valve scenario.

Inside that threaded needle valve tunnel there should be a removable aluminum threaded barrel (comes out with the needle valve if you pull hard enough). This is what the needle valve screws into... make sure it's installed. There should be two (2) #307583 fiber packing washers between that aluminum barrel and the brass lock nut. The lock nut should be tight enough to keep the needle valve from turning due to vibration... BUT... loose enough that one can turn it to adjust when needed.

Laying horizontal in the bottom center portion of the float chamber is the high speed jet. Make sure that it is clean... absolutely clean!
 

Bigscott

Cadet
Thread starter
Joined
Aug 26, 2017
Messages
12
Ok here I go...so I just spent the last 6hrs working on this piece of dog doo. My main objective today was to take apart and thoroughly clean the carb. Which I did extensively making sure I did everything correctly. I took my time to make sure everything was correct. Then I installed the carb and tried to start it. Now this is where I'm totally stumped...I choked it, primed it and it started but ran even worse. Now it wont even run in high rpm without coughing. I actually think its a misfire. So I decided to recheck my points setting and condensers and coils. I checked them with a multimeter. and all checked good. I even put new spark plugs in it because the others were fouled out so bad from running rich. Now it wont even start at all. so I did another compression test and theyre still at 110 each. Rechecked the points gap at .020. Got great spark on both plugs. The pump is working and I'm getting gas. Tried to start again...nothing. Pulled the plugs...the top plug is saturated in gas and the bottom plug is all black soot and fouled out again. Getting really tired of wasting my weekends on this thing. Throughout the years ive worked on small engines and outboards and ive always been able to fix them but this one has me stumped. I appreciate the all the help everyone has given me but honestly I have no idea where to go from here.
​Sincerely stressed,
Scott
 

lindy46

Captain
Joined
Nov 27, 2008
Messages
3,886
Sounds like the top plug isn't firing. How did you check for spark? With an open-air spark tester set to a minimum of 3/8"? Did you change the plug wires? Could be an old wire shorting out.
 

oldboat1

Fleet Admiral
Joined
Apr 3, 2002
Messages
9,612
Could be a broken reed. Could be a condenser wire rubbing against the flywheel. (Sorry to hear the carb revisit didn't get it.)
 

Joe Reeves

Supreme Mariner
Joined
Feb 24, 2002
Messages
13,262
Check the fuel pump diaphragm as follows
********************
(Fuel Pump Diaphragm Test)
(Two Hose Type Only)
(J. Reeves)

Note: This pertains only to the regular Two Hose type fuel pumps.

Leave the hoses attached to the fuel pump. Remove only the two screws that attach the fuel pump to the powerhead. Re-insert those two screws and install a nut to each of them so that the fuel pump is securely clamped together. With the fuel line attached to the engine, pump the primer bulb while observing the pressure/vacuum operating hole on the back side of the fuel pump. Should any fuel leak out that hole, the diaphragm is faulty.

If the diaphragm is faulty, the fuel pump will require rebuilding or replacing. Note that repair kits are not available for all fuel pumps, in which case replacing the pump would be necessary.
 

Bigscott

Cadet
Thread starter
Joined
Aug 26, 2017
Messages
12
Unfortunately with work starting back up it doesn't leave me much time to tear into it during the week. I don't know much about the reeds other than they are all in place from what I can see through the intake. The spark plug wires were replaced when I replaced the coils points and condensers. And I made sure the wire label "UP" was on the correct coil and spark plug. I haven't had a chance to check the fuel pump yet. That is definitely a to do on my list. I haven't delt with reeds too much to know if they are bad just by looking through the intake. I really appreciate your time and help though and even with my busy work week I'm going to try and find some time to hopefully figure this out. I will keep you updated on my findings. Thanks again for your time and help trying to figure out my mess.

Scott
 

oldboat1

Fleet Admiral
Joined
Apr 3, 2002
Messages
9,612
On the reeds -- given degree of difficulty you are having, I would think in terms of a broken reed -- part broken off. So if the two round leafs seemed complete and flat against the plate (i.e., nothing seemed out of the ordinary), the reeds are probably not the problem.

[edit. flywheel torque and location an issue for timing, of course.]
 
Last edited:

Bigscott

Cadet
Thread starter
Joined
Aug 26, 2017
Messages
12
Well I was able to work on the motor tonight...first I checked the fuel pump diaphram as per Joe suggested and it checked out good. No leaks and a solid primer ball. Next I took the carbureter back off and rechecked the reeds and they are intact and spring back nicely when pushed against. Then I pulled the flywheel off to recheck the coils, condensers and points gap. All good. Then I put a 3rd set of new J6c spark plugs in and tried firing it up. It fired up but ran sluggish so I gave her some throttle and it cleared up and ran well for me in high rpm. After it was warmed up some I tried to get it to idle and set the slow needle adjustment. All it did was sneeze and cough like it did before I cleaned the carb on Sunday. So I'm back to my original problem of running terribly rich do to the slow idle needle needing to be out 4 turns to make the sneeze go away. Any other ideas I can try to make this carb functional or do I just need to find a new carburetor?
Thanks again
Scott
 

oldboat1

Fleet Admiral
Joined
Apr 3, 2002
Messages
9,612
Sure getting your ticket punched there, bigscott.

It's possible there is a crankcase or lower main seal leak, giving you seriously lean running -- something you wouldn't be able to dial out with the carb adjustment.

You might try spraying some WD-40 or some carb cleaner around the intake gasket and around the base of the powerhead (need to shield the carb -- folded newspaper or something). If there is a leak, you should hear a change in rpms.

Will mention again the timing issues related to a sheared flywheel key. It's not the sheared key itself, it's movement of the flywheel on the shaft due to light torque -- change in location changes timing. Flywheel key/keyway is the reference point.
 
Last edited:

lindy46

Captain
Joined
Nov 27, 2008
Messages
3,886
You never mentioned whether you removed the welch plug on top of the carb and cleaned/inspected the idle circuit?
 

Bigscott

Cadet
Thread starter
Joined
Aug 26, 2017
Messages
12
No Title

Yeah it seems like I just can't win with this thing but I'm not giving up. Lol. Yes the key is in place and the flywheel was torqued to 40ft lbs. Not sheered off. I have yet to try spraying carb cleaner around the areas mentioned. The carburetor was fully dismantled and every nook and cranny and hole cleaned extensively including the Welch plug.
Hopefully the picture I posted came through of the carb. I will check with carb cleaner tomorrow and let you know my findings.
Thanks ,
Scott
 

Attachments

  • photo275695.jpg
    photo275695.jpg
    23.2 KB · Views: 1
Top