1965 Starcraft Holiday Restomod

Watermann

Starmada Splash of the Year 2014
Joined
Jan 12, 2013
Messages
13,794
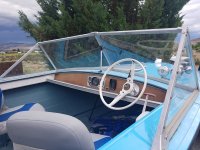
I did some windshield work on a friends 65 Holly and ended up putting a windshield support brace in the center after reinforcing the frame.

20180710_074649.jpg
 
Joined
Aug 17, 2020
Messages
64
Welcome! Following along on your build. Looks like you’re well underway!
Thank you! It's coming along faster that I originally thought. Though I'm sure its gonna slow down a lot once we go to drop the motor back in. The cosmetics are the fun part lol.
 
Joined
Aug 17, 2020
Messages
64
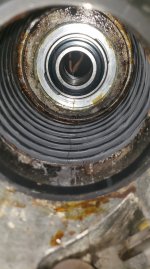
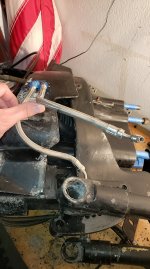
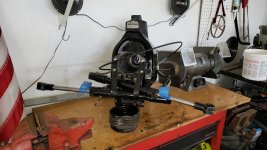
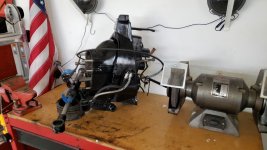
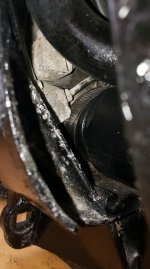
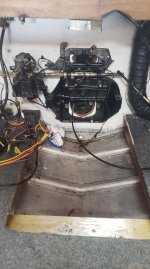
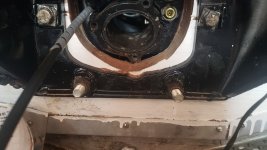
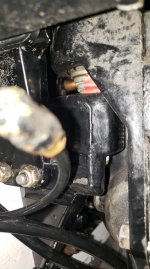
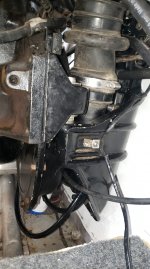
Finally got the gimbal housing back and bellows look good. Got it taped and painted with the Quicksilver outdrive paint. Not perfect, but it'll dress it up a bit and keep it protected. My plan was to replace the trim lines but doing some research it seems like this style is obsolete. Hard to tell from the pictures but there are two hydraulic blocks on the inside of the gimbal that I would need to reach to get at the lines. I believe they only made this style from 67-69? I should've had the shop take a look at that before replacing the bellows... whoops. The lines themselves don't look to be in bad condition so I will most likely run it with what is currently on there, and if I run into problems with it, I can concoct something from a 70's style trim and go from there.
 

Attachments

  • 20210422_125000-min.jpg
    20210422_125000-min.jpg
    938.3 KB · Views: 19
  • 20210422_175928-min.jpg
    20210422_175928-min.jpg
    1.2 MB · Views: 19
  • 20210423_143811-min.jpg
    20210423_143811-min.jpg
    1 MB · Views: 20
  • 20210423_143821-min.jpg
    20210423_143821-min.jpg
    1,014.4 KB · Views: 20
  • 20210424_092420-min.jpg
    20210424_092420-min.jpg
    984.6 KB · Views: 19
Joined
Aug 17, 2020
Messages
64
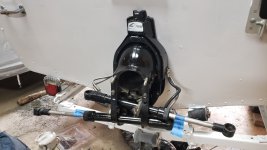
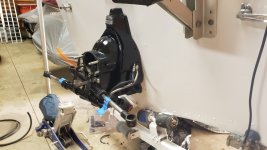
Got everything installed on Monday and man does it look good! We ended up having to take about 1/4" off the bottom of the keyhole for the exhaust pipe to bolt in correctly, but went a lot smoother than I was planning on. Tested the trim and made sure there were no leaks. I have a couple new lines coming from the trim motor to the gimbal. Better off replacing those while the motor is out. A few things to tidy up (new bolts, trim lines, etc) in the next few weeks, then hopefully dropping the engine in (many picts/ videos of that to come)
 

Attachments

  • 20210426_173459-min.jpg
    20210426_173459-min.jpg
    921.8 KB · Views: 13
  • 20210426_173505-min.jpg
    20210426_173505-min.jpg
    803.7 KB · Views: 13
  • 20210427_182909-min.jpg
    20210427_182909-min.jpg
    876.2 KB · Views: 11
  • 20210427_182919-min.jpg
    20210427_182919-min.jpg
    1,008.6 KB · Views: 13
Joined
Aug 17, 2020
Messages
64
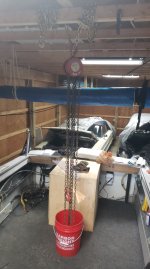
Went home last night and finished up the trim system. Installed new lines on the inside, bled the system and made sure everything worked. I'll be hooking up the shift cables and steering hopefully over the weekend, then its time to get the engine prepped to drop in. Any tips for dropping one of these in? We have a cherry picker, but we were planning on using a chain pulley hanging from the (reinforced) rafters. Based on youtube research it seems pretty straightforward, but any tips help :)
 

Watermann

Starmada Splash of the Year 2014
Joined
Jan 12, 2013
Messages
13,794
The easiest part of the job is dropping the motor back in place. Then comes the alignment which isn't that tough if you center the gimbal bearing first in the transom assembly by inserting the bar until it engages the coupler and tapping on all 4 sides of the bar.
 
Joined
Aug 17, 2020
Messages
64
Got the shift cables and steering hooked up, just need the final adjustment on the cables once the outdrive is on. Gonna empty whats left of my savings and get some 2x4s this week to reinforce the rafters in our barn to hold the engine weight. Got all the fuel lines hooked up last night and made sure it could suck its own gas. All went well - throttle was stuck open so that gave my dad and I a 10 second heart attack while we scrambled to figure out how to shut it off. Whoops. Fixed that and started it again just to make sure nothing else was stuck. At least it got some oil through it!
 
Joined
Aug 17, 2020
Messages
64
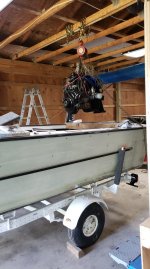
Engine hoist is ready to go! I'll be pulling the boat out this weekend, hooking up the engine to the hoist and dropping it in.
 

Attachments

  • 20210512_195428-min.jpg
    20210512_195428-min.jpg
    1.1 MB · Views: 13

Watermann

Starmada Splash of the Year 2014
Joined
Jan 12, 2013
Messages
13,794
Nice set up you have, should make for some quick work setting the iron back in the boat.
 
Joined
Aug 17, 2020
Messages
64
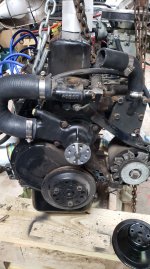
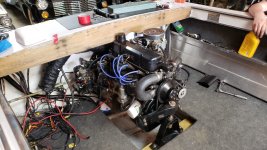
& shes in! Went better than I was expecting, really not that much effort to drop it in. Got it all bolted down but couldn't get it aligned, even with it adjusted all the way down. I'm guessing the gimbal bracket was slightly lower on the new one, causing an offset in the back. We ended up using a few lock washers to shim in between the motor mount and gimbal mount and were able to get it all bolted down & aligned properly.

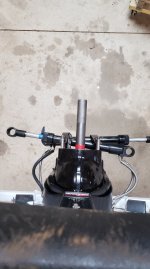
I have the outdrive finished up (new impeller, gaskets & greased up) and about to slide that in this week. As far as the shift cable on the outdrive section, what does 'forward' look like? I had everything disconnected when we replaced gimbal and based on the youtube videos I've seen, I should have the outdrive on before hooking up the cables on the inside. All the outdrive install videos I've seen say to have the selector in forward - but can't hook that up until the outdrive is on? Not sure how to hook it up when all the cables are loose. Any suggestions? I can grab some pictures of the setup on Monday if that helps
 

Attachments

  • 20210515_090808-min.jpg
    20210515_090808-min.jpg
    872.2 KB · Views: 17
  • 20210515_101100-min.jpg
    20210515_101100-min.jpg
    938.2 KB · Views: 18
  • 20210515_143153-min.jpg
    20210515_143153-min.jpg
    976.8 KB · Views: 17
  • 20210515_143228-min.jpg
    20210515_143228-min.jpg
    957.4 KB · Views: 15
  • 20210515_143317-min.jpg
    20210515_143317-min.jpg
    1.1 MB · Views: 14
  • 20210515_143330-min.jpg
    20210515_143330-min.jpg
    834.4 KB · Views: 15

Watermann

Starmada Splash of the Year 2014
Joined
Jan 12, 2013
Messages
13,794
Nice work.

On the gear case in drive, the shifter shoe on the drive has to be straight to line up with the shift slot on the transom assembly. Just turn the shoe straight pointing toward the boat and the prop should lock in forward. On the transom assembly the slot is straight too so they go together. The shift lever on the end of the cable push it in place over the little wheel on the shift lever. Just remember to throw the controls into forward before hooking it all up at the motor.
 
Joined
Aug 17, 2020
Messages
64
Nice work.

On the gear case in drive, the shifter shoe on the drive has to be straight to line up with the shift slot on the transom assembly. Just turn the shoe straight pointing toward the boat and the prop should lock in forward. On the transom assembly the slot is straight too so they go together. The shift lever on the end of the cable push it in place over the little wheel on the shift lever. Just remember to throw the controls into forward before hooking it all up at the motor.
Oh cool, that helps out a lot - thanks! I'll most likely be working on that tonight (or the wiring, not sure which yet lol)
 
Top