1963 johnson 10 HP rebuild

bufferin

Cadet
Thread starter
Joined
Sep 14, 2016
Messages
8
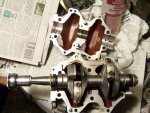
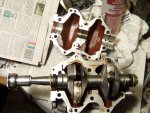
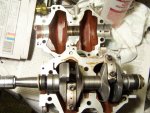
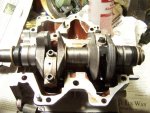
My first rebuild and the crankcase half wont fit back onto the crankcase. I can see the thicknesses are different. Recently retired and have rebuilt chainsaws. A friend said to freeze the crank,any suggestions.
 

gm280

Supreme Mariner
Joined
Jun 26, 2011
Messages
14,605
:welcome: to iboats bufferin.

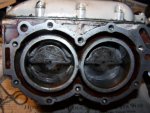
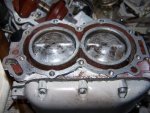
I am not sure what you are trying to explain. Could you post a picture or three? I have rebuilt a '76 Johnson 40 HP engine and didn't have any issues. And I certainly didn't have to heat or freeze anything to get the halfs back together again.
 

racerone

Honorary Supreme Mariner
Joined
Dec 28, 2013
Messages
40,028
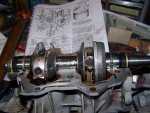
Stop the work.--------And ignore the friend with the freezing stuff.--------Note that the bearings may need to be located on dowel pins.---------Remove the spring loaded seal on the bottom.--------Install that seal when assembly is done.---------Very important to use the correct sealer too !!
 

AlTn

Commander
Joined
Mar 9, 2010
Messages
2,813
make certain the pistons have enough clearance on the head end so the crankshaft is allowed to seat in the journals
 

flyingscott

Fleet Admiral
Joined
Apr 8, 2014
Messages
8,348
Turn the crank around like racer said and use loc-tite 518 to seal the crank halves. Make sure the pistons are in the right way also.
 

bufferin

Cadet
Thread starter
Joined
Sep 14, 2016
Messages
8
Glad I posted a pic...Thanks gm280 raceone and flyinscott . I have to laugh..people say I do things backward. Da...
 

interalian

Commander
Joined
Jul 23, 2009
Messages
2,105
And make sure your conrod bearing caps are on the correct rod and the right way around.
 

gm280

Supreme Mariner
Joined
Jun 26, 2011
Messages
14,605
Glad I posted a pic...Thanks gm280 raceone and flyinscott . I have to laugh..people say I do things backward. Da...

Please before you proceed, post a picture after you swap the crank so we can see the tops of the pistons to verify they are installed properly as well. There is a certain direction they have to be installed. And I can tell you "raceone" knows his OB engines. If he says something, you can bank on it. JMHO
 

bufferin

Cadet
Thread starter
Joined
Sep 14, 2016
Messages
8
No Title

Conrad bearing caps.. thanks Not sure of the right way
 

Attachments

  • photo252472.jpg
    photo252472.jpg
    62.1 KB · Views: 0

racerone

Honorary Supreme Mariner
Joined
Dec 28, 2013
Messages
40,028
Pistons are installed wrong too !!!-------Sloping side goes to the exhaust.
 

HighTrim

Supreme Mariner
Joined
Jun 21, 2007
Messages
10,486
You may want to invest in a manual to help you through it. Will also have torque values and such which are required. As stated above, turn those pistons around.

I hope you marked the rod caps before taking them off? They MUST go back exactly as they came off. And torqued to spec.
 

gm280

Supreme Mariner
Joined
Jun 26, 2011
Messages
14,605
Seeing and reading along with this thread, I have to wonder if you installed the rings correctly now. Not trying to be funny or anything else. Just wanting to make sure you got things correct before you button it up. As you remove the pistons to turn them around, take a couple pictures (close up if possible) to show how the rings are installed. Some rings have a top and bottom sides. It could save you some problems . JMHO
 

Chinewalker

Fleet Admiral
Joined
Aug 19, 2001
Messages
8,902
Also, I believe there were locator pins in the crankcase that seat in holes in the upper and lower main bearings. They must be aligned properly for the crankshaft to seat.
 

racerone

Honorary Supreme Mariner
Joined
Dec 28, 2013
Messages
40,028
Rods are " offset " as well and with the pistons backwards there is no way that this thing could be assembled and turned smoothly.
 

bufferin

Cadet
Thread starter
Joined
Sep 14, 2016
Messages
8
Before going on vaca I turned everything around and checked the rings. The book said the rings could go in either way but I put them beveled side up.
I turned the pistons around.
 

Attachments

  • 100_3681.JPG
    100_3681.JPG
    49 KB · Views: 0
  • 100_3684.JPG
    100_3684.JPG
    46.8 KB · Views: 0
  • 100_3686.JPG
    100_3686.JPG
    45.3 KB · Views: 0
Top