1984 Ski Supreme Restoration

Status
Not open for further replies.

iqxoqlms

Seaman
Joined
Jan 26, 2010
Messages
62
Re: 1984 Ski Supreme Restoration

I am using AC exterior plywood for the deck. I will double coat with epoxy, then add one or two layers of glass cloth and epoxy on top for strength. This boat has been alive for 26 years...I doubt it will rot out as fast the next time around - it should be good for at least another 30 years.

Glassing the stringers in is way more time consuming than I'd imagined. Headed to Colorado for some mountain snowmobiling on Thursday...it may be a couple of weeks before I start fitting the deck.
 

iqxoqlms

Seaman
Joined
Jan 26, 2010
Messages
62
Re: 1984 Ski Supreme Restoration

Work is progressing a bit slowly. It is more tedious glassing in the stringers than I anticipated.

I have a question regarding bilge paint...should I repaint the bilge when I am done or leave the new wood visible behind the epoxy to show a future buyer that the work has been completed? I'd like to paint it for the finished look, but wonder if I'd be hurting my resale potential by doing so. If I do paint it, what would be the recommended paint?

I have been dabbling with graphics too. I want to liven the boat up a bit...the brown hull is so 80's! Here is what I have come up with. This is a spin-off of the 90's Ski Supreme graphics. Interesting to note that in 1984 they were called "competition tow boats" in the later 80's they called them "competition ski boats" and in the 90's the went to a "tournament series" moniker. Huh. The side graphic will be 9" high and 120" long (big) and the smaller graphic will go on the transom above the swim platform. Opinions?

redgraphics.jpg
 

MTribe08

Senior Chief Petty Officer
Joined
Oct 25, 2008
Messages
680
Re: 1984 Ski Supreme Restoration

Paint it forsure! Bilgecoat is what think most people use. You are documenting this whole build with this thread and pictures. If you go to sell it, put together a series of pics to show people. If they don't believe you, tell them to leave and go find one better.

I like the graphics! I take it you are going to paint the boat too?
 

iqxoqlms

Seaman
Joined
Jan 26, 2010
Messages
62
Re: 1984 Ski Supreme Restoration

I am not painting the boat! I am going to revive the finish on the hull and topsides (the next phase). Believe it or not, we played with colors for the graphics and the red/white graphics on the brown hull looks pretty darn good. I played with the kids colored pencils for hours...
 

Walkenvol

Cadet
Joined
Jul 6, 2009
Messages
26
Re: 1984 Ski Supreme Restoration

I'm enjoying your progress - thanks for posting.

Could you answer a couple of questions as I'm going to have to do this with my '85 Supra in the next year or so due to soft spots in the deck. Do you intend to put the deck back without removing the top half of the boat or are you wanting to put the stringers and transom back with the top on to maintain the shape? Does the inside lip of the top screw down to the floor (it does on a Supra)?
 

iqxoqlms

Seaman
Joined
Jan 26, 2010
Messages
62
Re: 1984 Ski Supreme Restoration

I am not going to remove the cap. I feel that I will be able to completely install the new deck without having to do so. On the Ski Supreme the outside of the deck is mounted with screws that go through a lip on the side panels and is tied into the hull. I am going to use 5200 to glue the deck pieces to the hull and then add a layer of cloth to further secure the deck to the hull. This will be possible only due to the fact that a PO punched a bunch of holes in the side panels for speakers (it must have rocked back in the day!).
SkiSupreme044-1.jpg
 

iqxoqlms

Seaman
Joined
Jan 26, 2010
Messages
62
Re: 1984 Ski Supreme Restoration

I should add that my plans also include gluing pink OC 250 styro board down to align flush with the underside of the deck - especially in proximity of deck seams. This will both support the deck and provide some floatation.
 

MTribe08

Senior Chief Petty Officer
Joined
Oct 25, 2008
Messages
680
Re: 1984 Ski Supreme Restoration

I am not going to remove the cap. I feel that I will be able to completely install the new deck without having to do so. On the Ski Supreme the outside of the deck is mounted with screws that go through a lip on the side panels and is tied into the hull. I am going to use 5200 to glue the deck pieces to the hull and then add a layer of cloth to further secure the deck to the hull. This will be possible only due to the fact that a PO punched a bunch of holes in the side panels for speakers (it must have rocked back in the day!).
SkiSupreme044-1.jpg

I left a little lip as well..bonded the deck to the lip with heavy duty PL, then tabbed the bond line with CSM 4" up the hull and 4" on the deck. Solid as a rock now!
 

iqxoqlms

Seaman
Joined
Jan 26, 2010
Messages
62
Re: 1984 Ski Supreme Restoration

Here is an update after another diversion to Colorado to satisfy the snowmobile affliction...

The stringers are FINALLY glassed in and complete. Working with the cap on and around the ski pylon bracket made the job a bit harder. None-the-less this step is complete!

skisupreme060.jpg


I decided to paint the bilge and got the first coat on tonight.

skisupreme059.jpg


As time has allowed I have worked on some other things too.

I have completely stripped all of the teak on the boat (26 pieces). They were slathered with layer after layer of varnish. It took time but all varnish is gone and the pieces have been treated to a couple coats of teak oil. The swim platform needed some attention also as the aft-most boards had been replaced with redwood. I ordered teak from Jamestown and while waiting for it to arrive have completely stripped and sanded the platform...which was also a varnish mess.

I fabricated a battery box to replace the original. It was a fiberglass bucket that dropped through a hole cut in the floor under the aft-facing seat. It allowed for one series 24 battery. I knew I'd want a second battery so built a suspended box in the same location that will accommodate 2 batteries. The box has a removable bottom so that access to the forward bilge area can be maintained.

I exhausted my supply of epoxy resin and hardener - so had to order another 2 gallons. I ran out of cloth too - but had enough to complete the stringers and battery box. I'll only need enough now to complete the deck.

Looking at all of those speaker holes in finally got into my head...so I ordered an amp, (4) 6.5" speakers and (2) 10" subs. (hence the need for the second battery)

I intend to be cutting cardboard templates for the deck boards by the weekend. I have a question about seams...how does one best firm up the deck in an area where two deck boards meet but are unsupported? I am conteplating a seam above the bilge directly ahead of the pylon. It will span about 16" (fore to aft) with support at both ends and each deck board will have to span in 11" from where they mount to the stringer. This area will get a lot of foot traffic. I am using 1/2" ply with a planned layer of 7.5 cloth and epoxy. Ideas??
 

MTribe08

Senior Chief Petty Officer
Joined
Oct 25, 2008
Messages
680
Re: 1984 Ski Supreme Restoration

I intend to be cutting cardboard templates for the deck boards by the weekend. I have a question about seams...how does one best firm up the deck in an area where two deck boards meet but are unsupported? I am conteplating a seam above the bilge directly ahead of the pylon. It will span about 16" (fore to aft) with support at both ends and each deck board will have to span in 11" from where they mount to the stringer. This area will get a lot of foot traffic. I am using 1/2" ply with a planned layer of 7.5 cloth and epoxy. Ideas??

The boat is looking great..gonna be a really nice ride when its all done!

This is what I would do if I had a seam that was unsupported. Glass in some support underneath along the seam..with that glassed in and the glass on top of the seam, it should firm up nice.
100_1037.jpg

100_1038.jpg
 

iqxoqlms

Seaman
Joined
Jan 26, 2010
Messages
62
Re: 1984 Ski Supreme Restoration

Work continues and some progress is being made.

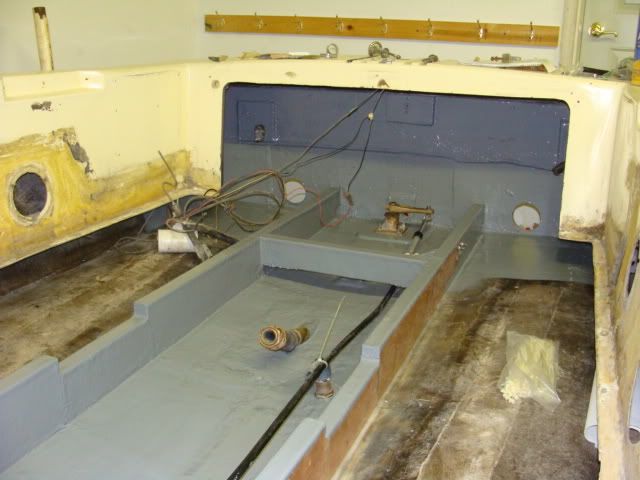
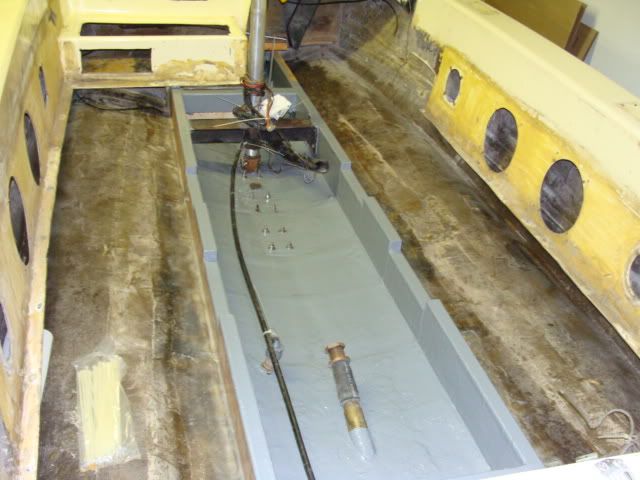
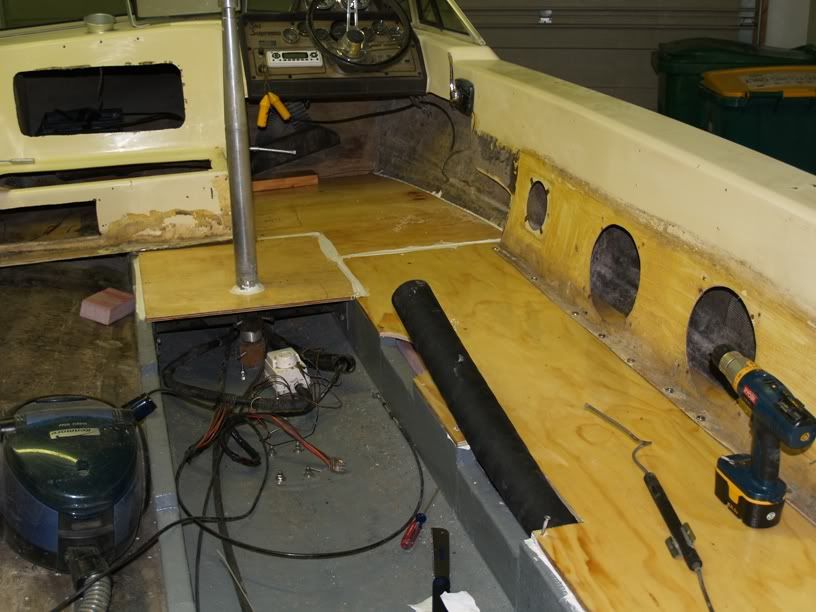
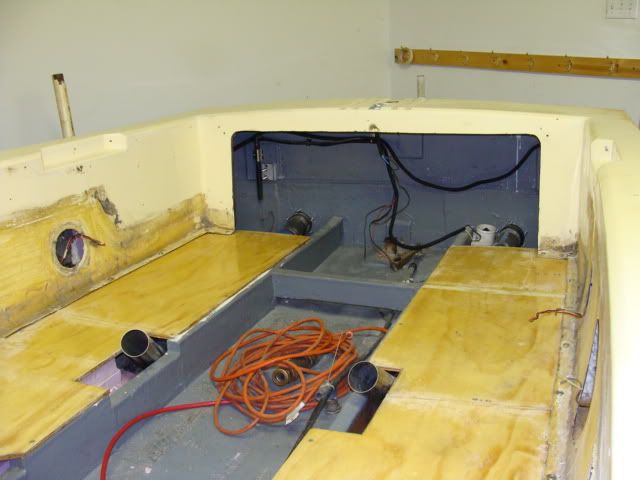
I got all of my deck pieces cut and epoxied with two coats. I got to install 3 sections yesterday. I have two pieces to install tomorrow night, then I'll make the removable deck piece for above the prop shaft. Haven't decided if I will lay in one or two layers of cloth/resin on top of the deck, but that will come after the motor is back in.

skisupreme067.jpg


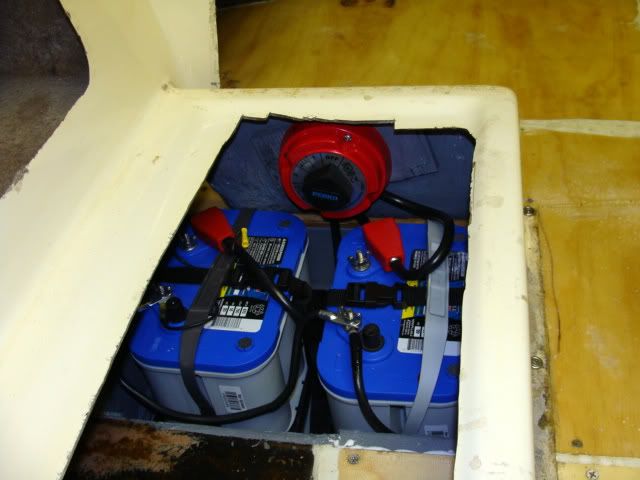
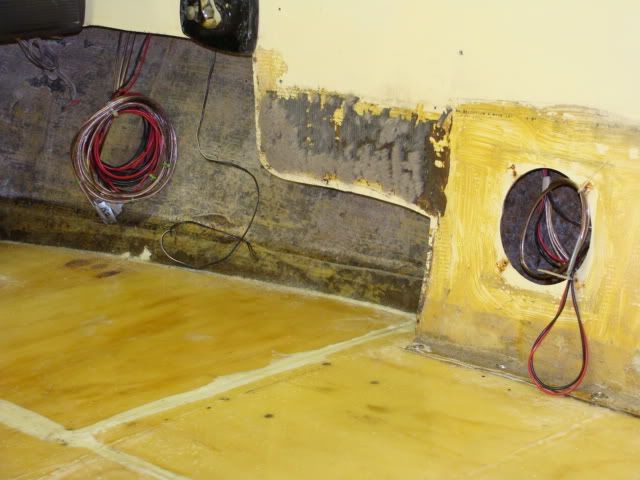
One of the characteristics of the boat I reengineered is the battery box. It was a cheesy drop-in fiberglass bucket that held one series 34 battery. Anticipating that I'd want a second battery some day, I built a box that will hold two - and it has a removable bottom for access to the bilge. The box is located under the rear facing passenger seat in front.

skisupreme069.jpg


So...I went ahead and ordered two Optima combo batteries to fill the space. And with all that spare power on tap...I ordered a 1000W amp, two 10" subs and four 6.5" speakers. I guess staring at all of those speaker holes made by a PO got to me. This old girl will make some noise - even with the engine off.

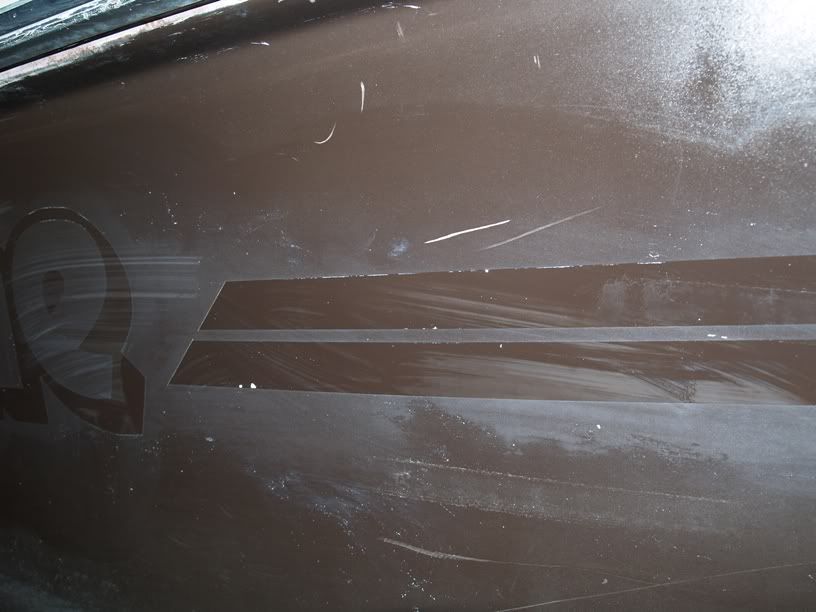
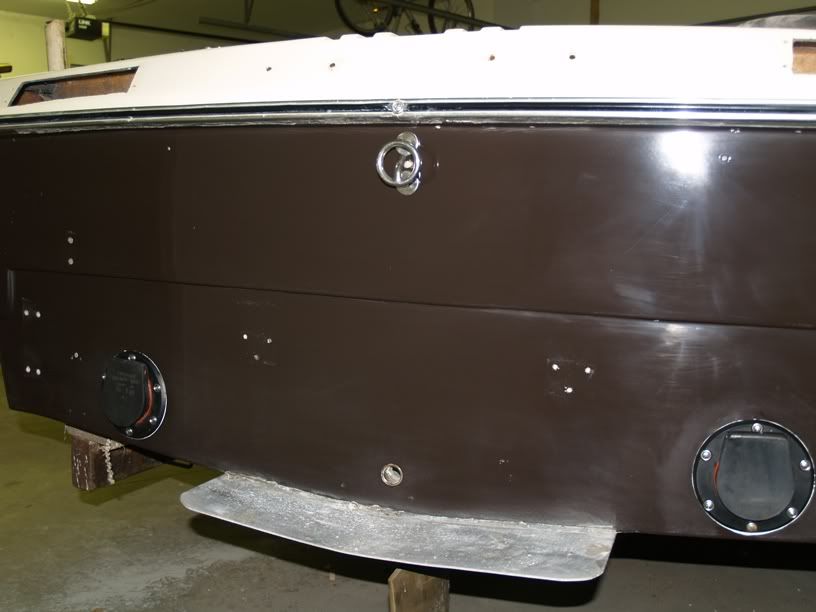
I started messing with the hull as well. It was a mess! Here is a look with the decals removed. It appears that a PO used some form of finish rejuvinator rather that do what I am doing. The gel coat under the decals is pretty nice, but everywhere else is dull and rough to the touch - almost like a chalk board.

skisupreme064.jpg


So I started wet sanding with 320, 400, 600 then 1000. It looked like this.

skisupreme062.jpg


To get some gratification I got the buffer out and hit it with 3M Imperial compound and the Finesse-it. I didn't spend much time with the buffer but am happy with my quick results. This will look great after I spend some time on it!

skisupreme066.jpg


I plan to have the engine back in early next week. Then I will finish the deck and get to the stereo, interior lighting and hull carpet. I am going to finish the deck with no-slip paint and make removable carpet pieces. The hull sanding/polishing will continue - hopefully I can get outside soon to do some of this work!

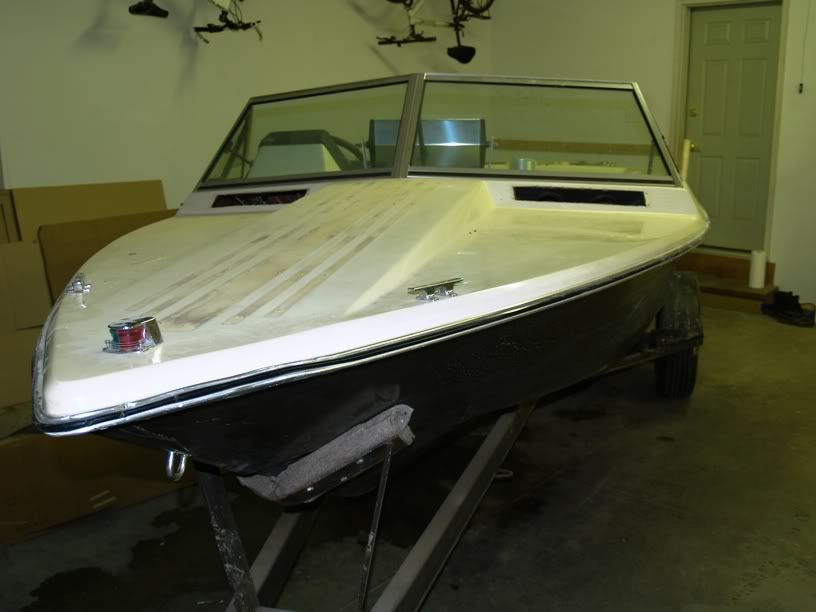
Still in the plan is to get the boat off the trailer and attack it too - it also shows its 27 years.

It seems my work is never done.
skisupreme070.jpg
 

Walkenvol

Cadet
Joined
Jul 6, 2009
Messages
26
Re: 1984 Ski Supreme Restoration

Great job!

Did you decided to not put any foam under the floor?

Are you going to use the lip on the cap to support the outside perimiter of the deck or is it going to be tabbed to the hull?

Keep those updates coming.
 

iqxoqlms

Seaman
Joined
Jan 26, 2010
Messages
62
Re: 1984 Ski Supreme Restoration

I did put OC 250 pink foam board under the deck. I glued it in and leveled it to the height of the deck (for some additional support). I left channels for water to get past the foam and glassed in passages from outside the stringers into the bilge so that water can pass. At rest, the low point of this boat is essentially under the helm - that is where I put the openings.

I am definitely going to tab the deck to the hull. It will be tight, but I am going to access it through the speaker holes.
 

tinkeringwackyone

Chief Petty Officer
Joined
May 2, 2008
Messages
415
Re: 1984 Ski Supreme Restoration

Nice looking restore. Glad to see the progress your making, hull is looking sharp after buffing.
 

iqxoqlms

Seaman
Joined
Jan 26, 2010
Messages
62
Re: 1984 Ski Supreme Restoration

Here is an update - albeit a bit overdue!

The deck is completed and installed - 2 coats of epoxy plus one layer of cloth on top. I plan to lay on at least one more layer of epoxy. Can I add pigment to epoxy to give the deck a uniform color? I am going with snap-in carpet so want something finished-looking on the deck for when the carpet is out.

The exhaust is completed and installed. I had to do this ahead of the deck as it is concealed. In later models of Ski Supremes they moved the exhaust inside the stringers - which makes more sense. I didn't want to mess with cutting new holes in the transom and closing the existing ones - so I installed new exhaust hose, new stainless clamps (double at each point) and 45-degree stainless elbows coming through the deck. When I got the boat the bends were made with flexible exhaut hose - I felt this was a bit cleaner and more reliable. You can see the elbows coming through the deck in these photos - as well as the new outlets going through the transom.

skisupreme073.jpg


skisupreme072.jpg


I got the batteries installed with a Perko battery switch. It came out pretty clean - funny that the PO had to hack up the opening below the seat just to get one battery in and out the way it was originally set up. I can now easily get two batteries in and out. I'm glad I took the time to do this.

skisupreme071.jpg


I have also started installing the wiring for the stereo and cockpit lights, as well as the foam in space behind the coaming (right term?) and the hull. I am glueing in OC 250 here and then filling the gaps with Great Stuff. This will uptimately be covered with carpet - as it was by the PO.

skisupreme074.jpg


We have wet sanded about 1/2 of the boat - hull and topside. I get some help with this from my wife and kids - but it isn't much fun and I don't see them all that often!

The best news is that tonight the engine is going back in! This, for me, is a big step toward finishing the boat. I have a friend that is an experienced marine mechanic who will help me with this step to insure the engine is aligned perfectly.

I feel that I am 2/3 of the way through the project and know the boat will be in the water running before it is warm enough to ski.
 

ezmobee

Supreme Mariner
Joined
Mar 26, 2007
Messages
23,767
Re: 1984 Ski Supreme Restoration

Your deck looks fantastic! I think you'd be better off painting it than trying to tint epoxy. From what I've read on here, epoxy doesn't like UV and will need to be protected.
 

fat fanny

Lieutenant Commander
Joined
Feb 9, 2006
Messages
1,935
Re: 1984 Ski Supreme Restoration

By the way looking good. The deck turned out great and maybe you should look into what frisco used on his glastron I can't remember the product name though sorry keep on keeping on.
 

iqxoqlms

Seaman
Joined
Jan 26, 2010
Messages
62
Re: 1984 Ski Supreme Restoration

As planned, and on schedule (first time for everything) the engine went back into the hull last night. I have to say it went very smoothly. We freed up the motor mounts so they adjusted nicely and dropped her in.

skisupreme076.jpg


skisupreme078.jpg


Everything lined up exact and we bolted the mounts to the stringers. I towed it back home and began hooking everything up. We did not align the prop shaft yet - I am going to get the motor running and check it over really well before we do that...just in case it needs to come out again for some reason.

More to come!
 

fat fanny

Lieutenant Commander
Joined
Feb 9, 2006
Messages
1,935
Re: 1984 Ski Supreme Restoration

Isn't it a good feeling when everthing lines up perfect after all that work I hope the rest goes just as smooth lokking good.
 

MTribe08

Senior Chief Petty Officer
Joined
Oct 25, 2008
Messages
680
Re: 1984 Ski Supreme Restoration

Awesome work! That boat is going to be really sweet when its all done..I smell a fun summer for you. Like EZ, I've read many times that epoxy does not like UV rays. I put down a tinted Gel Coat and think it turned out really nice. I'm putting snap in Carpet as well. EasyPoxy might be a good choice for you to put down. Your Gel Coat came out pretty sweet as well, for a fast buffing job. I'm doing a bit of the same..wet sanding..then hit it with some 3m heavy duty..and I just ordered some Finesse it II..I think that will make it pop better. What kind of pad were you using? Foam or Wool?

I did ALOT of research into the making of snap in carpet for my boat..I ended up going with Corinthian Marine, I really liked how helpful they were, and their prices seemed to be really fair, They have a JR. Berber that I'm putting in the boat that is really reasonable, has a nice non skid backing on it and should look really nice...I am working with a guy named Nick down there..very helpful guy.

He sent me out a template kid with a strong piece of plastic to make the templates from...turned out pretty good. Word of advice, put your seats and stuff in the boat that you need to work the carpet around, and mark their pedestals or whatever with pencil on the deck...its much easier than trying to make your cutouts when everything in the boat. Here is a picture of how it came out..

Best of luck, its look great!!
Dayatthelake3-18-10003.jpg
 
Status
Not open for further replies.
Top