'69 offshore rebuild- BMerr

Watermann

Starmada Splash of the Year 2014
Joined
Jan 12, 2013
Messages
13,753
Looks like you guys had fun even if the fish weren't jumping into the boat.

Hey I have to ask, why didn't you replace the side panels in your boat?
 

BMerr509

Petty Officer 2nd Class
Joined
Jun 28, 2016
Messages
167
Thanks guys-

I'm not sure what you are talking about with the side panels- if you mean from the gunnels straight down to the floor? I wanted to keep it as open as possible. It's certainly a possibility to add it next year but im not too concerned about it. I like that little ledge halfway up the sides. Good place for needle nose or lures or drinks.
 

Watermann

Starmada Splash of the Year 2014
Joined
Jan 12, 2013
Messages
13,753
Thanks guys-

I'm not sure what you are talking about with the side panels- if you mean from the gunnels straight down to the floor? I wanted to keep it as open as possible. It's certainly a possibility to add it next year but im not too concerned about it. I like that little ledge halfway up the sides. Good place for needle nose or lures or drinks.

fetch


The panels in the SS or offshore go from the deck to the side tray, see the holes in yours where they were attached by rivets, not to the gunnels except up by the helm they raise up so you can add your controls. The panel you can make as high as you want above that tray lip so more things than pliers can be stored in there with deeper recess. Do you still have the aluminum strip that is the toe kick attachment point of the side panel to the deck?


The side panels main function though is to tie the deck and the sides of the hull together as structure which adds strength. I fashioned the panels in my Chief the same way with a couple inches of panel above the tray, take a look and never mind the rats nest in the pic, it's been tamed :lol:

y4mGa0LFd0SY_v6Y7zbhcHiQvBIEb3ZaXEF2xC13-ut0BcxmhWd287p7pDJ7dYkTxN-3KVkSUb4sWspy70ZgRpLpNqDh_LSvty-tWb475ZmHFzE7vA4UgJvIC87v7VyIdUWbOM2sBV0unoCMdREbM3Lb4esPD2Ya37GSVn11jbWYXNXA0oXD35GKeMeLjSr61BR6aj0gbHatvNzBDpNvmcSHw
 

BMerr509

Petty Officer 2nd Class
Joined
Jun 28, 2016
Messages
167
Ah that makes sense. Yes i should have everything i need for those. I'll add them either this fall or next spring. I'm not in too much hurry to make any further modifications to the boat. The trailer i bought doesnt fit in my garage so i have to keep it outside for the time being, so if it's nice out i'm out on the boat fishing. If it's raining, i'm inside lol Thanks though.
 

jbcurt00

Moderator
Staff member
Joined
Oct 25, 2011
Messages
24,871
Did your hull have the added rib end/chine braces?

Reducing hull flex at the chine is also a function of those side panels you didnt put back end.

Plenty of chine cracks have been posted

Boating big water w out them and w out a splashwell wouldnt be my preference.

Consider a swing tongue for the trailer, might let you park it inside.
 

BMerr509

Petty Officer 2nd Class
Joined
Jun 28, 2016
Messages
167
I'm sure they do help with the structural support, but when i put the flooring in, i press fit it, so in order for any of the boat to flex, the flooring would have to as well. Again, i see why they would be necessary from an engineering standpoint and i will put them in after season. makes sense. The ones that came with the boat are incredibly fragile and provided no support i'm sure. Who knows how long it was run like that.
 

Watermann

Starmada Splash of the Year 2014
Joined
Jan 12, 2013
Messages
13,753
Okay well you missed the point we were trying to make but to leave you with something to think about. Here in the pic below is a 1976 SC with a 47" crack right down the spray rail chine that is currently being worked on, there's another SC with a smaller crack but this pic shows how a PO merely slathered on epoxy to "fix" the split out side of the boat. You're 3/4" deck will actually accelerate this process as that spray rail is above it and it is now solely the flex point without the bracing and side panels.

Good luck...

IMAG0094-1075x608_zps1ykxqozp.jpg
 

BMerr509

Petty Officer 2nd Class
Joined
Jun 28, 2016
Messages
167
Sorry guys, didn't mean to seem rude. I appreciate the concern and will address the problem- seems best to run a piece of angle down the sides on the flooring, then run vertical angle up to the gunwhales, rivet in place then use 3/4" plywood epoxied/vinyl to fill the rectangle created by the angle? i assume this would solve the problem. Does the wall of the boat flex in or out causing the problem? Thank you again for the concern!
 

DirtyHarry83

Petty Officer 1st Class
Joined
Jun 5, 2012
Messages
302

Wow, I like Epoxy but I'd definitely want to see a welder on that kind of crack. I would guess a tool box with flex seal tape just in case? It's not like a boater can pull over and wait for a spare hull to show up while out on the water.

I really like the hull design on this boat, a lot of freeboard to keep you dry while out on the water.
 

GreenHoliday

Seaman Apprentice
Joined
Aug 5, 2016
Messages
42
Oh Lord... my poor Holiday has become the new poster child for neglect! :facepalm::facepalm::facepalm:

BMerr, whatever you decide to do, I would do it sooner rather than later because I can tell you that fixing your cracked hull will be more difficult than preventing a crack in the first place. Someone that knows more than me will probably disagree, but I would just reinstall the side panels. After all, most of these boats did just fine for decades without additional hull support... assuming they had solid decks and the side panels were properly installed. If you feel like going above and beyond, you could follow WM's lead and install hull stiffeners (as I am in the process of doing to combat that monster crack seen above). Check out his condensed Chieftain thread for pictures.
 

Watermann

Starmada Splash of the Year 2014
Joined
Jan 12, 2013
Messages
13,753
Sorry guys, didn't mean to seem rude. I appreciate the concern and will address the problem- seems best to run a piece of angle down the sides on the flooring, then run vertical angle up to the gunwhales, rivet in place then use 3/4" plywood epoxied/vinyl to fill the rectangle created by the angle? i assume this would solve the problem. Does the wall of the boat flex in or out causing the problem? Thank you again for the concern!

GH is exactly right. It's a very well known issue with these older boats developing cracks in the spray rail chine and at the ends of the ribs.Only on models prior to the late 70's when they added the braces like my SS has. The braces transfer the forces and isolate the spray rail chine.

Really the issue only came about when these boats were used floppy with rotten decks and side panels with loose large flange blind rivets which allows for that chine to flex and the rib ends to flex the bottom of the hull causing the cracks. With a hull that's in sound shape and not damage replacement of these structural elements will do just fine for many years to come without need for additional braces to be added. But once it starts cracking you HAVE to add the extra braces to make the boat safe again.

So in your case having no issues of cracking with your Offshore then all you'll really need to do is add those side panels with good sealed up 1/2" ply along with that toe kick angle aluminum to attach to the deck that they originally used will isolate above and below the spray rail chine and all should be fine. They really do work as the SC engineers designed them to but guys using these boats in heavy waters with compromised structural elements made the braces a necessity.
 

GreenHoliday

Seaman Apprentice
Joined
Aug 5, 2016
Messages
42
seems best to run a piece of angle down the sides on the flooring, then run vertical angle up to the gunwhales, rivet in place then use 3/4" plywood epoxied/vinyl to fill the rectangle created by the angle? i assume this would solve the problem. Does the wall of the boat flex in or out causing the problem? Thank you again for the concern!

Eventually I'll stop prefacing each post with a disclaimer that I baaaarely know what I'm talking about, but insert obligatory disclaimer here and I will try to answer your question... as best I can.

First off, all of that angle you are talking about adding would seem to serve the same purpose as the original side panel which, if my memory serves me, you still have hanging around somewhere.

**Now for my understanding of the directional forces that crack the chines/spray rails. I had a hard time grasping the concept so forgive me if I come across as basic: It isn't so much that the gunwales are splaying outward on a regular basis. The chines are stressed by sporadic downward pressure from the weight of the gunwales when the boat slams through heavy chop or wakes. In a stock SC, the side panel is essentially riveted to the gunwale via the side compartment "shelf," so the panel absorbs a lot of that downward force and transfers it to your deck. In turn, your deck puts it on multiple ribs (and the stringers). Without that side panel, all of the downward pressure gets absorbed by the chintzy chine (hey, that could be my boat's new name!). A properly installed side panel redirects that force right past the chine.

I liken my cracked chine to my wrecked knees...joints that prematurely gave out after years of slamming around with inadequate bracing. Don't be like me.
 

oldhaven

Chief Petty Officer
Joined
Aug 30, 2015
Messages
568
The early SC side panels did not connect to the gunwales except at the front through the consoles or cabin bulkhead and the back through an aluminum brace. I tied the short panels to the gunwales with the seat brace aluminum, since the package tray is not the best brace as it is at approximately right angles to the side panels and hull. later models added a extension of the panels up to the gunwales at the front.

image_251046[1].jpg
 

ctswf

Chief Petty Officer
Joined
Aug 7, 2012
Messages
424
Hi BMerr!

I do agree those side panels have some structural support. Especially for me since I climb over the sides to get in.

In my picture here I have some epoxyed 1/2 ply and aluminum channel from home Depot. (Boat needs a little paint job)

My favorite part tho is my 4inch notched out pvc beer holders inside that wall pocket. I usually park and sit facing backwards. Cup holder is exactly placed in "hold me beer" position for when the fish strikes!
 

Attachments

  • IMG_20170725_201446.jpg
    IMG_20170725_201446.jpg
    252.8 KB · Views: 2

BMerr509

Petty Officer 2nd Class
Joined
Jun 28, 2016
Messages
167
Hey guys! I'm finally back on here, i was away for a while! Hope you all are well!

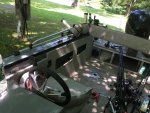
I just got the boat out of storage, changed the oil and performed the specified maintenance. One question i had was if these motors can/should be run with no water through it. Recall that this is a brand new 4 stroke merc 90 Hp. THe video on Merc's website says to run the motor for 5 minutes, but the guy is in a garage with no hose line lol I did just turn it over until it fired up then immediately turned it off.

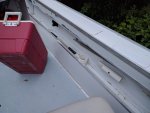
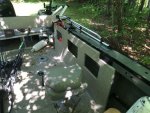
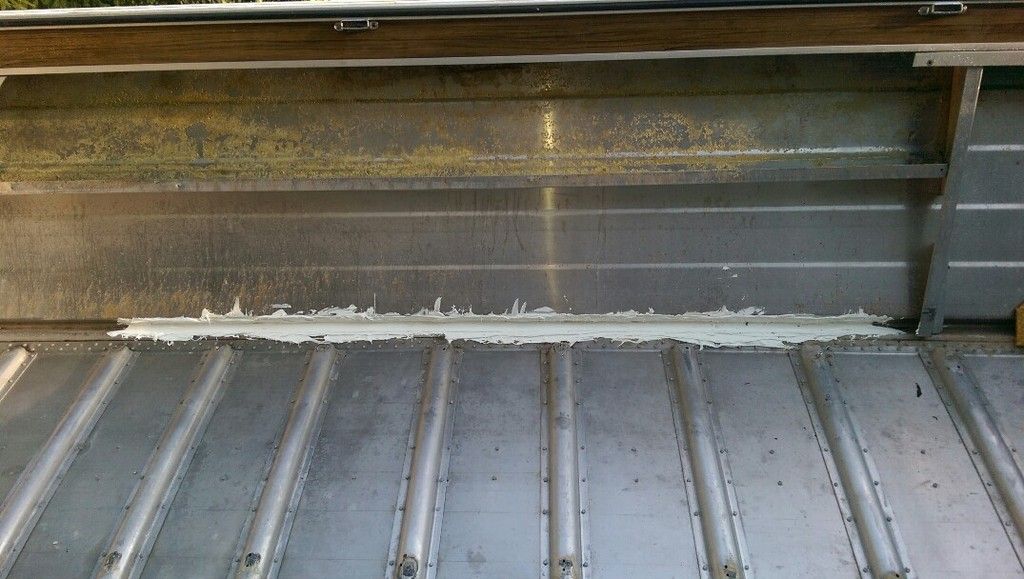
I also just ordered all the parts i need to get my sidewall up to snuff. I know you guys beat me up over that! i'm hoping to get that done in the next week or so.

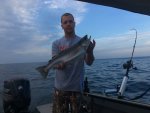
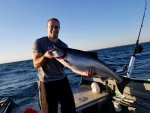
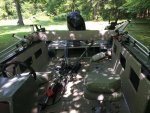
We did well last year; 5 salmon, the largest was over 35", 1 brown (still haven't mastered that), two lake trout and a few walleye. but i had a lot of fun. For the cheap gear that i have, that was not bad. 93 hours total. I need to get a trolling plate for sure for the walleye, that will probably be my next purchase. I wanted to get the track system also but it is expensive. But we all know what BOAT stands for lol
 

Watermann

Starmada Splash of the Year 2014
Joined
Jan 12, 2013
Messages
13,753
Welcome back, we're still here. :wave:

So you started your motor without water. That could be a problem for the rubber impeller, they get hot real quick without water, immediate shutdown, it should be alright but could shorten it's lifespan.

Glad you got her out on the waves and nailed some fish, that's a good variety.
 

BMerr509

Petty Officer 2nd Class
Joined
Jun 28, 2016
Messages
167
Thanks Rob. I'll have to catch up on what everyone's building! I was fortunate enough to have my offshore stored in a garage over the winter. I'll get some pics up once i get the new sidewalls installed.
 

BMerr509

Petty Officer 2nd Class
Joined
Jun 28, 2016
Messages
167
Hi all- as promised, here are some pictures of the sidewalls i've finally installed. 3/4" marine plywood with aluminum angle for support. I used rivets instead of screws or bolts. I also cut out holes as you can see so that side shelves are still accessible. Added 48" Cisco tracks on either side with three cannon rod holders. Although they are expensive, they are worth every penny. Also included some more pictures of some fish that have been caught on it. I have around 140 hours on the motor. All is well. I hope you all are having a great summer!
 

Attachments

  • photo297970.jpg
    photo297970.jpg
    267.7 KB · Views: 3
  • photo297971.jpg
    photo297971.jpg
    399 KB · Views: 2
  • photo297972.jpg
    photo297972.jpg
    196.6 KB · Views: 3
  • photo297973.jpg
    photo297973.jpg
    424.8 KB · Views: 3
  • photo297974.jpg
    photo297974.jpg
    531.3 KB · Views: 3
  • photo297975.jpg
    photo297975.jpg
    525.5 KB · Views: 3

BMerr509

Petty Officer 2nd Class
Joined
Jun 28, 2016
Messages
167
Thanks MT- the salmon was 27lb, the rainbow was 26". We have done well this year with many salmon, 3 rainbows and maybe a dozen browns. Lake Ontario is hot for everyone. Charter capts are saying its the best they have seen in decades. The 27 pounder is going on my wall!
 
Top